
Managing embedded dashboards with Cumul.io Integrations
Teams that build analytics features into a product typically run into the same set of problems: dashboards need to reach end users inside the host application, collections of dashboards need to be organized and maintained, user rights have to be scoped per collection, and each user should only see data relevant to them. Cumul.io's Integrations feature addresses these issues, and most of the configuration happens in the Cumul.io UI rather than in code.
What an integration is
An Integration is a structure that defines a collection of dashboards meant to be used together, for example in the same application. It is also the mechanism through which dashboards are embedded: the application gets access to the integration that contains them. Dashboards can be associated with an integration, and the access rights that end users of that integration hold on those dashboards and their datasets are administered at the integration level. The same dashboard can belong to several integrations and carry different access rights in each. Publicly available SDKs exist for a range of stacks.
Integration management is available to organization owners under the Integrations tab. A single account might hold many dashboards, not all intended for the same audience:

Grouping them into integrations separates those audiences — in the example account below, the owner maintains two distinct applications:

Setting up an integration
The walkthrough assumes a pre-made set of dashboards; dashboard design itself is out of scope. Take an analytics platform with three dashboards to expose: Marketing, Sales and Leads.

From the Integrations tab, choose New Integration. The dialog outlines the steps that follow:

Next, pick the dashboards to include and name the integration:

After confirming, you can assign each dashboard a slug, which is strongly recommended. Slugs let front-end code reference dashboards legibly and make swapping dashboards easier, since dashboard IDs never appear in the client code.
Rights, filters and multi-tenancy
The integration then gets access rights for the datasets its dashboards use — here set to "Can view":

For multi-tenant setups, Cumul.io supports parameters and filters on the datasets a dashboard draws from, so each logged-in user sees only the data they are permitted to see. In this example, access is scoped by the end user's department. Filters can also be configured during dashboard design, where their effect is easier to visualize, but they can be set here during integration creation as well. A department parameter is defined and the data filtered on it:

On completion, the next dialog explains the embedding steps:

The new integration appears in the Integrations tab, where its Integration ID is readily available for embedding:

Integrations remain editable: dashboards can be added or removed, and slugs and access rights changed. Because all of this happens in the UI, non-technical users can adapt integrations as the application evolves without developer involvement.
Embedding the dashboards
The goal is a custom app in which a logged-in user sees dashboards populated with the data they are allowed to see. The host application can look however you like — the example below uses a sidebar for flipping between dashboards — but the embedding mechanics are independent of that.
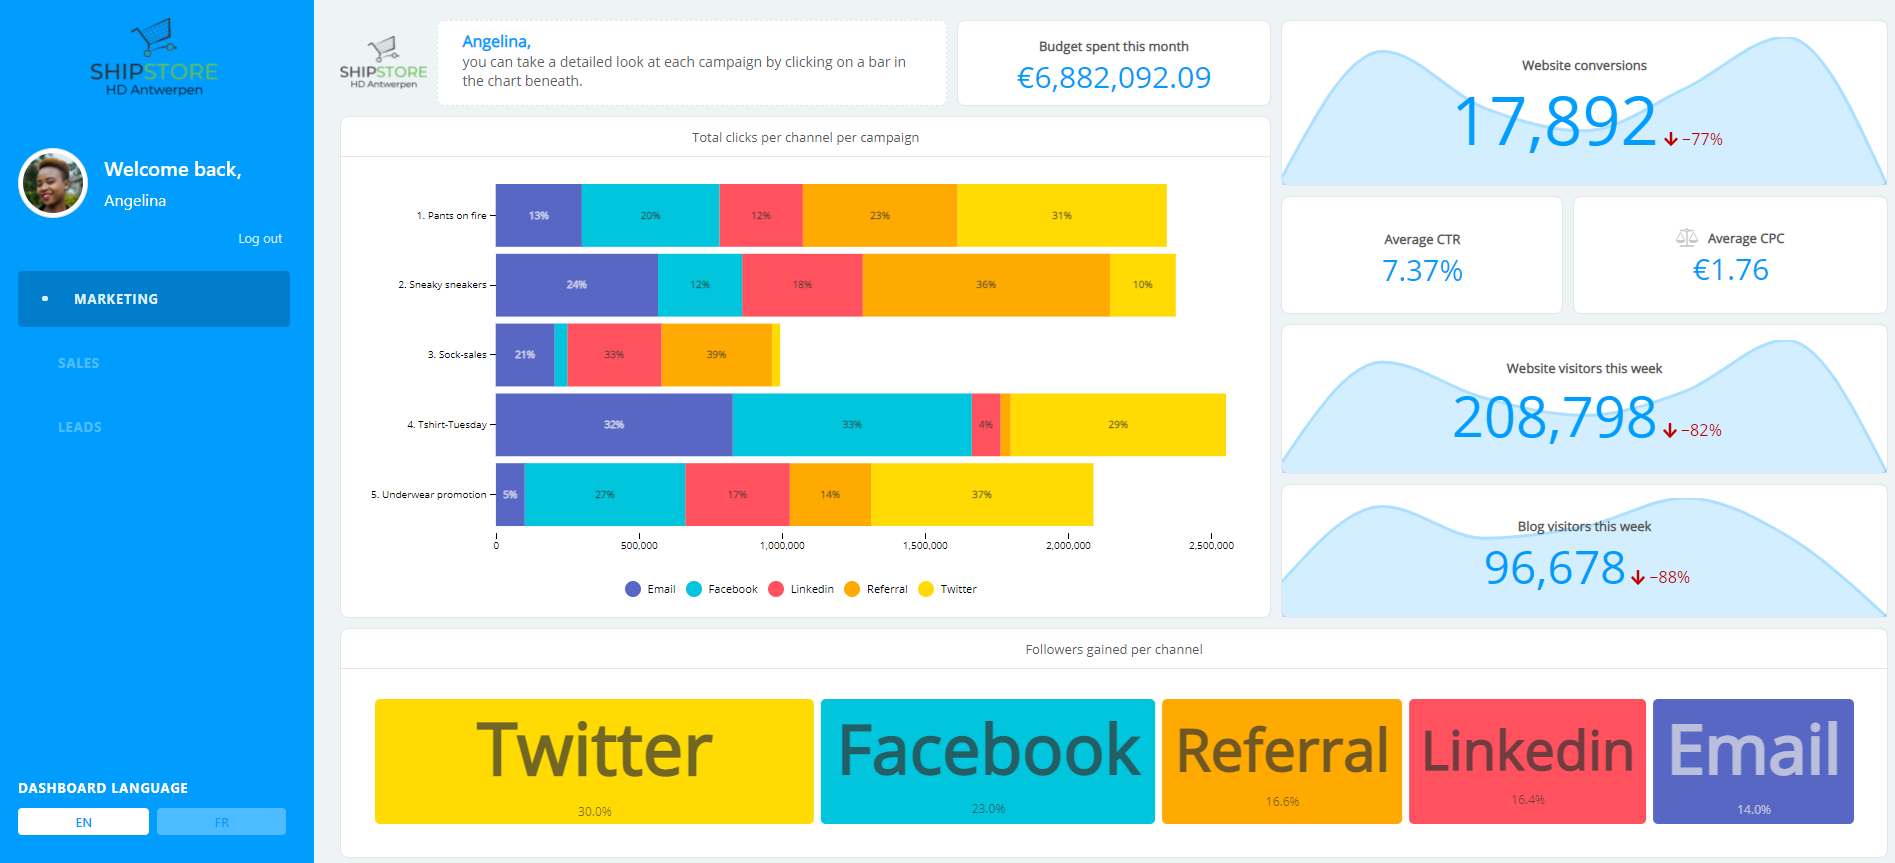
Cumul.io ships several publicly available SDKs; the Node SDK is used here, and the developer docs cover the alternatives.
Issuing SSO tokens
First, create an API key and token in the Cumul.io Profile. The organization owner with access to the integration should be the one to create and use this key and token for the SSO authorization request. The Cumul.io client is then instantiated server-side:
const Cumulio = require("cumulio");

const client = new Cumulio({
  api_key: '<YOUR API KEY>',
  api_token: '<YOUR API TOKEN>',
});
The SSO token for the end user is created next; the developer documentation on generating SSO tokens covers the API call and its required fields:
let promise = client.create('authorization', {
  integration_id: '<THE INTEGRATION ID>',
  type: 'sso',
  expiry: '24 hours',
  inactivity_interval: '10 minutes',
  username: '< A unique identifier for your end user >',
  name: '< end-user name >',
  email: '< end-user email >',
  suborganization: '< end-user suborganization >',
  role: 'viewer',
  metadata: {}
});
The optional metadata field carries the parameter values used to filter the dashboards' datasets — the department value in this example, ideally sourced from your authentication provider. The request returns a JSON object containing an authorization id and token, which serve as the key/token pair used for client-side embedding.
Another optional addition is a CSS property, which lets you define a custom look and feel per user or user group. The same Marketing Dashboard can render differently for Angelina and for Brad:


Placing dashboards in the client
Install and import the Web component:
import '@cumul.io/cumulio-dashboard';It can then be used like an HTML tag, which is where dashboards get embedded:
<cumulio-dashboard
  dashboardId="< a dashboard id >"
  dashboardSlug="< a dashboard slug >"
  authKey="< SSO key from step 1 >"
  authToken="< SSO token from step 1 >">
</cumulio-dashboard>
You can supply the dashboard Id of any dashboard, or the slug defined during integration setup — the more readable option, and the reason slugs are recommended.
One workable pattern is to declare the component skeleton in HTML and populate it from client-side code. The component carries the ID dashboard:
<cumulio-dashboard id="dashboard"></cumulio-dashboard>Client code retrieves it:
const dashboardElement = document.getElementById("dashboard");It then requests the SSO token from the server, which returns the key and token for the component. Assuming a wrapper function getDashboardAuthorizationToken() returns that server-side response, the component is filled in as follows:
const authorizationToken = await getDashboardAuthorizationToken();
if (authorizationToken.id && authorizationToken.token) {
  dashboardElement.authToken = authorizationToken.token;
  dashboardElement.authKey = authorizationToken.id;
  dashboardElement.dashboardSlug = "marketing|sales|leads";
}
Because slugs were defined, there is no need to look up dashboard IDs or pass dashboardId as a dashboardElement parameter — supplying marketing, sales or leads suffices. The host application still needs its own selection logic to decide where and when each dashboard is embedded.
Integrations keep this manageable when many dashboards must reach different places with different access rights. Further material covers user-specific themes and CSS, and configuring parameters and filters for a multi-tenant setup:
- Cumul.io Developer Docs
- Academy Article for Adding Custom CSS
- Multi-Tenancy on Cumul.io Dashboards with Auth0
- Generating SSO Tokens
- Embedding