

Why Headless CMS for Modern Content Workflows
Traditional Content Management Systems bundle content storage with presentation templates, which becomes restrictive when content must reach SPAs, mobile apps, and other clients. Headless CMS platforms decouple the two: content lives in a backend database and is served through an API, leaving presentation entirely to the frontend.
Webiny is an open-source framework for building serverless applications, offering both a personalized admin application for content creation and a GraphQL API for consuming that content. The admin app and API together form Webiny's serverless headless CMS. The broader Webiny framework also generates a three-part project structure: a GraphQL API, an admin app, and a website. All three deploy to AWS.
This walkthrough covers setting up a Webiny project and then using its headless CMS as a remote data source for a Gatsby blog. You'll need an AWS account, yarn or npm, and familiarity with React since the demo frontend is Gatsby-based.
Bootstrapping a Webiny Project
The Webiny CLI generates a new project interactively, with prompts determining your project's configuration:
npx create-webiny-project@beta webiny-blog-backend --tag beta
The bootstrap process scaffolds the three applications — GraphQL API, admin app, and website — inside a root project folder. After generation, deploy those components to AWS so the GraphQL API becomes reachable:
yarn webiny deployDeployment takes several minutes. When it finishes, the terminal prints URLs for all three applications; keep those handy for configuration in later steps. The generated project structure and the deployment anatomy are both covered in detail in the Webiny documentation, including instructions for deploying each app individually rather than together.
Modeling the Blog Content Model
Every blog post in Webiny is represented by a content model. Each model instance you create becomes a record in the database and is automatically exposed through the generated GraphQL API. After your initial Admin app installation — which steps you through creating a default user and enabling the Headless CMS, Page Builder, and Form Builder — you can start modeling your content.
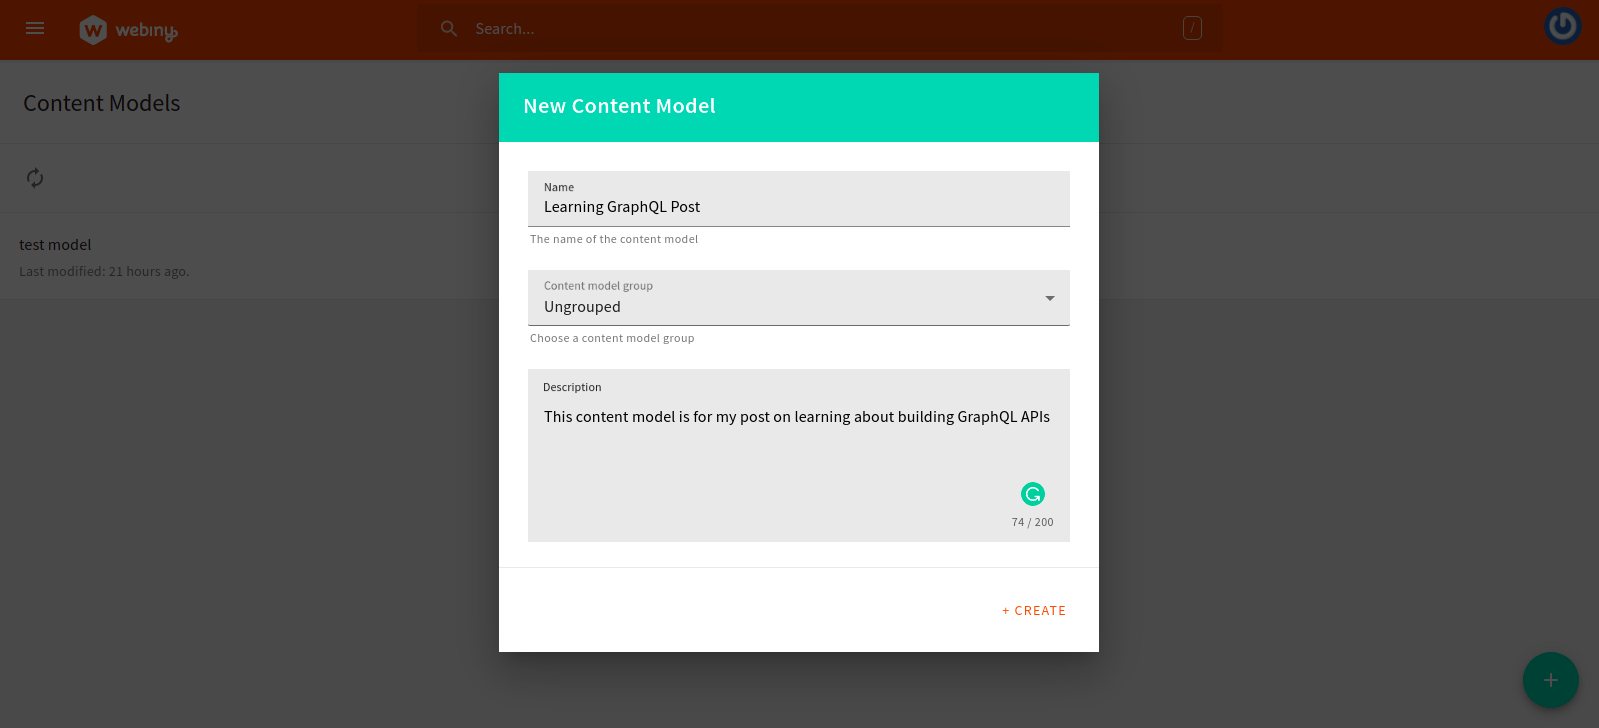
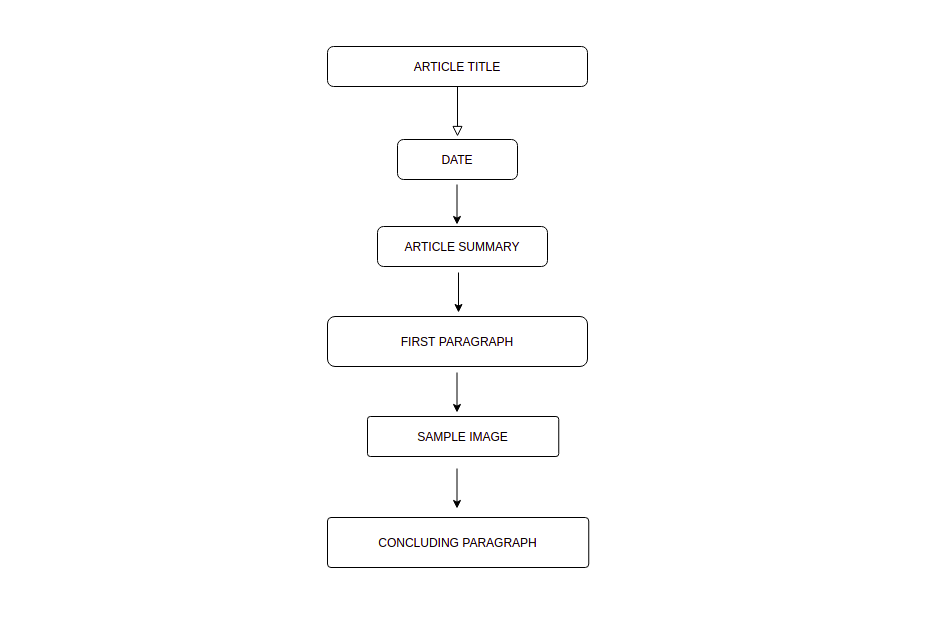
Navigate to Content Models under the Headless CMS card and create your first model. Once saved, open the model to define its fields. Webiny offers a drag-and-drop editor with eight field categories, each designed for a specific value type. Before adding fields, plan the structure of a blog post:
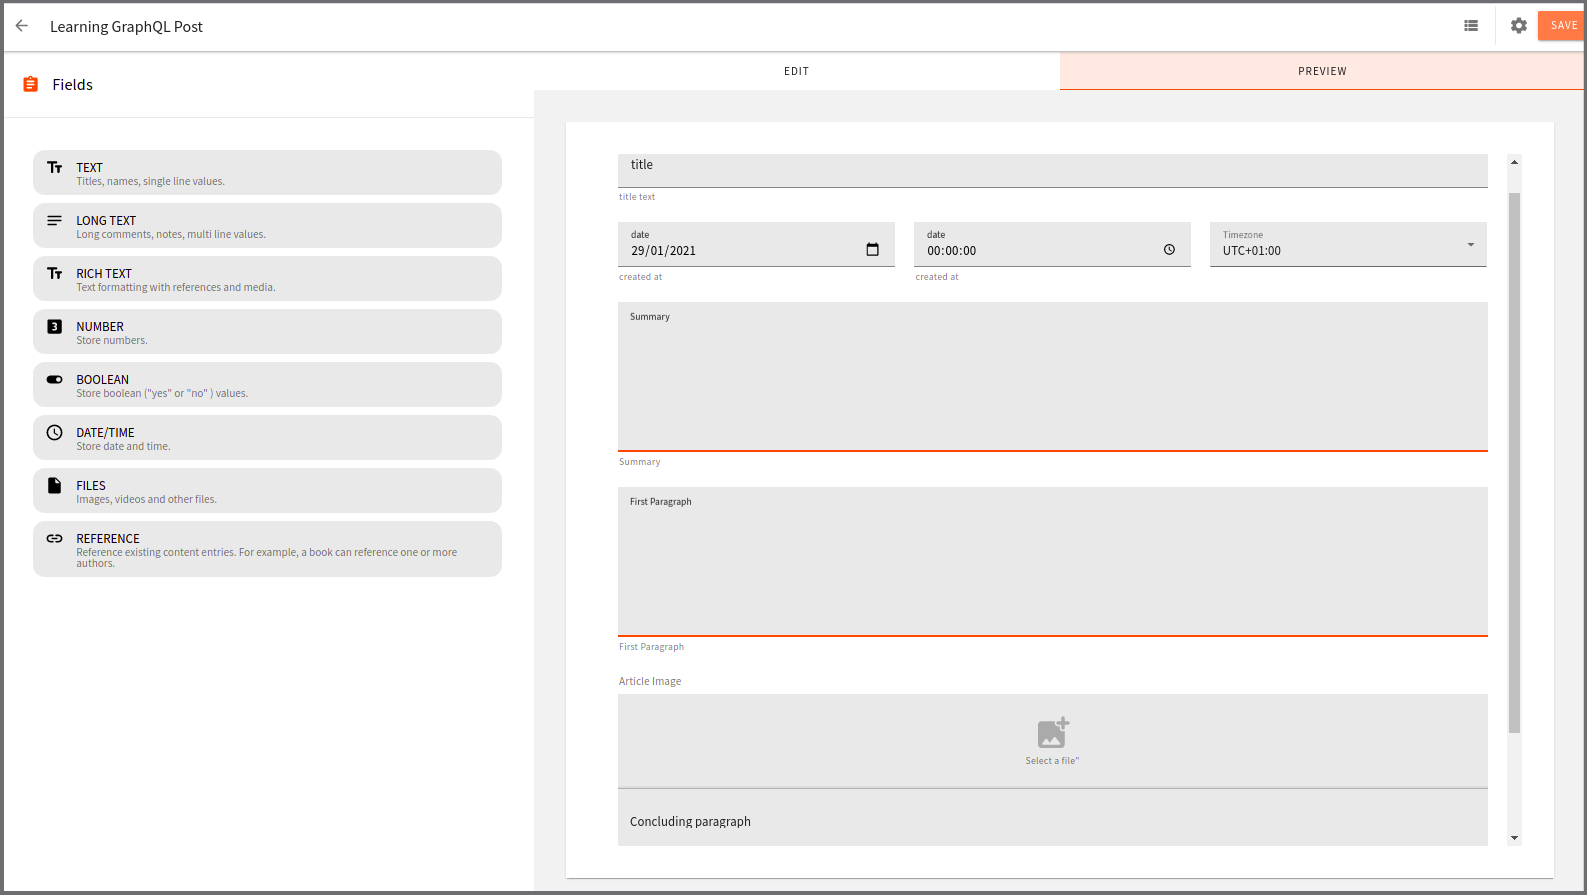
Defining the Fields
Working down the list of intended content items, build out the model field by field:
-
Article Title: Drop the
TEXTfield into the editor. This field is intended for short, single-line text values — well-suited for the title. Configure the label, helper text, and placeholder in the field settings modal. -
Date: The
DATEfield includes formatting options for date-only, time-only, date-time with timezone, and date-time without timezone. We select the timezone-aware date-time format so readers see the publishing time in their local timezone. -
Article Summary, First Paragraph, Concluding Paragraph: Use the
LONG TEXTfield for all three items. This field stores multi-line text values, making it appropriate for any block with several lines of content. -
Sample Image: Drop the
FILESfield into the editor. This field handles file and object data, and in our case, image uploads for the blog post.
Once all fields are in place, open the Preview tab to see the form inputs rendered from the model, fill in values for a sample post, and hit Save.
Inspecting the Generated API
To inspect the schema and test queries against your saved data, open the API Information page from the sidebar and launch the GraphQL playground. The Docs panel uses schema introspection to browse the full API structure. The playground also serves as a place to prototype queries and mutations before wiring them into a client application.
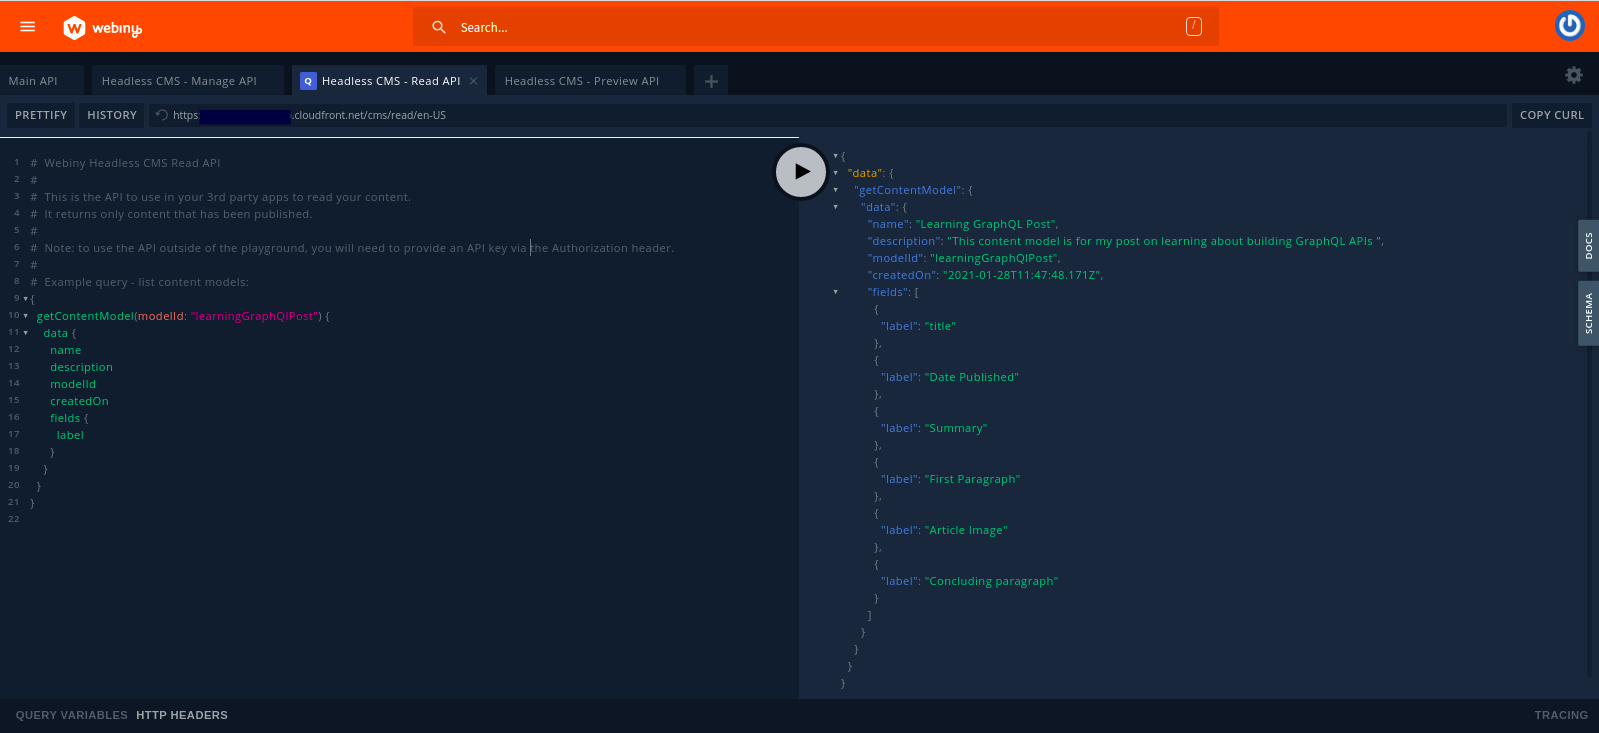
In the example above, the getContentModel query returns the most recently created model, receiving the model’s modelID as an argument. Your Webiny project is now configured with a modeled API and test data, so the remaining work is connecting it to a frontend.
Consuming the API from Gatsby
Create an API Access Key
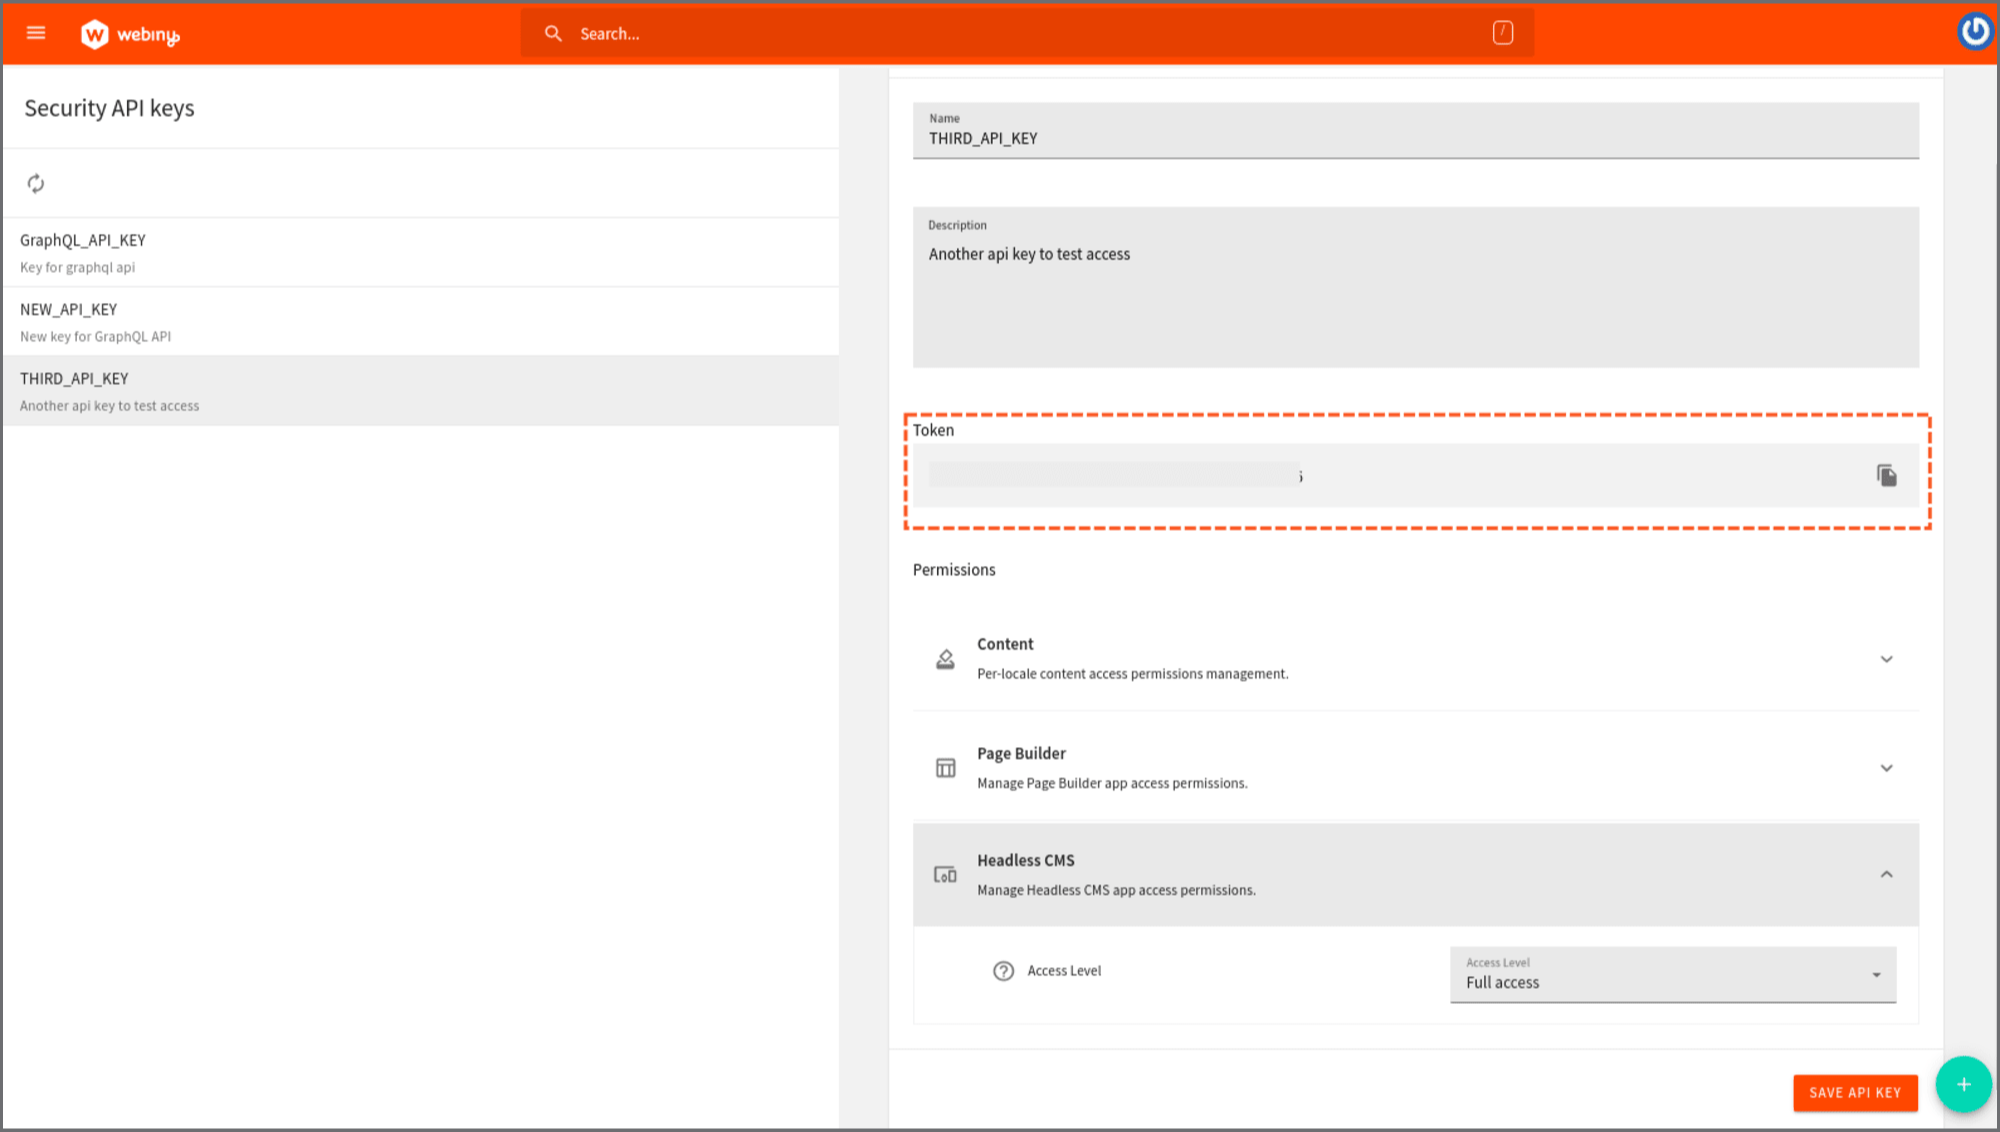
Every request to the Webiny GraphQL API must carry a valid token in its headers. This token is generated when you create an API key. From the sidebar, open API Keys under the Security dropdown. Give the key a name and description, select All locales in the Content section, and choose Full Access under the Headless CMS access-level dropdown. Webiny also offers Custom Access if you want finer control over what the key can do within a given application.
After saving, a token is displayed for the new key — copy and store it, as the Gatsby app will use it for authenticated requests.
Set Up a Gatsby Project
Generate a new Gatsby site by running the CLI installer and answering the prompts:
npm init gatsbyThen install the dependencies required to query the remote GraphQL source:
yarn add gatsby-source-graphql styled-components react-icons momentOpen gatsby-config.js and update it with the plugin configuration shown below.
// gatsby-config.js

module.exports = {
    siteMetadata: {
        title: "My Blog Powered by Webiny CMS",
    },
    plugins: [
        "gatsby-plugin-styled-components",
        "gatsby-plugin-react-helmet",
        `gatsby-plugin-styled-components`,
        {
            resolve: `gatsby-source-filesystem`,
            options: {
                name: `images`,
                path: `${__dirname}/src/images`,
            },
        },
        {
            resolve: "gatsby-source-graphql",
            options: {
                // Arbitrary name for the remote schema Query type
                typeName: "blogs",
                // Field for remote schema. You'll use this in your Gatsby query
                fieldName: "posts",
                url: process.env.GATSBY_APP_WEBINY_GRAPHQL_ENDPOINT,
                headers : {
                    Authorization : process.env.GATSBY_APP_WEBINY_GRAPHQL_TOKEN
                }
            },
        },
    ],
};
The gatsby-source-graphql plugin merges the external GraphQL API into Gatsby’s internal schema. The endpoint URL and access token are pulled from environment variables used in the request headers. Run yarn webiny info from inside the Webiny project to print the production API endpoint you would place in the url field.
When the Gatsby dev server runs, the combined schema is inspectable at https://localhost:8000/___graphql.
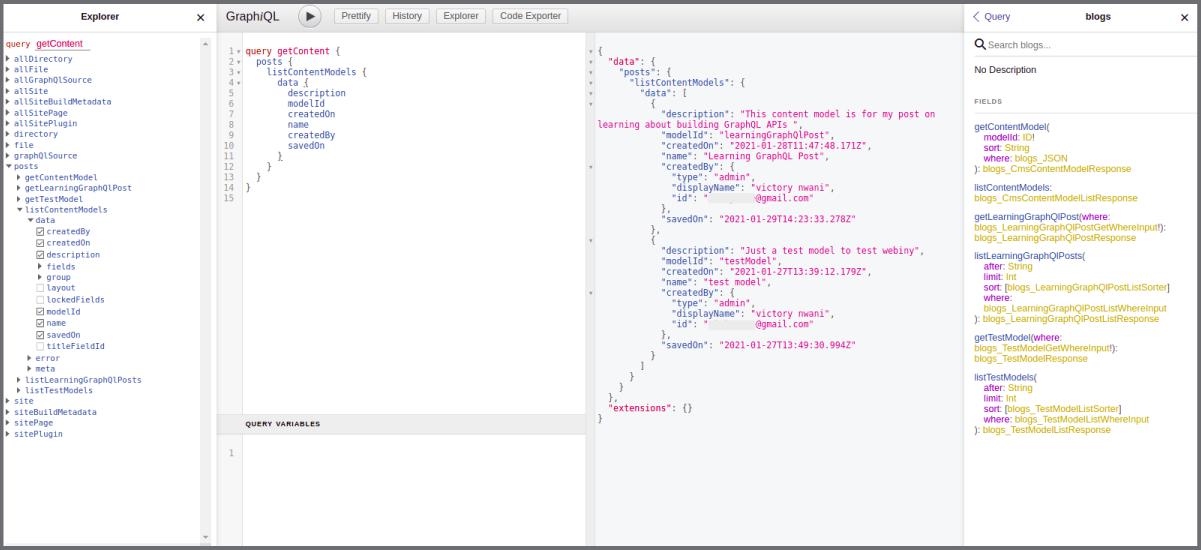
The test query above confirms the remote Webiny schema is accessible within Gatsby and exposes a range of available fields. A later-created second content model is included in the demonstration to show multiple models being returned from a listContentModels query.
Query and Render Content
Finally, add a posts.js component to fetch the data with Gatsby’s useStaticQuery hook and render the post list using styled-components.
import React from "react"
import {FiCalendar} from "react-icons/fi"
import {graphql, useStaticQuery, Link} from "gatsby";
import Moment from "moment"

import {PostsContainer, Post, Title, Text, Button, Hover, HoverIcon} from "../styles"
import Header from "../components/header"
import Footer from "../components/footer"

const Posts = () => {
    const data = useStaticQuery(graphql`
        query fetchAllModels {
            posts {
                listContentModels {
                    data {
                        name
                        description
                        createdOn
                        modelId
                    }
                }
            }
        }`)

    return (
        <div>
            <Header title={"Home   ||   Blog"}/>

            <div style={{display: "flex", justifyContent: "center",}}>

                <PostsContainer>
                    <div>
                        <Title align={"center"} bold> A collection of my ideas</Title>
                        <Text align={"center"} color={"grey"}> A small space to document my thoughts in form of blog posts and articles </Text>
                    </div>
                    <br/>
                    {
                        data.posts.listContentModels.data.map(({id, name, description, createdOn, modelId}) => (
                            <Post key={id}>
                                <div style={{display: "flex"}}>
                                    <HoverIcon>
                                        <FiCalendar/>
                                    </HoverIcon>

                                    <div>
                                        <Text small
                                              style={{marginTop: "2px"}}> {Moment(createdOn).format("dddd, m, yyyy")} </Text>
                                    </div>
                                </div>
                                <br/>
                                <Title bold align={"center"}> {name} </Title>
                                <br/>
                                <Text align={"center"}> {description} </Text>
                                <br/>
                                <div style={{textAlign: "right"}}>
                                    <Link to={`/${modelId}`} state={{modelId}}>
                                        <Button onClick={_ => {
                                        }}> Continue Reading </Button>
                                    </Link>
                                </div>
                            </Post>
                        ))
                    }
                    <br/>

                </PostsContainer>
            </div>

            <Footer/>

        </div>

    )
}

export default Posts

