

What Test-Driven Development Actually Means
Test-Driven Development (TDD) is an iterative development method where each cycle begins by writing a test that describes a piece of behavior you intend to implement. That test defines the expected output for a given input before any production code exists. The cycle then proceeds through a predictable rhythm: write a test, watch it fail, write the minimum code to make it pass, then refactor for clarity.
TDD’s value shows up in practical scenarios. Say you have a search box on a site and you need to ensure it only returns results when the keyword matches certain criteria. Writing a test for that behavior first forces you to define the requirements precisely. The same approach scales to any feature where correctness matters.
The Four-Step TDD Cycle
The process is best understood as a loop with four distinct stages:
- Write a test. Pick a single behavior and write a short unit test for it. The test should describe the interface you’re working against — not the implementation details — and should check a specific input against a specific output.
- Watch the test fail. Run it and confirm it fails. This is expected because no implementation exists yet. The failure tells you where your code currently stands and confirms the test is actually executing.
- Make the test pass. Add the simplest possible implementation that satisfies the test. Now the test turns green.
- Refactor. Improve the code you just wrote without changing its behavior. The test must still pass after refactoring. This step targets speed, readability, and maintainability.
Because TDD is iterative, you return to step one after each refactor, continuously building up functionality one small test at a time.
Why Teams Adopt TDD
Beyond correctness, TDD offers several practical advantages for development teams:
- Productivity boost. Though it feels slower at first, testing first avoids the cost of chasing unexpected results later. With practice, the cycle becomes second nature.
- Code that works. Tests verify behavior continuously, so you ship with confidence that the code does what it claims to do.
- Easier maintenance. Writing tests first encourages clean, modular code that’s simpler to update.
- Lower production costs. Catching defects early reduces the expense of debugging after deployment and shortens time to market.
- Better design. Writing tests that describe behavior forces you to think through the code before you write it.
- Less debugging. Fewer errors make it into the codebase, so developers spend less time hunting down bugs.
Setting Up a Node.js TDD Project
To see TDD in action, we’ll build a small test suite using Node.js with the Mocha test framework and the Chai assertion library. Mocha handles asynchronous testing on Node.js, while Chai provides the expect() style assertions we’ll pair with it.
Start by creating a project directory and generating a package.json file:
npm initPress Enter through the prompts to use defaults. Then install both dependencies:
npm install --save-dev mocha
npm install --save-dev chai
Your package.json will now list Mocha and Chai as dependencies.
Creating the Test File
Next, create two files: test.js for the test code and index.js for the implementation. Following TDD, we write the test first. In test.js, we’ll define tests for a circle’s diameter and area:
//import the function circle from index.js
const circle = require('./index.js').circle;
//import your assertion library from chai
const expect = require('chai').expect;
//write your test here
 describe('Testing Diameter, Area of circle',function() {
     it('Test1. circle Diameter', function(done) {
         let radius = new circle(5);
         expect(radius.getDiameter()).to.equal(10);
         done();
     });
     it('Test2. Circle area', function(done) {

         let radius = new circle(25);
         expect(radius.getArea()).to.equal(79);
         done();
     });
 });
A few key functions are at work here:
describe()groups tests by the function or feature being tested.it()defines a single test case.expect(), imported from Chai, performs the actual assertion.done()marks the end of an asynchronous test.
Remember to import your JavaScript file with require and to import your chosen assertion library at the top of the test file.
Running the Failing Tests
Run the test file with Mocha:
npm test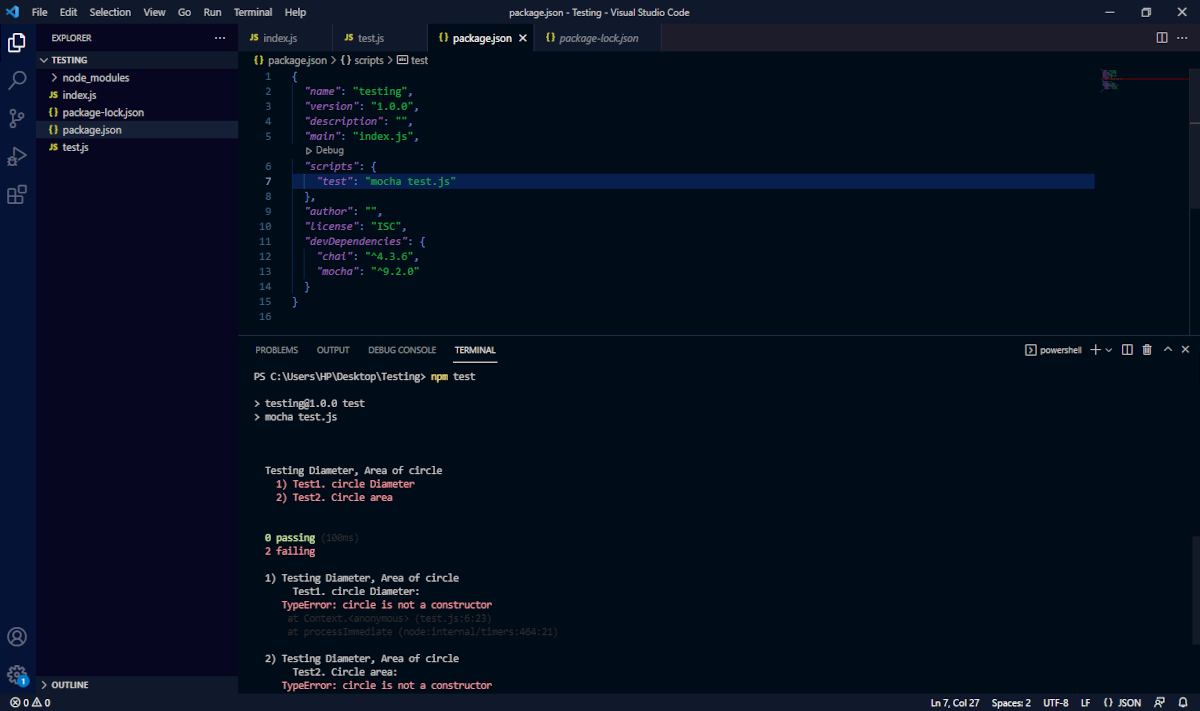
The tests fail with a TypeError: circle is not a constructor. That’s the expected outcome — there’s no implementation yet for the test to target.
Implementing to Pass
Now we add the code in index.js that satisfies the tests:
//implement the class
class circle{
    //create the constructor
    constructor(radius,squareR ) {
        this.radius = radius;
    }
    //create the methods to calculate the diameter and area of circle
    getDiameter() {
        return this.radius * 2;
    }
    getArea() {
        return Math.round(Math.PI * this.radius);
    }
}
//export the class
module.exports = {
    circle:circle
}
Run the tests again:
npm test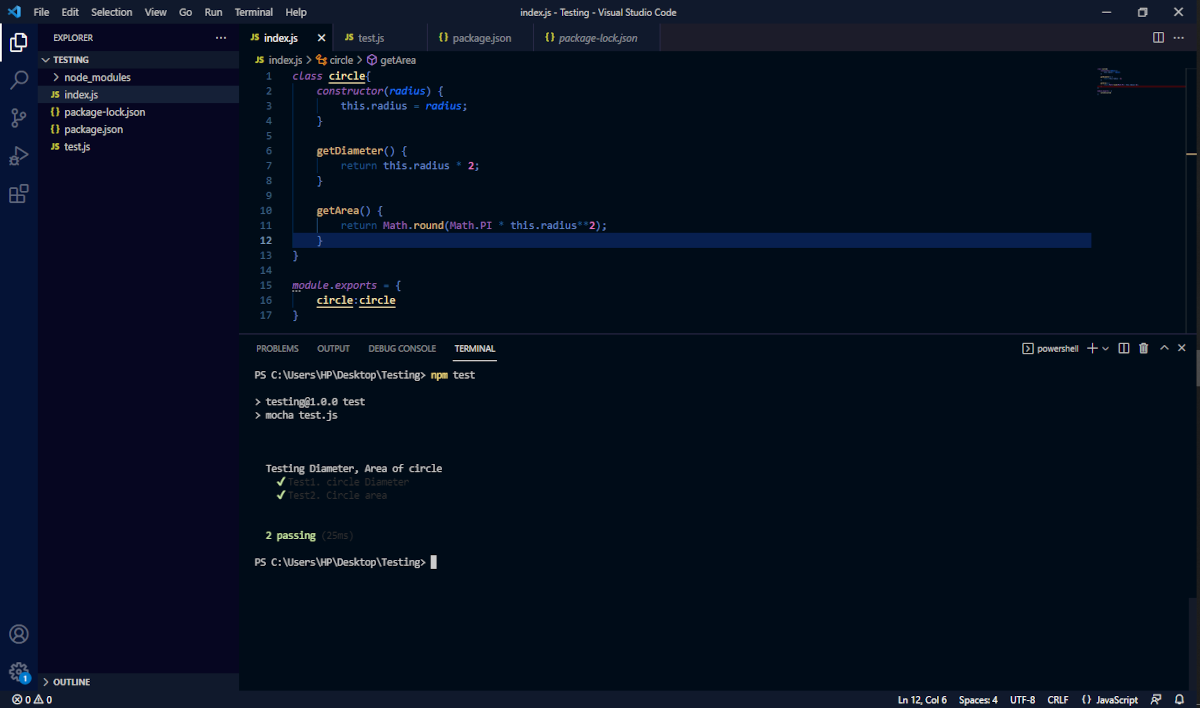
Both tests pass. The output also shows the execution time — in this case, 25 milliseconds.
Refactoring for Cleaner Code
The final TDD step is refactoring. The original implementation can be simplified by replacing a class with plain functions that produce the same results. In test.js, we adjust the assertions to call those functions instead of instantiating a class:
//import the index.js and its function
const getDiameter = require('./index.js').getDiameter;
const getArea = require('./index.js').getArea;
//require chai library and expect function
const expect = require('chai').expect;
//write your tests
 describe('Testing Diameter, Area of circle',function() {
     it('Test1. circle Diameter', function(done) {
         let radius = getDiameter();
         expect(radius).to.equal(25);
         done();
     });
     it('Test2. Circle area', function(done) {
         let radius = getArea();
         expect(radius).to.equal(79);
         done();
     });
 });
And in index.js, we rewrite the logic more concisely:
//enter you radius values
radius = 5;
radius2 = 25;
//export the functions
module.exports = {

    getDiameter: function() {
        return radius ** 2;
    },
    getArea: function() {
        return Math.round(Math.PI * radius2);
    }
}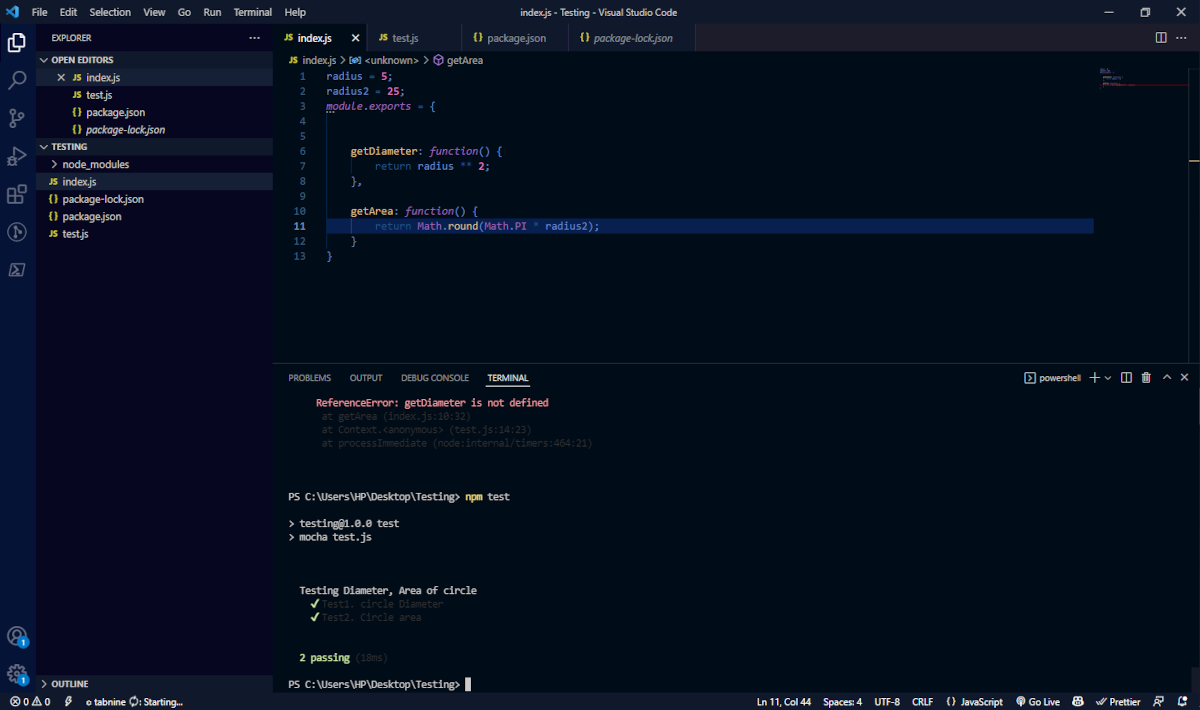
The refactored version achieves the same result in fewer lines and runs in roughly 18 milliseconds — about 7 milliseconds faster. That efficiency gain, along with the clearer structure, is the point of the refactoring stage: keep the behavior identical while making the code easier to read and maintain.


