

Understanding Reactive Variables in Apollo Client
Reactive variables offer a way to manage local state in GraphQL Apollo applications without the added complexity of Redux or Context API. They integrate naturally with the Apollo Client cache and follow familiar GraphQL patterns. For developers already working with GraphQL and state management tools, reactive variables provide a straightforward alternative that keeps local and remote data handling consistent.
The Basics of GraphQL and Apollo Client
GraphQL is designed to return exactly the data a client requests, structured according to the query. Apollo Client builds on this by managing loading and error states, supporting modern React patterns such as hooks, and simplifying the synchronization between fetched data and the UI.
Defining a Reactive Variable
A reactive variable is created using the makeVar function imported from Apollo Client. The function accepts an initial value:
import { makeVar } from '@apollo/client';

const myReactiveVariable = makeVar(/** An initial value can be passed in here.**/)
Reading the value from a reactive variable is straightforward — call the variable as a function without arguments:
const variable = myReactiveVariable();
This is the simplest way to retrieve the stored data. Reactive variables also respond to updates automatically, meaning components that depend on them re-render when the value changes, much like React local state.
Integrating Reactive Variables with the Cache
To query reactive variables using the standard useQuery hook, you define type and field policies for the Apollo Client cache. Field policies determine how a particular cache field is read and written. In the inMemoryCache constructor, you provide a typePolicy that contains the field configurations. For example, to read a field named myReactiveVariable on the Query type:
import { InMemoryCache } from '@apollo/client';

// Here we import our reactive variable which we declared in another
// component
import { myReactiveVariable } from './reactivities/variable.js';

// The field policies hold the initial cached state of a field.
export default new InMemoryCache({
  typePolicies: {
    Query: {
      fields: {
        myReactiveVariable: {
          read() {
            return myReactiveVariable();
          }
        }
      }
    }
  }
})
The read function inside the field policy specifies that when the cache attempts to read myReactiveVariable, it should return the value stored in the imported reactive variable.
You can then define a GraphQL query in Apollo Client using the gql template literal:
import { gql } from "@apollo/client";

export const GET_REACTIVE_VARIABLE = gql`
  query getReractiveVariable{
    myReactiveVariable @client
  }
`
Notice the @client directive after the field name. This tells Apollo to resolve the field locally rather than sending a request to a remote GraphQL API. The field name in the query must match the one declared in the field policy.
Once configured, fetching the reactive variable is no different from querying remote data. In a React component:
import { useQuery } from '@apollo/client';
import { GET_REACTIVE_VARIABLE } from 'FILE_PATH_TO_YOUR_QUERY_FILE';

const {loading, error, data} = useQeury(GET_DARK_MODE);

// you can track loading, error states, and data the same way with a normal query in Apollo
The useQuery hook works with the local query just as it does with remote queries, returning loading, error, and data.
Updating a Reactive Variable
Updates are handled by calling the variable function with the new value as the single argument:
import { myReactiveVariable } from 'PATH_TO_OUR_REACTIVE_VARIABLE_FILE'

myReactiveVariable("A new value is in!");
After the update, Apollo Client automatically propagates the change to every component using that reactive variable, and the UI reflects the new state without any further code.
Building a Theme Switcher with Reactive Variables
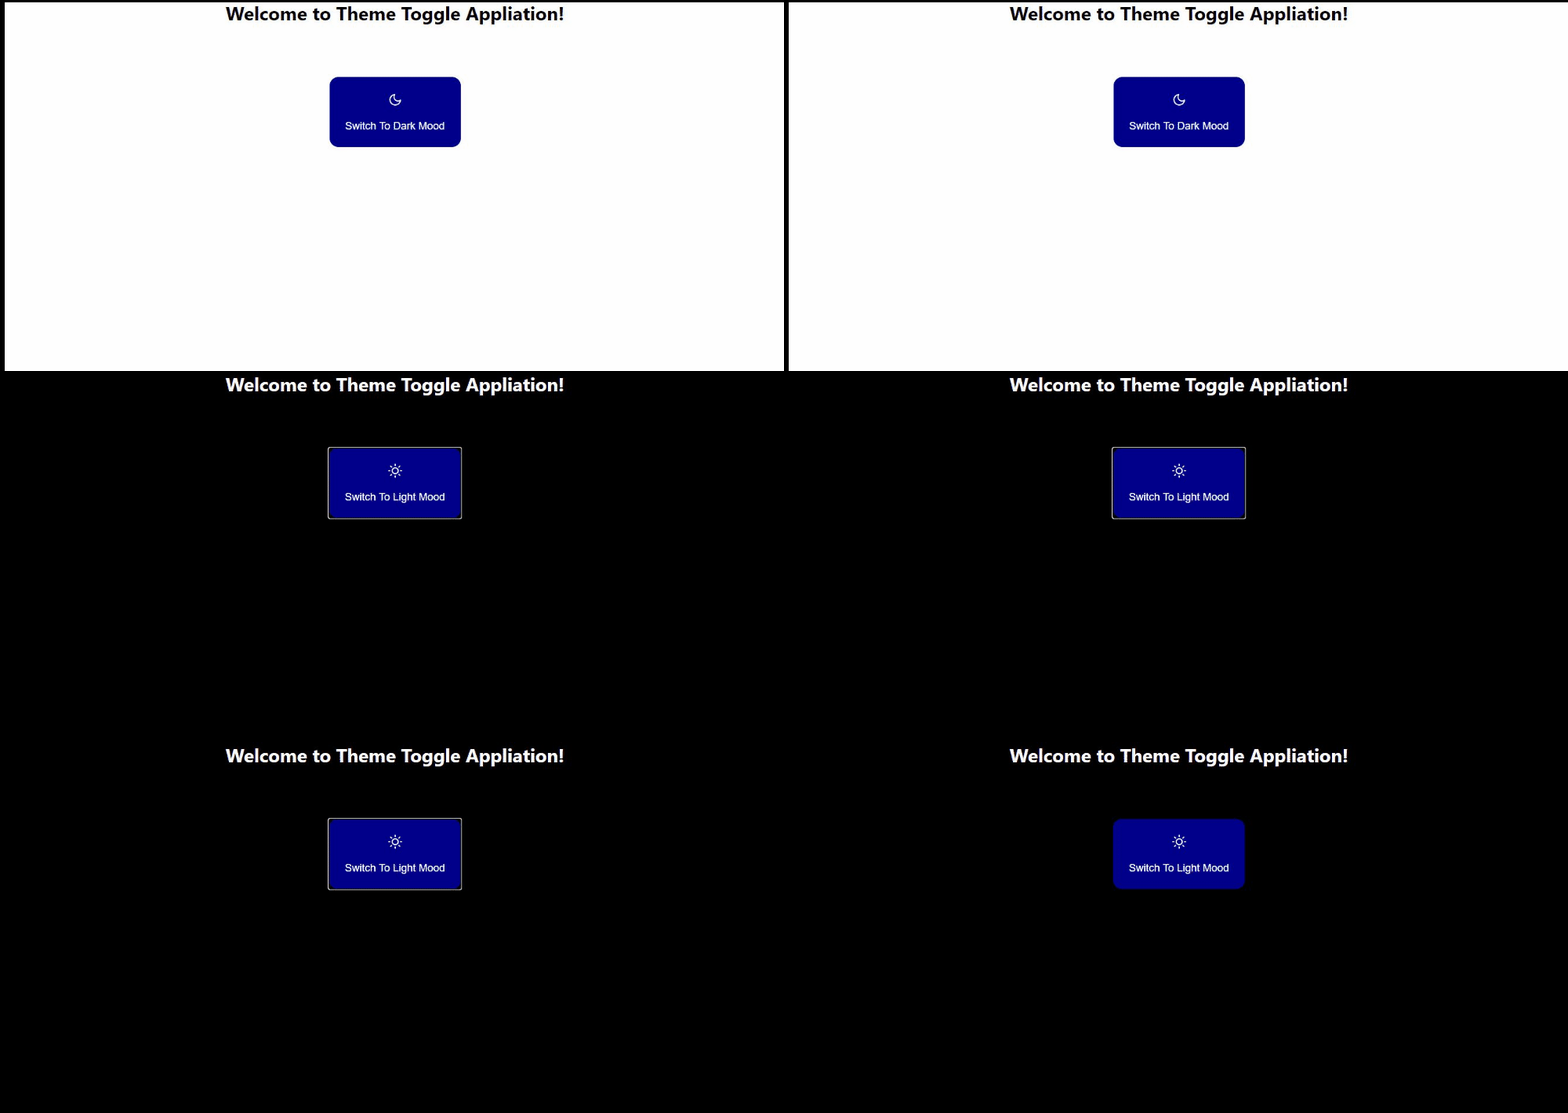
To see reactive variables in action, we will build an application that toggles between dark mode and light mode.
Setting Up the Reactive Theme Variable
Start by creating a reactive variable to hold the current theme. The initial value can be 'light' or any default theme of your choice. When the user clicks the toggle button, the variable is updated with the opposite theme value. Every component that reads the theme — such as the page background and the button label — automatically re-renders because they depend on the reactive variable.
Applying the Theme Across Components
Components access the theme by calling the reactive variable directly or via a useQuery with a @client field. For styles, you can conditionally apply CSS classes or inline styles based on the current theme value. The button text would change to indicate the action, for example switching to “Light Mode” when the app is currently in dark mode.
Reactive variables reduce boilerplate compared to Redux, and they align neatly with Apollo's existing caching and query model. There is no need for separate state management libraries or additional setup for global state when the application is already built on Apollo Client — the same tools used for remote data extend directly to local state.
Building the Project Structure
Start by creating a new React application and installing the Apollo Client, GraphQL, react-feather, and react-router-dom packages:
npx create-react-app theme_toggle
npm install @apollo/client graphql react-feather react-router-dom
Next, organize the source code with a dedicated folder for GraphQL-related logic. Inside src, create a graphql directory, then a reactivities sub-folder to hold all reactive variable definitions:
src > graphql > reactivities > themeVariable.js
Declare the reactive variable in this file using makeVar() with an initial value of false, and export both the variable and a client-side query for it:
import { makeVar, gql } from "@apollo/client";
export const darkMode = makeVar(false);
import { makeVar, gql } from "@apollo/client";

export const darkMode = makeVar(false);

// This is the query to get the darkMode reactive variable.
export const GET_DARK_MODE = gql`
  query getDarkMode{
    darkMode @client
  }
`
The query is written with the gql template literal tag from Apollo Client. The @client directive tells Apollo to resolve this query locally rather than making a network request.
Configuring the Cache
Create a cache.js file inside the graphql folder. This file defines the cache instance and the field policy that connects the darkMode field to the reactive variable:
import { InMemoryCache } from '@apollo/client';
import { darkMode } from './reactivities/themeVariable';

export default new InMemoryCache({
  typePolicies: {
    Query: {
      fields: {
        darkMode: {
          read() {
            return darkMode();
          }
        }
      }
    }
  }
})
The InMemoryCache instance stores the field policy inside typePolicy. The policy for the darkMode field on the Query type reads from the darkMode reactive variable, letting Apollo treat it like any other queryable field.
The final piece of the Apollo setup is a client.js file in src. This instantiates ApolloClient with the cache and enables browser dev tools:
import { ApolloClient } from '@apollo/client';
import cache from './graphql/cache';
const client = new ApolloClient({
  cache,
  connectToDevTools: true,
});
export default client;
Then, wire the client through the root index.js file by wrapping the app in ApolloProvider:
import React from 'react';
import ReactDOM from 'react-dom';
import { ApolloProvider } from '@apollo/client';
import './index.css';
import App from './App';
import client from './client';
ReactDOM.render(
  <ApolloProvider client={client}>
    <App />
  </ApolloProvider>,
  document.getElementById('root')
);
Creating the UI Components
With the client configured, build a single page component. In src/pages/landingPage.jsx, create a functional component with a heading:
import React from 'react';

const LandingPage = () => {
  return (
    <div
      style={{
        height: '100vh',
        backgroundColor: 'white',
        }}
    >
      <h1>Welcome to Theme Toggle Appliation!</h1>
    </div>
  )
}
export default LandingPage
Next, create the button component in src/components/button.jsx. Import the icons, the useQuery hook, and the query and reactive variable:
import React from 'react'
import { Moon, Sun } from 'react-feather';
import {  useQuery } from '@apollo/client';
import { GET_DARK_MODE, darkMode as reactiveDarkMode } from '../graphql/reactivities/themeVariable';
Inside the button component, run the GET_DARK_MODE query as you would with any GraphQL query:
...

const ButtonComponent = () => {

  {loading, error, data} = useQuery(GET_DARK_MODE);

  return (...)
}

export default ButtonComponent;
Use the boolean value from data.darkMode to conditionally render either a light-mode or dark-mode toggle button. A ternary operator handles the conditional logic, and each button carries an onClick handler called toggleMode:
...

const ButtonComponent = () => {

  const {loading, error, data} = useQuery(GET_DARK_MODE);

  return (
    <div>
      {
        data.darkMode ? (
          <button
            style={{
              backgroundColor: '#00008B',
              border: 'none',
              padding: '2%',
              height: '120px',
              borderRadius: '15px',
              color: 'white',
              fontSize: '18px',
              marginTop: '5%',
              cursor: 'pointer'
            }}
            onClick={toggleMode}
          >
            <Sun />
            <p>Switch To Light Mood</p>
          </button>
        ) :(
          <button
          style={{
            backgroundColor: '#00008B',
            border: 'none',
            padding: '2%',
            height: '120px',
            borderRadius: '15px',
            color: 'white',
            fontSize: '18px',
            marginTop: '5%',
            cursor: 'pointer'
          }}
          onClick={toggleMode}
        >
          <Moon />
          <p>Switch To Dark Mood</p>
        </button>
        )
      }
    </div>
  )
}
export default ButtonComponent;
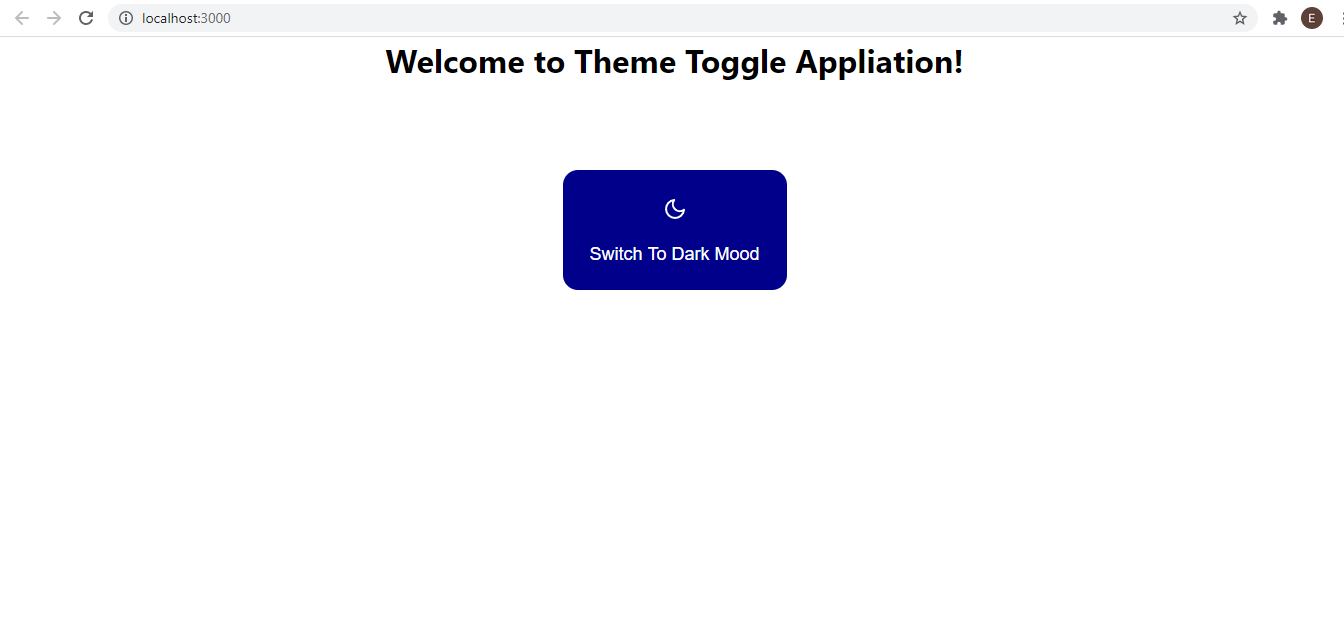
Because the cache policy declares darkMode as a field on the Query type, the value is available directly from the query result. The buttons receive their icons from react-feather, with accompanying CSS for styling.
Define the toggleMode handler within the component. For now, it logs to the console; it will be updated later to actually modify the reactive variable:
...

const ButtonComponent = () => {

  const toggleMode = () => {
    console.log("Clicked toggle mode!")
  }

return (...)
}

export default ButtonComponent;
Return to landingPage.jsx and import the button component, placing it below the heading:
import React from 'react';
import ButtonComponent from '../components/button';

const LandingPage = () => {
  return (
    <div
      style={{
        height: '100vh',
        backgroundColor: 'white',
        }}
    >
      <h1>Welcome to Theme Toggle Appliation!</h1>
      <ButtonComponent />
    </div>
  )
}
export default LandingPage
At this stage, the app renders with both buttons visible according to the initial false value of darkMode:
Applying the Reactive State to Styling
To make the page respond to the dark mode state, modify landingPage.jsx to query the same reactive variable separately. Use ternary operators to switch the backgroundColor and color of the container based on data.darkMode:
import React from 'react'
import { useQuery } from '@apollo/client';
import ButtonComponent from '../components/button';
import { darkMode, GET_DARK_MODE } from '../graphql/reactivities/themeVariable';

const LandingPage = () => {
  const {loading, error, data} = useQuery(GET_DARK_MODE);
  return (
    <div style={{ height: '100vh', backgroundColor: data.darkMode ? 'black' : 'white', color: data.darkMode ? 'white' : 'black' }}>
      <h1>Welcome to Theme Toggle Appliation!</h1>
      <ButtonComponent />
    </div>
  )
}
export default LandingPage
The page now reflects the current theme value from the reactive variable. When the value changes, this component re-renders automatically with the updated styles.
Updating the Reactive Variable
To complete the toggle functionality, update the toggleMode function in the button component. Modifying a reactive variable is simply a matter of calling the function returned by makeVar and passing the new value:
...
import { GET_DARK_MODE, darkMode } from '../graphql/reactivities/themeVariable';

const ButtonComponent = () => {

  const toggleMode = () => {
    darkMode(!darkMode)
  }

return (...)
}

export default ButtonComponent;
Here, toggleMode calls darkMode() with the inverted current value. Since data.darkMode reflects the live reactive state, the toggle alternates between true and false on each click.
Every component that queries this field updates automatically when the variable changes, without any dispatchers, reducers, or additional context providers. The completed demo code is available on GitHub.
Related Resources
- Reactive Variables, Apollo Docs
- Local State Management With Reactive Variables
- Configuring The Cache, Apollo Docs


