
Why Teams Are Moving Off Monolithic WordPress
WordPress dominates because it makes site-building fast, and its plugin ecosystem makes scaling straightforward. But the default WordPress stack is monolithic: the user interface and data access live on the same platform. Since the REST API was introduced, WordPress can be used decoupled — keep WordPress as the backend, build the front-end elsewhere — yet models and controllers stay bundled on the WordPress side. You still need to configure, secure and update it, and you remain tied to its technology when adding new functionality.
A headless CMS reverses the relationship. It handles content management and delivery through APIs, so the team working on rendering owns the entire front-end as an independent, familiar project. As the editor of the source piece notes, teams managing more than one site get particular value: content is centralized in one administration interface, then distributed via APIs to each site that needs it. That pattern scales to brand consistency — the same front-end code powers multiple properties while each one pulls a separate content space, much like conference sites that share a codebase and differ only in content.
The Practical Case For Going Headless
WordPress’ architecture frequently fights modern performance requirements, especially Core Web Vitals. But for a single-author personal blog, migration isn’t a necessary burden. The moment a project involves content creators, marketers or more than a handful of developers, headless becomes the stronger fit.
The reasons cluster into performance, structure and operations:
- The front-end is decoupled from content creation. You choose the framework, and future framework upgrades don’t depend on someone else’s backend release cycle.
- Multi-platform projects don’t multiply admin panels. An app can add a
short_descriptionfield and consume it without creating a second editing experience. - The visual layer can change wholesale while the content model stays intact, lowering the cost of redesigns.
- Assets and responses are faster by design. A headless CMS typically surrounds content delivery with CDN infrastructure rather than leaving it to you to configure.
There’s also considerable support for brand and workflow needs. With a visual editor, editors preview changes without involving developers. Content workflows can require approval stages before publication and thus move upstream the kind of orchestration WordPress sites often duct-tape together.
Operationally, vendor-run updates, security patching, and database performance are absorbed by the CMS provider, leaving the internal team free to iterate on the thing it directly controls.
Those reasons make sense before the grind of migration — when more people than usual touch content, when performance targets factor heavily into the build, or when the organization operates multiple properties on the same stack — the switch starts to justify itself.
What follows is a concrete move from WordPress to Storyblok, a headless CMS that keeps the editing experience friendly. The overview then walks through the migration stages, blockers you’re likely to hit and how to handle them, and cleanup steps that protect the project over time.
What Actually Changes When You Go Headless
A headless CMS splits content management from presentation cleanly. Developers define the content architecture and how it maps to the front-end; editors work with structured blocks in the admin panel without touching code. That separation shapes everything about how you plan a migration.
Structuring Content as Content Types and Blocks
Most headless CMS platforms model content with two layers. The first is the entry template, similar in spirit to WordPress custom post types but with more flexible data types and editor fields. These templates cover the main page archetypes — a generic page structure, a blog post template, and so on. In Storyblok these are called Content Types, and a default "Page" type ships out of the box.
The second layer is reusable components. In Storyblok, those components are Bloks. They are nested inside Content Types via a schema field of type blocks, which lets editors drop components into a page as they write. This is where flexibility comes from: a marketing editor can add a new Hero component to the About page themselves, without a developer round-trip, provided the Hero Blok was previously defined as a nested component and the page has a Blocks field.
During a migration, you typically do not need to build out many of these nested components upfront. The primary work is mapping your existing page and post structures to the corresponding Content Types.
Choosing the Rendering Layer
The headless CMS only delivers data, so you must decide which framework renders it. Before committing, ask three questions: Is your team already fluent in the technology? Does it support the rendering mode your project requires? Are there existing integration modules for your chosen CMS?
For most projects, a statically generated site is the most cost-effective and performant option. Pick a static site generator aligned with your team's skills — Nuxt for Vue, Next for React. Pairing a headless CMS with a static site generator is the architecture known as Jamstack: the result tends to be faster, more secure, and easier to scale.
These popular frameworks almost always ship an official package or community module for the major headless CMS APIs. With that integration in place, the remaining design decision is matching your front-end component tree to the content structure you defined in the CMS.
Automating the publishing workflow is the final step. Most headless CMS platforms expose Webhooks; you can have a publish event trigger a rebuild on your host's build hooks so the static site regenerates whenever content changes.
Scoping the Migration Timeline
Effort scales proportionally with site complexity. A standard WordPress install — Posts, Pages, Categories, and their content — migrates relatively quickly. The hard work begins when custom plugins are tightly woven into the site. Each plugin's functionality must either be recreated in the front-end code or replaced by an equivalent feature in the headless CMS.
SEO is the typical example. If Yoast SEO handled your metadata on WordPress, Storyblok has a Field-Type SEO plugin to ease the transition, but you will still be responsible for generating the sitemap in the front-end, using a guide like this one.
It is fair to say the CMS configuration itself is rarely the bottleneck. The front-end project carries the development weight. Once those components and integrations are built, you only have the actual content transfer left to handle.
Executing the Migration
The migration itself breaks down into four tasks: creating a Storyblok space, defining the content models, moving the WordPress content over, and wiring up the front end. The official WordPress importer plugin for Storyblok handles much of the heavy lifting, but you still need to configure the schemas and credentials correctly.
Setting Up the Storyblok Space
Start by creating an account via the Storyblok pricing page and selecting a plan. Once you can access the dashboard, choose Create a new space. The space acts as a content repository for a single project, containing its own components, assets, environments, domains, collaborators, and permissions.
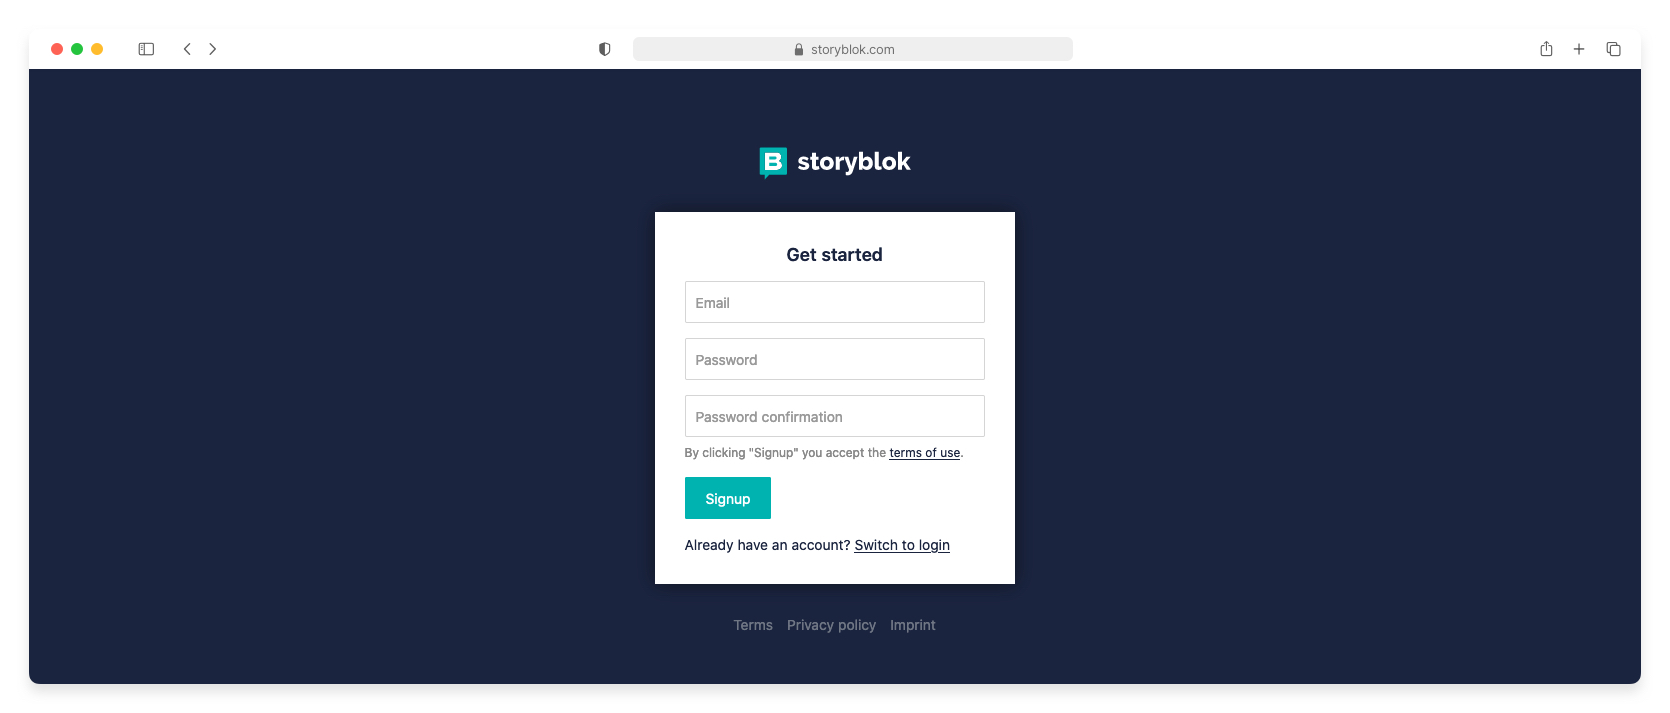
The left sidebar is your control panel. The key sections to understand before proceeding:
- Content — where the marketing team will manage entries.
- Assets — image storage, served optimized through the CDN.
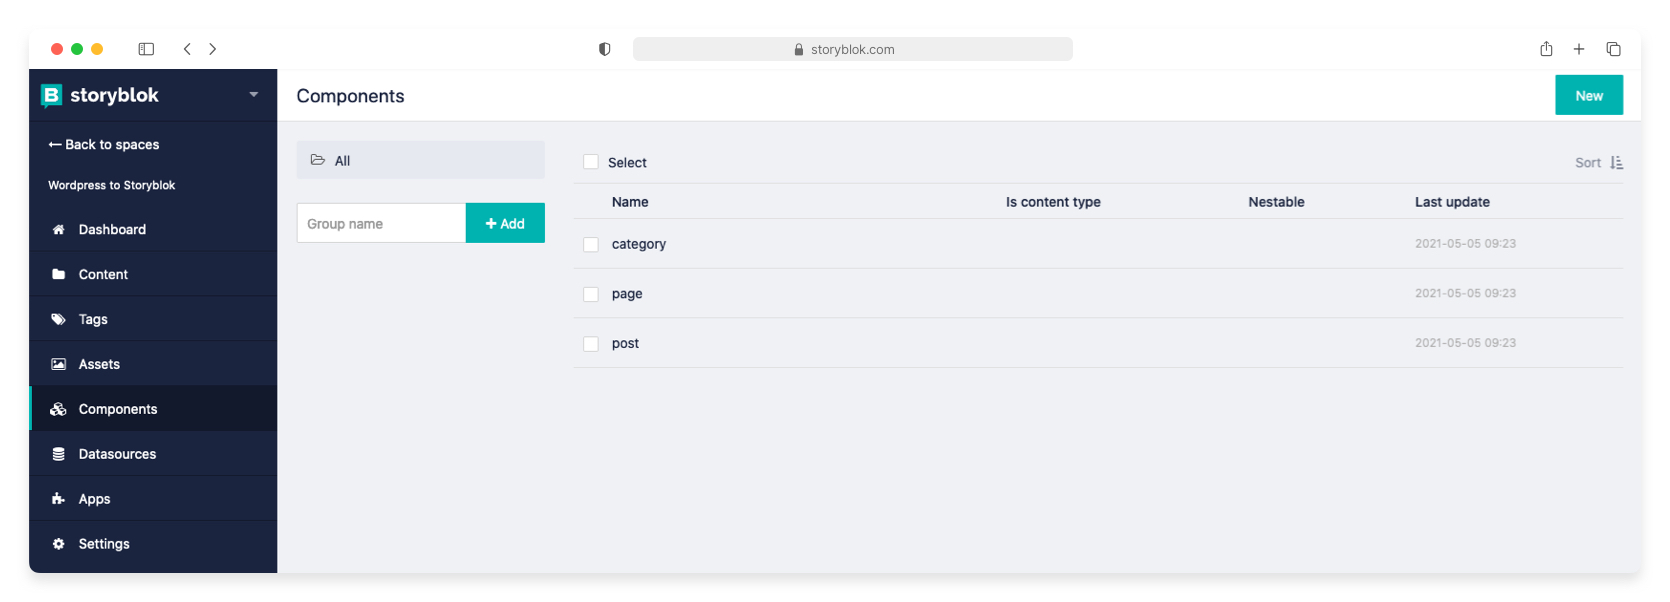
- Components — where you create Content types and Nested components.
- Settings — space configuration, languages, workflows, and user permissions.
Defining Content Models
The next step is to create schemas that mirror the WordPress data structure. In a standard WP install, the primary types are page and post, each with fields like title, slug, featured image, date, and content.
Storyblok Content Types come with default fields — Name, Slug, Tags, and a first published date — which you can reuse. For the Page Content Type, navigate to Components, select the default page, remove the body field, and add featured_image as an Assets > Images field and content as Rich-text.
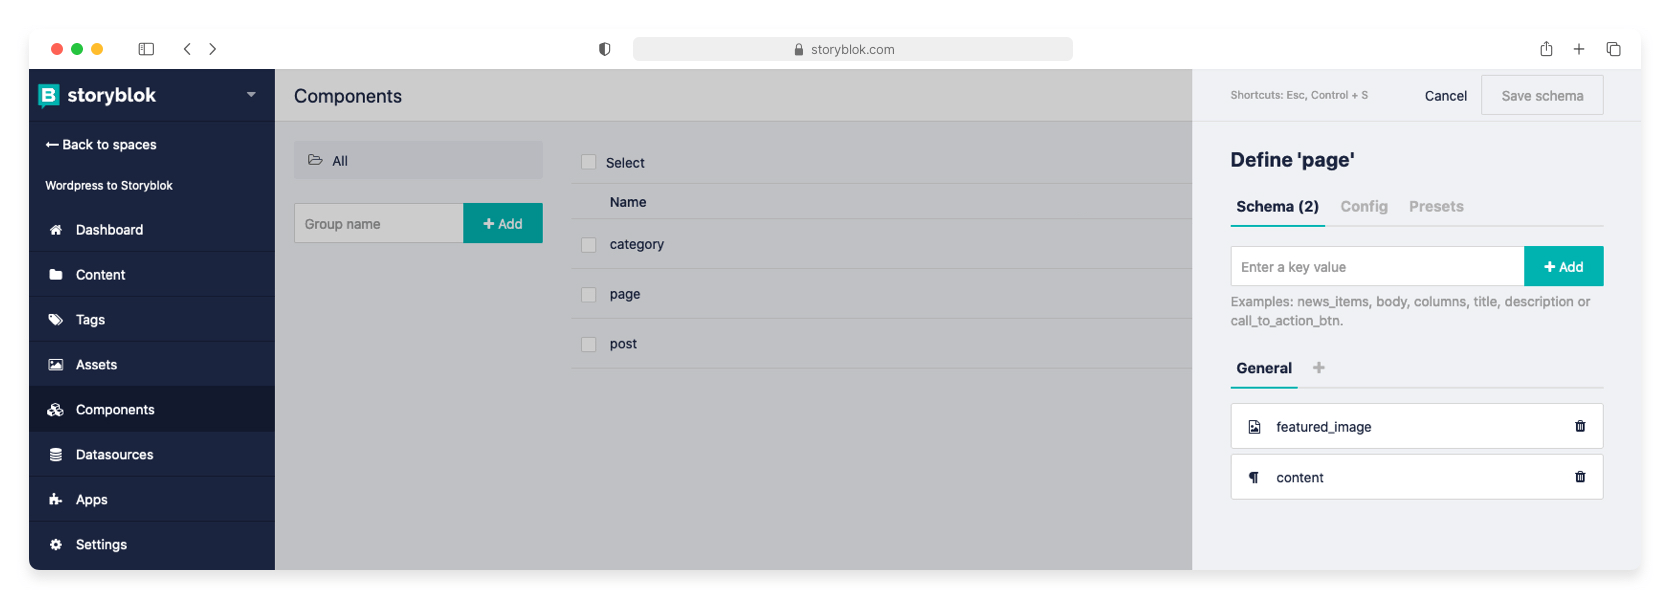
The post type requires more fields — featured_image, excerpt, content — plus relationships to Authors and Categories. Since those entities will have their own content, create folders named authors and categories under Content. Build the corresponding Content Types and associate each type with its folder via the Settings option on the folder’s menu.
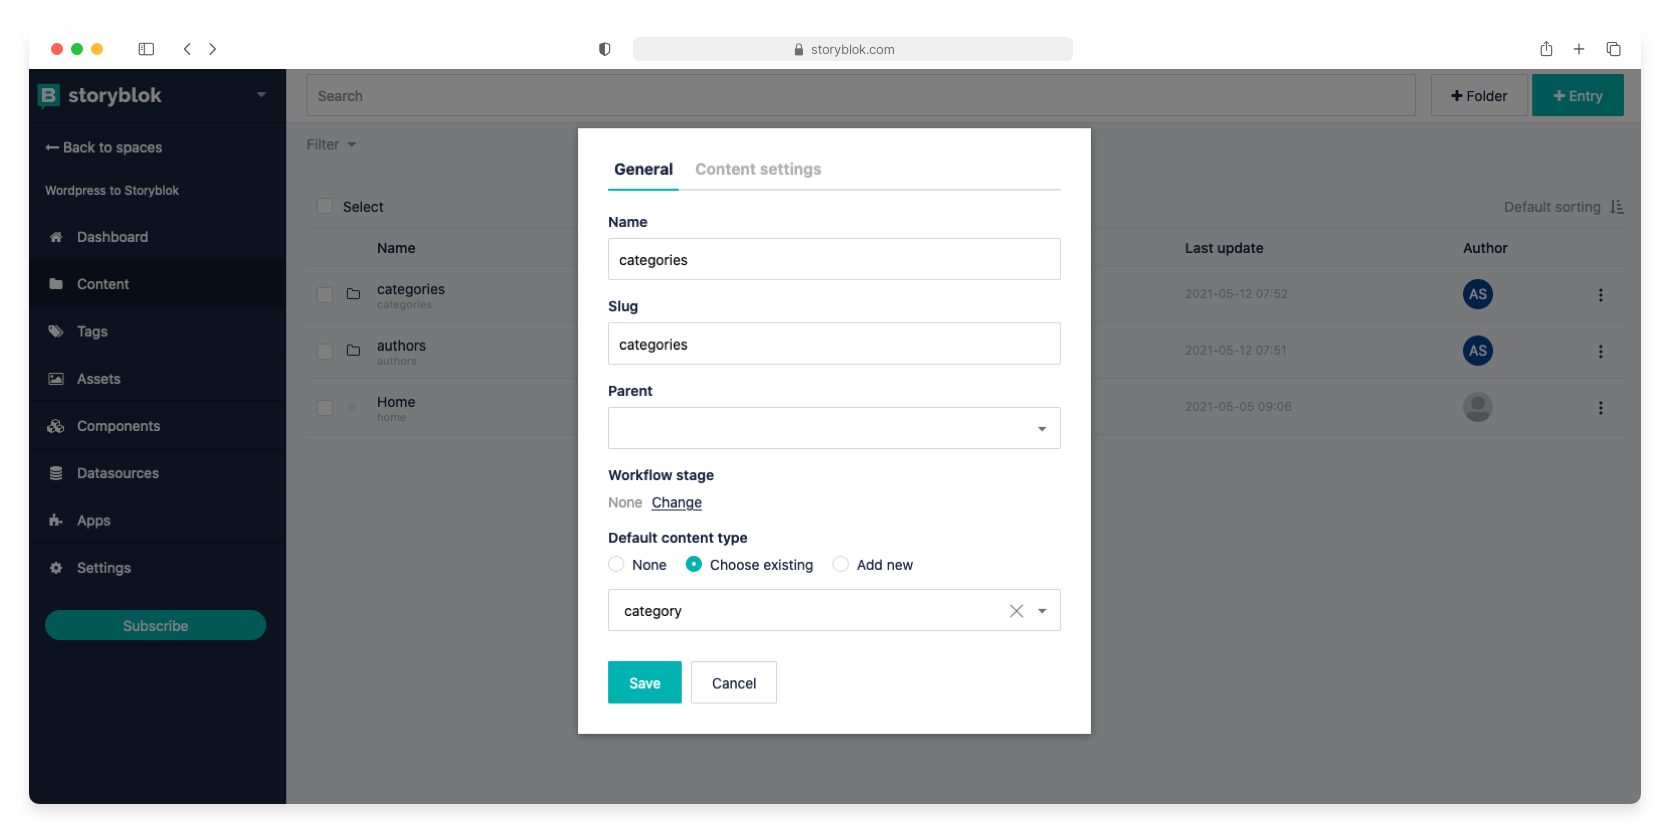
Within the post type, add a Single-Option or Multi-Options field with source Stories for each relation:
- Authors, pointing to
authors/. - Categories, pointing to
categories/.
Define any remaining models the same way. For shared elements like navigation or footers, Storyblok’s guide on creating a global Content Type shows how to expose that content dynamically.
Migrating WordPress Content
WordPress exposes its content via the REST JSON API at /wp-json for deployed projects or ?rest_route=/ locally. If neither works, check the HTML for a link with rel="https://api.w.org/" as described in the WP discovery guide.
The wordpress-importer plugin accepts a mapping between WP post types and Storyblok Content Types, pushes the entries, and migrates images into your Assets section. The script requires node ≥14.0.0 because it relies on optional chaining.
Creating the Migration Script
Clone the importer repository and install the NPM packages with npm install or yarn. Create migrateWPtoStoryblok.js in the project root and add a corresponding script entry to package.json:
"migrate": "node ./migrateWPtoStoryblok.js"
To connect to your space, you need two credentials: the Space_id, located in the Settings section, and an OAuth token, generated under My Account → Personal access tokens. Add these to the script’s top-level config.
import { Wp2Storyblok } from './index.js'

const wp2storyblok = new Wp2Storyblok('https://your-domain.com/wp-json', {
  token: 'storyblok-oauth-token', // My Account > Personal access tokens
  space_id: 'space-id', // Settings
})
The script requires you to map the WP post type to its Storyblok equivalent, then translate field names within the schema_mapping option. Fields can be mapped in several forms:
- A simple field, such as
title. - A sub-property of a field — for example, the featured image URL via
links.wp:featuredmedia.0. The plugin migrates the referenced image into the space automatically. - A field destined for a nested block in Storyblok.
For a full migration, use the object format to avoid losing structured content.
import { Wp2Storyblok } from './index.js'

const wp2storyblok = new Wp2Storyblok('https://your-domain.com/wp-json', {
  // ... Secrets
  content_types: [
    {
      // ... Post type WP:Storyblok
      schema_mapping: {
        "title": "name", // "Field in WP": "Field in Storyblok"
        "_links.wp:featuredmedia.0": "content.preview_image", // Using the dot notation you can define subproperties.
        // Using nested blocks in Storyblok
        "content": {
          field: 'content.body_items', // Field name in Storyblok
          component: "rich-text", // Component name inside the above field
          component_field: "content" // Field name inside the component where you want to migrate the content
        }
      }
    }
  ]
})

wp2storyblok.migrate()
Entry Type Mappings
The importer preserves parent-child page relationships by creating folders under the parent slug in Storyblok. The plugin also handles images found within the content body.
{
  name: 'pages', // Name of the post type in WP
  new_content_type: 'page', // Name of the Content Type in Storyblok
  schema_mapping: {
    "date": "first_published_at",
    "title": "name",
    "slug": "slug",
    "_links.wp:featuredmedia.0": "content.featured_image",
    "content": "content.content",
  }
}
For posts, the configuration additionally specifies the target folder. Categories need their permalink base changed from category to categories via WordPress Admin → Permalinks so the multi-option field on the post entry maintains the correct relationship.
{
  name: 'categories', // Name of the post type in WP
  new_content_type: 'category', // Name of the Content Type in Storyblok
  // By default will be contained by a folder called Category (change it in the Permalinks option in WP)
  schema_mapping: {
    "name": "name",
    "slug": "slug",
    "description": "content.description",
    "parent": "content.parent",
  }
}
Following this pattern for all of your entry types lets you reproduce your WP structure. The complete configuration for a basic project is shown in the final script below.
import { Wp2Storyblok } from './index.js'

const wp2storyblok = new Wp2Storyblok('https://your-domain.com/wp-json', {
  token: '',
  space_id: 34234,
  content_types: [
    {
      name: 'pages', // Name of the post type in WP
      new_content_type: 'page', // Name of the Content Type in Storyblok
      schema_mapping: {
        "date": "first_published_at",
        "title": "name",
        "slug": "slug",
        "_links.wp:featuredmedia.0": "content.featured_image",
        "content": "content.content",
      }
    },
    {
      name: 'categories', // Name of the post type in WP
      new_content_type: 'category', // Name of the Content Type in Storyblok
      // By default will be contained by a folder called Category (change it in the Permalinks option in WP)
      schema_mapping: {
        "name": "name",
        "slug": "slug",
        "description": "content.description",
        "parent": "content.parent",
      }
    },
    // Add authors as categories.
    {
      name: 'posts', // Name of the post type in WP
      new_content_type: 'post', // Name of the Content Type in Storyblok
      folder: 'articles', // Name of the destination folder in Storyblok
      schema_mapping: {
        "date": "first_published_at",
        "title": "name",
        "slug": "slug",
        "_links.wp:featuredmedia.0": "content.featured_image",
        "excerpt": "content.excerpt",
        "content": "content.content",
      }
    }
    // More schemas...
  ]
})

wp2storyblok.migrate()
Connecting a Front-End Project
With content staged in Storyblok, you can hook up your front end. Storyblok publishes a JavaScript API client, plus dedicated modules for frameworks such as Nuxt’s storyblok-nuxt. The JS API includes a bridge that communicates via iframe between the editing UI and your running app, opening the correct component on click.
Official integration guides are available for:
- Next
- Gatsby
- Vue
- Nuxt
- Angular
- Svelte
- Ember
- AMP
Automated Deploys
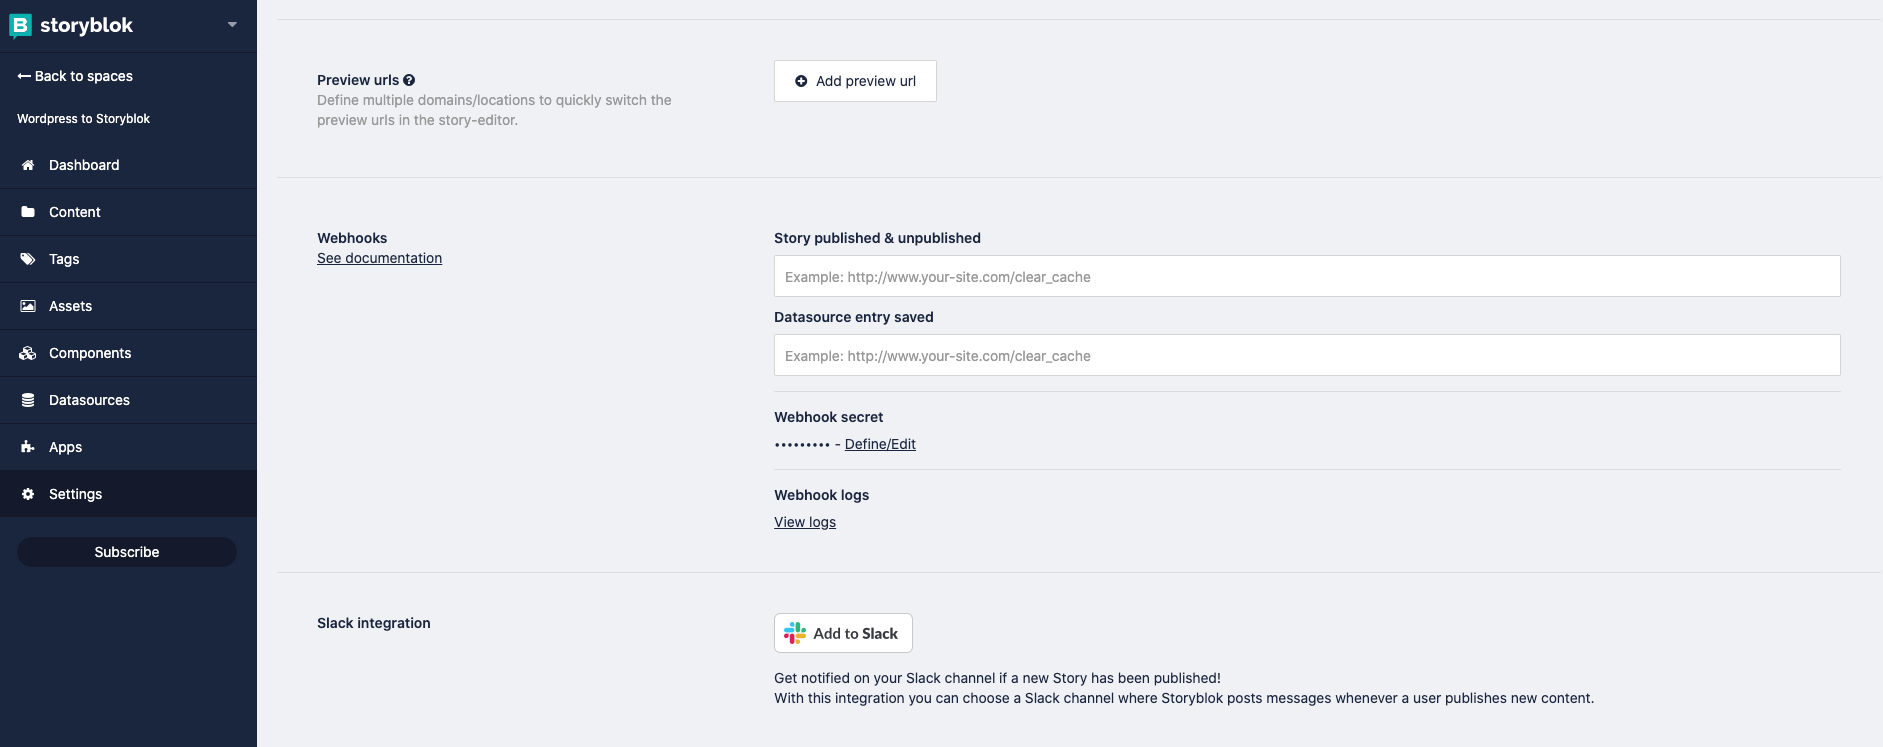
To redeploy a static site when content gets published or unpublished, combine Storyblok’s webhooks with your hosting provider’s build hooks. For example, Netlify lets you create a build hook URL within the deployment section. Paste that URL into Settings → Webhooks → Story published & unpublished in the Storyblok space to trigger a new build each time content changes.
Useful Resources For Your Own Migration
The migration described here relied on a specific set of tools and documentation. If you are planning a similar move, these references will cover the API mechanics, the headless CMS setup, and the supporting infrastructure.
WordPress REST API References
For the exact shape of the data you will pull, consult the schema docs for pages, posts, and categories.
Working With Storyblok
The core documentation covers the essentials you will need to structure content and understand the interface:
For specific parts of the system, these guides address navigation, live previewing, and search engine concerns:
- Building a header menu navigation with Storyblok
- The Storyblok Bridge V2 for real-time editing
- Generating a sitemap with a headless CMS
- SEO app documentation
Automating content regeneration relies on webhooks and build hooks. The official Storyblok documentation covers the former, and Netlify’s guide demonstrates the hosting side:
Two packages can save considerable effort. The universal JavaScript SDK handle API communication, and Storyblok’s WordPress importer automates content transfer:
Jamstack Foundations
If you are still evaluating the architecture or selecting your static site generator, the Jamstack community maintains the definitive source for both:
The migration path is well trodden. The flexibility you gain in scaling, performance, and developer productivity is the payoff for the upfront work of re-structuring your content and wiring up the new frontend. With the documentation above and the available helper scripts, the process is more mechanical than creative — largely a matter of mapping old fields to new components and proving out the API calls.
If you are considering such a move, the primary blockers will not be technical. They will be content modeling decisions and the time required to test the new build pipeline. Start by pulling a representative subset of posts and pages through the REST API, load them into Storyblok, and run them through your preview environment. Once that small loop works, scaling it to the full content base is an execution problem rather than an open question.


