
A headless CMS keeps only the backend: content is created, stored, managed and published through an API, leaving the frontend entirely decoupled. That split lets teams pick their own frontend tooling and ship user-facing experiences faster. This walkthrough assembles a blogging platform called Blogify🚀 from Fauna as the content store and Vercel Functions as the server-side layer.
What a CMS Is, and What Going Headless Changes
A content management system manages the creation and modification of digital content, and typically consists of two parts: a content management application (CMA), the interface through which someone with limited expertise adds, modifies and removes content without a webmaster, and a content delivery application (CDA), which compiles that content and updates the site.
Decoupling the two sides is the core trade-off between traditional and headless systems.
- Traditional, on the plus side: everything needed — content management, design and so on — ships together, so setup is simpler. Many such systems offer drag and drop for people with no programming experience, and customization with little to no code.
- Traditional, on the minus side: plugins and themes may carry malicious code or bugs and can slow a site down. The front-end/back-end coupling costs additional time and money for maintenance and customization.
- Headless, on the plus side: since the two layers are separate, you choose whichever frontend framework and tools suit the job. Applications built this way also deploy more easily across web, mobile and AR/VR displays.
- Headless, on the minus side: you own backend infrastructure management and the UI work for your site or app. Implementations are generally more expensive than traditional CMSs, and adding analytics to a headless build is not cost-effective.
The Two Services
Fauna lets you build web applications on existing infrastructure without standing up a custom API server, which saves developers time and removes the region selection and storage configuration other databases require — it is global/multi-region by default. Maintenance is handled by Fauna's engineers and automated DevOps. Useful properties for this role:
- A database instance can be created from inside the development environment of hosting platforms such as Netlify or Vercel.
- Data can be queried over GraphQL or with Fauna Query Language (FQL) for complex functions.
- Multiple data models are available: relational, document, graph and temporal.
- Built-in authentication, transparent scalability and multi-tenancy are included.
- The Fauna Console and Fauna Shell make instance management straightforward.
Vercel Functions, also called Serverless Functions, are code written in backend languages that receives an HTTP request and returns a response.
Prerequisites
- Access to the Fauna dashboard
- Basic knowledge of React and React Hooks
create-react-appinstalled globally, ornpxto bootstrap the project- Node.js
>= 12.x.x npmoryarnas package manager
Setting Up the Fauna Database
Register with email credentials or an existing GitHub account (or sign in) at the Fauna dashboard. The fauna shell is an alternative for creating and modifying resources from a terminal:
npm install --global fauna-shell
fauna cloud-login
This tutorial uses the web dashboard throughout. Once signed in, you land on the dashboard screen.

Name the database blogify; it will serve as the content management system.

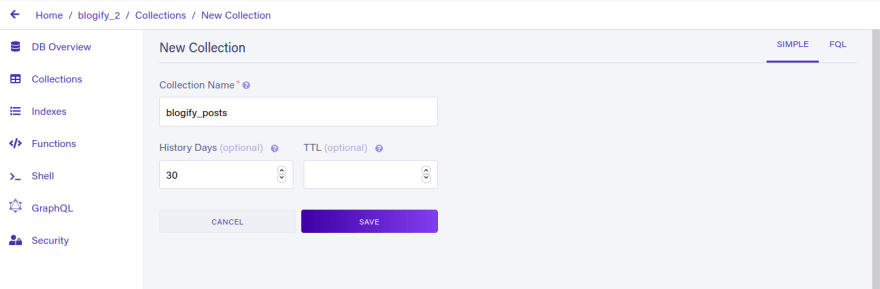
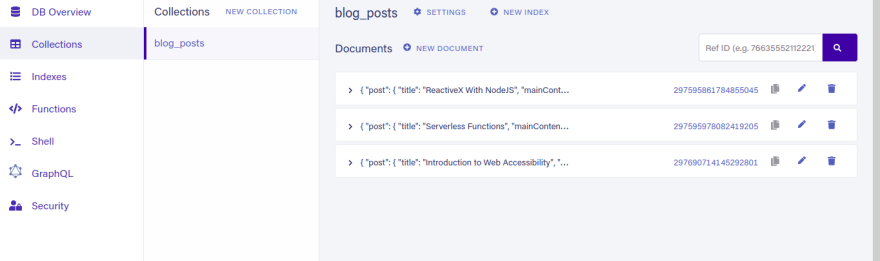
Next, go to the Collection tab and click NEW COLLECTION.

The collection here is named blogify_posts.
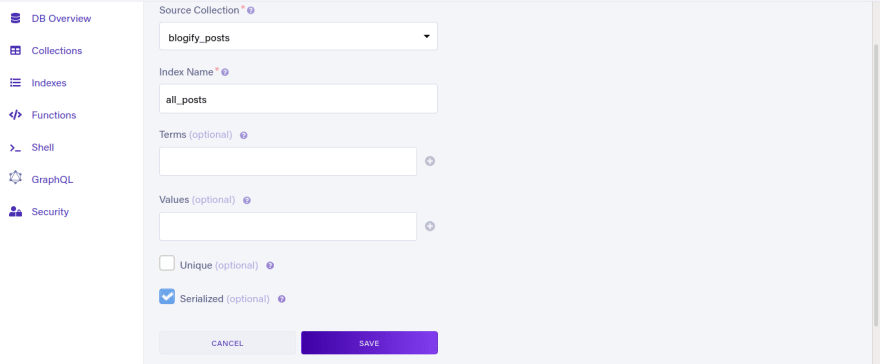
Then create an index from the Indexes tab. Fauna searches documents by matching inputs against an index's terms field, so click NEW INDEX, select the collection just created, and name the index all_posts before saving.
With the index in place, create a DOCUMENT to hold the content. Click NEW DOCUMENT and write an object in the editor that serves the site's needs:
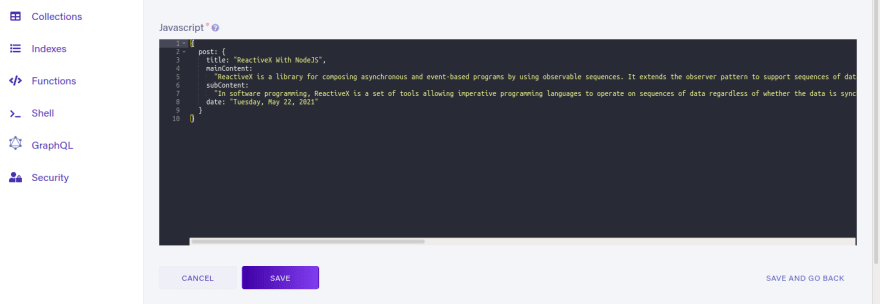
That post object is the unit of data behind each blog post; the shape of your own data can differ entirely depending on the site. Create as many documents as needed — three posts are enough to keep this example simple.
Building the React Frontend
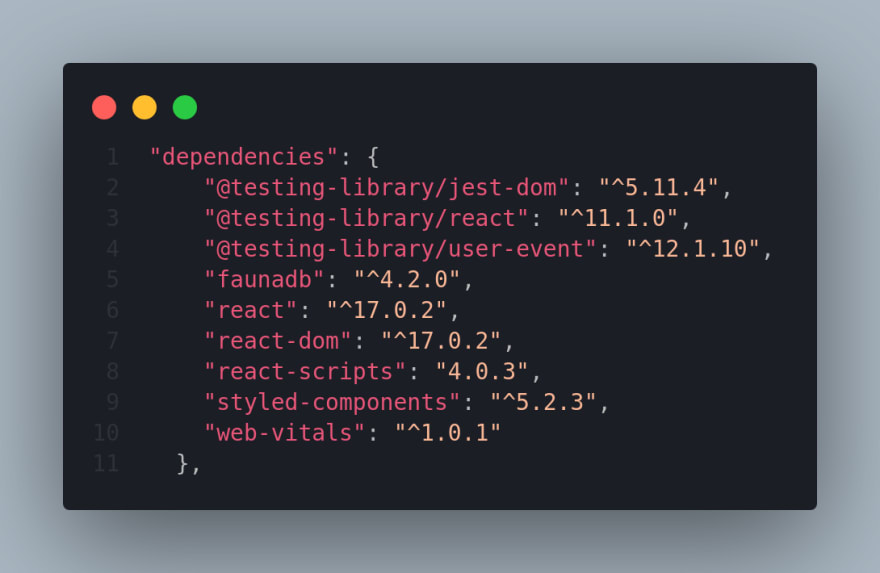
The app needs the Fauna SDK to reach the database, styled-components for UI styling, and vercel in the terminal to host the result. The styling library can be swapped for any other UI approach.
npx create-react-app blogify
# install dependencies once directory is done/created
yarn add fauna styled-components
# install vercel globally
yarn global add vercel
The fauna package is Fauna's JavaScript driver; styled-components lets you write actual CSS to style components. Confirm the installs in package.json afterward.
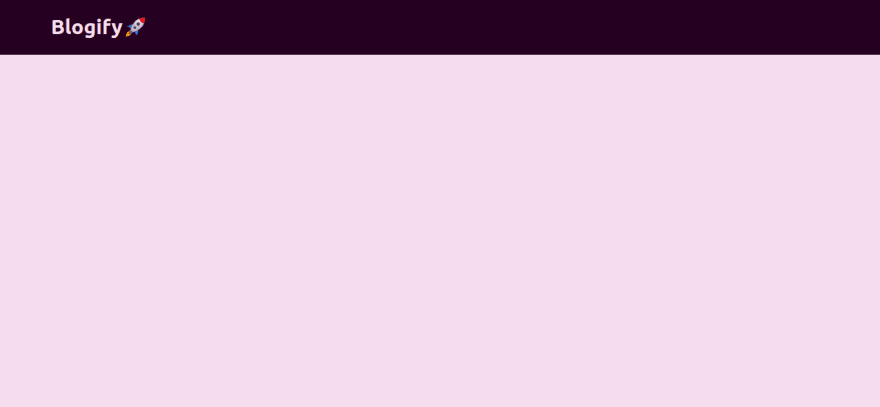
Start with the header. A Navigation component in src/components holds the blog name, Blogify🚀.
import styled from "styled-components";
function Navigation() {
  return (
    <Wrapper>
      <h1>Blogify🚀</h1>
    </Wrapper>
  );
}
const Wrapper = styled.div`
  background-color: #23001e;
  color: #f3e0ec;
  padding: 1.5rem 5rem;
  & > h1 {
    margin: 0px;
  }
`;
export default Navigation;
Imported into App along with the styled-components styling, it renders as the UI below:
The body of the site holds the post data from the database. A component called Posts contains the blog posts created in the backend.
import styled from "styled-components";
function Posts() {
  return (
    <Wrapper>
      <h3>My Recent Articles</h3>
      <div className="container"></div>
    </Wrapper>
  );
}
const Wrapper = styled.div`
  margin-top: 3rem;
  padding-left: 5rem;
  color: #23001e;
  & > .container {
    display: flex;
    flex-wrap: wrap;
  }
  & > .container > div {
    width: 50%;
    padding: 1rem;
    border: 2px dotted #ca9ce1;
    margin-bottom: 1rem;
    border-radius: 0.2rem;
  }
  & > .container > div > h4 {
    margin: 0px 0px 5px 0px;
  }
  & > .container > div > button {
    padding: 0.4rem 0.5rem;
    border: 1px solid #f2befc;
    border-radius: 0.35rem;
    background-color: #23001e;
    color: #ffffff;
    font-weight: medium;
    margin-top: 1rem;
    cursor: pointer;
  }
  & > .container > div > article {
    margin-top: 1rem;
  }
`;
export default Posts;
Its styles cover JSX that is written once the backend data is queried from the frontend.
Connecting Fauna to React
Create db.js at src/config/, import the fauna driver and define a new client. The secret argument to fauna.Client() holds the access key from the .env file:
import fauna from 'fauna';
const client = new fauna.Client({
  secret: process.env.REACT_APP_DB_KEY,
});
const q = fauna.query;
export { client, q };
Inside Posts, declare a posts state variable with useState, defaulting to an array; setPosts stores what comes back from the database. A second state variable, visible, defaults to false and controls showing more post content through a handleDisplay function triggered by a button added later.
function App() {
  const [posts, setPosts] = useState([]);
  const [visible, setVisibility] = useState(false);
  const handleDisplay = () => setVisibility(!visible);
  // ...
}
Writing the Serverless Query
The blog performs exactly one operation — fetching the content created in the database — so create a directory src/api/ containing a file index.js. Using ES6 import, pull the client and the query instance from config/db.js:
export const getAllPosts = client
  .query(q.Paginate(q.Match(q.Ref('indexes/all_posts'))))
    .then(response => {
      const expenseRef = response.data;
      const getAllDataQuery = expenseRef.map(ref => {
        return q.Get(ref);
      });
     return client.query(getAllDataQuery).then(data => data);
   })
   .catch(error => console.error('Error: ', error.message));
})
.catch(error => console.error('Error: ', error.message));The query returns a ref that can be mapped over to obtain the results the app needs. Append a catch to log any error raised while querying.
To render everything returned from the Fauna collection, invoke getAllPosts from ./api/index.js inside the useEffect Hook in Posts; the first render then walks the data and checks for existing posts:
useEffect(() => {
  getAllPosts.then((res) => {
    setPosts(res);
    console.log(res);
  });
}, []);
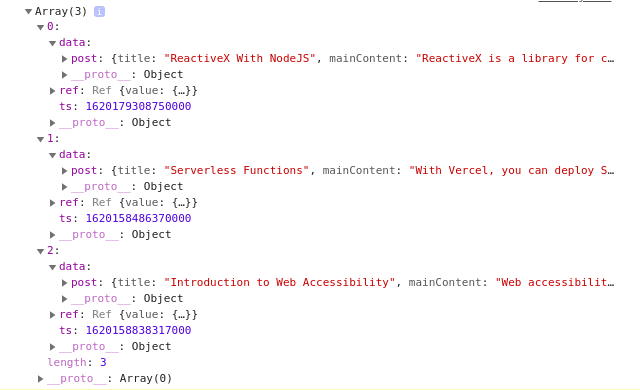
Inspect the returned data in the browser console:
Now finish the Posts component with the JSX elements styled through styled-components, looping over the posts array with JavaScript map only while it is non-empty:
import { useEffect, useState } from "react";
import styled from "styled-components";
import { getAllPosts } from "../api";

function Posts() {
  useEffect(() => {
    getAllPosts.then((res) => {
      setPosts(res);
      console.log(res);
    });
  }, []);

  const [posts, setPosts] = useState([]);
  const [visible, setVisibility] = useState(false);
  const handleDisplay = () => setVisibility(!visible);

  return (
    <Wrapper>
      <h3>My Recent Articles</h3>
      <div className="container">
        {posts &&
          posts.map((post) => (
            <div key={post.ref.id} id={post.ref.id}>
              <h4>{post.data.post.title}</h4>
              <em>{post.data.post.date}</em>
              <article>
                {post.data.post.mainContent}
                <p style={{ display: visible ? "block" : "none" }}>
                  {post.data.post.subContent}
                </p>
              </article>
              <button onClick={handleDisplay}>
                {visible ? "Show less" : "Show more"}
              </button>
            </div>
          ))}
      </div>
    </Wrapper>
  );
}

const Wrapper = styled.div`
  margin-top: 3rem;
  padding-left: 5rem;
  color: #23001e;
  & > .container {
    display: flex;
    flex-wrap: wrap;
  }
  & > .container > div {
    width: 50%;
    padding: 1rem;
    border: 2px dotted #ca9ce1;
    margin-bottom: 1rem;
    border-radius: 0.2rem;
  }
  & > .container > div > h4 {
    margin: 0px 0px 5px 0px;
  }
  & > .container > div > button {
    padding: 0.4rem 0.5rem;
    border: 1px solid #f2befc;
    border-radius: 0.35rem;
    background-color: #23001e;
    color: #ffffff;
    font-weight: medium;
    margin-top: 1rem;
    cursor: pointer;
  }
  & > .container > div > article {
    margin-top: 1rem;
  }
`;

export default Posts;
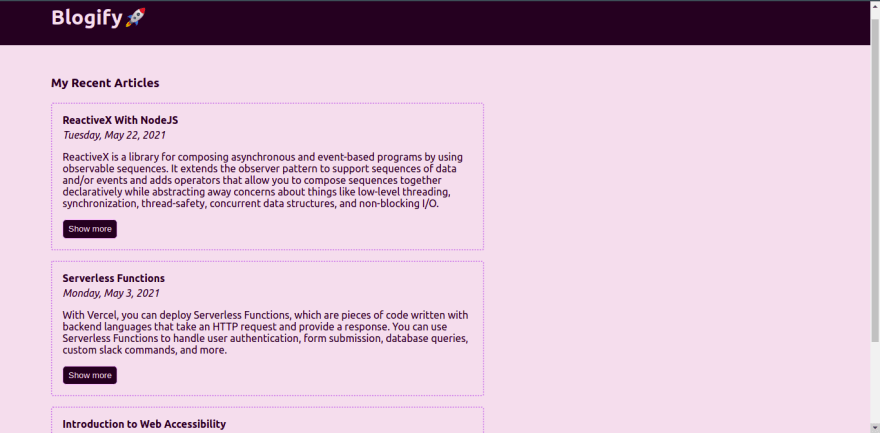
The completed structure produces the following UI for Blogify🚀:
Deploying with the Vercel CLI
The Vercel CLI supplies the commands for deploying and managing projects from the terminal. Log in to your Vercel account first:
vercel loginFollow the terminal instructions to authenticate:
vercelThen run vercel from the project root; provide answers to the prompts it raises.
vercel
? Set up and deploy “~/Projects/JavaScript/React JS/blogify”? [Y/n]
? Which scope do you want to deploy to? ikehakinyemi
? Link to existing project? [y/N] n
? What’s your project’s name? (blogify)
  # click enter if you don't want to change the name of the project
? In which directory is your code located? ./
  # click enter if you running this deployment from root directory
? ? Want to override the settings? [y/N] n
The project is deployed to Vercel; visit your Vercel account to complete any remaining CI/CD setup.
Wrapping Up
Fauna as a headless CMS pairs with a decoupled frontend for applications well beyond blogging — e-commerce, note-keeping, anything that stores data and retrieves it for the frontend. The tutorial's code sample and the live demo hosted on Vercel are available for reference, alongside Fauna's CRUD docs, its material on native GraphQL and on indexes.