
A Dockerfile can describe an entire runtime environment, dependencies and all. The remaining question is how to actually write code inside that container. VS Code's Remote – Containers extension answers it: it loads a project inside a Docker container and connects the editor to it.
Why develop inside a container
The payoff is portability of the whole environment, not just the source. Ship the project to anyone and they can run it without reconfiguring their own machine. A single Dockerfile stands in for that setup step.
Bootstrapping the container
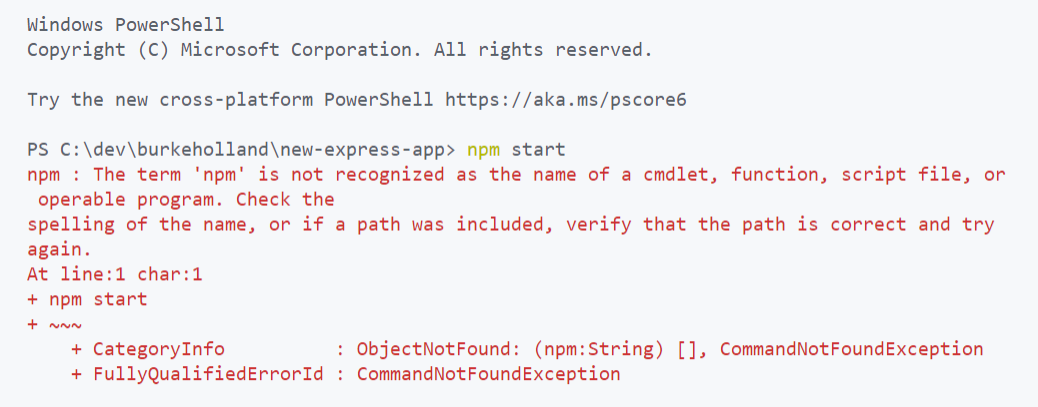
Consider a clean Windows machine with WSL2 and Docker installed and nothing else. Attempt to run a Node.js project there and the shell has no idea what you mean.
Installing Node.js locally is one fix, but the container route avoids touching the host. From the Command Palette, the Add Development Container Configuration Files… command inspects the project and proposes a definition.
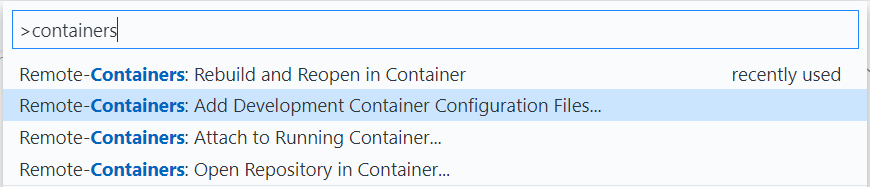
For a Node project, pick Node.js 14.

That writes a .devcontainer folder containing a Dockerfile with the chosen Node.js image and a devcontainer.json holding project-level configuration. Before editing anything, run Rebuild and Reopen in Container from the Command Palette. VS Code restarts, builds the image, and reopens the project attached to the container; the lower-left corner of the window confirms the connection. The first build can take a while depending on hardware.

Open the integrated terminal and it is no longer PowerShell — it is a Linux container shell, where npm install and npm start both work. The Express app listens on port 3000, though the browser can't reach it until that port is mapped to localhost. The Remote Explorer view provides the UI: open the Port Forwarding section, click Forward a Port, and enter 3000.
Project-level automation in devcontainer.json
Ports and setup commands can be persisted rather than repeated by hand. In devcontainer.json, set forwardPorts to 3000 so forwarding happens automatically, and use postCreateCommand to run npm install on creation.
{
  // ...
  // Use 'forwardPorts' to make a list of ports inside the container available locally.
  "forwardPorts": [3000],
  // Use 'postCreateCommand' to run commands after the container is created.
  "postCreateCommand": "npm install",
  // ...
}
Extensions declared here are installed into the container; the VS Code running inside it does not inherit your local extension set. Prettier and ESLint are natural candidates. Extension IDs autocomplete if the extension is installed locally; otherwise copy the ID from the marketplace entry's context menu, or use Add to devcontainer.json.
Environment-level changes in the Dockerfile
Adding software means editing the Dockerfile. The base image handed out by the VS Code configuration is Debian Linux, which uses apt-get. Appending an install to the end of the Dockerfile adds packages such as cowsay.
apt-get install cowsayAlways run apt-get update before installing: it refreshes the cached package and repository lists, and skipping it makes the build fail with a package-not-found error. Four details govern the RUN line itself:
RUNcreates a new image layer, the mechanism by which the container tracks changes. Keep related logic in a singleRUNso you don't accumulate unnecessary layers.- A trailing
\marks a line break for multi-line commands; omit it and the build fails. &&chains additional commands onto the sameRUNline.- The
-yflag suppresses apt-get's confirmation prompt. Nothing is present to answer it interactively, so without-ythe build fails.
After Rebuild Container, the package installs but the binary is still not found. Debian places cowsay in /usr/games, which is absent from the PATH environment variable — the kind of distribution-level discrepancy that trips people up across Mac, WSL2 and container builds. One fix is to extend PATH in the Dockerfile.
FROM mcr.microsoft.com/vscode/devcontainers/javascript-node:0-14
RUN apt-get update \
  && apt-get -y install cowsay
ENV PATH="/usr/games:${PATH}"
Carrying over shell and editor preferences
To summarize the split: project configuration (ports, dependencies) lives in devcontainer.json; environment configuration (installed software) lives in the Dockerfile.
Custom shell setups follow the same division. zsh ships in the image but isn't the default shell, and normal Docker tricks for changing the default don't apply because the build process isn't yours to control. The "settings" block of devcontainer.json already contains a line setting the default terminal to "/bin/bash"; change it to "/bin/zsh". Any VS Code setting can go in that block.
// Set *default* container specific settings.json values on container create.
"settings": {
  "terminal.integrated.shell.linux": "/bin/zsh"
}
Shell plugins need your .zshrc. oh-my-zsh is already present in the image under the root folder, so set the ZSH path at the top of the file to point at root, then copy the file into the root folder from the Dockerfile — keeping it inside the project's .devcontainer folder makes it easy to find.
# Path to your oh-my-zsh installation.
export ZSH="/root/.oh-my-zsh"


# Set name of the theme to load --- if set to "random", it will
# load a random theme each time oh-my-zsh is loaded, in which case,
# to know which specific one was loaded, run: echo $RANDOM_THEME
# See https://github.com/ohmyzsh/ohmyzsh/wiki/Themes
ZSH_THEME="cloud"


# Which plugins would you like to load?
plugins=(zsh-autosuggestions nvm git)


source $ZSH/oh-my-zsh.sh
Plugins that must be downloaded first are fetched in the Dockerfile with a RUN command, again grouped into one command because each RUN is a layer.
RUN git clone https://github.com/zsh-users/zsh-autosuggestions ${ZSH_CUSTOM:-~/.oh-my-zsh/custom}/plugins/zsh-autosuggestionsDocumentation pointer
For adding databases or using Docker Compose with Remote Containers, the official Remote Container documentation covers the details.