
Uploading Files From A GraphQL API To Google Cloud Storage
Modern applications increasingly need to handle file uploads, from profile pictures to media assets. This article demonstrates how to build file upload functionality into a React and Node.js GraphQL application using Apollo and Google Cloud Storage. We'll create a demo app where users upload a profile image alongside a username when creating an account.
Building The GraphQL Backend
To bootstrap the API, we'll use apollo-server-express and Express.js. Set up the project and install dependencies:
# Create a new Project folder and( && ) move into it
mkdir Node-GraphQL-API && cd Node-GraphQL-API

# Create A New Node project
yarn init -y

# Install The Two Needed Dependencies
yarn add apollo-server-express express
Next, configure a single GraphQL endpoint accessible on port 4000:
const express = require('express')
const { ApolloServer } = require('apollo-server-express')

const { Queries , Mutations , TypeDefs } = require('./resolvers')

const resolvers = {
  Query : Queries ,
  Mutation : Mutations
}

const server = new ApolloServer({ TypeDefs, resolvers });

const app = express();
server.applyMiddleware({ app });

app.listen({ port: 4000 }, () =>
  console.log(`Graphiql running at https://localhost:4000/${server.graphqlPath}`));
The setup imports queries, mutations, and type definitions from the resolvers file, creates a resolvers object, and passes it into the ApolloServer constructor along with the type definitions. An Express instance is integrated via the applyMiddleware method, and the server listens on port 4000.
GraphQL's strong typing comes from the Schema Definition Language. Our schema defines three types:
const { gql }  =  require('apollo-server-express')

const typeDefinitions  = gql`
  type File {
    filename: String!
    mimetype: String!
    encoding: String!
  }

  type User {
     username: String
     imageurl: String
  }

  type Query {
    getUser  : User
  }

  type Mutation {
    createUser (
      username : String!
      image : Upload!
     ) : User

    deleteUser () : Boolean!
   }
`
export default typeDefinitions
The File object type contains three string fields — filename, mimetype, and encoding — which are standard metadata for uploaded files. The User type has username and imageurl string fields; the latter holds the URL of the uploaded image so it can be rendered in an src attribute.
We define a getUser query that returns user data, plus two mutations:
createUseraccepts ausernamestring and anUploadinput, returning the fullUserobject after account creation.deleteUsertakes no arguments and returns a boolean indicating success.
The exclamation marks (!) make fields mandatory.
Implementing Resolvers
With the schema in place, we implement the resolver functions. The getUser resolver returns stored user data from a globally declared array:
// stores our user data
let Data  = []

export const Queries = {
   getUser: () => {
      return Data
  }
}
Mutations perform CREATE, UPDATE, and DELETE operations. The two mutation resolvers are:
export const Mutations = {
    createUser: (_, { username, image }) => {
      # boilerplate resolver function
   },

 # Resets The User's Data
  deleteUser: (_ ) =>  {
    Data = []

    if (Data.length < 1) {
        return true
    } else {
        return false
    }
 },
}
createUserdestructures theusernameandimagearguments passed from the frontend. This is where file upload processing takes place; we'll complete this after setting up Google Cloud Storage.deleteUserclears the data array and checks its length to returntrueif empty,falseotherwise. With a real database, this would accept an ID argument.
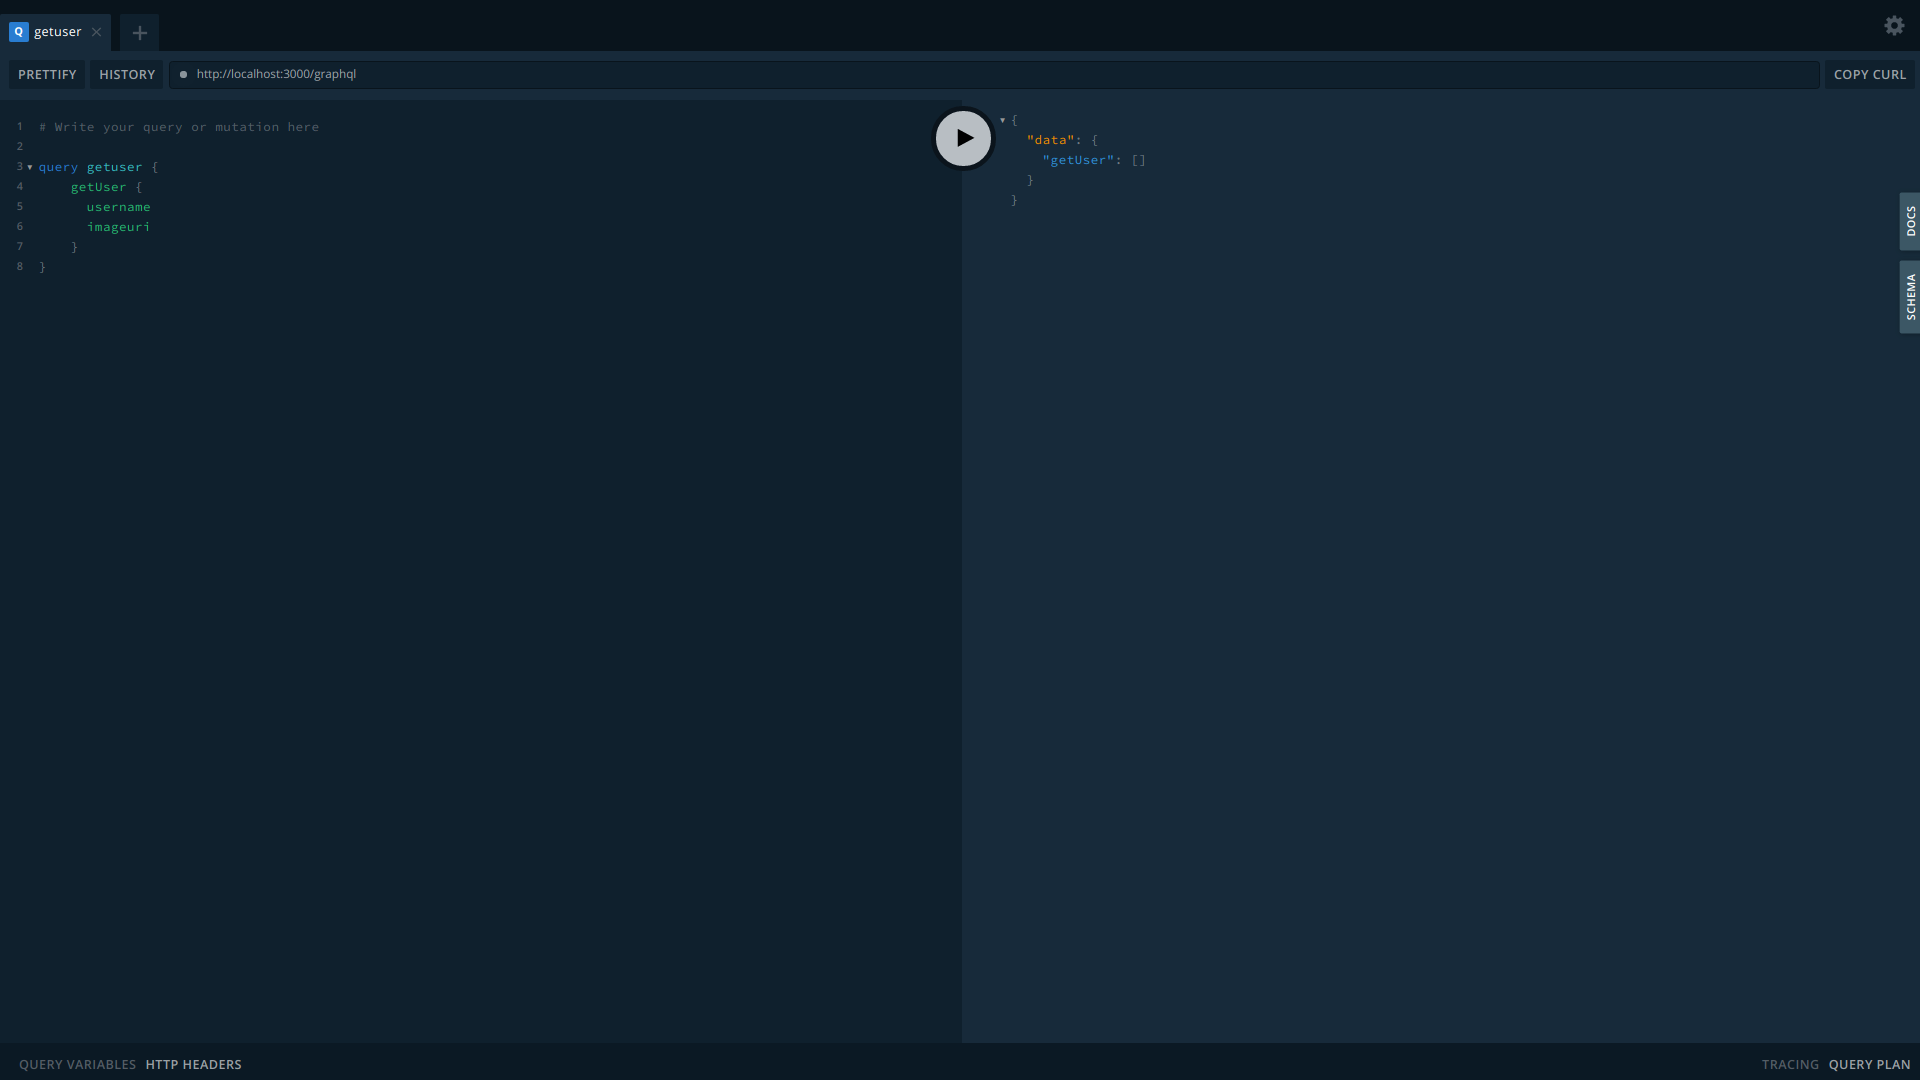
You can test the server via curl at https://localhost:4000/graphql or the GraphiQL web console:
Configuring Google Cloud Storage
Google Cloud Storage stores object data and can scale from personal projects to enterprise applications. Start by creating a GCP account and project, then follow these steps:
- Navigate to the Storage Browser in the Cloud Console and click Create Bucket.
- Choose a bucket name and keep default settings.
- Click create; you'll land on an empty bucket view.
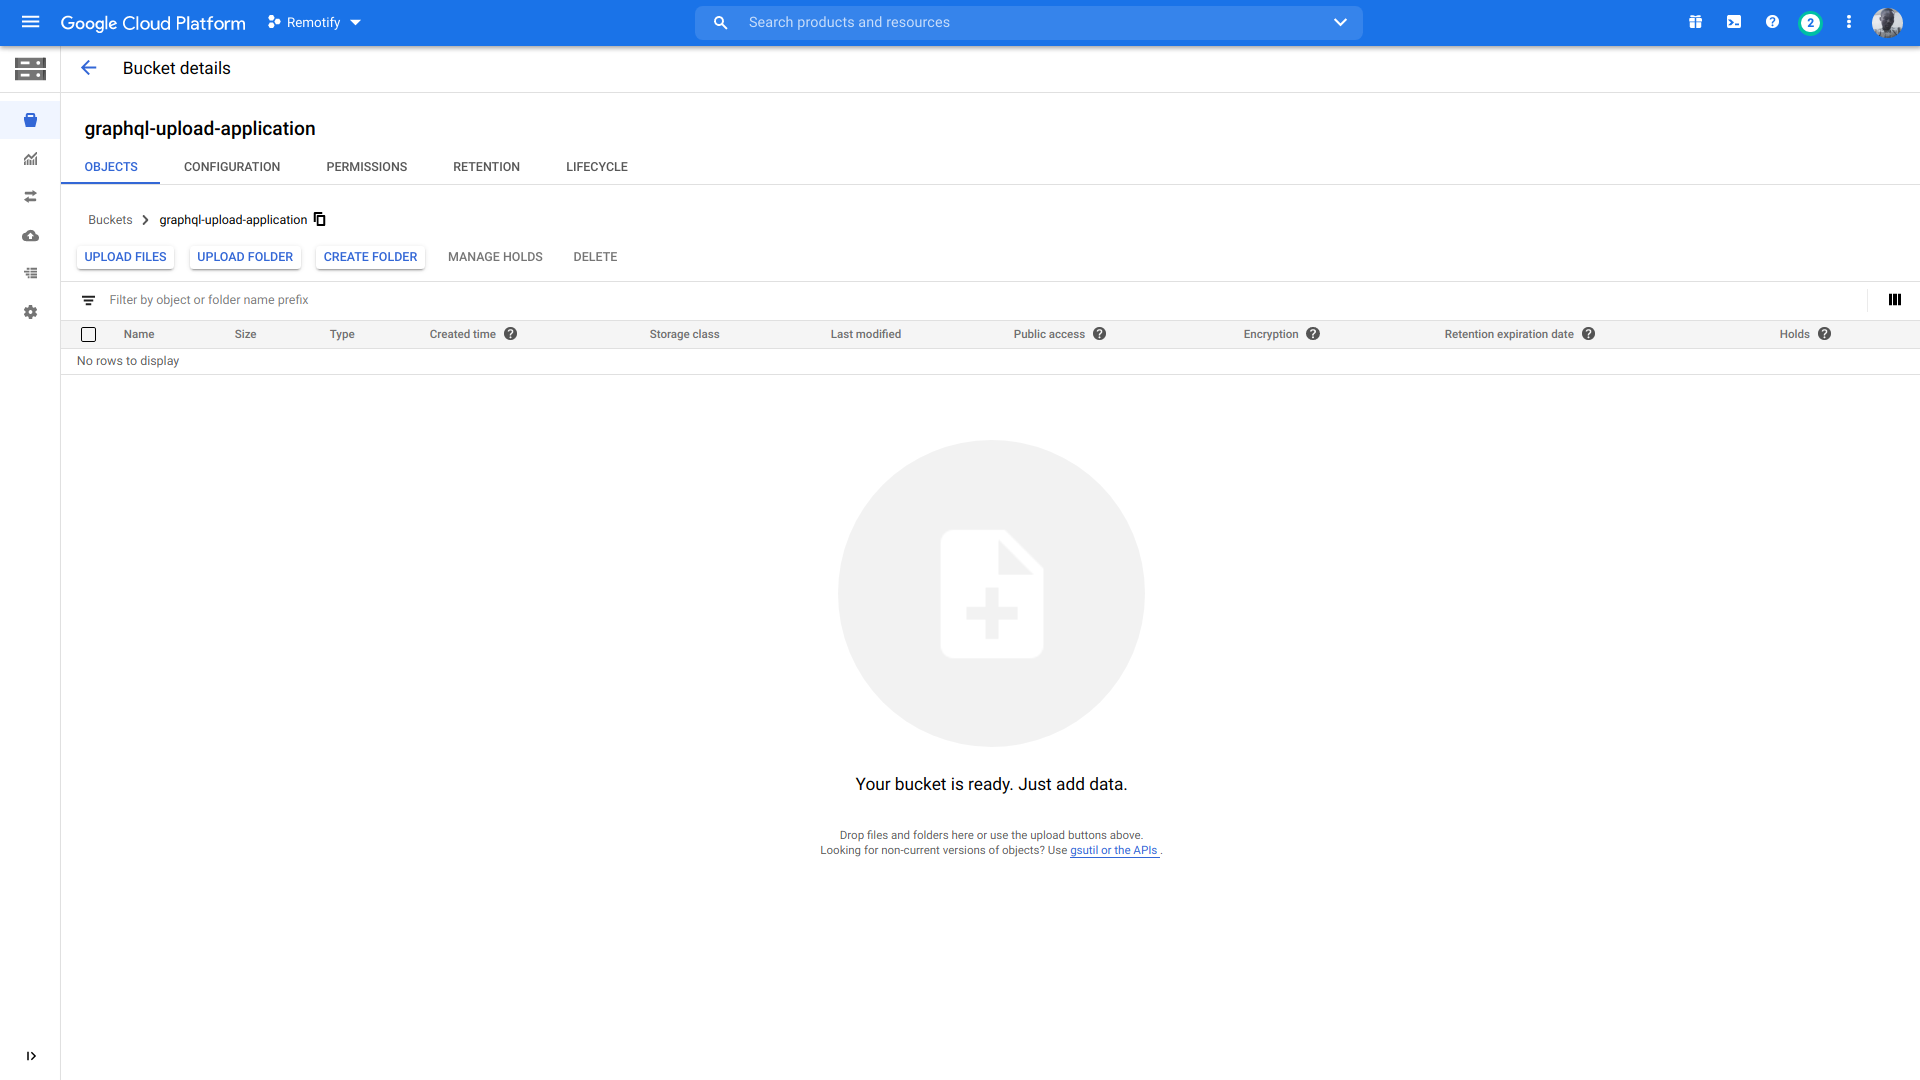
The bucket is ready, but our Node server needs a Service Account to communicate with Google Cloud.
Service Accounts And Keys
Service accounts are special Google Cloud accounts for non-human, API-based interactions. Our Node API uses one with a service account key to authenticate uploads.
To create a service account:
- Open the Identity Access Management (IAM) section.
- Navigate to Service Accounts and click Create Service Account.
- Enter a name and description; an ID is auto-generated.
- Select the Storage Admin role from the dropdown.
- Click Done.
Now generate a secret service account key in JSON format:
- Open the newly created service account.
- Scroll to the Keys section, click Add Key, then Create new key.
- Select JSON format and click Create.
The key downloads locally. A sample of its structure:
 {
  "type": "service_account",
  "project_id": "PROJECT_NAME-PROJECT_ID",
  "private_key_id": "XXX-XXX-XXX-XXX-XXXX-XXX",
  "private_key": AN R.S.A KEY,
  "client_email": "SERVICE_ACCOUNT_NAME-PROJECT-NAME.iam.gserviceaccount.com",
  "client_id": PROJECT-CLIENT-ID,
  "auth_uri": "https://accounts.google.com/o/oauth2/auth",
  "token_uri": "https://oauth2.googleapis.com/token",
  "auth_provider_x509_cert_url": "https://www.googleapis.com/oauth2/v1/certs",
  "client_x509_cert_url": "https://www.googleapis.com/robot/v1/metadata/x509/SERVICE-ACCOUNT-NAME%PROJECT-NAME-PROJECT-ID.iam.gserviceaccount.com"
}
Finally, move the downloaded key file into the project directory and add its filename to .gitignore so it never gets committed to version control.
Uploading Files in the createUser Resolver
To implement the createUser mutation, we connect to Google Cloud Storage using the @google-cloud/storage package. While direct HTTP requests to the storage API endpoints are possible, this library handles the underlying communication and exposes a cleaner interface for interacting with buckets and files.
First, we establish a connection to Google Cloud Storage inside the resolver:
import  { Storage } from '@google-cloud/storage';


export const Mutations = {

createUser : (_, { username, image }) => {
const bucketName = "node-graphql-application"; // our bucket name

// We pass-in the downloaded SECRET KEY from our Service Account,
 const storage = new Storage({ keyFilename: path.join(__dirname, "../upload.json") });
  }
}
The Storage constructor is initialized by pointing to the secret-key JSON file containing the credentials needed for authentication. We construct the file path using the path package.
Next, we expand the resolver to process and upload incoming images to our storage bucket:
const removeWhiteSpaces = (name) => {
  return name.replace(/\s+/g, "");
};

export const Mutations = {
  createUser : async (_ , {filename , image}) => {
   const { filename, createReadStream } = await image;

    let sanitizedName = removeWhiteSpaces(filename);
    await new Promise((resolve, reject) => {
      createReadStream().pipe(
        storage
          .bucket(bucketName)
          .file(sanitizedName)
          .createWriteStream()
          .on("finish", () => {
            storage
              .bucket(bucketName)
              .file(sanitizedName)

           // make the file public
              .makePublic()
              .then(() => {
                Data = [];

            // save user's data into the Data array
                Data.push({
                  username: username,
                  imageurl: `https://storage.googleapis.com/${bucketName}/${sanitizedName}`,
                });
                resolve();
              })
              .catch((e) => {
                reject((e) => console.log(`exec error : ${e}`));
              });
          })
      );
    });
  }
}
Here is what happens step by step in the resolver:
- We asynchronously destructure
filenameandcreateReadStreamfrom the uploaded file, then strip whitespace from the filename. The storage library would otherwise replace whitespace with a%character, distorting the final file URL. This is optional but recommended for cleaner URLs. - We create a new promise and, using Node Streams, pipe the
createReadStreaminto the storage bucket viacreateWriteStream. The promise resolves on a successful upload and rejects if the subsequentmakePubliccall fails. - We reference our bucket by name, then the file by name, and call
createWriteStreamto perform the upload. - We call
makePublicon the newly uploaded file to make it publicly accessible. - We build the user data object (including the username and a constructed file URL) and pass it to the API response. Public file URLs in Google Cloud Storage follow the pattern
https://storage.googleapis.com/{BUCKET_NAME}/{FILENAME}, which we assemble using template literals.
Note: Files in Google Cloud Storage are private by default and cannot be accessed via URL. Making files public after upload is required if they need to be fetched directly.
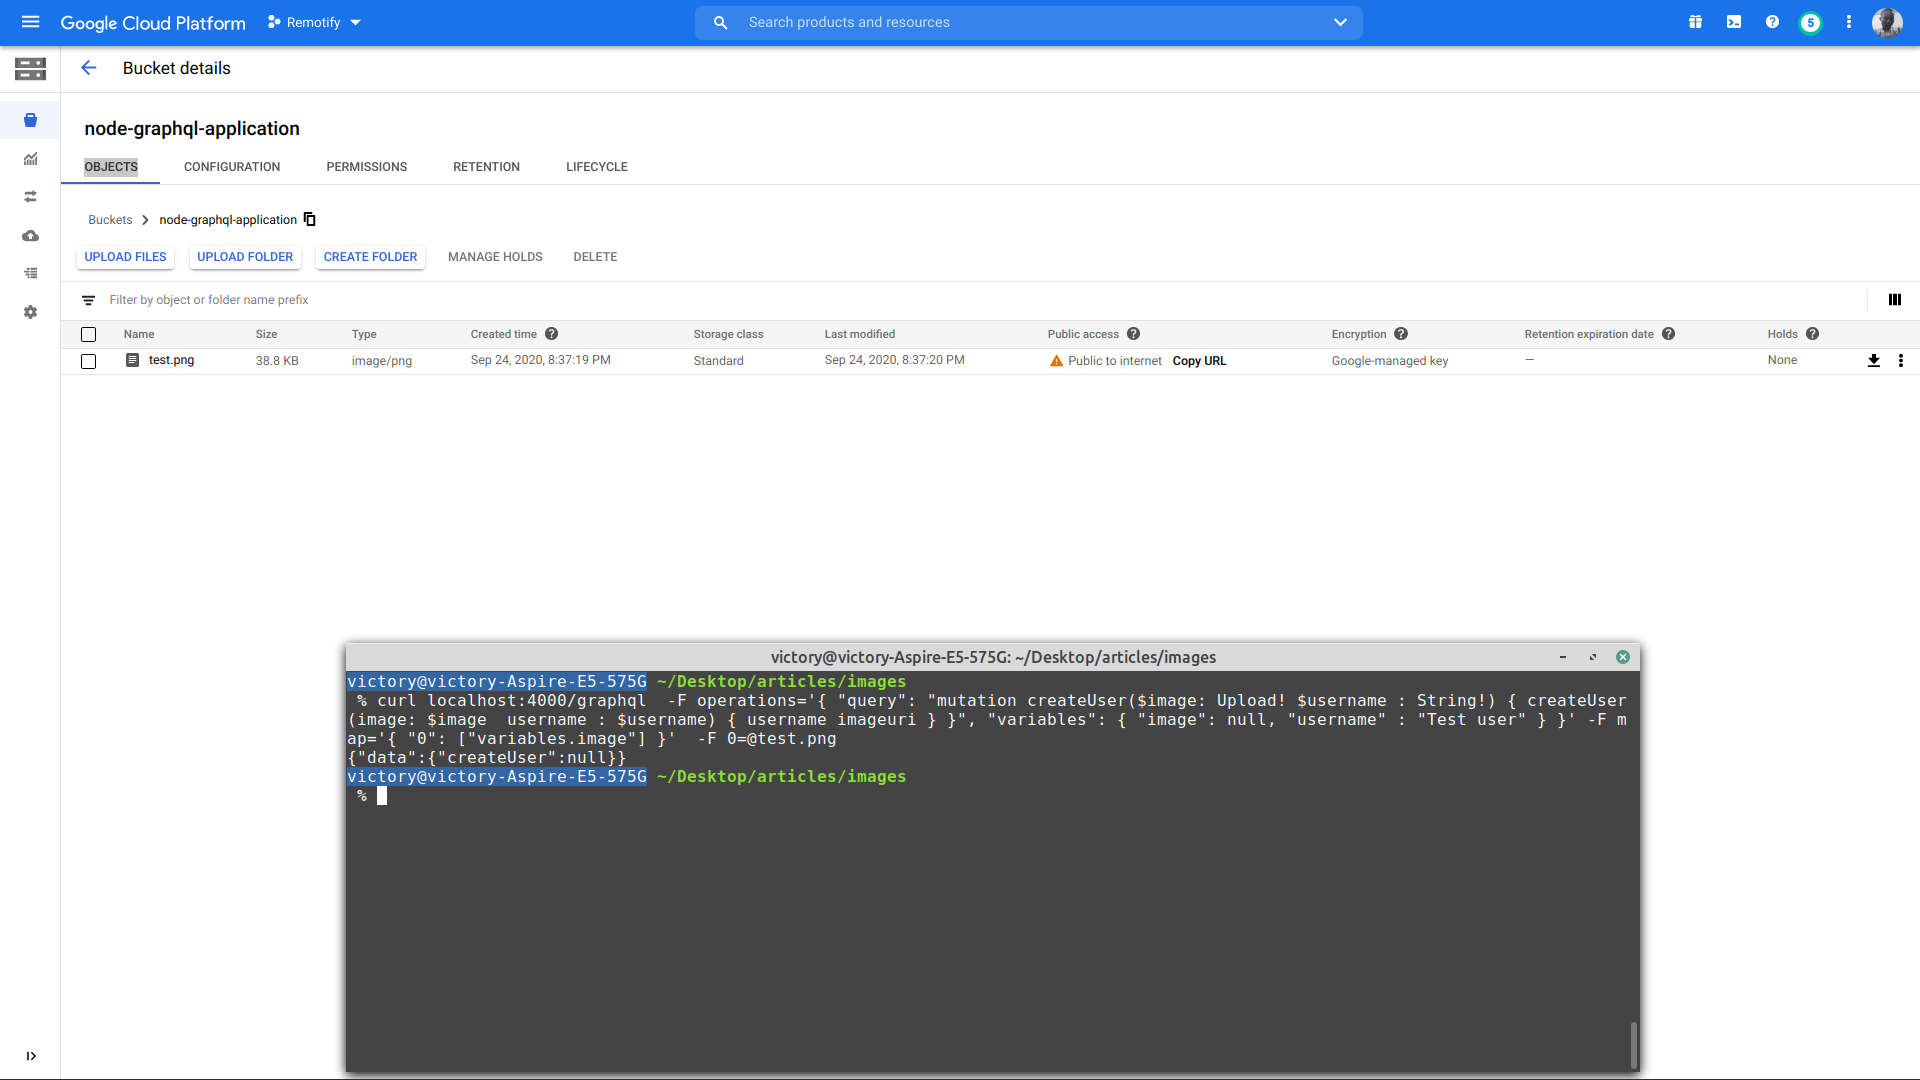
We can verify the createUser endpoint works by sending a test request with curl:
curl localhost:4000/graphql -F operations='{ "query": "mutation createUser($image: Upload! $username : String!) { createUser(image: $image username : $username) { username imageuri } }", "variables": { "image": null, "username" : "Test user" } }' -F map='{ "0": ["variables.image"] }' -F 0=test.png
This POST request includes the necessary headers, the GraphQL mutation with its username and image arguments, and the path to a local test file. If the request succeeds, the uploaded file will appear in the bucket:
Connecting the React Frontend
With the backend in place, we now build the React application that consumes the API. We bootstrap it with the create-react-app CLI:
# Create A New Application using Create-React-App CLI
npx create-react-app Graphql-upload-frontend

# Move Into Newly Created Project Directory
cd Graphql-upload-frontend

# Dependencies Needed For Our Application
yarn add react-dropzone @apollo/react-hooks graphql apollo-cache-inmemory
Next, we set up a link to our GraphQL endpoint and initialize the Apollo Client in a configuration file:
// config.js

import { ApolloClient } from "apollo-client";
import { InMemoryCache } from "apollo-cache-inmemory";
import { createUploadLink } from "apollo-upload-client";

const GRAPHQL_ENDPOINT = "https://localhost:3000/graphql";
const cache = new InMemoryCache()

const Link = createUploadLink({
  url: GRAPHQL_ENDPOINT,
});

export const Config = new ApolloClient({
  link: uploadLink,
  cache
})
This setup differs slightly from what you may have seen in the React-Apollo documentation's Getting Started guide. Here's what the configuration accomplishes:
- We instantiate
InMemoryCachefrom theapollo-cache-inmemorypackage to store cached data from all requests made in the app. - We create a connection link using
apollo-upload-client, pointing to the single GraphQL endpoint. This link handles multipart upload requests for files as well as regular Query and Mutation operations. - We initialize the Apollo Client with both the link and the cache, then export it for use with the ApolloProvider.
The entire application tree is wrapped in ApolloProvider, making queries, mutations, and subscriptions available from any component:
import React from "react";
import ReactDOM from "react-dom";
import App from "./App";
import * as serviceWorker from "./serviceWorker";
import { Config } from "./config";
import { ApolloProvider } from "@apollo/react-hooks";

ReactDOM.render(
    <ApolloProvider client={Config}>
      <App />
    </ApolloProvider>,
  document.getElementById("root")
);

serviceWorker.unregister();
The exported Apollo Client from the config file is passed to the provider's client prop.
Defining GraphQL Operations on the Client
Before working with data, we define our GraphQL operations client-side. GraphQL's strong typing applies here as well — operations are declared using the gql tag from @apollo/react-hooks with backticks. Each operation starts with its type (query, mutation, or subscription), a name, and optionally typed arguments prefixed with the $ sigil. These typed arguments can then be referenced throughout the operation.
Below are the three GraphQL operations used in our application:
# data.js
import { gql } from "@apollo/react-hooks";

export const CREATE_USER = gql`
  mutation createUser($username: String!, $image: Upload!) {
    createUser(username: $username, image: $image) {
      username
    }
  }
`;

export const DELETE_ACCOUNT = gql`
  mutation deleteAccount {
    deleteUser
  }
`;

export const GET_USER = gql`
  query getUser {
    getUser {
      username
      imageurl
    }
  }
`;
Each exported variable serves a specific purpose:
CREATE_USER
Defines thecreateUsermutation, receiving ausernamestring and animagewith theUploadobject type. The image represents the user-uploaded file with all its associated fields.DELETE_ACCOUNT
Defines thedeleteUsermutation, which takes no arguments and requires no parenthesized type declarations.GET_USER
Declares a query returning two fields. Although this query takes no arguments, queries can accept arguments in parentheses when fetching specific data, just like mutations.
With the connection established and operations defined, we can proceed to build the application layout and incorporate these operations into its components.
Mapping the App’s States
The interface is driven by three distinct states, all managed with React Hooks across two components:
- Guest State — The starting point, showing a default username and image. Account creation switches this state.
- Create Account State — The user enters a username and attaches an image via drag-and-drop or click. Submitting triggers the
createUsermutation. - Signed In State — The image comes from the Google Cloud Bucket URL returned by the query, replacing the default.
All state transitions live in the App Component and the Create Account Component.
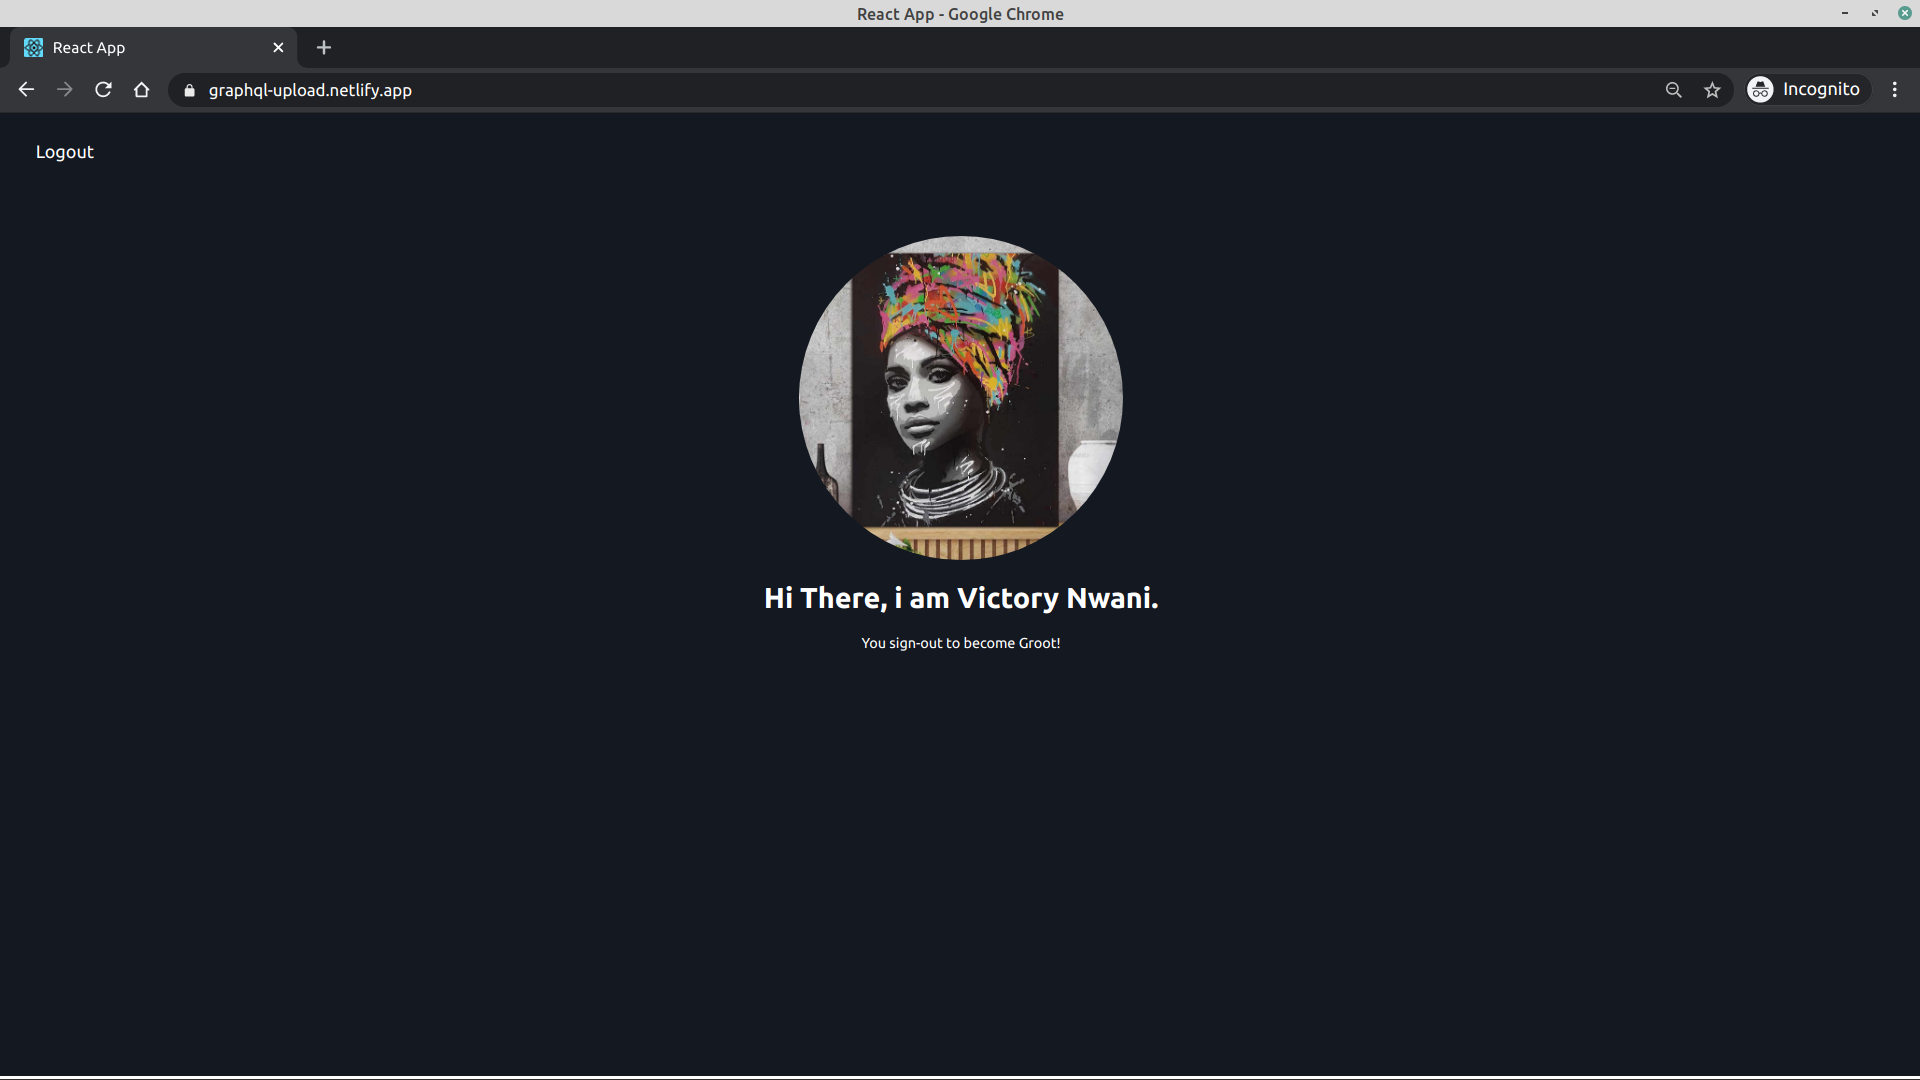
The App Component begins in the Guest State, rendering a welcome message, a default image, and a Sign In button.
import React, { useState } from "react";

const App  = () => {
 const [ isCreatingAccount , setCreatingAccount ] = useState(false)

 return (
  <div className="App" style={{ height: window.innerHeight - 35 }}>
      <div onClick={() => {isCreatingAccount(true)}}  className="auth" >
        <p className="auth-text">
          Sign In
        </p>
      </div>
        <div className="content"
            <img
              className="user-img"
              src={ require("./assets/groot.jpg")}
              alt="default user and user"
            />
              <h1>  Hi There, i am   Groot </h1>
              <p> You can sign-in to become you!  </p>
          </div>
    </div>
   )
}

export default App
Adding this component to app.js yields the base layout:
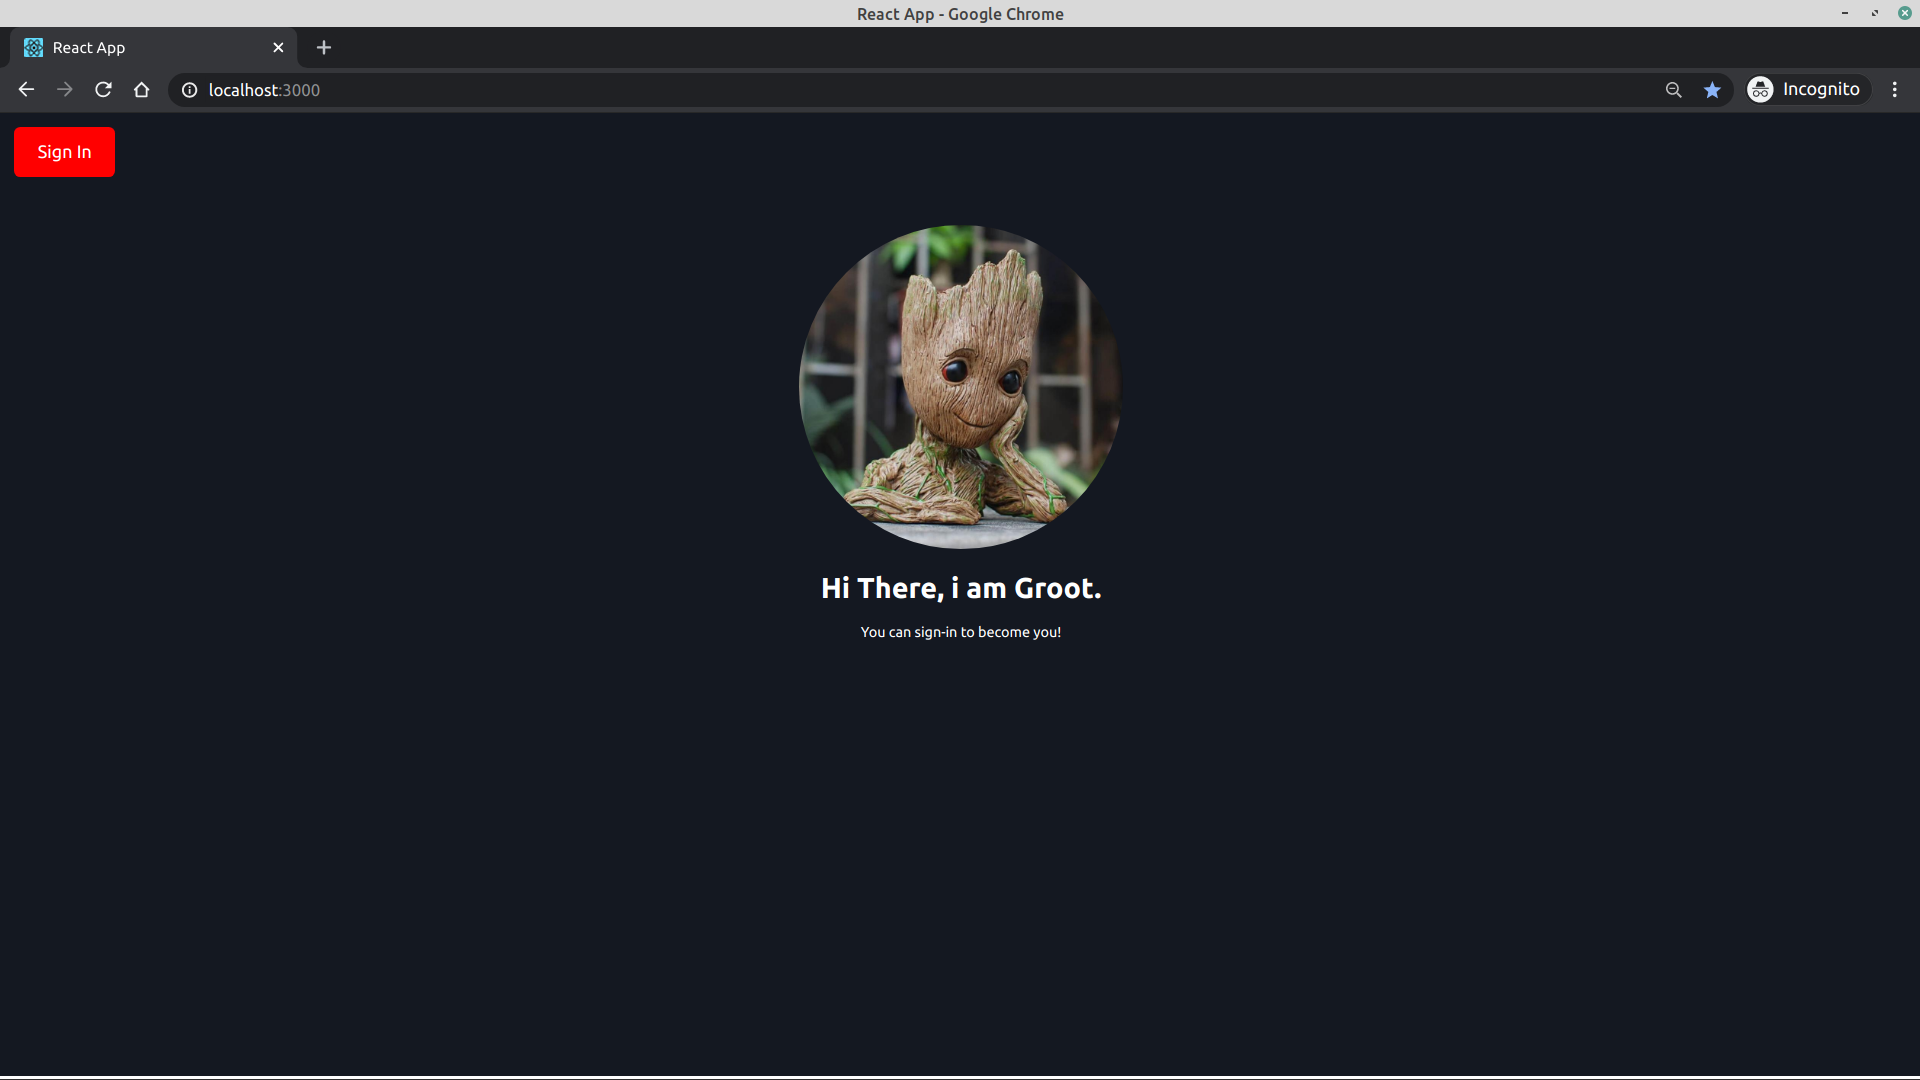
Clicking the Sign In button toggles the view to the account creation fields:
import React, { useState, useEffect } from "react";
import { useMutation, useLazyQuery } from "@apollo/react-hooks";
import CreateUser from "./create-user";
import "../App.css";
import { DELETE_ACCOUNT, GET_USER } from "../data";

function App() {
  const [deleteUser] = useMutation(DELETE_ACCOUNT);
  const [getUser, { data, error }] = useLazyQuery(GET_USER);

  // state used to switch between a Guest and a user
  const [isLoggedIn, setLoggedIn] = useState(false);
  const [isCreatingAccount, beginCreatingAccount] = useState(false);

  // user data stored in state and passed to GraphQL
  const [userName, setuserName] = useState("");
  const [imgUrl, setImgUrl] = useState(null);

  // deleteAccount function which deletes the user's account
  const deleteAnAccount = () => {
    deleteUser()
      .then(() => {
        // resets all stored state
        setLoggedIn(false);
        setImgUrl(null);
        setuserName("");
      })
      .catch((e) => console.log(e));
  };

  useEffect(() => {
    if (isLoggedIn && data !== undefined) {
      setImgUrl(data.getUser[0].imageurl);
    }
  }, [data]);

  return (
    <div className="App" style={{ height: window.innerHeight - 35 }}>
      <div
        onClick={() => {
          if (!isLoggedIn) {
            beginCreatingAccount(!isCreatingAccount);
          } else if (isLoggedIn) {
            deleteAnAccount();
          }
        }}
        className="auth"
      >
        <p className="auth-text">
          {!isLoggedIn ? (!isCreatingAccount ? "Sign In" : "Cancel") : "Logout"}
        </p>
      </div>
      <div className="content">
        {!isCreatingAccount ? (
          <div>
            <img
              className="user-img"
              src={imgUrl ? imgUrl : require("../assets/groot.jpg")}
              alt="default user and user"
            />
            <h1>
              Hi There, i am
              {userName.length > 3 ? ` ${userName}` : ` Groot`}.
            </h1>
            <p>
              {!isLoggedIn
                ? "You can sign-in to become you!"
                : "You sign-out to become Groot!"}
            </p>
          </div>
        ) : (
          <CreateUser
            updateProfile={() => {
              getUser();
              setLoggedIn(true);
              beginCreatingAccount(false);
            }}
          />
        )}
      </div>
    </div>
  );
}

export default App;
This expansion introduces several new behaviors:
- Two new state flags track whether the user is authenticated and whether the create-account form is visible. The Sign In button either starts or cancels account creation.
- The
useLazyQueryhook fromapollo/react-hooksfetches the user’s data using the predefinedGET_USERquery. Lazy execution means the query doesn’t run on mount; it fires in response to the successfulcreateUsermutation, as documented by Apollo. - A
useEffectwatches the destructureddatavalue, which is undefined until the query resolves. When data arrives, the imagesrcis updated to the returnedimageurl. - While
isCreatingAccountis true, the Create Account component is displayed for username and image input. - Sign Out invokes
deleteAUser, which runs thedeleteUsermutation and, on success, resets all state in the App Component.
The create-user component then implements the drag-and-drop zone. Users can drag a file over the area or click to open the device’s media browser, after which the file is sent to the Node server.
import React, { useState, useCallback } from "react";
import { useMutation } from "@apollo/react-hooks";
import { useDropzone } from "react-dropzone";
import "../App.css";
import { CREATE_USER, GET_USER } from "../data";

const CreateUser = (props) => {
  const { updateProfile } = props;
  const [createAccount, { loading }] = useMutation(CREATE_USER);
  // user data stored in state and passed to GraphQL
  const [userName, setuserName] = useState("");
  // user's uploaded image store in useState and passed to the GraphQL mutation
  const [userImage, setUserImage] = useState(null);

  // create user mutation function fired at the click of `createAccount` button
  const createAUser = () => {
    createAccount({
      variables: {
        username: userName,
        image: userImage,
      },
    })
      .then(() => {
        updateProfile();
      })
      .catch((e) => console.log(e));
  };

  const onDrop = useCallback(([file]) => {
    setUserImage(file);
  }, []);

  const {
    getRootProps,
    isDragActive,
    isDragAccept,
    getInputProps,
    isDragReject,
  } = useDropzone({
    onDrop,
    accept: "image/jpeg , image/jpg, image/png",
  });

  return (
    <div className="CreateUser" style={{ height: window.innerHeight - 35 }}>
      <div className="content">
        <div>
          <h1> {!loading ? "Create An Account" : "Creating Account ..."}</h1>
          <hr />
          <br />
          <form className="form">
            <div className="input-body">
              <label style={{ color: loading && "grey" }}> Username </label>
              <input
                disabled={loading}
                style={{ color: loading && "grey" }}
                onChange={(e) => setuserName(e.target.value)}
                placeholder="some nifty name"
                required={true}
                type="text"
              />
              <br />
              <br />
              {!userImage ? (
                <div
                  className="circle-ctn"
                  {...getRootProps({
                    isDragActive,
                    isDragAccept,
                    isDragReject,
                  })}
                >
                  <input {...getInputProps()} />
                  <div
                    className="box"
                    style={{
                      background: isDragActive && "#1b2733",
                    }}
                  >
                    <p
                      style={{ color: isDragReject && "red" }}
                      className="circle-text"
                    >
                      {!isDragActive
                        ? `Tap or Drag 'n' Drop Image  to Add Profile Picture`
                        : isDragReject
                        ? "Ooops upload images only"
                        : "Drop your image here to upload"}
                    </p>
                  </div>
                </div>
              ) : (
                <div className="img-illustration">
                  <img
                    style={{ filter: loading && "grayscale(80%)" }}
                    className="img-icon"
                    src={require("../assets/image-icon.png")}
                    alt="image illustration"
                  />
                  <p style={{ color: loading && "grey" }} className="file-name">
                    {userImage.path}
                  </p>
                </div>
              )}
              <br />
              <br />
              <button
                style={{
                  background: userName.length < 3 && "transparent",
                  color: userName.length < 3 && "silver",
                }}
                className="create-acct-btn"
                onClick={(e) => {
                  e.preventDefault();
                  createAUser();
                }}
                disabled={userName.length < 3 || loading}
              >
                {!loading ? "Create Account" : "Creating Account"}
              </button>
            </div>
          </form>
        </div>
      </div>
    </div>
  );
};

export default CreateUser;
Breaking down what that code does:
- The
createAccountresolver is destructured fromuseMutationafter passing theCREATE_USERoperation. - The
createAUserfunction fires when the Create Account button is clicked with a username and image supplied. - The
onDrophandler is wrapped inuseCallbackto avoid unnecessary recomputation. After a drop, the file is stored temporarily in theuserImagestate for submission. - Four root properties are destructured from the
useDropZonehook, with accepted file types and the customonDropfunction passed in. - These properties build a reactive dropzone: they’re spread onto a
divwrapper, with accessible-file and invalid-file drag states reflected through inline styles. Spreading…getInputProps()onto the hiddeninputelement means clicking the zone opens the file picker. - A ternary operator in the inline styles adds a border when dragging and turns it red when an unsupported file type is dragged over.
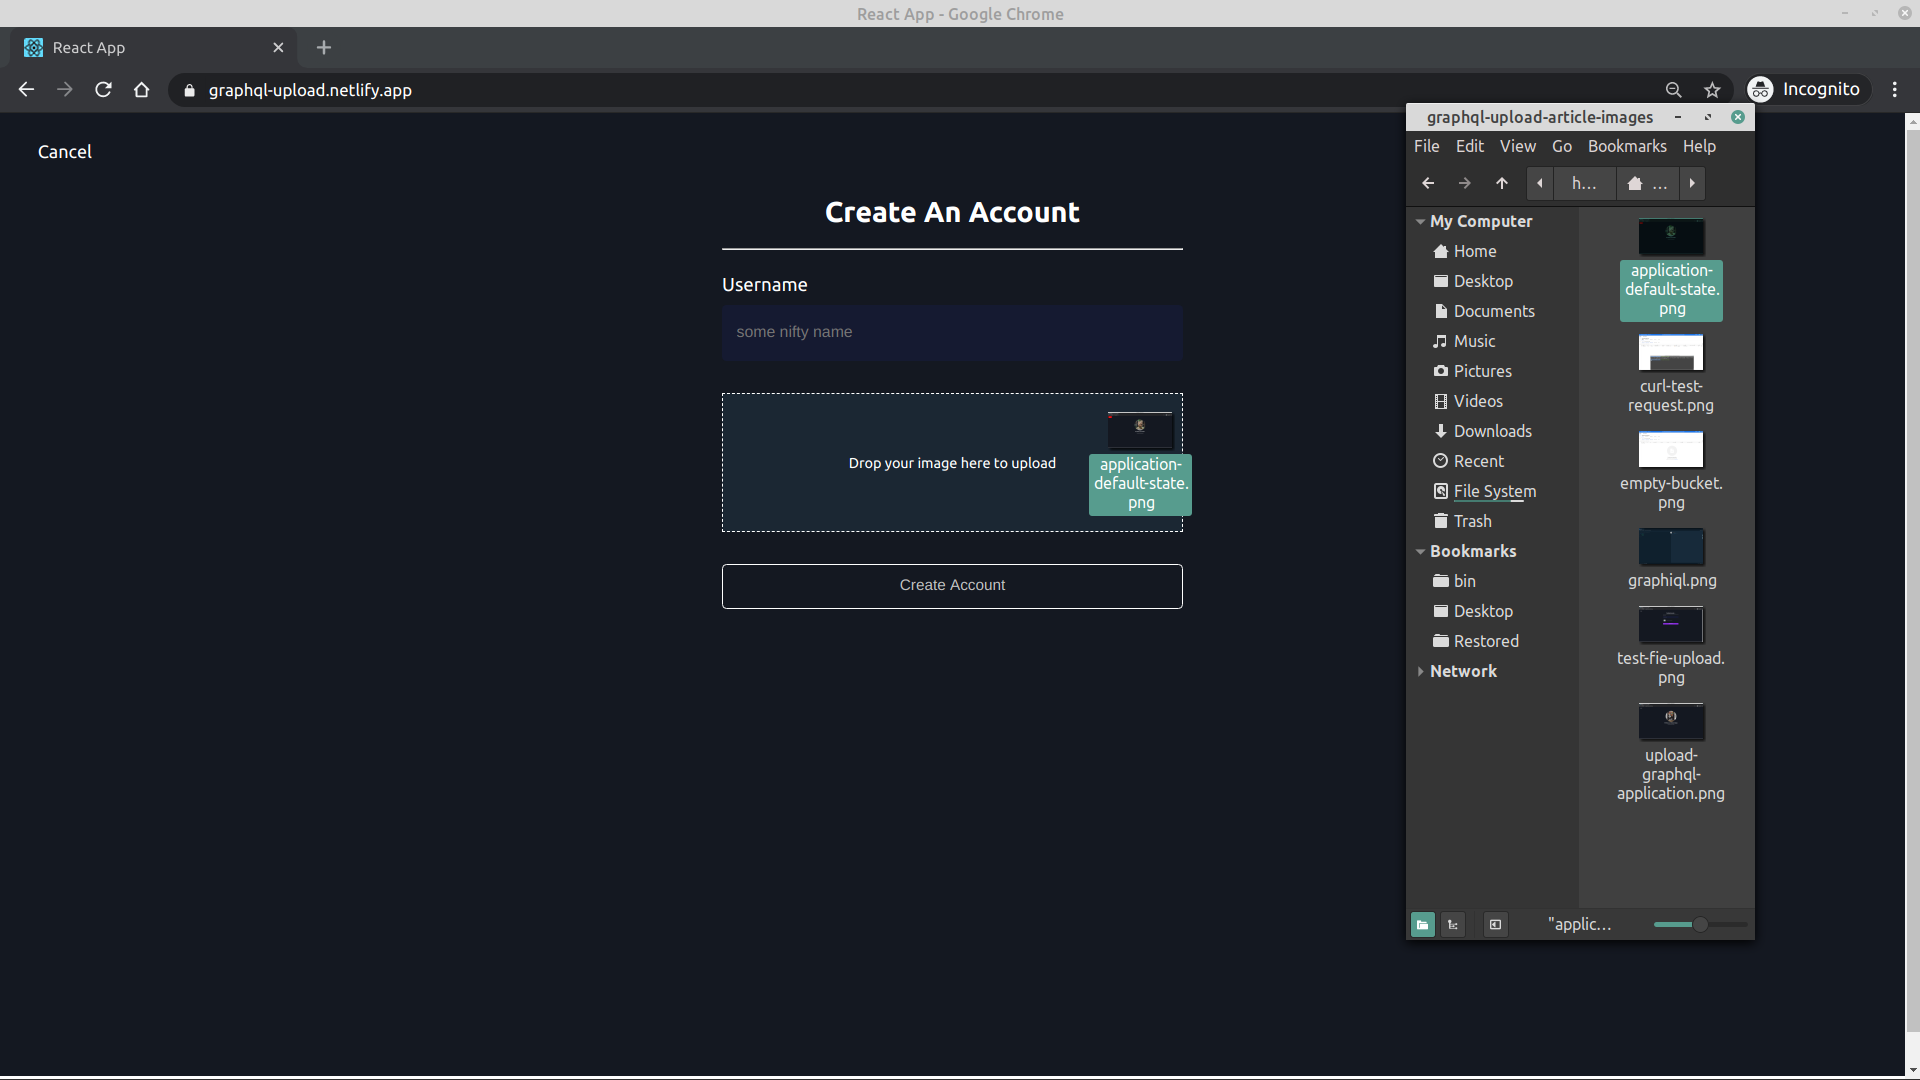
When the Create Account button is clicked, a ternary on the destructured loading boolean flips the label from “Create Account” to “Creating Account…,” indicating the network request is in flight.
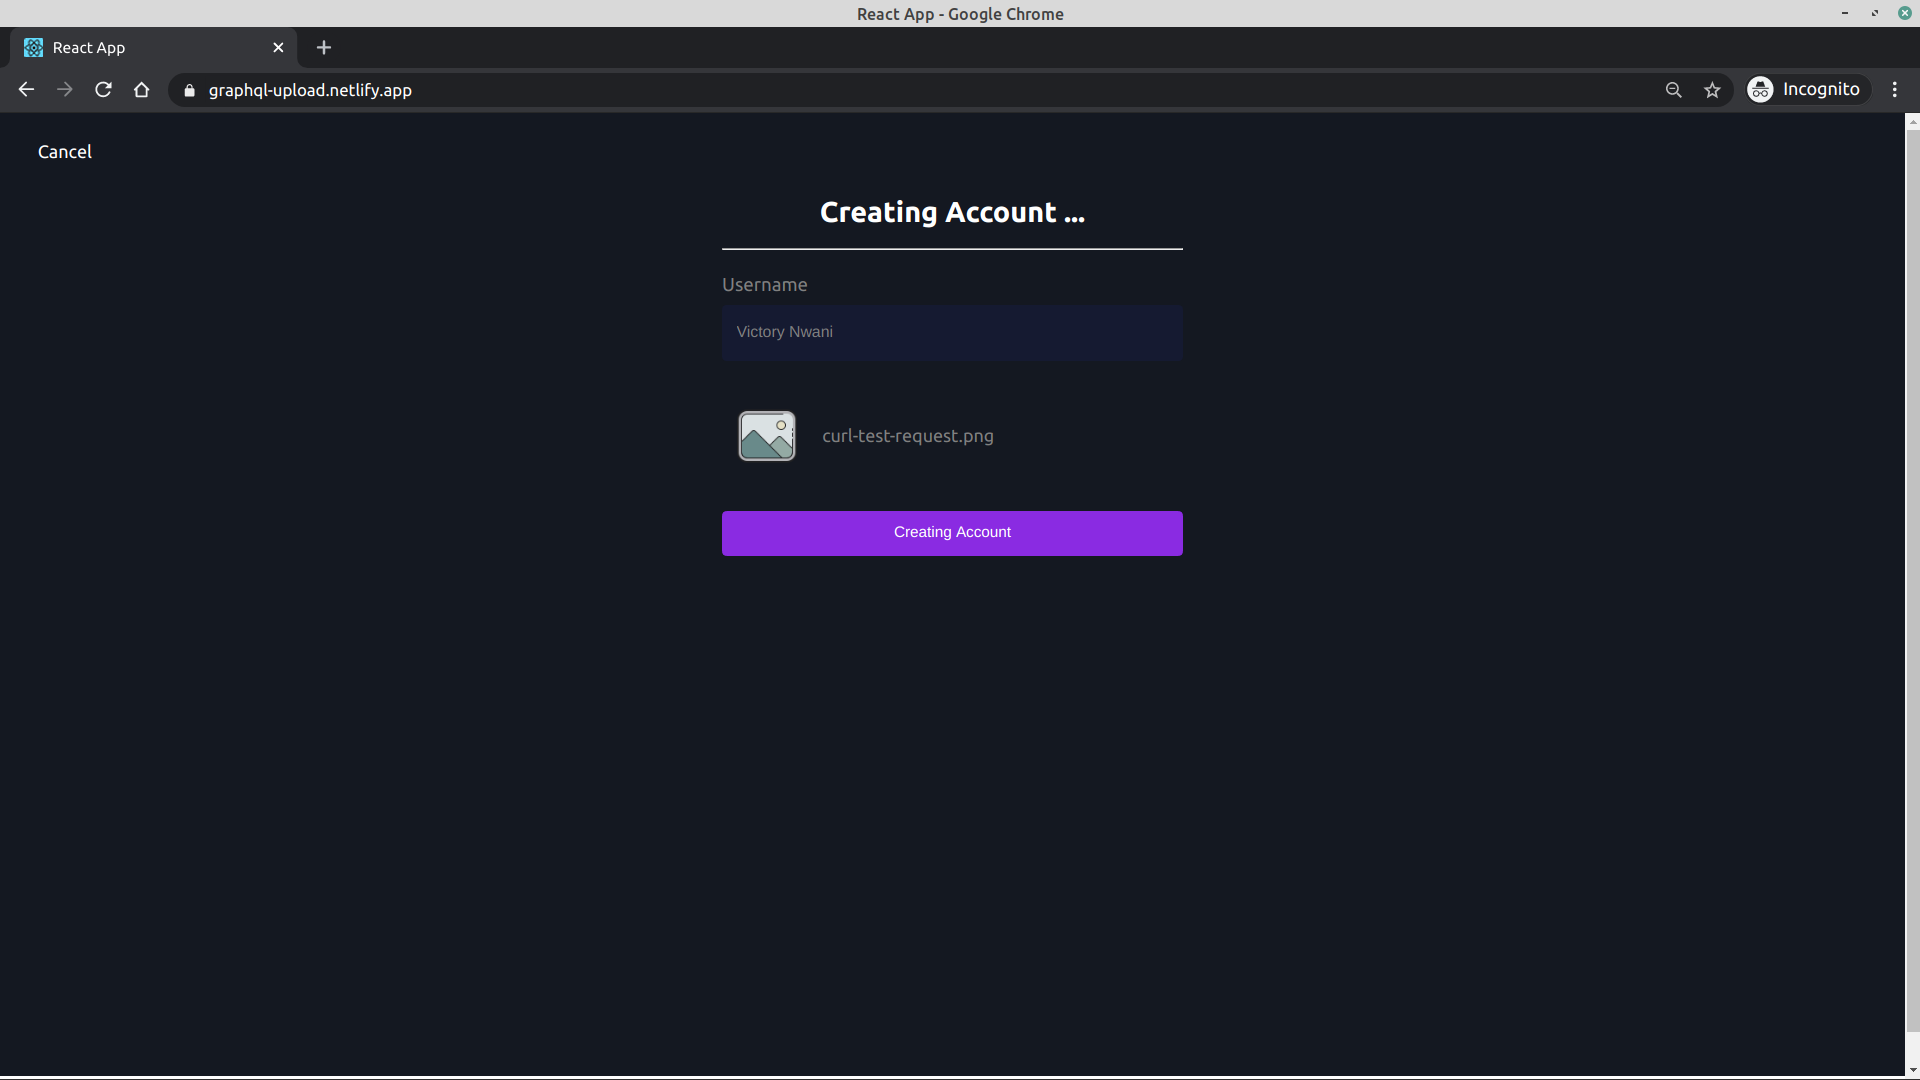
Once the mutation resolves, the lazy getUser query executes, and the view returns to the home screen—but now with data from the query. The imageurl from that result provides the uploaded image from Google Cloud Storage, displayed directly on the page.