

Why Sapper and Strapi
Static-site generators and headless CMS platforms continue to gain ground in front-end development because they lower the barrier to entry while offering flexibility and a strong developer experience. Sapper, built on Svelte, is a particularly good fit when performance is the priority. Svelte-based applications are known for their small bundle sizes and runtime speed, which matters more as user experience expectations continue to rise.
A headless CMS like Strapi complements this setup by decoupling content management from presentation. You get API-driven content without being locked into a specific language, platform, or vendor. The result is a stack that keeps the front end lightweight and the back end flexible.
This guide walks through the core steps for building a minimal blog with Sapper on the front end and Strapi on the back end, including how to query content with GraphQL. The complete source code is available on GitHub.
Before starting, you'll need the LTS version of Node.js, a package manager such as Yarn or npm, and a working knowledge of JavaScript and GraphQL queries.
Setting Up the Sapper Front End
Sapper is a framework for building high-performance web apps with Svelte. One of its strengths is the ability to export pages as static files, which is exactly what we'll need. Sapper projects are typically scaffolded using Degit, a tool that fetches only the latest commit from a Git repository rather than cloning the full history.
Start by installing Degit globally:
npm install -g degitThen scaffold the project and install dependencies. In this tutorial, we'll use Rollup as the bundler.
npx degit "sveltejs/sapper-template#rollup" frontend
# or: npx degit "sveltejs/sapper-template#webpack" frontend
cd frontend
npm install
npm run dev
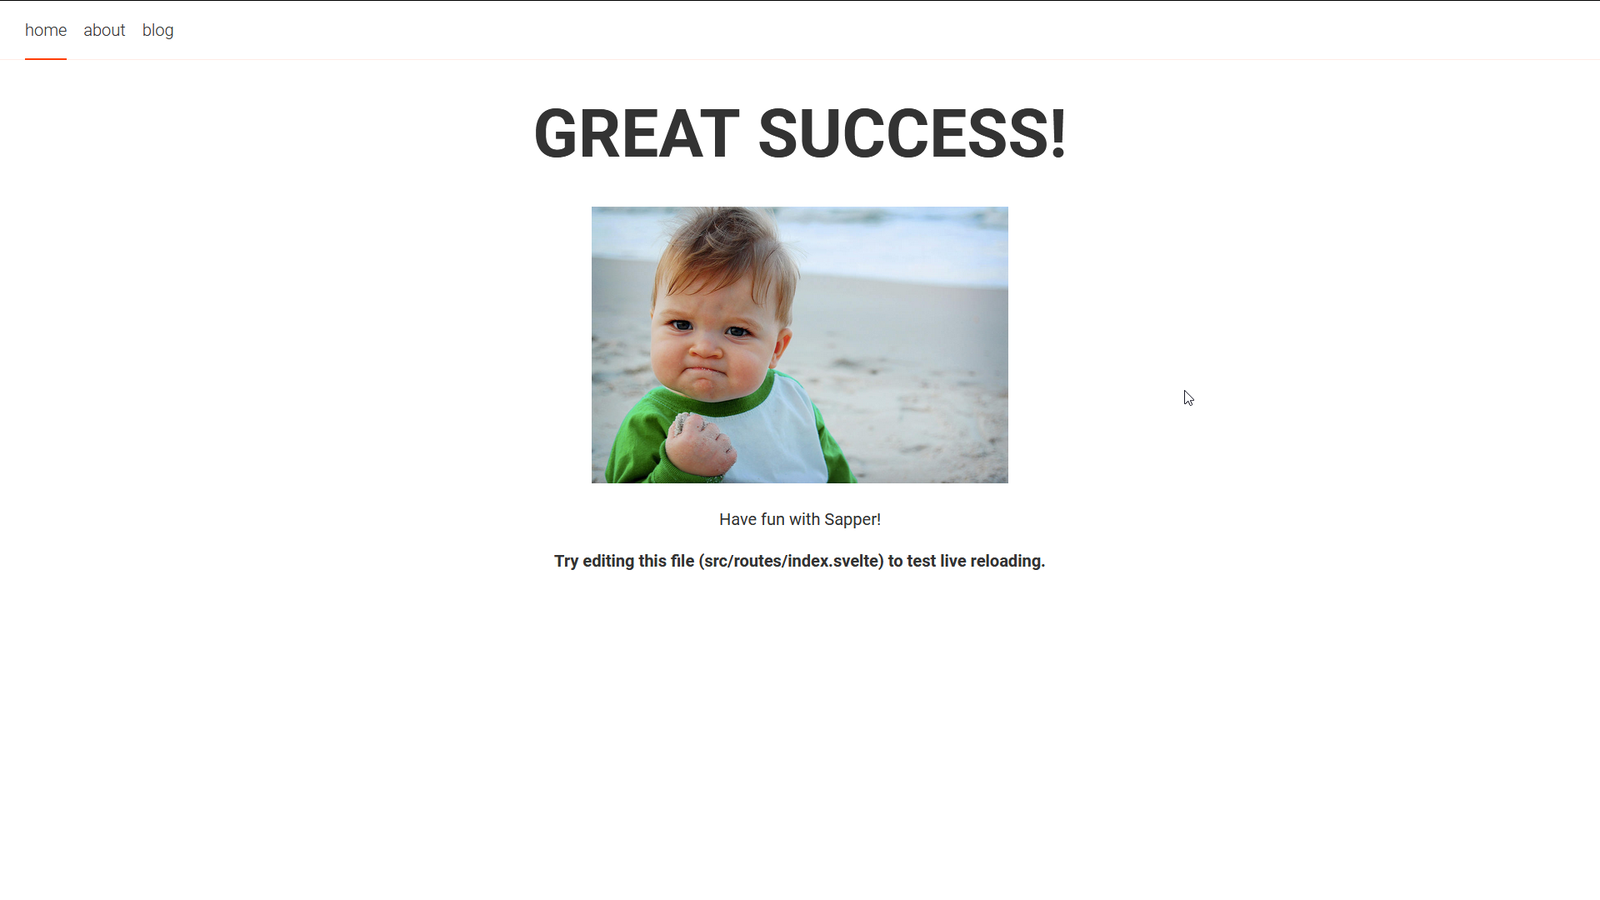
Once the server starts on localhost, the default Sapper starter page should render. If you're unfamiliar with Sapper's structure, here's a quick orientation:
package.json— Defines app dependencies and run scripts.src— Contains the entry points:src/client.js,src/server.js, and an optionalsrc/service-worker.js, plussrc/template.html.src/routes— The core of the app, holding page and server routes.static— For static assets like fonts and images. A file atstatic/favicon.pngis served as/favicon.png.rollup.config.js— Rollup configuration; you generally won't need to edit it.
Sapper creates an additional __sapper__ directory at first run for generated files; any extra files and the cypress directory can be ignored for this project.
Run the dev server with npm run dev to see the starter template.
Setting Up the Strapi Back End
Strapi is a self-hosted, headless CMS built with JavaScript, and its admin interface is powered by React. It gives you full control over content storage and hosting without vendor lock-in. For our purposes, it provides a content editor to define models and create content that we can query later.
1. Install Strapi and Create a New Project
Run the quickstart command to create a new folder named backend with the admin UI:
yarn create strapi-app backend --quickstart2. Create an Administrator
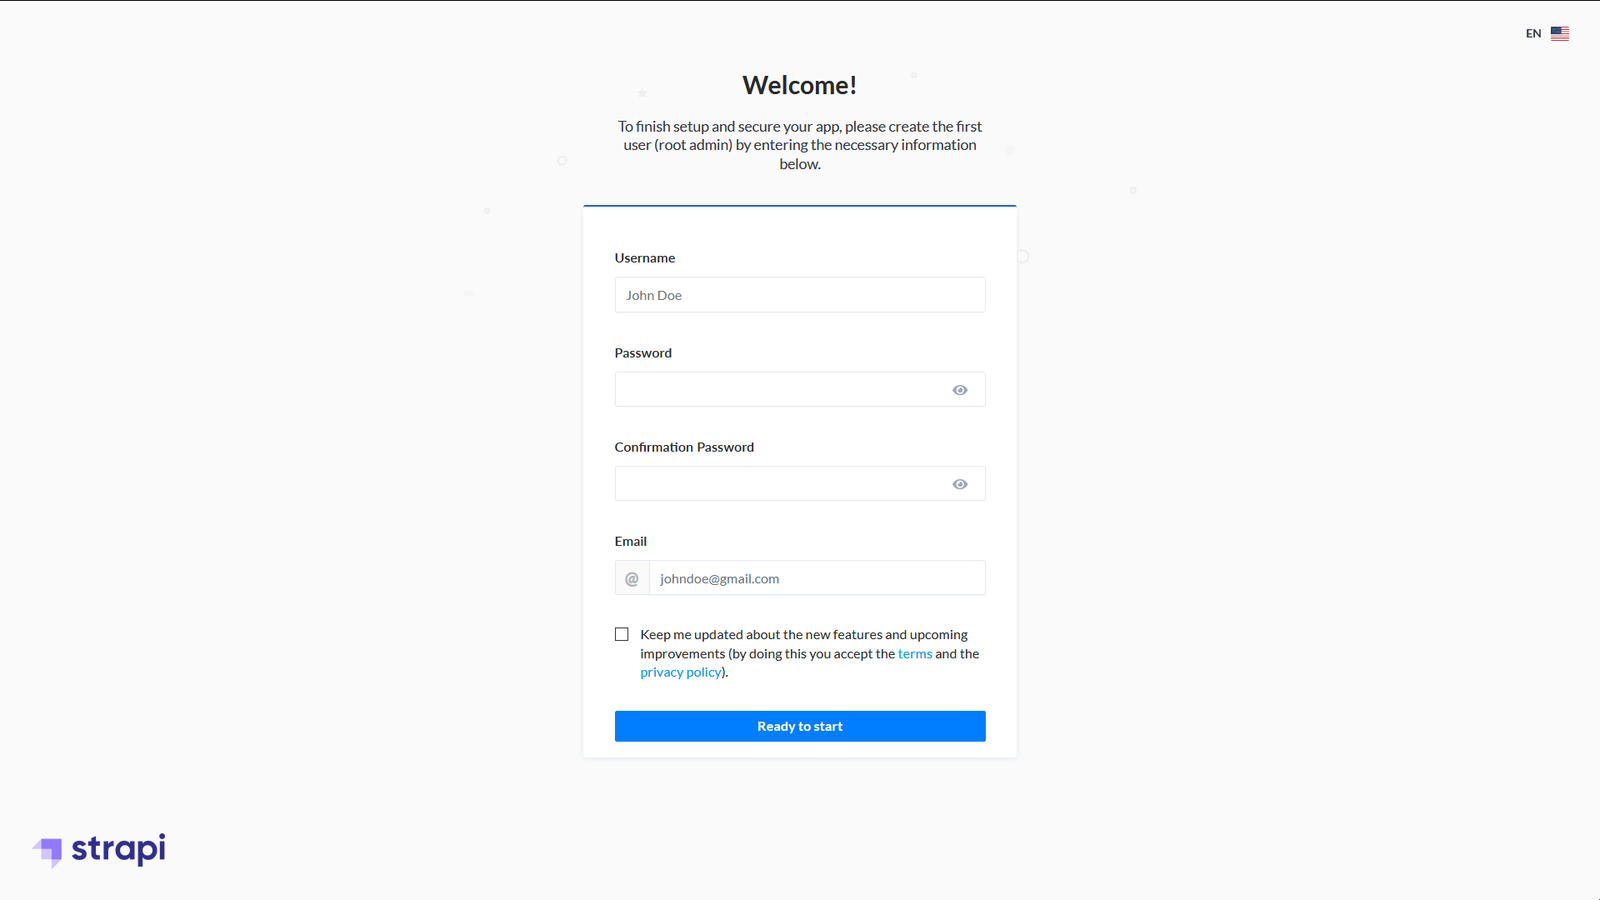
Navigate to https://localhost:1337/admin, complete the form to create the first admin user, then click "Ready to start".
3. Create the Blog Collection Type
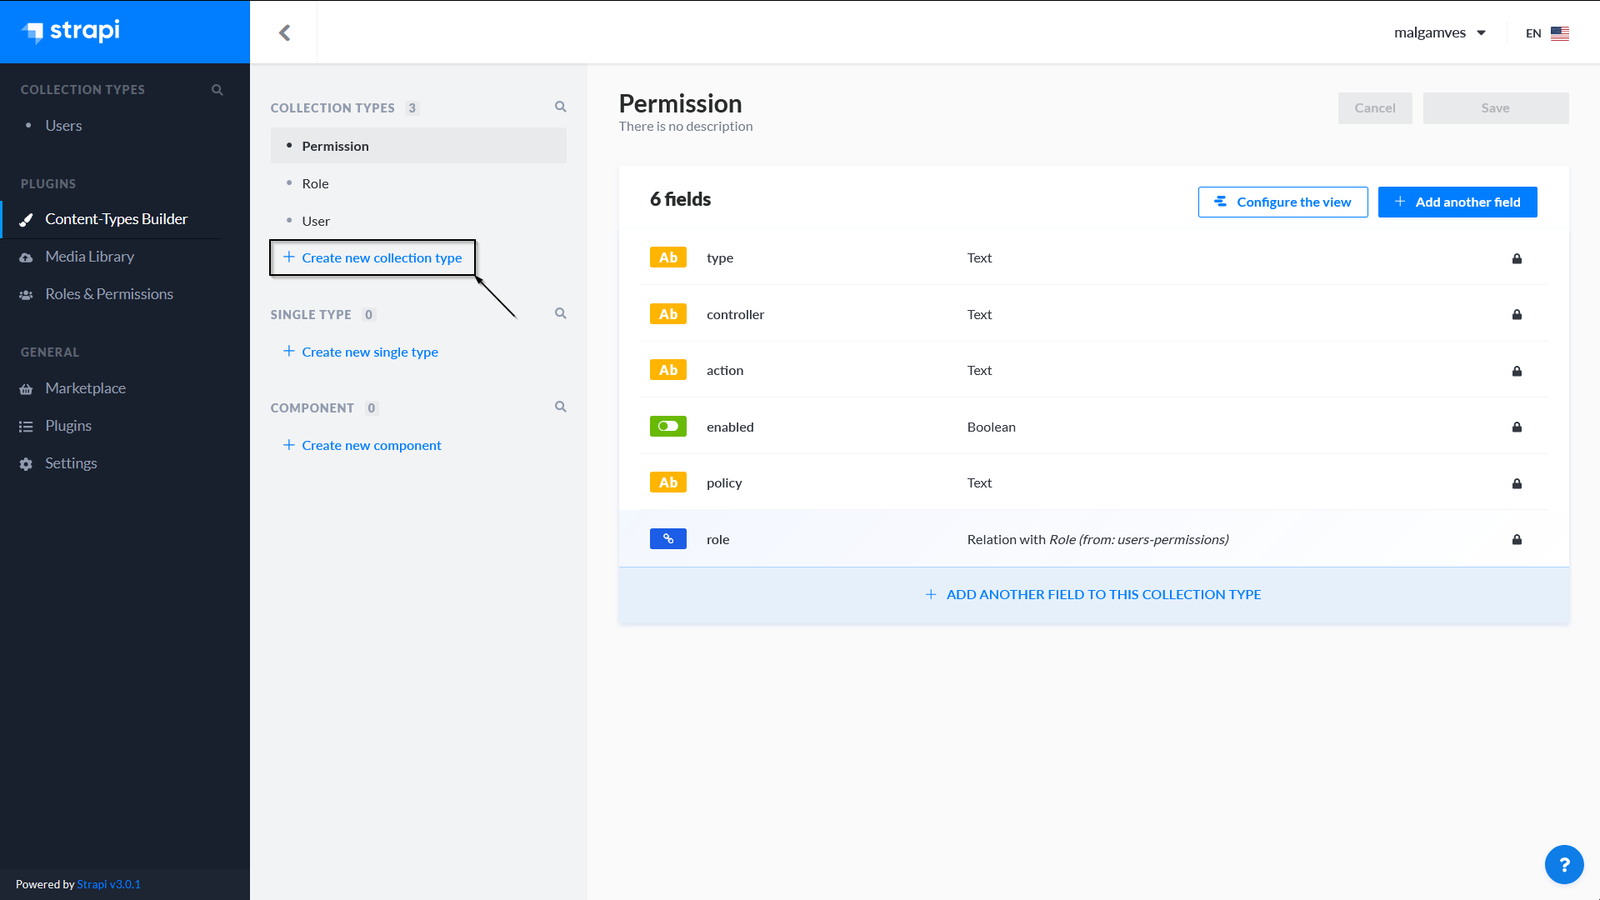
Under "Plugins" in the left-hand menu, go to "Content-Types Builder" and click "+ Create new collection type". Name it blog and continue.
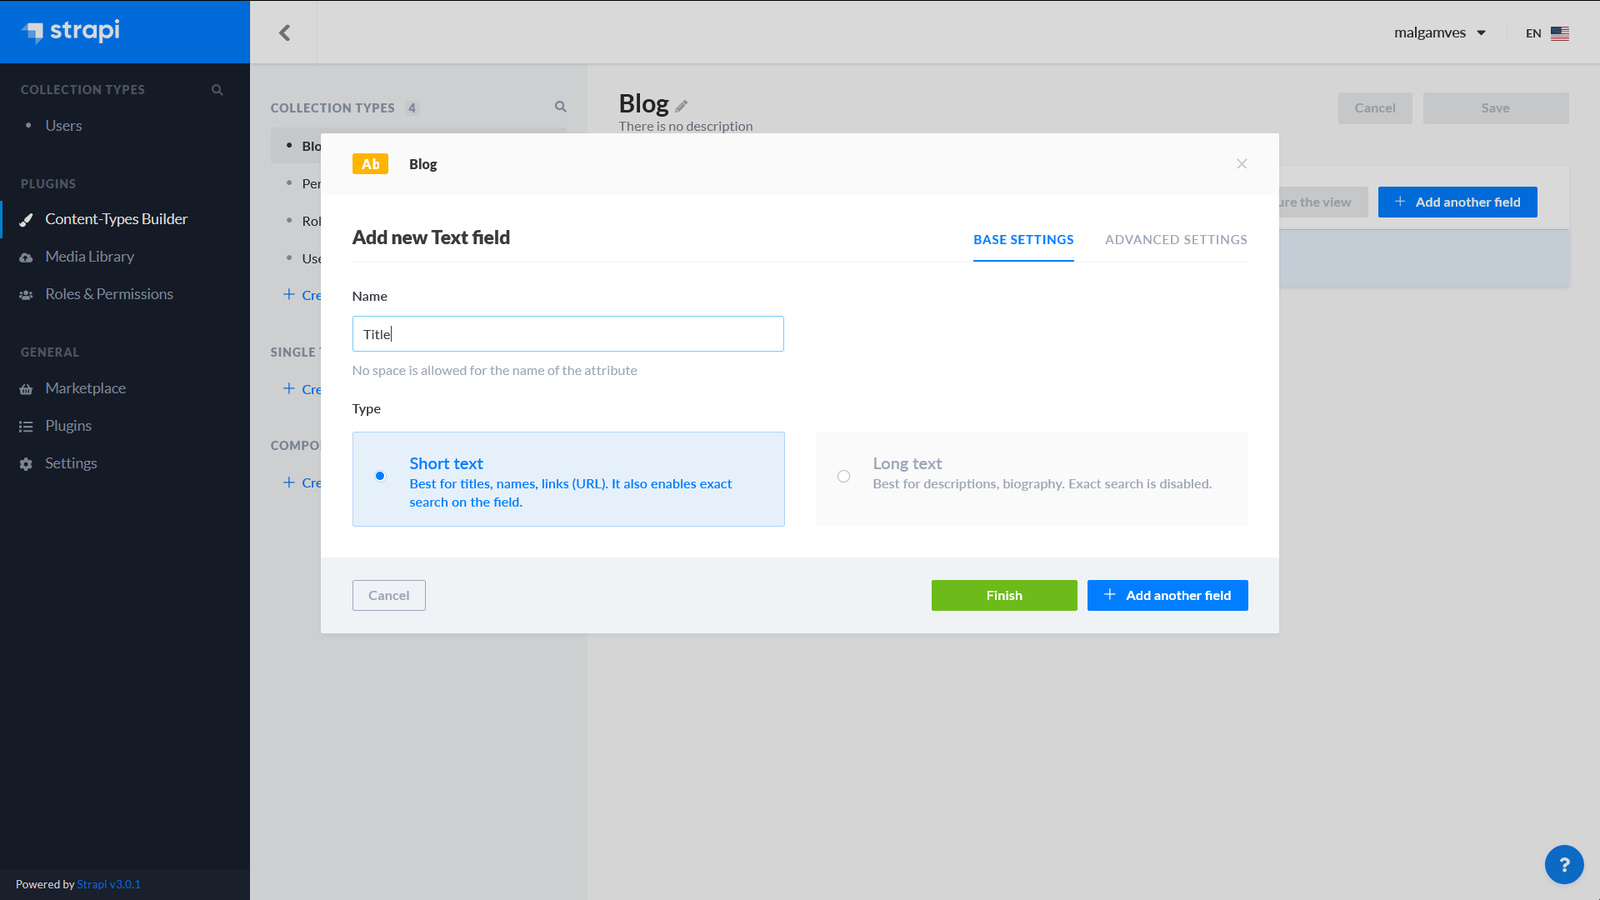
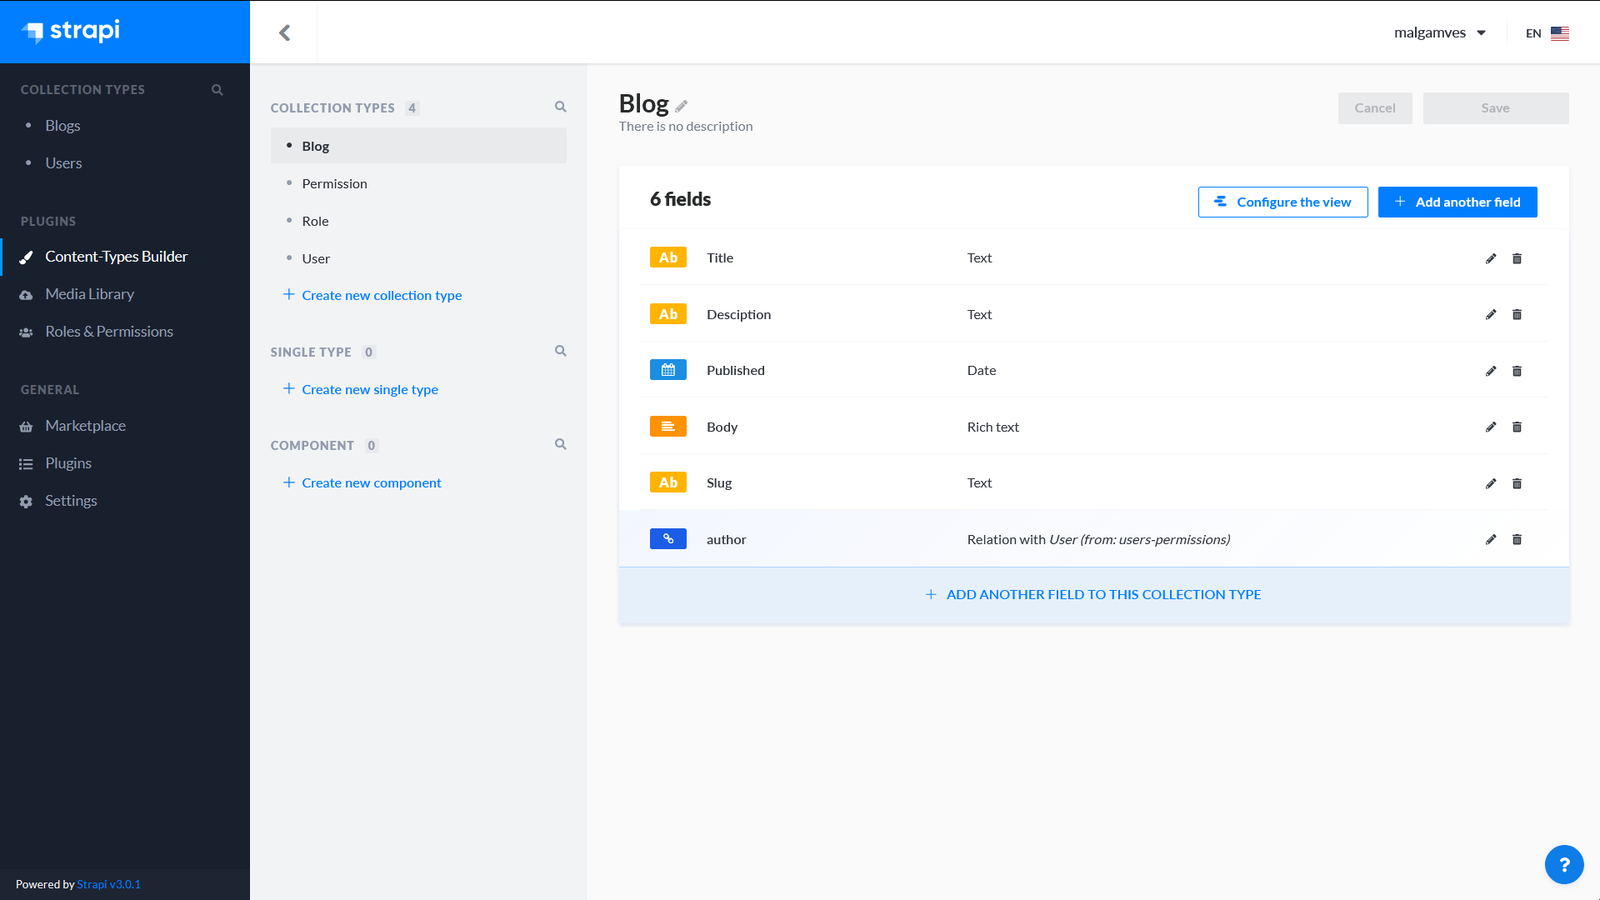
Add fields one at a time with "+ Add another field" between each:
- A "Text field" (short text) named
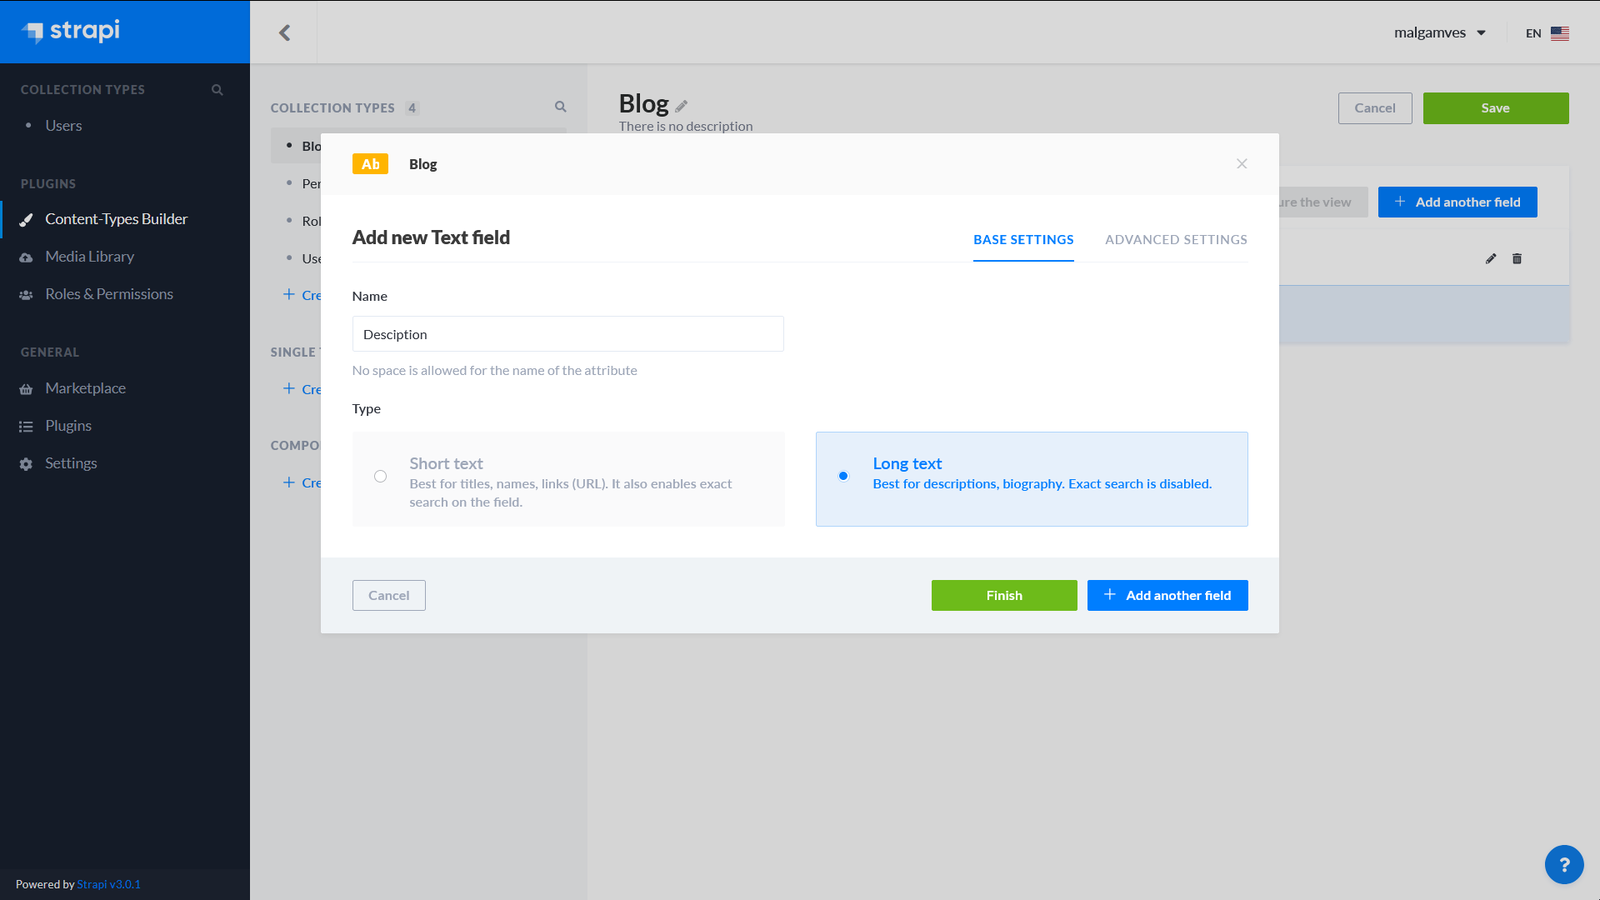
Title. - A "Text field" (long text) named
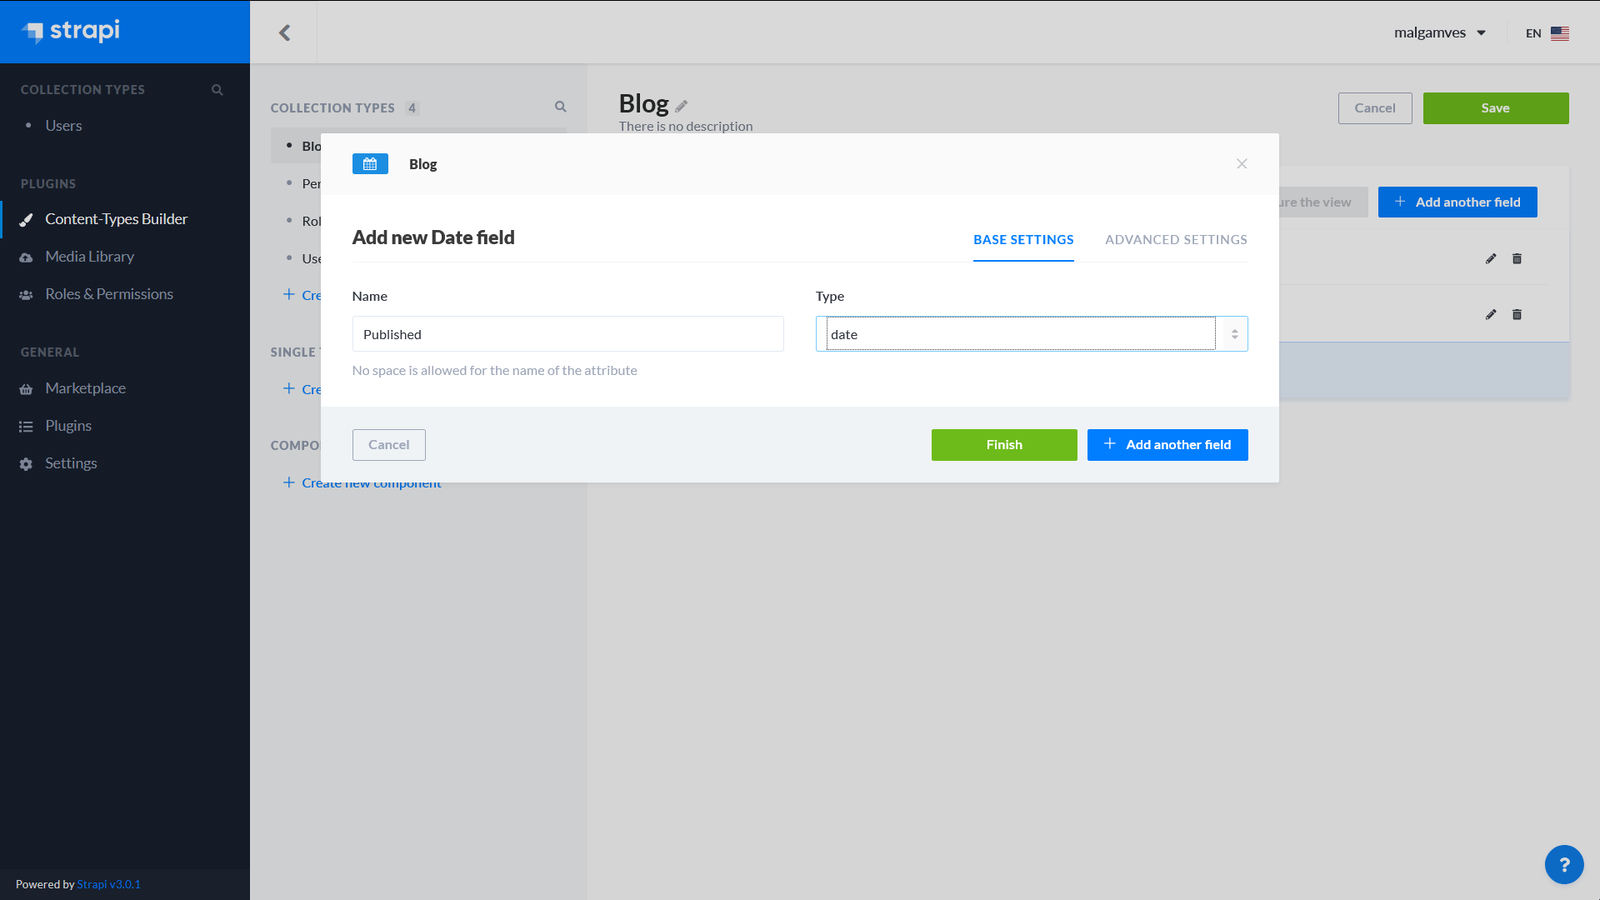
Description. - A "Date field" of type
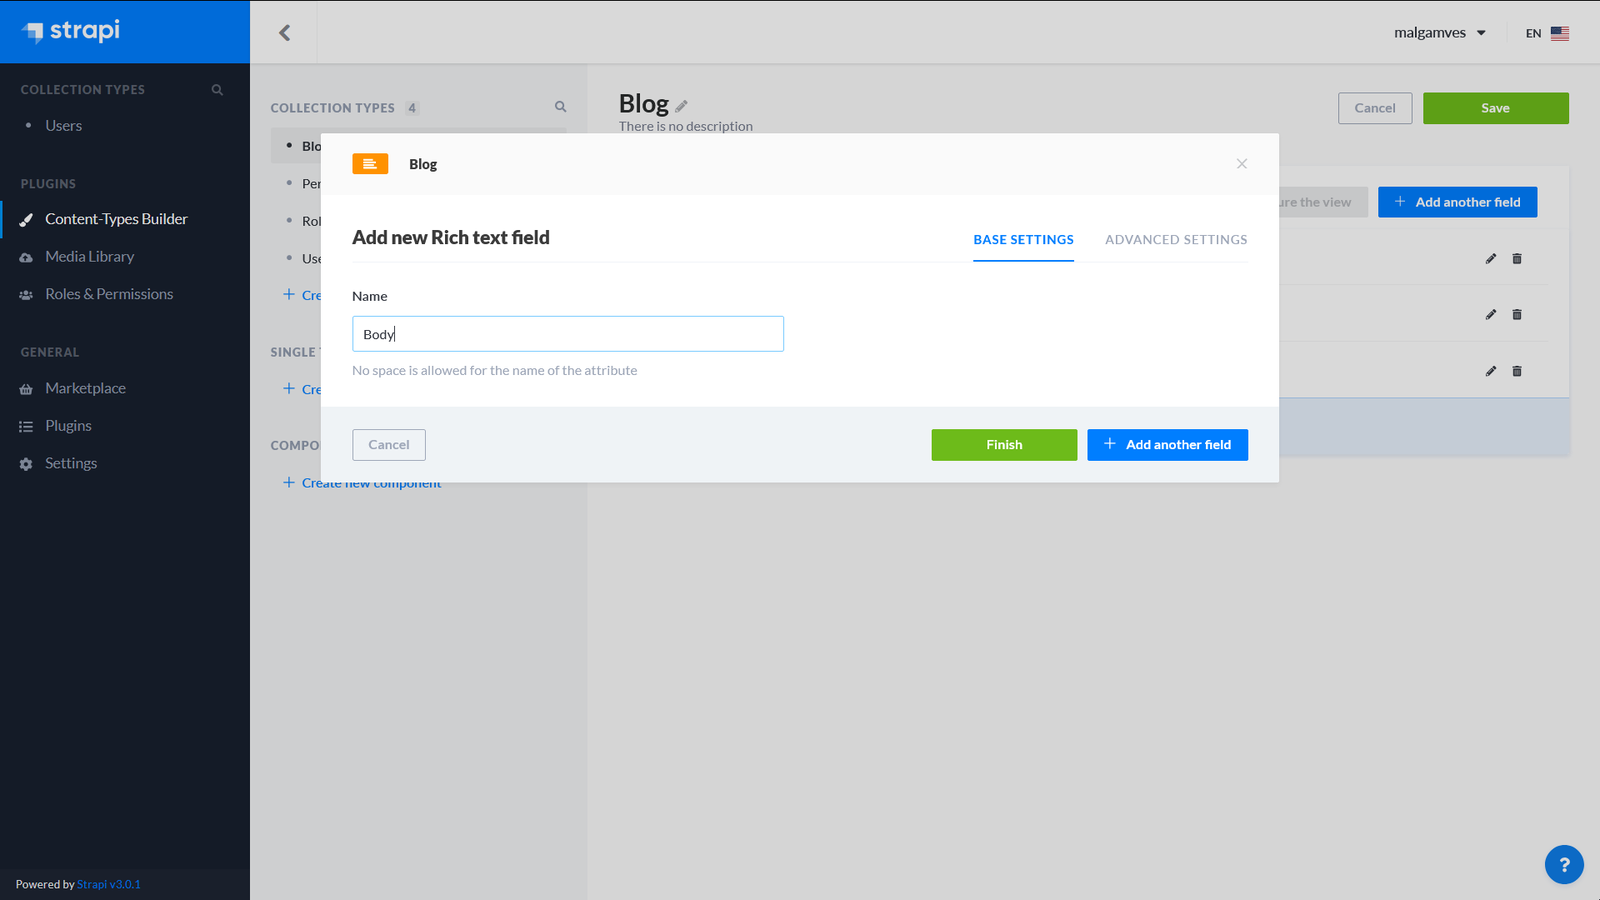
datenamedPublished. - A "Rich Text field" named
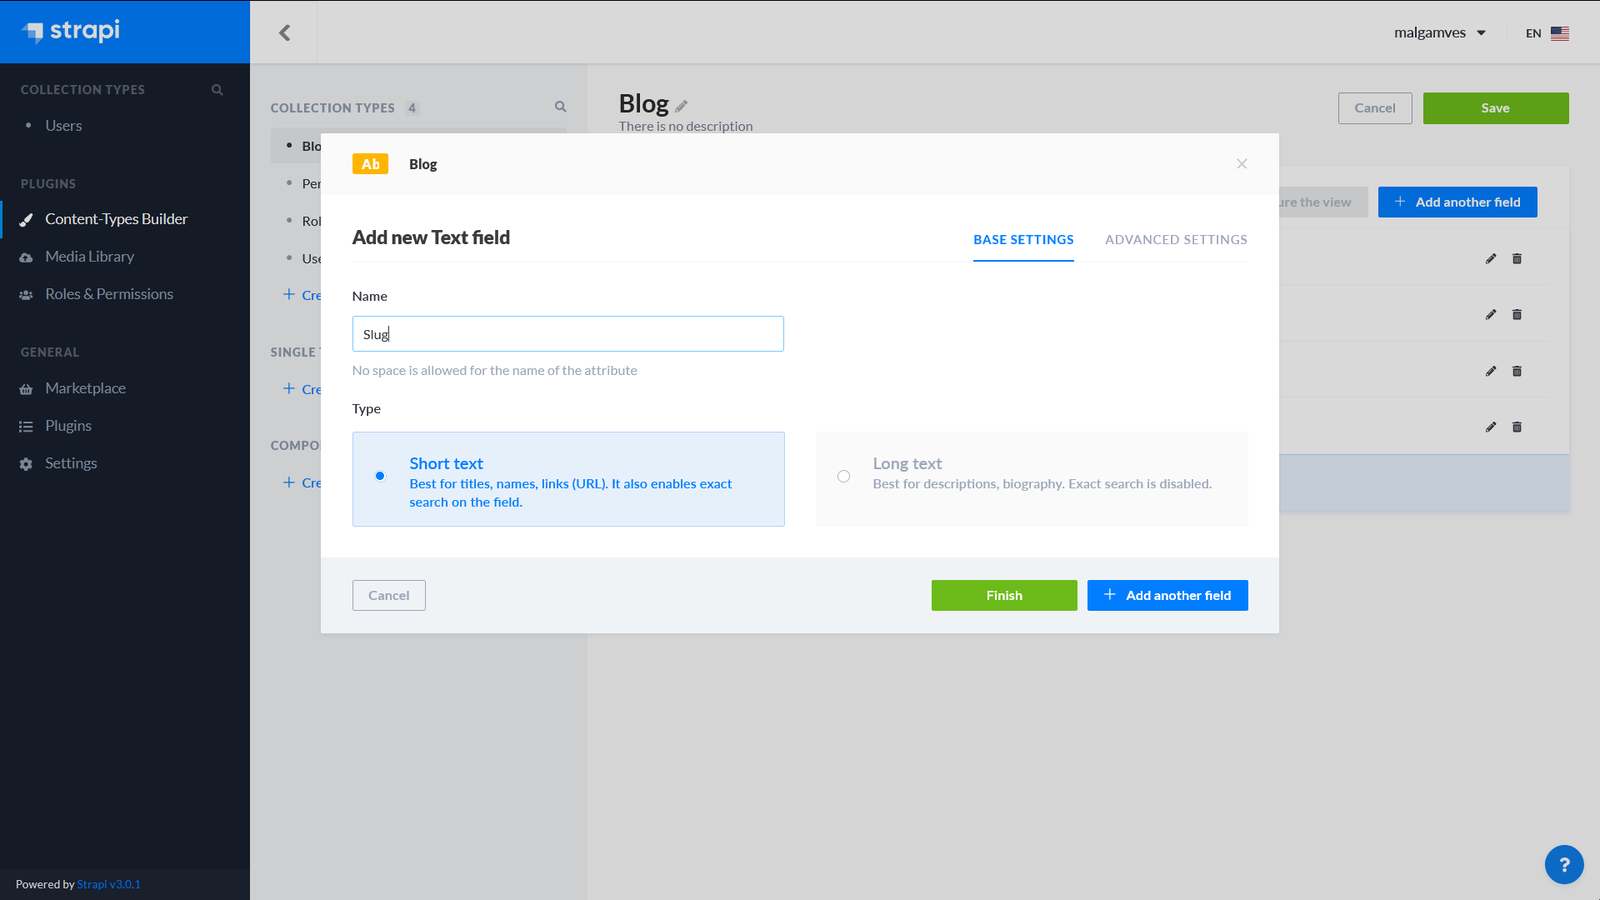
Body. - Another "Text field" (short text) named
Slug.
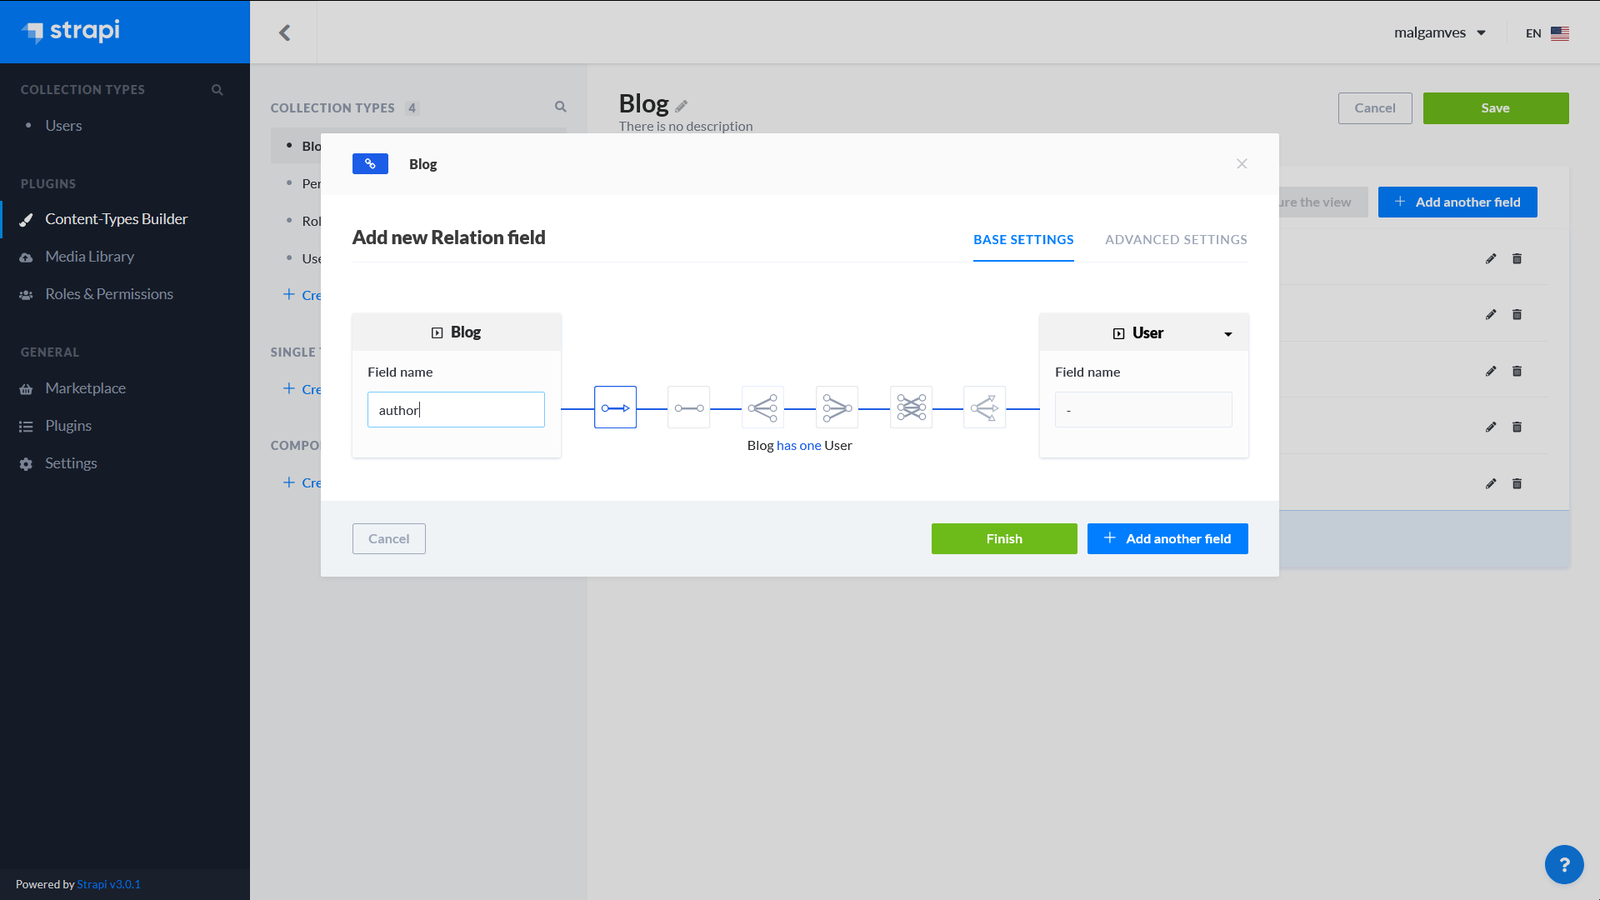
Then set up a relation field: change the field on the right side to "User", and on the left side rename it to author. Finish and save; wait for Strapi to restart.
4. Create a User
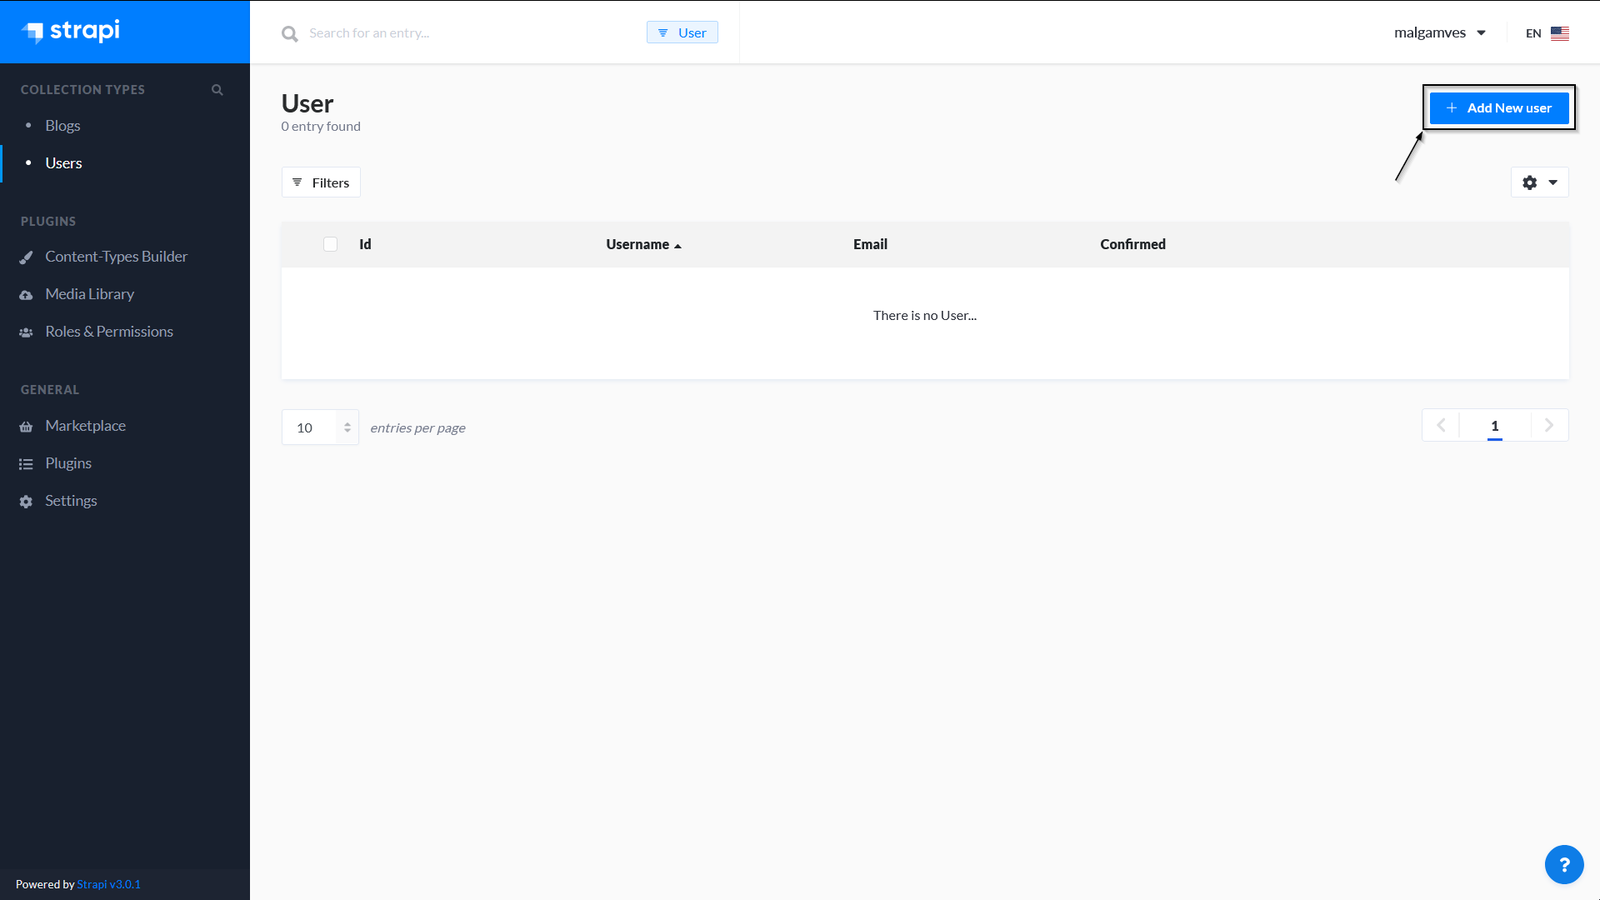
Under "Collection Types", navigate to "Users" and click "Add new user". Provide an email, username, and password, toggle the "Confirmed" button on, and save. This user will be available to attribute articles to.
5. Add Blog Content
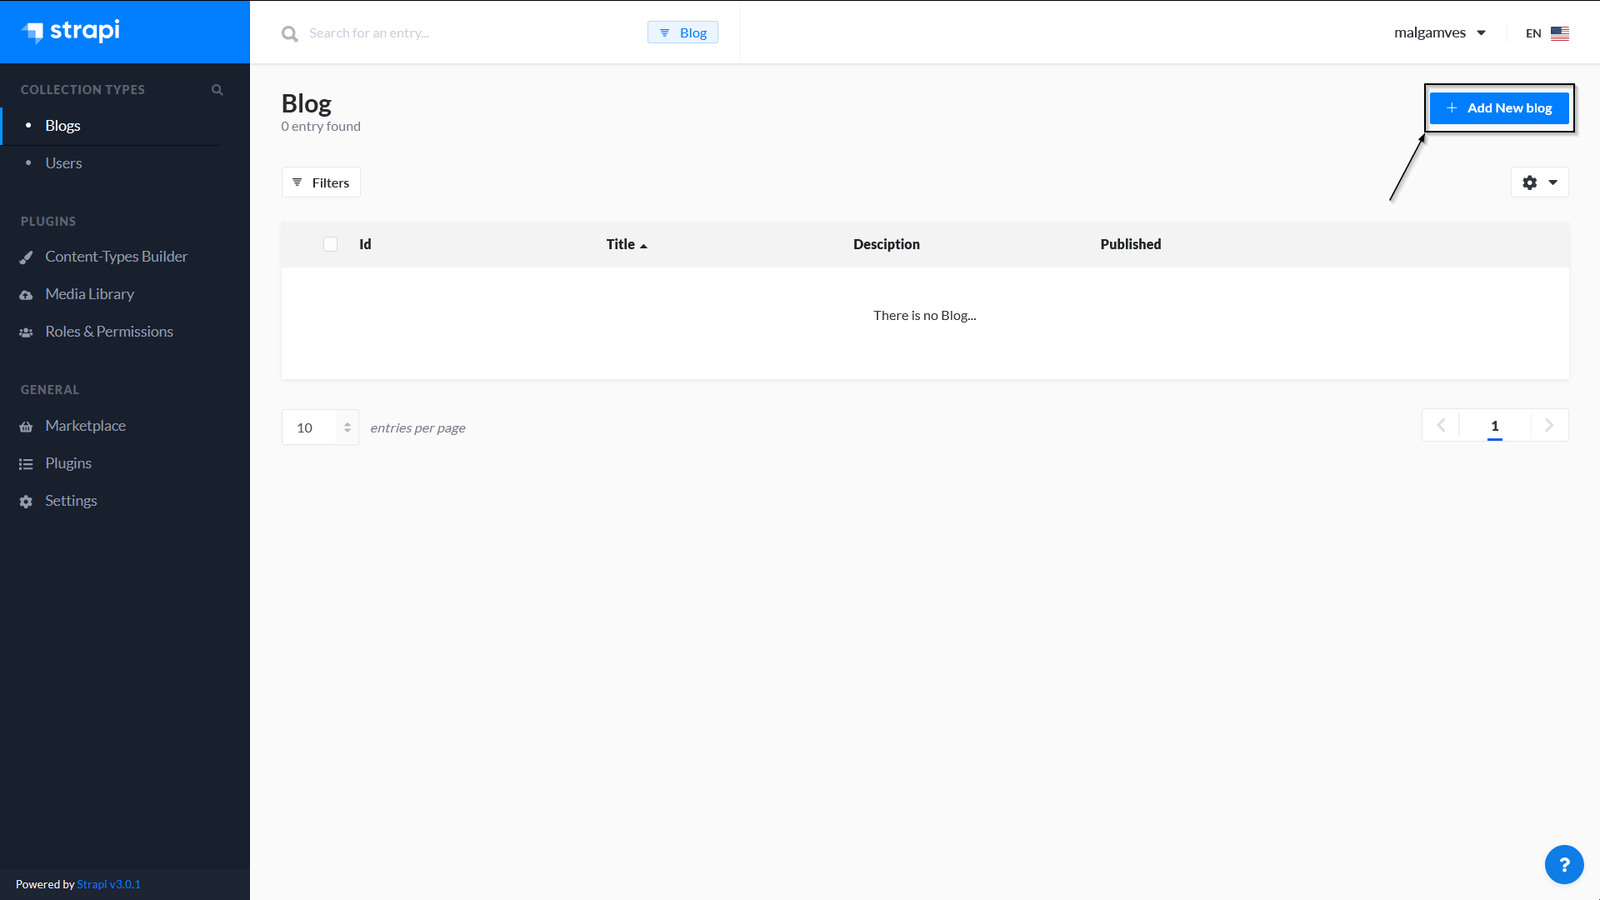
Go to "Blogs" under "Collection Types", click "Add new blog", and fill in the fields—you can select the user you just created as the author. Save the entry.
6. Configure Roles and Permissions
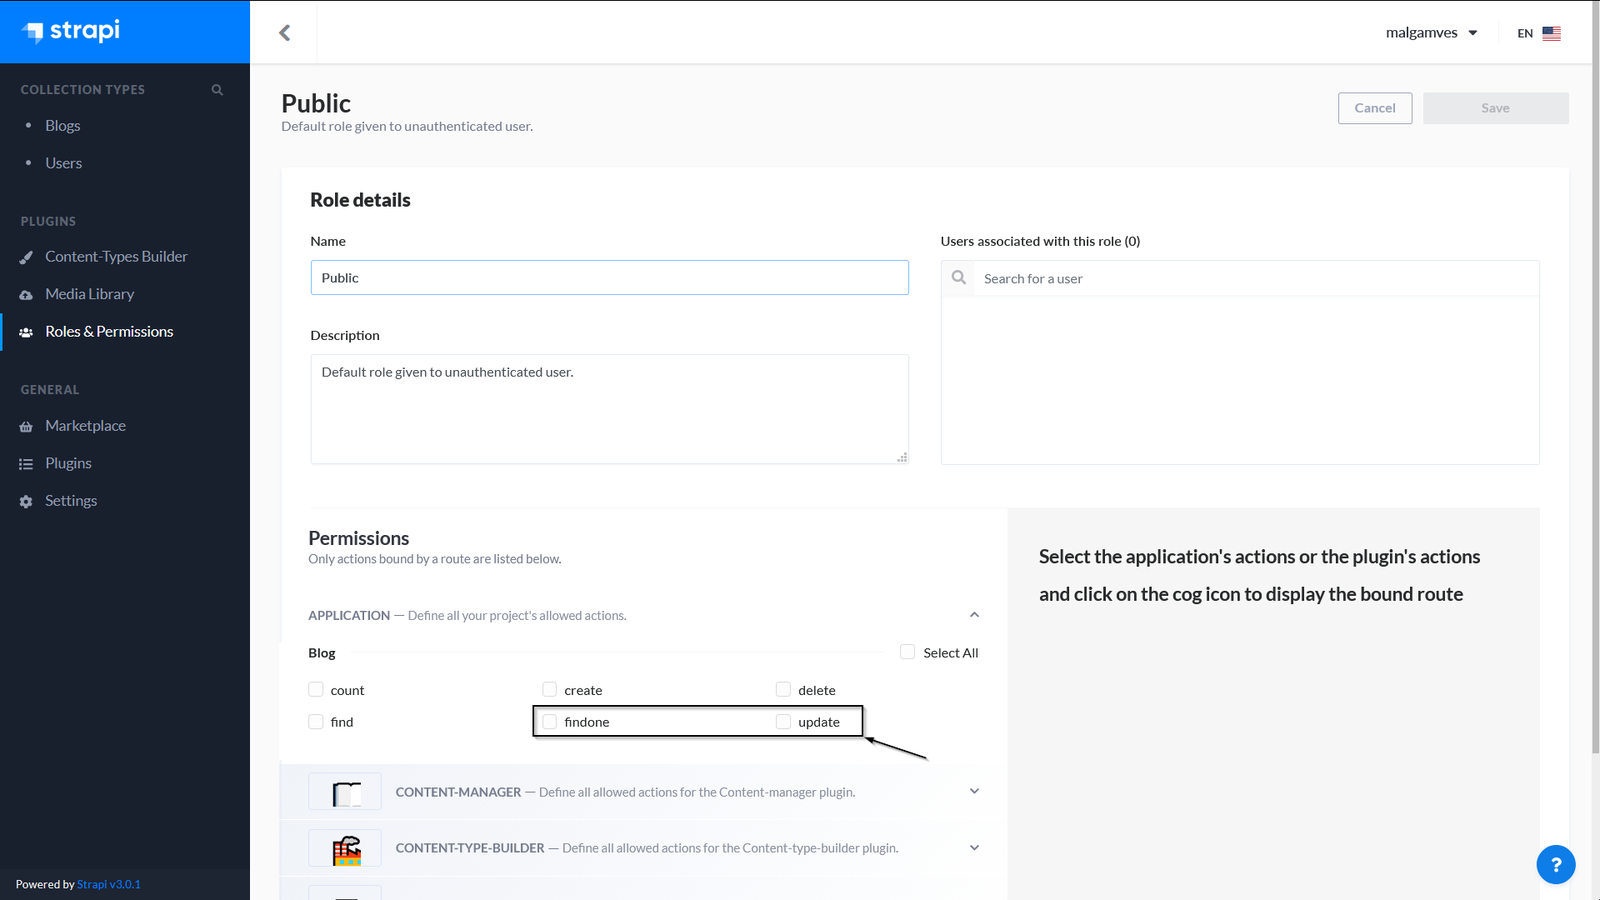
Under "Plugins", go to "Roles and Permissions" and select the "Public" role. Scroll to "Blogs" under Permissions and check the boxes for find and findone. Save the changes.
7. Enable GraphQL and Query the API
The standard REST endpoint at https://localhost:1337/Blogs returns JSON data for the content you created. For this project, we'll use GraphQL instead.
To install the GraphQL plugin from the CLI:
cd backend
yarn strapi install graphql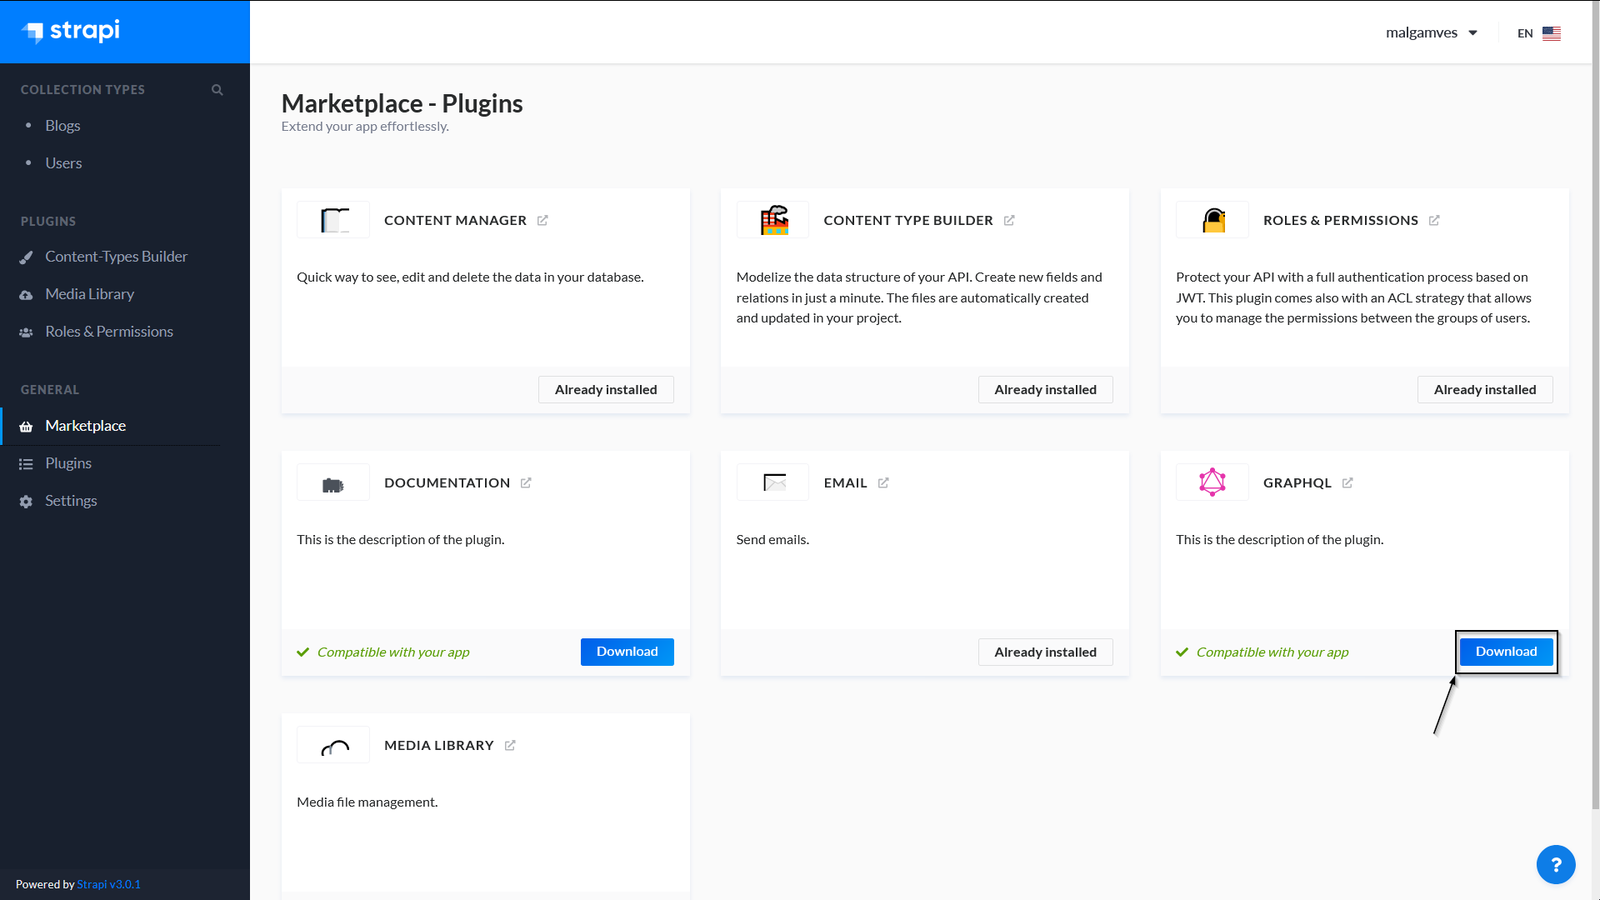
Alternatively, install it through the admin UI via "Marketplace" under "General" in the left-hand menu, using the "Download" button on the GraphQL card.
Once Strapi restarts, test queries in the GraphQL playground at https://localhost:1337/graphql.
At this point the back end is fully configured. The remaining work is connecting the Sapper front end to the GraphQL API and rendering the blog content. To handle GraphQL requests in Sapper, we'll install the Svelte Apollo client and related packages.
Adding GraphQL to the Frontend
From the ./frontend directory, run the following command to install the packages needed for GraphQL queries in your Svelte app:
npm i --save apollo-boost graphql svelte-apollo momentMoment.js handles parsing, validating, manipulating, and displaying dates and times. With these tools in place, we can now build the three main pages of the blog: “home”, “about”, and “articles”. All posts from Strapi will be listed on the “articles” page, with each post getting its own route at /articles/:slug, where slug is the value you enter in the “Slug” field of the Strapi admin UI.
In ./frontend/src/routes, you will find a folder named “blog”. Delete it — this will temporarily break the app, but the next steps will restore it. Create a new folder named “articles” in its place and add an index.svelte file inside it with the code below. Be sure to replace <Your Strapi GraphQL Endpoint> with your actual endpoint, typically https://localhost:1337/graphql for local development.
<script context="module">
        import ApolloClient, { gql } from 'apollo-boost';
        import moment from 'moment';

        const blogQuery = gql`
        query Blogs {
                blogs {
                        id
                        Title
                        Description
                        Published
                        Body
                        author {
                                username
                        }
                        Slug
                }
        }
        `;
        export async function preload({params, query}) {
                const client = new ApolloClient({
                        uri: '<Your Strapi GraphQL Endpoint>',
                        fetch: this.fetch
                         });
                const results = await client.query({
                        query: blogQuery
                })
                return {posts: results.data.blogs}
        }
</script>

<script>
        export let posts;
</script>

<style>
        ul, p {
                margin: 0 0 1em 0;
                line-height: 1.5;
        }
        .main-title {
                font-size: 25px;
        }
</style>

<svelte:head>
        <title>articles</title>
</svelte:head>

<h1>recent posts</h1>

<ul>
{#each posts as post}
    <li>
          <a class="main-title" rel='prefetch' href='articles/{post.Slug}'>
            {post.Title}
          </a>
    </li>
    <p>
  {moment().to(post.Published, "DD-MM-YYYY")} ago by {post.author.username}
    </p>
{/each}
</ul>
This /articles route imports the necessary packages and uses Apollo Client to run a blogQuery. The preload() function processes the response and returns a posts variable with the parsed data. The Svelte #each block then iterates over the posts, displaying the title, publication date, and author. Each post links to a route based on its slug, which we defined in the Strapi admin UI.
For the individual article route, create [slug].svelte in ./src/routes/articles with the code provided here:
<script context="module">
        import ApolloClient, { gql } from 'apollo-boost';
        import moment from 'moment';

        const blogQuery = gql`
        query Blogs($Slug: String!) {
                blogs: blogs(where: { Slug: $Slug }) {
                        id
                        Title
                        Description
                        Published
                        Body
                        author {
                                username
                        }
                        Slug
                }
                }
        `;
        export async function preload({params, query}) {
                const client = new ApolloClient({
                        uri: '<Your Strapi GraphQL Endpoint>',
                        fetch: this.fetch
                         });
                const results = await client.query({
                        query: blogQuery,
                        variables: {"Slug" : params.slug}
                })
                return {post: results.data.blogs}
        }
</script>

<script>
        export let post;
</script>

<style>
        .content :global(h2) {
                font-size: 1.4em;
                font-weight: 500;
        }
        .content :global(pre) {
                background-color: #f9f9f9;
                box-shadow: inset 1px 1px 5px rgba(0,0,0,0.05);
                padding: 0.5em;
                border-radius: 2px;
                overflow-x: auto;
        }
        .content :global(pre) :global(code) {
                background-color: transparent;
                padding: 0;
        }
        .content :global(ul) {
                line-height: 1.5;
        }
        .content :global(li) {
                margin: 0 0 0.5em 0;
        }
</style>

<svelte:head>
        <title>an amazing article</title>
</svelte:head>

{#each post as post}
                <h2>{post.Title}</h2>
                <h3>{moment().to(post.Published)} by {post.author.username}</h3>

                <div class='content'>
                {@html post.Body} </div>

{/each}

<p>⇺<a href="articles"> back to articles</a></p>
Note: Svelte encodes dynamic route parameters using [brackets], so [slug].svelte handles routes for each individual post.
This file makes a similar blogQuery, but with a filter so only the post matching the current slug is returned. The params argument in preload() gives access to params.slug, which is passed as a variable into the GraphQL query. The returned posts variable then renders the post’s title, date, and body — the body wrapped in Svelte’s {@html} tag so that the HTML content is displayed.
That covers dynamic post pages. Now update the remaining routes. In about.svelte, place the following code:
<svelte:head>
        <title>about</title>
</svelte:head>

<h1>about this site</h1>

<p>
minimalist web design really let's the content stand out and shine.
this is why a simple website design is the first choice of so many artists, photographers,
and even some writers. they want their creative content to be the center of attention,
rather than design elements created by someone else.
</p>

<p>this minimal blog is built with <a href="https://svelte.dev/">svelte</a> and <a href="https://strapi.io/">strapi</a>
images by <a href="https://unsplash.com/@glencarrie">glen carrie</a> from unsplash
</p>
And for index.svelte, use the code below:
<style>
        h1, figure, p {
                text-align: center;
                margin: 0 auto;
        }
        h1 {
                font-size: 2.8em;
                font-weight: 400;
                margin: 0 0 0.5em 0;
        }
        figure {
                margin: 0 0 1em 0;
        }
        img {
                width: 100%;
                max-width: 400px;
                margin: 0 0 1em 0;
        }
        p {
                margin: 1em auto;
                padding-bottom: 1em;
        }
        @media (min-width: 480px) {
                h1 {
                        font-size: 4em;
                }
        }
</style>

<svelte:head>
        <title>a minimal sapper blog</title>
</svelte:head>
<p>welcome to</p>
<h1>the<b>blog.</b></h1>

<figure>
        <img alt='the birds on a line' src='bird-bg.png'>
        <figcaption>where less is more</figcaption>
</figure>

<p>
<strong>
we're minimal and that might seem boring, except you're actually paying attention.
</strong>
</p>
<p class="link"><a href="about">find out why</a>...</p>
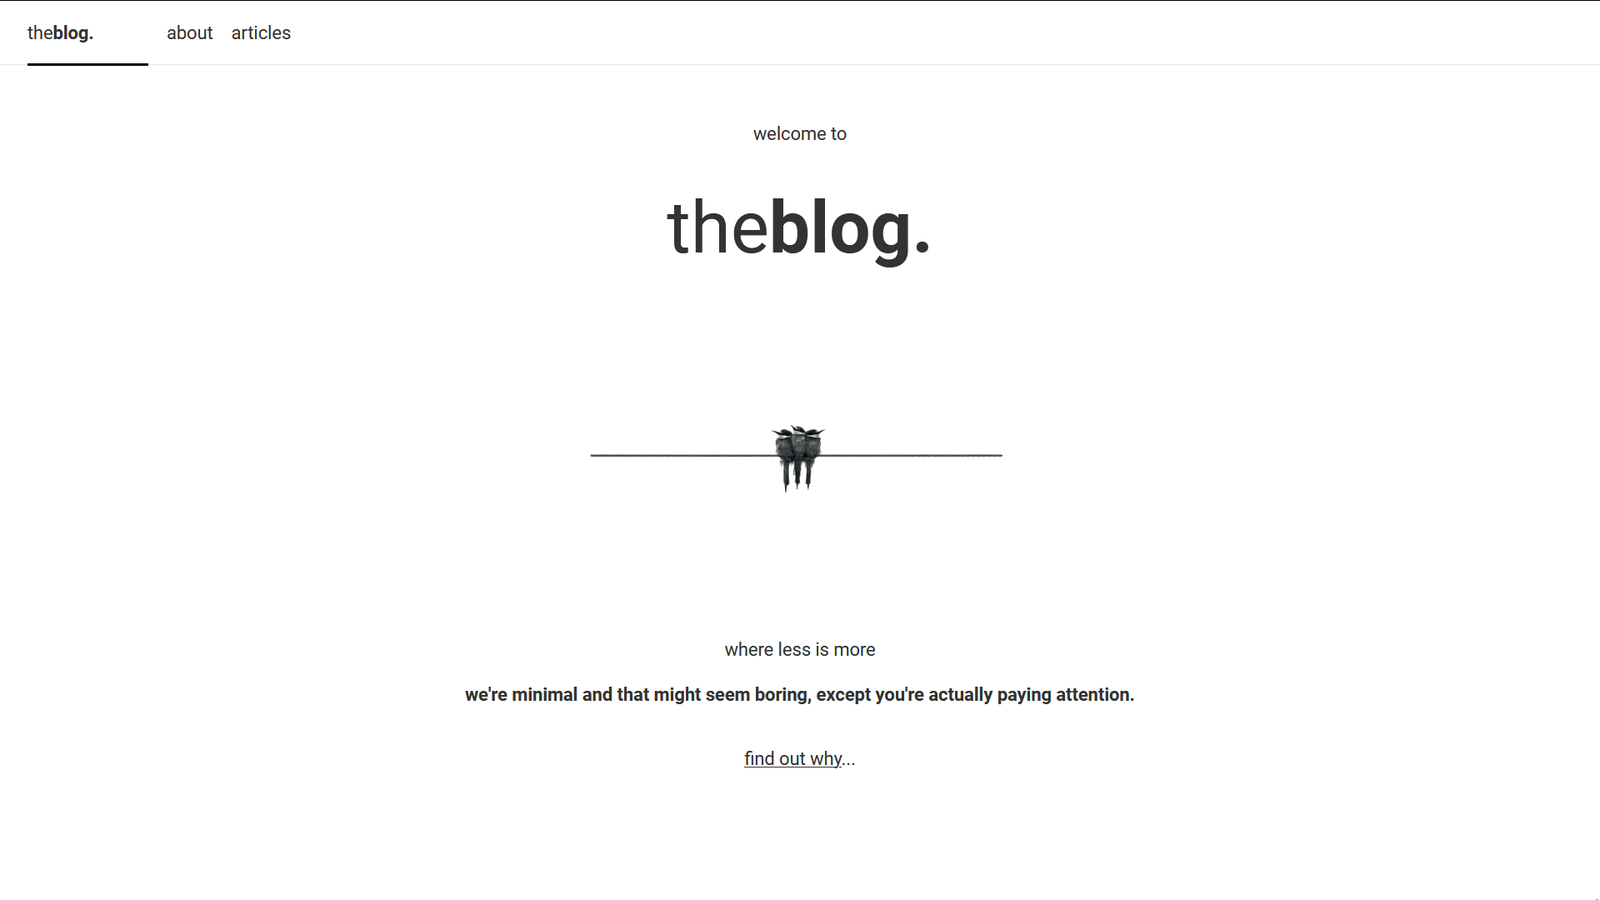
With all pages in place, running the app should show the working blog structure.
Deploying the Static Site
To share your blog, start by exporting a static version of the Sapper app. From ./frontend, run:
npm run exportThe export will be generated in ./frontend/sapper/export. You can drag this entire folder into the Netlify dashboard for an instant deployment, as shown here:
If you prefer deploying from Git, follow Netlify’s documentation, set npm run export as the build command, and specify __sapper__/export as the base directory. Vercel (formerly ZEIT) is also a supported deployment target, as noted in the Sapper documentation.
Wrapping Up
The result is a static blog that combines Strapi for content management with Sapper for fast, prerendered pages, deployable in minutes. The combination shows how a headless CMS and a modern Svelte framework can streamline static site development without sacrificing developer experience — and the same approach applies well beyond blogs. Share what you build with the community on Twitter, and keep experimenting.



