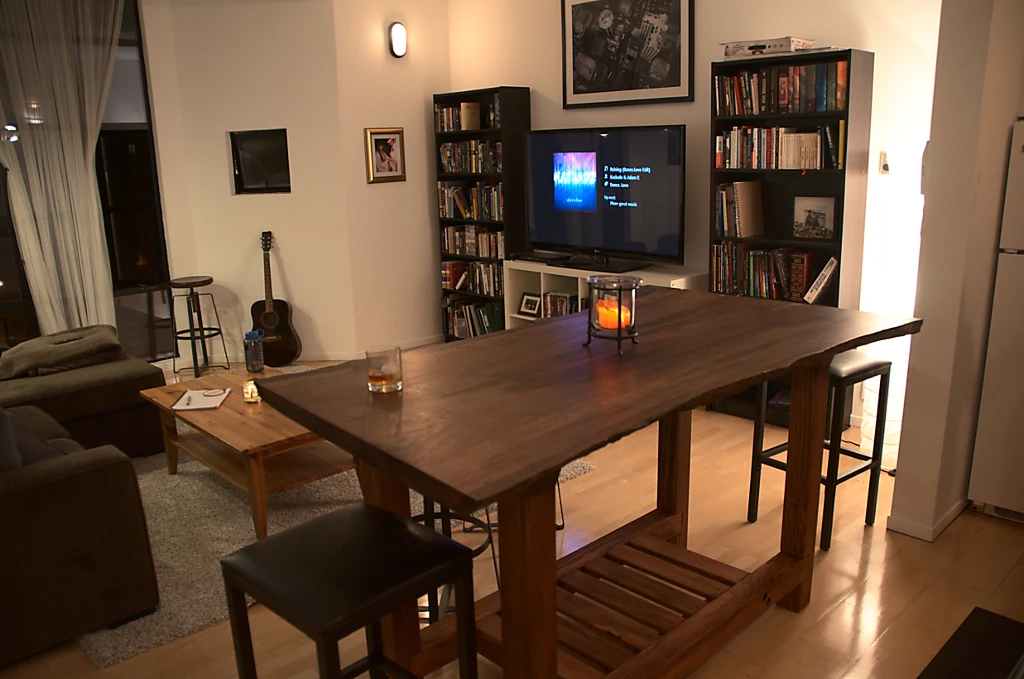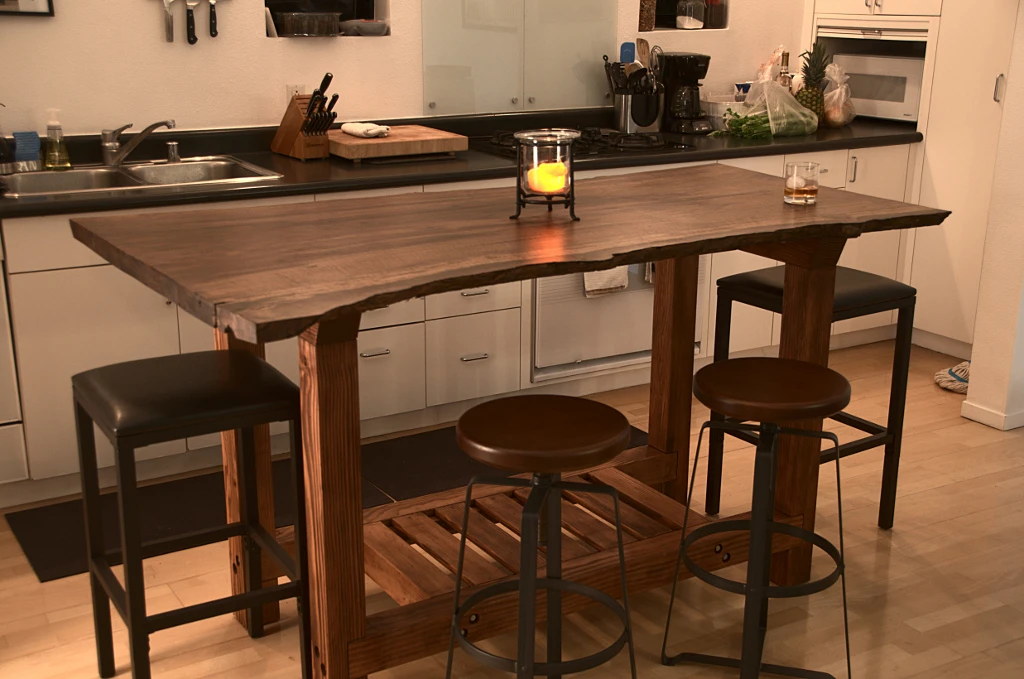
A Table Born in Eight Days
When Kyle Kingsbury and his roommate Tyler moved into their apartment, they knew the common room needed a physical divider between the kitchen and the living area. Their space—with its linear kitchen at one end and couch at the other—called for a dining table that could double as extra counter space and storage. After rejecting pricey, ill-sized options from catalogs and Craigslist, they decided to build their own.
Kingsbury isn't a professional woodworker. He's a software engineer with a beginner's grasp of grain and technique, a few basic tools, and an ample supply of patience. His vision was shaped seven years prior, at Carleton College, when he dined at a table built by an acquaintance: a pair of book-matched oak slabs, eight feet by 40 inches, resting on legs barely 18 inches tall. That feeling of rough, warm material stayed with him.
From Sketch to Slab
Before committing to a design, Kingsbury set up an old IKEA desk in the future table's spot for several months to study how the space worked—clearance around the kitchen, how people moved to reach cupboards and the fridge, and the ideal surface height. From that, he knew the table would be roughly six by three feet and about 40 inches high—unusually tall, to serve as a standing work surface. He sketched initial plans in Blender to explore aspect ratios and how joins would hold up under load and torsion.
Then he got fired, handled a wave of job interviews, and picked up a full-time contract on Riemann. The month he'd planned for construction shrank to eight days before Thanksgiving. He decided to make it happen anyway.
Kingsbury checked Cal Urban Lumber first, where a perfect Bastogne walnut slab at the right dimensions had just sold for $1K. Other options—a book-matched walnut pair requiring a more complex frame, or cheaper redwood lacking the figure he wanted—didn't fit. Then Dan at Tree to Table said he'd found something in their warehouse.
The slab was Claro walnut: just over two inches thick, with a rippling fiddleback pattern and a swirl of sap- and heartwood. The bark was intact, the shape regular, and it had dried for three years with only minor cracks and a quarter inch of cupping. It cost more than he could realistically afford, but Kingsbury pulled extra from savings and made arrangements to pick it up the next day.
Reworking the Frame Plans
With final slab dimensions in hand, Kingsbury revised his plans. He'd never been happy with his original two-by-four half-lap joins—they faced the wrong way aesthetically, and he worried they wouldn't resist racking forces well enough. He and Tyler decided on an all four-by-four frame instead. To leave room below for pots and pans, they moved the spans to the edges and added spreaders and slats inside. That lowered the center of gravity, letting them narrow the frame slightly and bring the table's edge further over each knee.
- The table stands 39 inches high, so keeping it visually grounded was a challenge. The slab's bark edges mirror the negative space between shelf slats; the bark's angle is echoed in a 22.5-degree mitre at the frame's upper spreaders, balanced by diagonal symmetries in the lag bolts.
- Foot clearances were tuned to accommodate 27-inch seats and comfortable standing work surfaces. Stools tuck underneath at the ends, where clearance is tightest.
Leveling the Slab
Drying wood warps; this slab had cupped almost a quarter inch at each edge. Kingsbury debated between a hand plane and a belt sander—both run about $60 at the low end. He chose the belt sander, figuring it'd be more useful later. Fourteen hours of sanding followed.
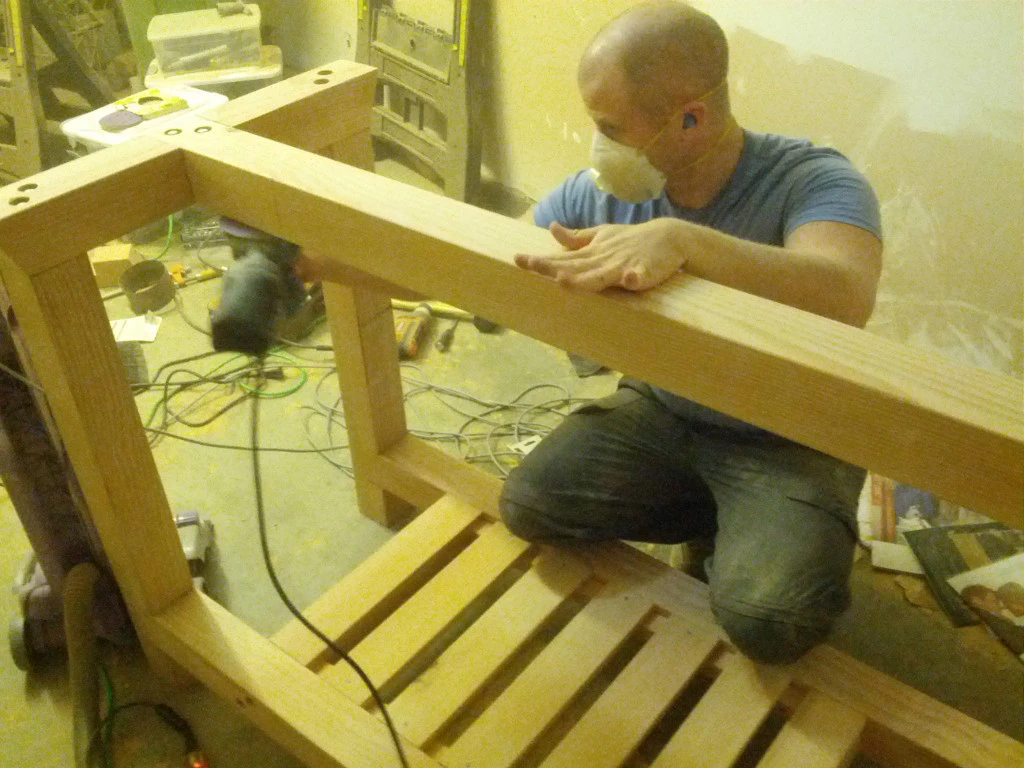
For bulk material removal, sand at +45 and −45 degrees to the grain. As the final thickness approaches, sand with the grain to minimize fiber damage. Kingsbury checked his work regularly with a metal rod and straightedge, testing curvature at 0, 90, and ±45 degrees. Trying to rotate the edge while applying pressure reveals high spots; sanding requires continuous, smooth motions around the point being reduced to keep the depth even. It's dusty, loud work—he recommends a respirator, earplugs, and changing clothes at the door. The garage collected about three cubic feet of dust by the end.
Finishing
The underside came first—the less noticeable side, and mostly hidden where it contacts the frame. It was quicker, but left belt marks that required repeated re-sanding. For the top, Kingsbury enlisted Tyler's help hand-sanding the entire piece with the grain through 80, 120, 180, and 220 grit. Hand-sanding preserves the intricate waves and whorls that power tools might oversand.
After vacuuming and wiping with mineral spirits, the wood's rich color emerged. Then came the finish: two coats of Rubio Monocoat 2C, a linseed oil with synthetic additives. It dries fast, penetrates, is hydrophobic, and VOC-free—and it leaves the wood's texture exposed. It's less durable than polyurethane, he concedes, but he finds poly's plasticky feel and the difficulty of getting an even surface worse trade-offs.
The monocoat chemically bonds with the wood; excess is wiped away after ten minutes. Tree to Table's Celia suggested a second coat with a wet, very light scuff using a 400-grit finishing pad. That first coat revealed the color and contrast within the figure—Kingsbury's favorite part of woodworking. "You're seeing into the wood," he writes.
Cutting and Assembling the Frame
His original plan called for soft maple or ash, but Kingsbury chose Douglas fir in finished 4x4s—about as inexpensive as wood gets, and dried enough to spot warping early. The frame lumber ran about $300 total; ash or maple would've cost roughly $11 per linear foot plus a $30 setup fee.
He mapped out a cut plan to maximize good wood, jumping over cracks and severely warped sections. Warped pieces go to short beams where alignment matters less. Kingsbury cuts a sixteenth of an inch long for tolerance, then clamps same-length pieces together and sands them to a uniform height.
The lap joints came next. They're simple, strong, and doable with a circular saw, chisel, and rasp: set the saw to the lap depth (1.75 inches) and cut across the beam, 20 to 30 times. Chisel, rasp, and liberal cursing clean up the cuts. Douglas fir has wildly varying density across growth layers, so it tends to splinter when sawed; keeping the densest layers on the side the blade exits reduces fracturing. A hardwood would behave better—there's a reason fir is usually reserved for construction.
Bolting It Together
Kingsbury picked up lag bolts (technically lag screws) and washers—9/16-inch, at 3 and 4.5 inches depending on join depth—plus a matching drill bit since his was too short. He made a template from a spare 4x4 to mark screw hole points at each join, countersunk with a 1-inch bit for washer and screwhead, then drilled the pilot shaft. Some bolts remain exposed as architectural features; biscuits would cover them if that's not the look you want.
- Standard wood glue went on permanent joints; the legs stay dry so the table can come apart.
- Leftover decking screws attach the shelf supports and slats.
Assembly happened on the upside-down slab, so everything lines up correctly—a crucial trick when wood has warped or joins are off by a centimeter. Kingsbury drilled and screwed bolts in two stages: one per joint, left loose for play, then a second pass once everything is square. This prevents the structure from twisting out of true. The result after eight days of work: a functional, hand-built slab table that balances the room's light space with something solid and warm.
Sanding and staining
With the frame glued and clamped, we moved to surface prep. A belt sander with 60-grit smoothed the misaligned joints—one beam had corkscrewed by 5 degrees—followed by a random orbit sander at 120 for the base finish, and a final hand pass before coating.
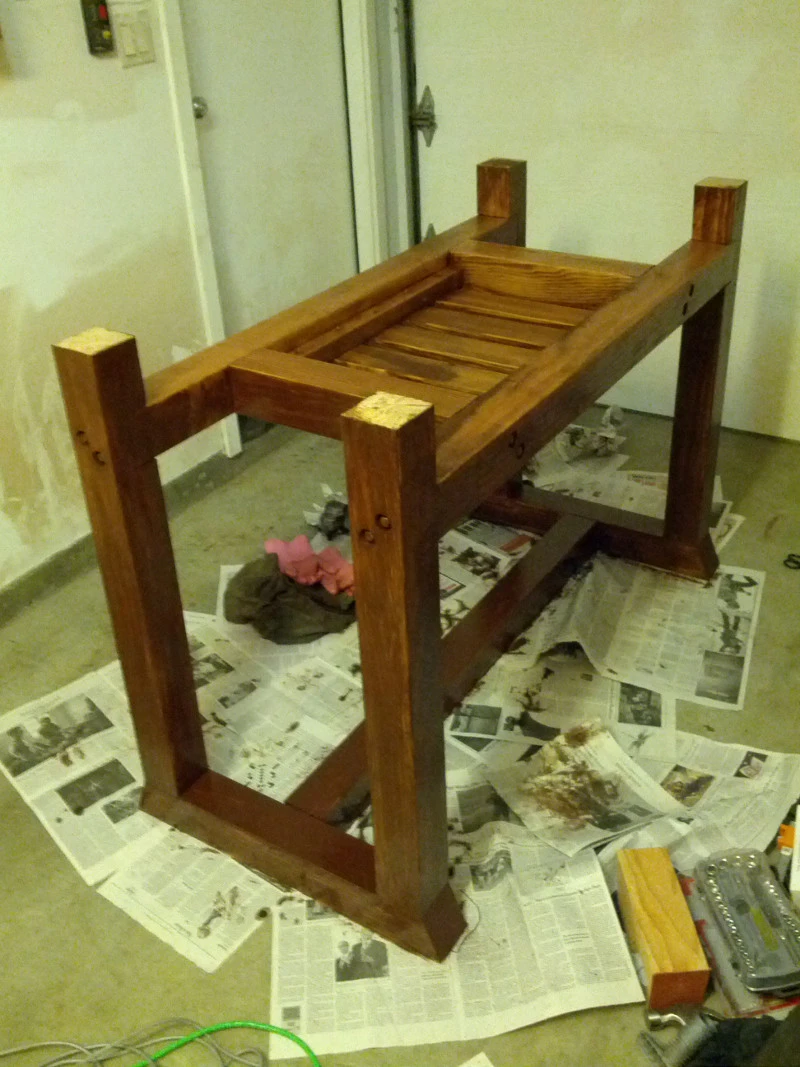
After vacuuming and wiping the wood down with mineral spirits, Tyler and I applied a heavy wiping stain in “American Walnut.” I left it on longer than usual and wiped it off unevenly to create a distressed, almost burnt look. I was unsure at first, but the effect has grown on me and reads well on the final piece.
Mounting the top
The remaining work was attaching the frame to the slab, which meant hauling the frame back upstairs and positioning it upside down on the top. We set six right-angle brackets and drilled pilot holes for the screws.
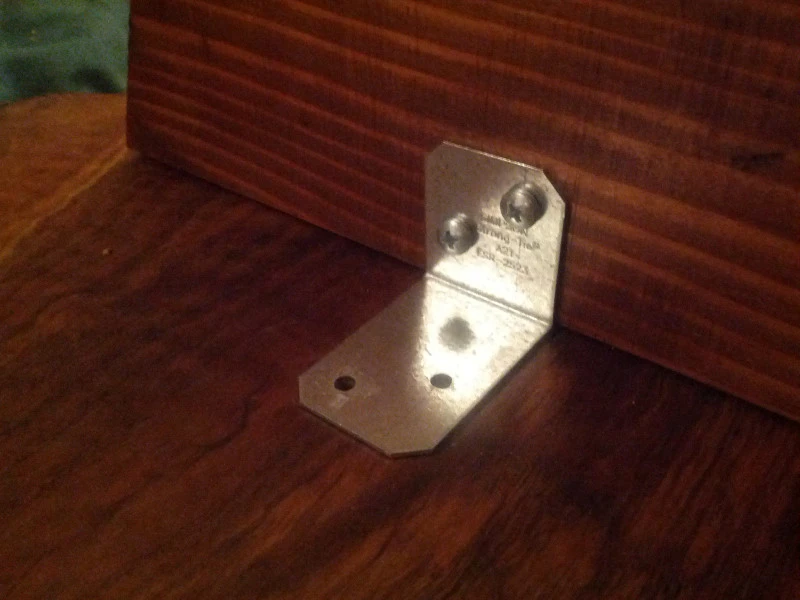
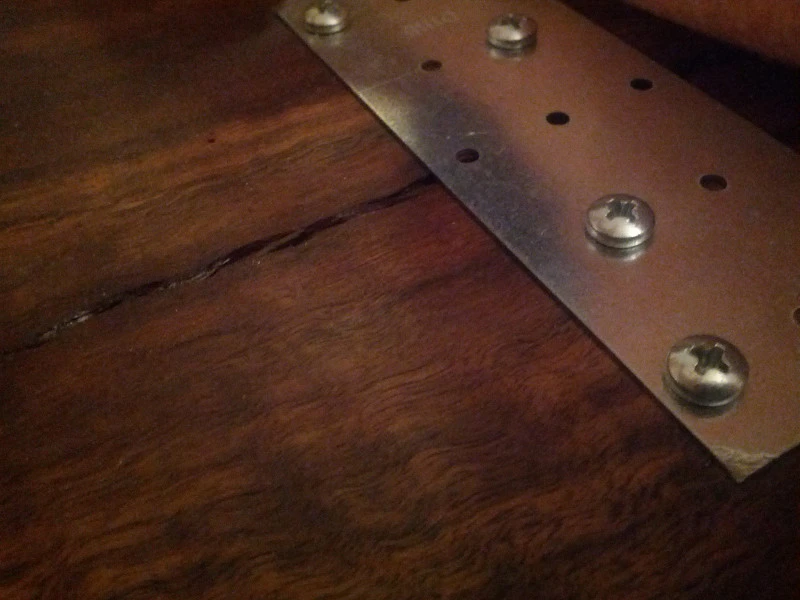
To keep the cracks at one end from shifting, I added a pair of flat framing plates. Tyler beveled their corners with a Dremel, since those spots sit right where your knees land.
After flipping the frame over and placing the slab on top, we screwed everything to the brackets. The underside wasn’t planed perfectly—there was a couple of millimeters of wobble under load—but a small cardboard shim between the frame and top took care of it.
Final assessment
The geometry is exactly right. The table divides the room without blocking work or traffic; the chopping height is comfortable; seated legroom works; the shelf lands where your feet naturally go. Nothing about the proportions bothers me, and I enjoy using it daily.
The finish is where I’m less certain. The tone and texture are pleasing, and it does resist water and stains, but rough ceramic plate bottoms have already scratched it noticeably. Since it’s not a polymer coat, I can spot-sand and re-stain individual marks; still, this finish really does call for placemats. If it wears poorly over the next several months, I’ll likely re-coat it with a light varnish. For now, rubbing the scratches with walnut meat may hide much of the damage.
All said, it’s a beautiful and sturdy piece. Minor construction errors aside, I’m pleased with the outcome—and it was ready just in time for Thanksgiving, when the family approved.