

Nuxt.js: A Primer for Vue Developers
Single Page Applications (SPAs) built with JavaScript frameworks like Angular, React, or Vue have a well-known weakness: their content is injected dynamically on load. When a search engine crawler arrives, the meaningful content may not yet exist in the page, hurting your SEO. Pre-rendering content on a server is the usual fix. For developers working in the Vue.js ecosystem, Nuxt.js is the standard tool for building these server-side rendered applications without abandoning the component model.
Nuxt.js is a progressive framework built on Vue.js, pulling in the official libraries (vue, vue-router, vuex) plus tooling like webpack, Babel, and PostCSS. The stated goal is a powerful, performant development experience. Depending on your target use case, Nuxt lets you build three types of applications:
- Static generated pages (pre-rendering). Content is already inside the HTML file; no API calls are needed at runtime. This is ideal for portfolios or product landing pages.
- Single Page Applications. Content is dynamically populated with fast transitions, using the HTML5 history API or hash-based routing.
- Server Side Rendered Applications (SSR). A fully rendered page is sent from the server, which is the better route for strong SEO.
This guide assumes a working familiarity with Vue.js. If you are new to Vue, start with the official documentation. We will start from the ground up: scaffolding a project, mapping the directory layout, understanding routing, and linking Nuxt to Vuex.
Scaffolding Your First App
There are two paths to create a Nuxt.js application: use the create-nuxt-app scaffolding tool, or build everything from scratch. We will use the scaffolding tool. With npx installed, run one of the following commands in your terminal:
$ npx create-nuxt-app nuxt-tutorial-appor
$ yarn create nuxt-app nuxt-tutorial-appThe name nuxt-tutorial-app is used here, but you can choose any name. After the initial command, a list of interactive options configures your app for development. It is fine to skip axios, linting, and Prettier configurations for this tutorial; a typical setup selection might look like this:
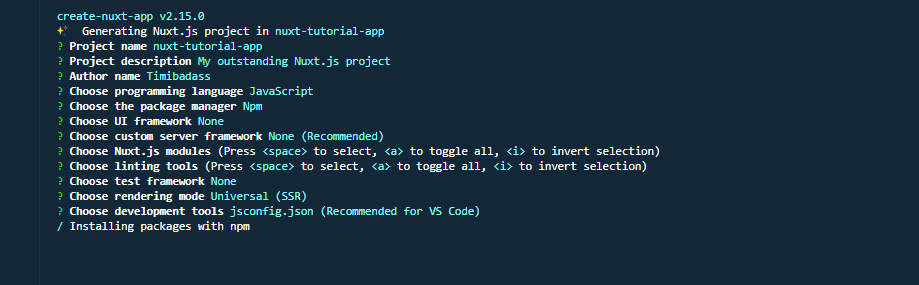
Once configuration is complete, navigate into the project directory and start the development server:
$ cd nuxt-tutorial-app
$ npm run dev
You should now see the default Nuxt welcome screen at https://localhost:3000:

Layout of the Nuxt Directory
The scaffolding process creates a structure that may look unfamiliar to someone coming straight from Vue.js. Each of these folders has a specific job.
assets holds un-compiled files: images, font files, SASS, LESS, or JavaScript. Add a styles folder with a main.css file inside it, and paste in the following CSS. These global styles will drive the navigation and other layout components we will build throughout the application.
a {
  text-decoration: none;
  color: inherit;
  cursor: pointer;
}
.header {
  width: 100%;
  max-width: 500px;
  margin-left: auto;
  margin-right: auto;
  height: 60px;
  top: 0;
  position: sticky;
  background-color: #fff;
  display: flex;
  justify-content: space-between;
  align-items: center;
}
.logo {
  width: 40%;
  max-width: 200px;
  height: 40px;
}
.logo .NuxtLogo {
  max-width: 30px;
  margin-left: 10px;
  max-height: 40px;
}
.nav {
  width: 60%;
  height: 40px;
  display: flex;
  justify-content: space-between;
  padding-right: 10px;
  max-width: 300px;
}
.nav__link {
  width: 80px;
  display: flex;
  align-items: center;
  border-radius: 4px;
  justify-content: center;
  height: 100%;
  border: 1px solid #00c58e;
  cursor: pointer;
}
.nav__link:active {
  background-color: #00c58e;
  border: 1px solid #00c58e;
  color: #fff;
  box-shadow: 5px 3px 5px 2px #3f41468c;
}
.home {
  padding-top: 30px;
}
.home__heading {
  text-align: center;
}
.directories {
  display: flex;
  box-sizing: border-box;
  padding: 10px;
  max-width: 1000px;
  margin: 0 auto;
  flex-wrap: wrap;
  justify-content: center;
}
@media (min-width: 768px) {
  .directories {
    justify-content: space-between;
  }
}
.directory__container {
  width: 100%;
  max-width: 220px;
  cursor: pointer;
  border-radius: 4px;
  border: 1px solid #00c58e;
  display: flex;
  height: 60px;
  margin: 10px 5px;
  margin-right: 0;
  justify-content: center;
  align-items: center;
}
.directory__name {
  text-align: center;
}
.directory {
  width: 100%;
  margin: 50px auto;
  max-width: 450px;
  border-radius: 4px;
  border: 1px solid #00c58e;
  box-sizing: border-box;
  padding: 10px 0;
}
.directory__info {
  padding-left: 10px;
  line-height: 22px;
  padding-right: 10px;
}
components is familiar territory; it contains reusable components from Vue.js. Let's create a new component called navBar.vue with the code below. This adds a site-wide navbar with a logo and links to the Home page and an About page that we will create shortly. It also references some of the styles from the file above.
<template>
  <header class="header">
    <div class="logo">
      <nuxt-link to="/">
        <Logo />
      </nuxt-link>
    </div>
    <nav class="nav">
      <div class="nav__link">
        <nuxt-link to="/">Home</nuxt-link>
      </div>
      <div class="nav__link">
        <nuxt-link to="/About">About</nuxt-link>
      </div>
    </nav>
  </header>
</template>
<script>
import Logo from "@/components/Logo";
export default {
  name: "nav-bar",
  components: {
    Logo
  }
};
</script>
<style>
</style>
The template contains the visible UI: a header with the logo and nav links. Navigation between pages is handled by the nuxt-link component. In the script section, the logo is imported using the Nuxt alias @ and registered before it is rendered in the template.
layouts stores your app-wide layout files. This is important if your design requires multiple layouts, such as different views for authenticated versus guest users, or an admin area. For now, the default layout is enough. Open default.vue and add your navBar component.
<template>
  <div>
    <Nav />
    <nuxt />
  </div>
</template>
<script>
import Nav from "~/components/navBar.vue";
export default {
  components: {
    Nav
  }
};
</script>
The Nav component is placed at the top of the layout container. Just below it sits the <nuxt /> component, which tells Nuxt exactly where to render the routes in your application. Putting the Nav component here ensures it appears on every page automatically.
middleware is for JavaScript files that must execute before a page is rendered. If you are familiar with Vue.js navigation guards, this is the logical home for those kinds of checks. The pages folder serves as both your views and your router in one: every *.vue file inside it is automatically assigned a route. Finally, plugins contains files that run before the root Vue.js application mounts. It isn't required and can be deleted safely.
The nuxt.config.js File
The nuxt.config.js file is where all broader application configuration happens. When you scaffold with the tool, it arrives pre-populated based on your answers; it also handles some app-wide defaults you would not normally have in a plain Vue project
export default {
  mode: 'universal',
  /*
  ** Headers of the page
  */
  head: {
    title: process.env.npm_package_name || '',
    meta: [
      { charset: 'utf-8' },
      { name: 'viewport', content: 'width=device-width, initial-scale=1' },
      { hid: 'description', name: 'description', content: process.env.npm_package_description || '' }
    ],
    link: [
      { rel: 'icon', type: 'image/x-icon', href: '/favicon.ico' }
    ]
  },
  /*
  ** Customize the progress-bar color
  */
  loading: { color: '#fff' },
  /*
  ** Global CSS
  */
  css: [
  ],
  /*
  ** Plugins to load before mounting the App
  */
  plugins: [
  ],
  /*
  ** Nuxt.js dev-modules
  */
  buildModules: [
  ],
  /*
  ** Nuxt.js modules
  */
  modules: [
  ],
  /*
  ** Build configuration
  */
  build: {
    /*
    ** You can extend webpack config here
    */
    extend (config, ctx) {
    }
  }
}
Every change to this file triggers an automatic restart of the dev server, so open it up and inspect the current settings before adjusting anything. Key properties include:
- Mode: Sets the type of application to either
universalorspa. Choosing universal configures Nuxt to run on both server and client. - Head: Nuxt doesn't use a default
index.htmllike Vue does. Instead, baseline meta tags and the favicon link go here. - loading: Every Nuxt app comes with a default loader; its
colorcan be edited visually from this property. - css: Lists links to your global CSS files so they get included when your app mounts. Our CSS file needs to be referenced here before the app will restart with the new styles applied.
 /*
   ** Global CSS
   */
  css: ["~/assets/styles/main.css"]
The plugins property connects files within the plugins folder to the application through objects with a src file path and a mode that defines whether plugin runs server- or client-side. If a given plugin depends on something unavailable server-side, like localStorage, this controlled handling avoids runtime errors.
{ src: '~/plugins/universal-plugin.js' }, // for server and client plugins
{ src: '~/plugins/client-side.js', mode: 'client' }, // for client only plugins
{ src: '~/plugins/server-side.js', mode: 'server' }, // for server side only plugins
The official configuration guide covers the full list of nuxt.config.js options, which is worth reading before you start customizing. In the next part of this tutorial, we will wire up routing between Home and About pages, build out more components for that specific flow, and explore how Nuxt's routing logic interacts with the component layer.
Routes on Autopilot
Nuxt turns your pages directory into your routing configuration. Need an /about page? Create about.vue. There is no extra setup for static routes, and well-named files guide Nuxt's behavior without additional config.
Nested and Dynamic Routes
Nesting requires two pieces: a folder inside pages holding child files, and a file in pages with the same name as that folder to wrap them.
pages/
 --| me/
 -----| index.vue
 -----| about.vue
 --| dashboard/
 -----| user.vue
 -----| settings.vue
 --| dashboard.vue
 --| work.vue
 --| contact.vue
 --| index.vue
Nuxt generates a consistent naming pattern for each route, making collisions nearly impossible.
name of the folder + '-' + name of the file
For parameterized paths, prepend an underscore to a file name. A file named _id.vue instantly creates a dynamic route where the id portion of the URL varies. This pattern proves essential for API-driven pages where database IDs map to route segments.
pages/
--| me/
-----| index.vue
-----| about.vue
-----| _routeName
-------| index.vue
-------| info.vue
--| dashboard/
-----| user.vue
-----| settings.vue
--| dashboard.vue
--| work.vue
--| _id.vue
--| contact.vue
--| index.vue
While Vue Router tags exist, Nuxt's components are preferable for its ecosystem.
| VueJs | NuxtJS |
|---|---|
| router-link | nuxt-link |
| router-view (for nested routes) | nuxt-child |
| router-view(default) | nuxt |
A Practical Example
Consider placing these concepts to work. You already have a shell with navigation visible at the top.
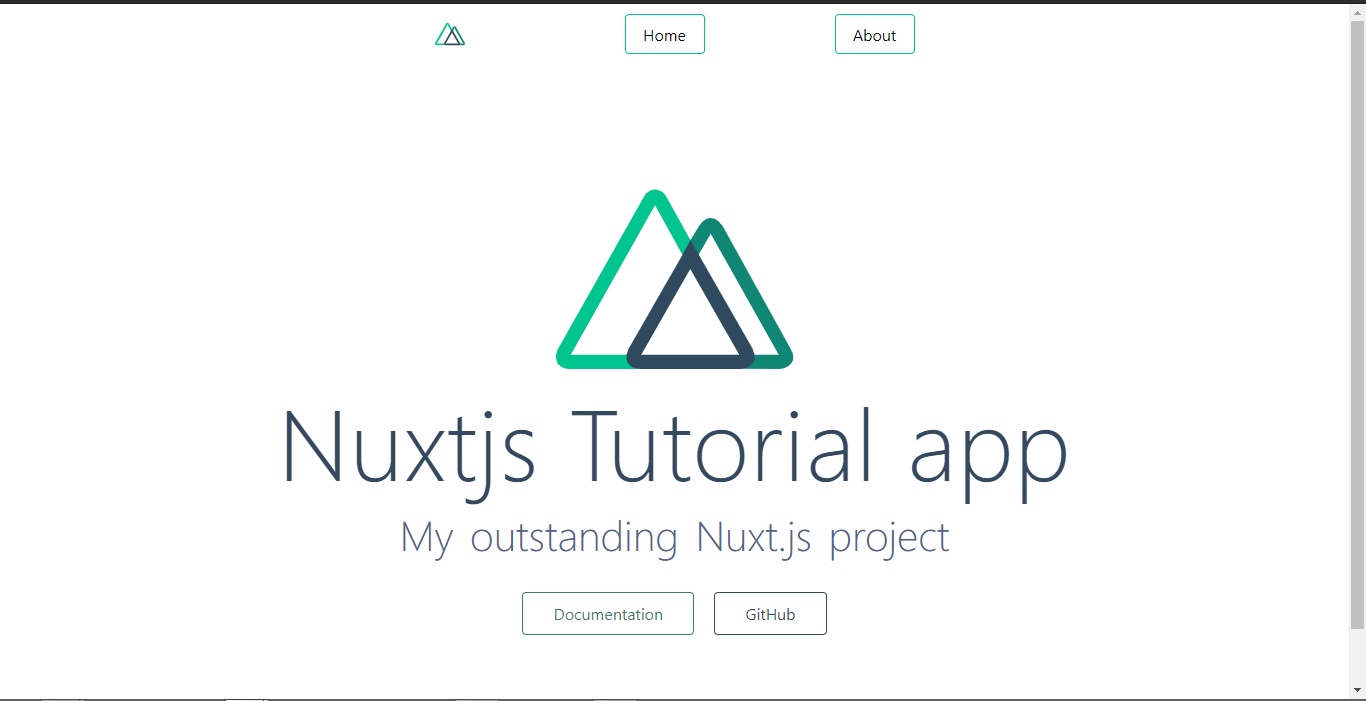
Say you want an /about page listing directories. Its script defines an array of objects, each carrying an id, name, and info.
<template>
  <section class="home">
    <h1 class="home__heading">About Nuxtjs Directory Structure</h1>
    <div class="directories">
      <div class="directory__container" v-for="directory in directories" :key="directory.id">
        <p class="directory__name">
          <nuxt-link
            :to="{ name: 'id', params: { id: directory.id, dir: directory } }"
          >{{ directory.name }}</nuxt-link>
        </p>
      </div>
    </div>
  </section>
</template>
<script>
export default {
  name: "about-nuxt",
  data() {
    return {
      directories: [
        {
          id: 0,
          name: "The Assets Directory",
          info:
            "By default, Nuxt uses vue-loader, file-loader and url-loader webpack loaders for strong assets serving. You can also use the static directory for static assets. This folder is for un-compiled files such as images, font files, SASS, LESS or JavaScript files"
        },
        {
          id: 1,
          name: "The Components Directory",
          info:
            "The components directory contains your Vue.js Components. You can’t use asyncData in these components."
        },
        {
          id: 2,
          name: "The Layouts Directory",
          info:
            "The layouts directory includes your application layouts. Layouts are used to change the look and feel of your page (for example by including a sidebar). Layouts are a great help when you want to change the look and feel of your Nuxt.js app. Whether you want to include a sidebar or having distinct layouts for mobile and desktop"
        },
        {
          id: 3,
          name: "The Middleware Directory",
          info:
            "The middleware directory contains your Application Middleware. Middleware lets you define custom functions that can be run before rendering either a page or a group of pages (layouts)."
        },
        {
          id: 4,
          name: "The Pages Directory",
          info:
            "The pages directory contains your Application Views and Routes. The framework reads all the .vue files inside this directory and creates the application router. Every Page component is a Vue component but Nuxt.js adds special attributes and functions to make the development of your universal application as easy as possible"
        },
        {
          id: 5,
          name: "The Plugins Directory",
          info:
            "The plugins directory contains your Javascript plugins that you want to run before instantiating the root Vue.js Application. This is the place to register components globally and to inject functions or constants. Nuxt.js allows you to define JavaScript plugins to be run before instantiating the root Vue.js Application. This is especially helpful when using your own libraries or external modules."
        },
        {
          id: 6,
          name: "The Static Directory",
          info:
            "The static directory is directly mapped to the server root (/static/robots.txt is accessible under https://localhost:3000/robots.txt) and contains files that likely won’t be changed (e.g. the favicon). If you don’t want to use Webpack assets from the assets directory, you can create and use the static directory (in your project root folder)."
        },
        {
          id: 7,
          name: "The Store Directory",
          info:
            "The store directory contains your Vuex Store files. The Vuex Store comes with Nuxt.js out of the box but is disabled by default. Creating an index.js file in this directory enables the store. Using a store to manage the state is important for every big application. That’s why Nuxt.js implements Vuex in its core."
        }
      ]
    };
  }
};
</script>
<style>
</style>
The template loops over that array, rendering each name inside a nuxt-link. That link passes the directory object's fields through the router. Clicking a given name navigates to a _id.vue page which reads the parameter from this.$route.params and shows the relevant details.
<template>
  <section class="directory">
    <h1 class="directory__name">{{ directory.name }}</h1>
    <p class="directory__info">{{ directory.info }}</p>
  </section>
</template>
<script>
export default {
  name: "directory-info",
  data() {
    return {
      directory: this.$route.params.dir
    };
  }
};
</script>
<style>
</style>
That approach falls over on refresh, because route params are lost. Persisting data requires a store layer.
A Persistent Store
Vuex is available in Nuxt in modules mode, where each file in your store folder is a module. Activation only happens when an index.js is present.
export const state = () => ({

})

export const getters = {

}

export const mutations = {

}

export const actions = {

}
The minimal setup includes state for the data itself, getters for derived values, mutations to alter state, and actions that commit mutations.
The core concepts can be split into separate files (state.js, getters.js, and so on), a sensible organization for larger projects.
To solve the refresh problem, install the vuex-persist npm package.
$ npm install --save vuex-persistAfter installation, a plugin file wires your store to browser storage. You configure the storage adapter and place the plugin in your app's plugins list.
import VuexPersistence from 'vuex-persist'

export default ({
  store
}) => {
  window.onNuxtReady(() => {
    new VuexPersistence({
      storage: window.localStorage
    }).plugin(store);
  });
}
The plugin gets registered in nuxt.config.js and set to load only on the client side.
/*
   ** Plugins to load before mounting the App
   */
  plugins: [{
    src: '~/plugins/vuex-persist',
    mode: 'client'
  }],
With the store armed, add a directory state and a saveInfo mutation that writes the incoming directory object.
export const state = () => ({
  directory: ''
})
export const getters = {
}
export const mutations = {
  saveInfo(state, payload) {
    state.directory = payload.directory
  }
}
export const actions = {
}
Your list page's link click now events into a handler that commits that mutation.
<template>
  <section class="home">
    <h1 class="home__heading">About Nuxtjs Directory Structure</h1>
    <div class="directories">
      <div
        class="directory__container"
        v-for="directory in directories"
        :key="directory.id"
        @click.prevent="storeDirectoryInfo(directory)"
      >
        <p class="directory__name">
          <nuxt-link
            :to="{ name: 'id', params: { id: directory.id, dir: directory } }"
          >{{ directory.name }}</nuxt-link>
        </p>
      </div>
    </div>
  </section>
</template>
<script>
export default {
  name: "about-nuxt",
  data() {
    return {
      directories: [
        //remains the same
      ]
    };
  },
  methods: {
    storeDirectoryInfo(dir) {
      this.$store.commit("saveInfo", {
        directory: dir
      });
    }
  }
};
</script>
<style>
</style>
Take the data out of the store instead of relying on route params.
<template>
  <section class="directory" v-if="directory">
    <h1 class="directory__name">{{ directory.name }}</h1>
    <p class="directory__info">{{ directory.info }}</p>
  </section>
</template>
<script>
import { mapState } from "vuex";
export default {
  name: "directory-info",
  computed: {
    ...mapState(["directory"])
  }
};
</script>
<style></style>
The view resists destructive actions like page refreshes because it reads the saved state directly.
Protect the template so it waits for data to exist.
<template>
  <section class="directory" v-if="directory">
    <h1 class="directory__name">{{ directory.name }}</h1>
    <p class="directory__info">{{ directory.info }}</p>
  </section>
</template>
Shipping to Heroku
Deployment starts by connecting your GitHub repository.
create a Heroku app, link the repo, and confirm the config variables are set.
NPM_CONFIG_PRODUCTION=false
HOST=0.0.0.0
NODE_ENV=production
Tell Heroku how to run your app with a Procfile alongside your config.
web: nuxt startThat command launches nuxt start. With automatic deploys on Heroku, any push to the connected branch publishes your app's latest version.
What to Explore Next
- The axios module for API requests.
- Authentication in Nuxt for user flows.
- The Nuxt official documentation for deeper features.
- The full
nuxt-tutorial-apprepository for reference.



