

What a GitHub repository actually is
A repository — usually shortened to “repo” — is the core building block of GitHub and Git. It’s where your project files live, along with their full version history, so you can track changes and collaborate with other people. Think of it as a project folder that keeps a record of everything that happens inside it.
Creating your first repository
After you create a GitHub account, you’ll land on your dashboard, where you’ll see a green “Create repository” button.
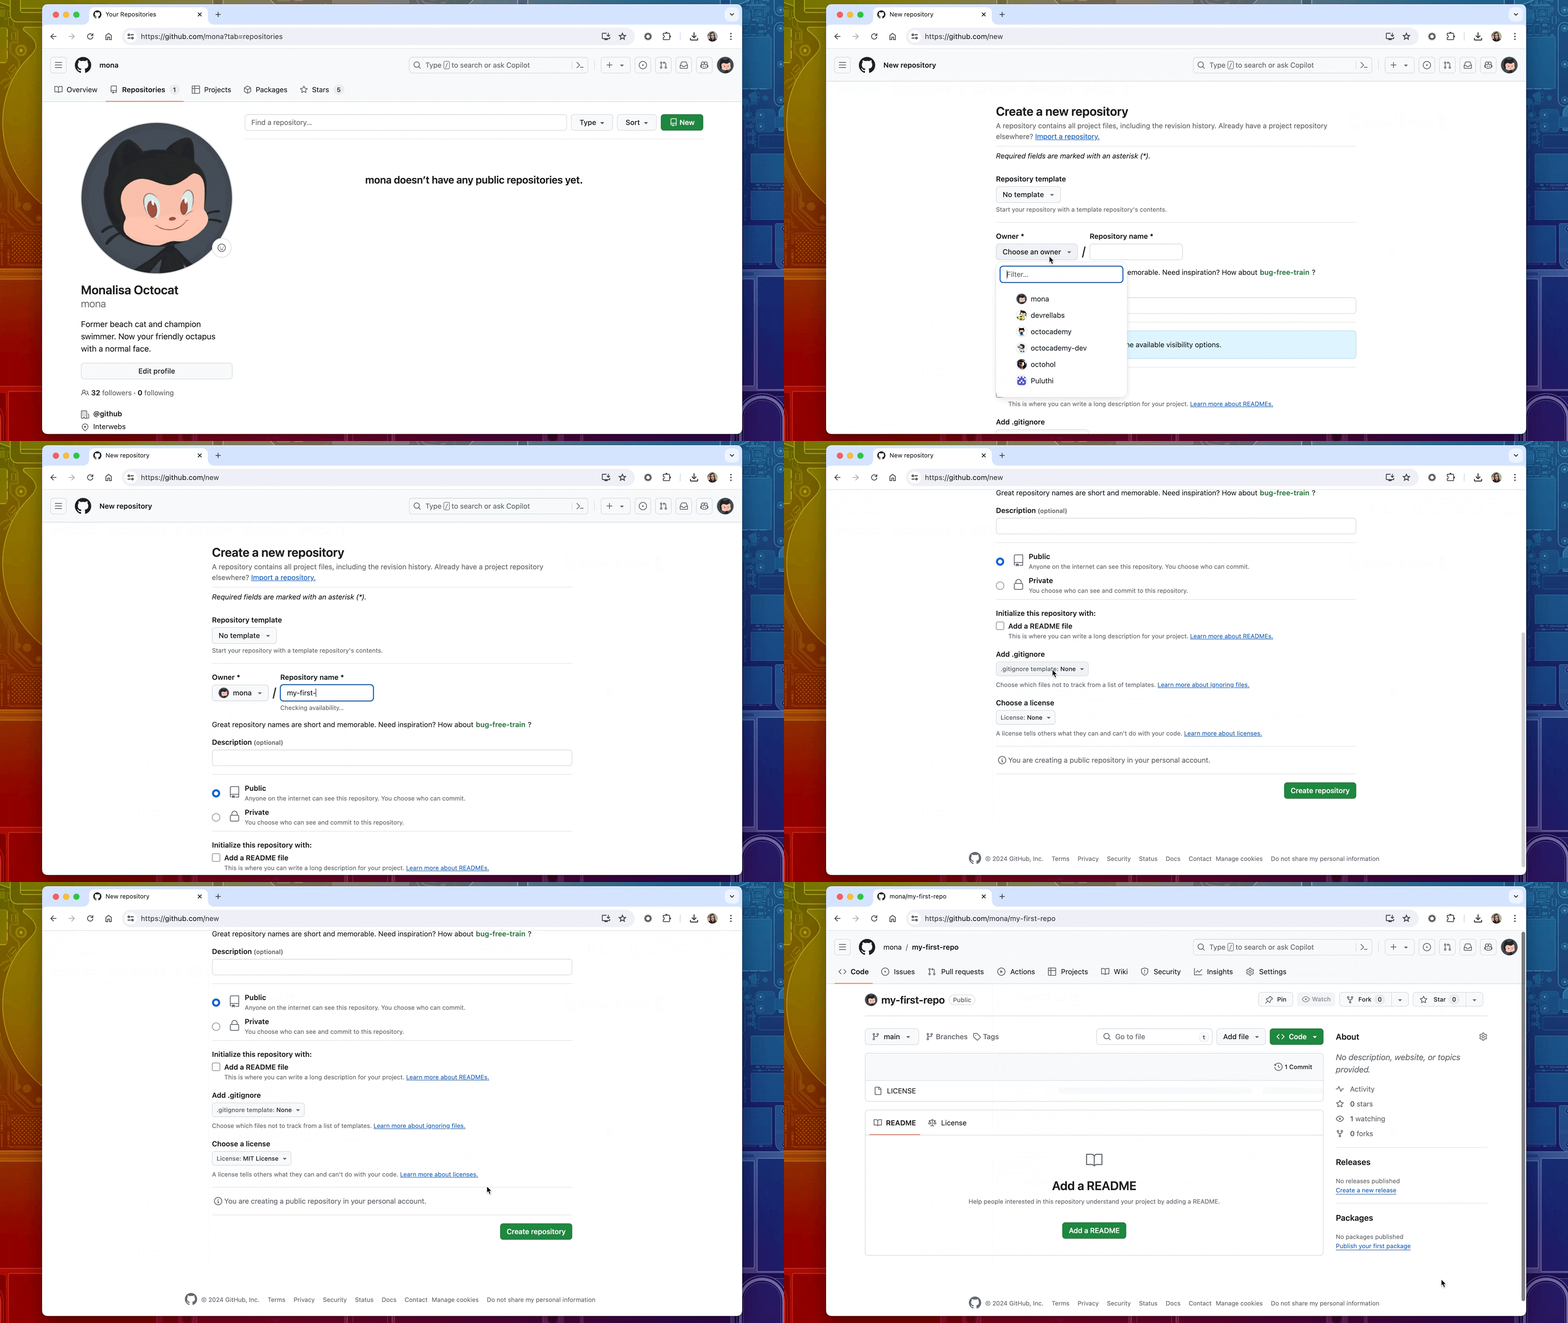
Clicking it takes you to the new repository page. Here you’ll set a few basics:
- A repository name
- The owner (you, initially)
- A description of the project
- Whether the repo is public or private
From there, you can optionally initialize the project with a README file. It’s worth doing.
Why add a README?
A README provides essential context about your project: what it does, how to use it, how to get started, where to find help, and who contributed. It acts as the front door for anyone visiting your repository. For your first repo, check the box to add one.

You can leave the .gitignore option set to “None” for now, and pick a license — the MIT License is listed as an option in the “Choose a license” dropdown. Once those fields are set, hit the green “Create repository” button and you’re done: your first GitHub repository is live.
Picking a license
A license defines what others may and may not do with your source code. If you intend to share code as open source, the license you choose controls how anyone on the internet can use it. The MIT License you selected is a “permissive license” — it gives people broad freedom to use your code as they see fit.
Choosing a license isn’t something to rush. It sets the legal terms under which others can use, modify, or redistribute your work. If you’re unsure which license fits your project, choosealicense.com is a good place to compare options.
Forking vs. creating from scratch
Forking is another way to create a repository, but instead of starting empty, you copy an existing one. A fork is your own version of someone else’s repository — you can work on it, modify it, and use it as a basis for contributing back to the original project via pull requests.

Forking is common when you want to contribute to open source. That’s also why licensing matters so much: without a clear license, others don’t know what they’re allowed to do with your code.
What is .gitignore?
The “Add .gitignore” option on the new repository page is for projects where you want Git to ignore certain files — anything you don’t want tracked in version control. Which files you exclude can depend on your language, framework, or tooling. If you need one, gitignore.io can generate a .gitignore file tailored to your project.
Main repository features
Once your repository exists, you’ll want to know your way around its main tools.
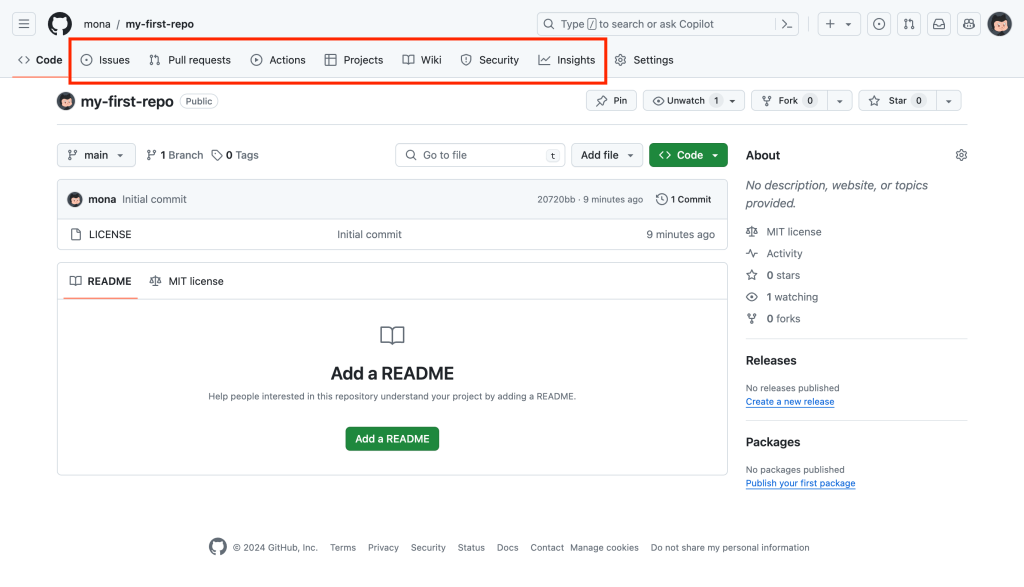
- Issues: for tracking bugs or tasks.
- Projects: Kanban-style boards for organizing work.
- Pull requests: for merging changes between branches or forks.
- Wikis: for more detailed documentation alongside the README.
Repository settings
The settings page is where you control how the repository operates.
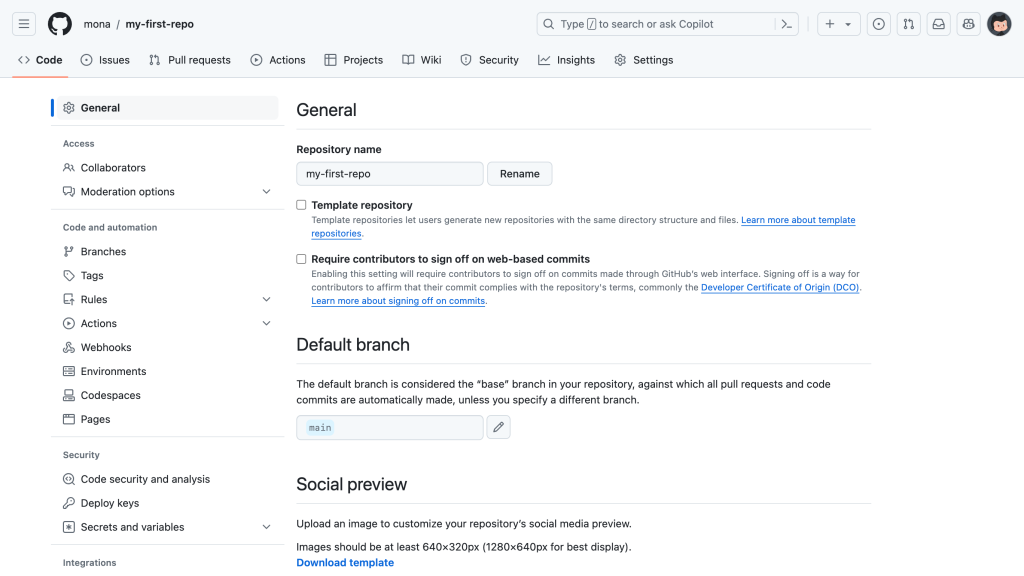
- Collaborators: add teammates who can work on the project.
- Automation: configure continuous integration or deployment via GitHub Actions.
- Security: set access controls and security preferences.
This is also where you can enable or disable repository features depending on what your project needs.
Where to go from here
With a repository created and an understanding of its core parts, you’re ready to start using GitHub for real work. Beyond the basics, worth exploring are best practices for repository structure, how forking works in more depth, and the GitHub Foundations certification if you want formal grounding in the platform.


