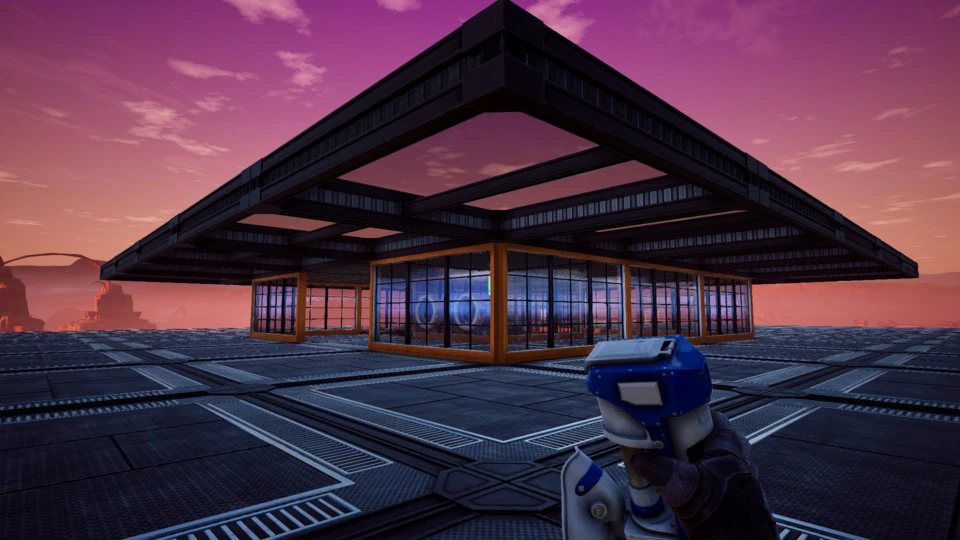
Building Satisfactory: A Pattern Language
Though Satisfactory presents itself as a factory construction game, most of the constraints that shape real-world factory design simply don't apply. Resources are inexhaustible, there are no quotas except those you set for yourself, and waiting is always a viable strategy. The practical pressures come from elsewhere: technology gating, the player's own time, and lag.
The tech tree defines which tools are available at any moment. Your time is the real budget: because every machine and foundation is placed by hand, rebuilding a production line carries a significant, linear time penalty. And lag—the game's technical cost of simulating many active buildings—grows with every machine you place. Keeping the game pleasant to play means spreading production across the map, since distant regions can be updated less frequently.
These three constraints generate a set of design goals that shape most good factory layouts:
- Automation
- Production rates
- Observability
- Expandability
- Flexibility
Automation exists to save player time; higher production rates enable more ambitious builds. The core gameplay loop—observing, expanding, redesigning—pushes toward layouts that make those operations easy. Unlike Factorio, Satisfactory never automates construction, so early choices lock in costs you'll pay later.
Factory Placement and Scale
The distribution of factories sets the map's overall structure. Keep factories far apart, both to mitigate lag and to leave room for expansion. Spreading across the map also puts you closer to diverse resource nodes, which you'll want anyway.
Raw materials are bulky; refined products are compact. Place each factory near the materials it consumes in volume, aiming for the center of a resource cluster where possible. Where one resource dominates, bias the site toward it to reduce the distance of the bulk-transport belts and pipes.
Single-purpose factories are easier to balance, observe, and refactor. A factory that produces many parts routes them around sections that don't consume them, consuming space and mental overhead. Devote each factory to one part or a tight cluster of related parts.
A caveat: building the full supply chain for high-volume parts like screws, rods, and plates locally is justified. For low-volume parts such as motors, heavy frames, and control rods, the balancing cost of setting up each local chain exceeds the cost of hauling finished goods. Build those from a dedicated factory and transport them.
Connectivity and Flow
When linking factories, maintain backpressure: when downstream demand falls, upstream production should slow too. Backpressure lets surpluses reallocate naturally—if one consumer of motors has more than it needs, another can draw from the excess. This property is essential for keeping your network responsive without manual intervention.
Mixed material flows break that. A belt alternating coal and iron into a smelter will eventually back up on the wrong material, and a train car carrying two item types will jam if even a single part of one type remains when loading the other. Separate each material into its own physically distinct channel. Wherever you can't—whether you're running a sorter or sushi belt—use smart splitters to handle excess.
The overflow output of a smart splitter is the standard mechanism here. Route excess into an Item Sink, back onto a recycling train, or, for low-volume parts, into permanent storage you'll never reclaim. Just as important: accept that load shedding defeats backpressure, so use it intentionally where efficiency isn't a concern.
Trains As the Backbone
For large factories, trucks and tractors have serious scaling issues. Dense truck traffic leads to collisions that can knock vehicles offline entirely. When power fails—and it will—trucks run dry on fuel and end up stranded far from base, requiring a tedious manual recovery effort. Reconfiguring any route means re-recording each affected truck's stops by hand.
Belts avoid some of those problems but introduce their own. A belt line carries far fewer items per area than a train track. Belts don't transmit power or transport people efficiently, so you have to build those connections separately. Worse, each resource flow needs its own dedicated belt—two resources means two belts. As your factory network grows, you spend more and more time laying new belt lines between distant production sites, and you can rarely reuse existing belts for new flows.
Trains solve these problems in one network. Tracks carry power, materials, and people simultaneously. Since tracks are independent of the flows moving across them, you rarely need to rework existing rail—just expand it to reach new factories. Trains are also fast: a single freight station can easily saturate two belts. Use trains liberally: nearly every factory should ship its outputs by rail, and receive even low-volume inputs the same way.
One Station Per Material
If a factory uses trains for both input and output, each material type needs its own station. Reusing the same freight platform for different items leads to deadlock when one item backs up and blocks another. A station that handles multiple material types requires load shedding to resolve, which wastes capacity. Instead, give each factory a dedicated station for every item it produces and every item it consumes. A motor factory, for example, ships out from a “Motors” station and receives at “Motors Stators Drop” and “Motors Rotors Drop” stations.
Buffer Stations Against Belt Stalls
Freight platforms pause their input and output belts while loading or unloading cargo. Without enough slack in the line, those pauses cause hiccups upstream or downstream. Place a storage container or fluid buffer between the station's freight platform and the production line, then run belts to and from that buffer.
Keep Trains Single-Purpose
It's tempting to put different resources in different cars of one train for a few short runs. That works until you change routes later and accidentally end up with a freight car full of concrete pulling into a platform meant for circuit boards. Devote each train to a single material type. The exception is a collector train that intentionally mixes materials, such as one serving a shopping mall or recycling route with many stops.
Recycling Trains for Excess Output
Backpressure can stall production chains—a refinery that makes fuel might stop entirely if its rubber or plastic output fills up. Use a recycling train to collect surplus components from factories and deposit them regularly at a recycling facility, either a shopping mall or an item sink.
Supply Trains for Construction
Building a new factory requires a steady stream of concrete, plates, frames, and other parts. Rather than running back to a mall each time, use the per-material station layout to route parts to your building site. A dedicated supply train picks up the needed items and drops them at a temporary station on-site. Use container chains for storage and a recycling train to clear leftovers.
A Personal Train
Traveling between factories—or to far-off exploration sites—on foot is slow. Riding existing freight trains risks interfering with their schedules. Instead, dedicate a train (or two) to personal transport. Keep it free of freight cars so it can't accidentally mix materials. If you have two personal trains, keep one at your current location for easy return and the other at home base, available if you respawn.
Leave Ground Clearance
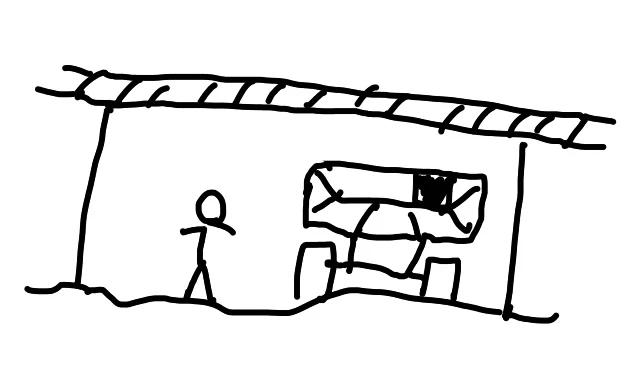
When routing tracks, hypertubes, or belts between factories, give them extra ground clearance. Nothing is more annoying than having to dismantle a belt just to walk past or drive a truck through. Once you're away from a factory, raise belts and hypertubes to their maximum height. For train tracks, use foundations or columns to elevate track at likely grade crossings.
Designing the Rail Network
The shape of your track layout determines how easily trains can move between stations. A few patterns avoid the AI pathfinding quirks that can otherwise stall traffic.
Triangle Junctions
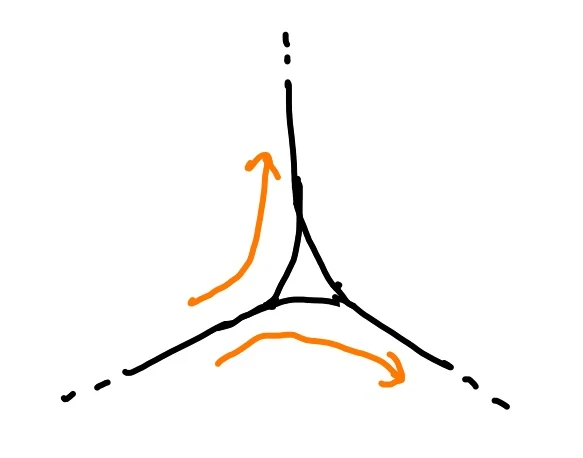
Trains should route directly from any station to any other, regardless of orientation. That means at every junction, a train must be able to choose a path to any outgoing track. Certain fork configurations—like a 2:2 split or a 1:3 split—break train pathfinding. Build every junction from three 1:2 forks arranged in a triangle to avoid this entirely.
Roundabouts
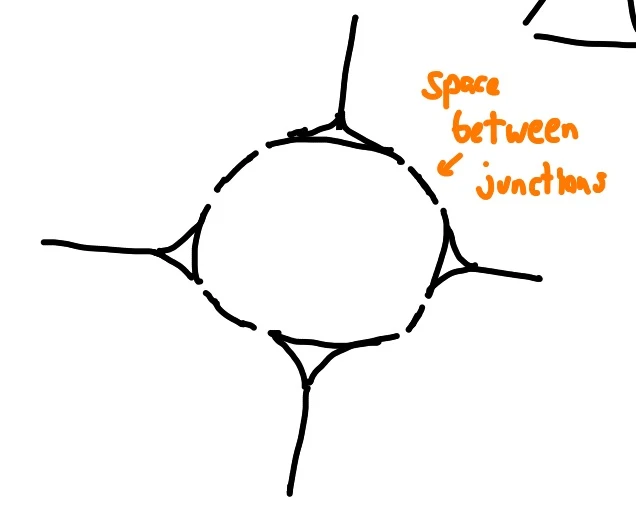
Two offset three-way junctions handle most four-way crossings. When five or more tracks meet, that becomes unwieldy. A compact roundabout—a small circle of short track segments in the middle of the crossing—works better. Connect each inbound track to the circle with a triangle junction. The circle can also serve as a turn-around point for trains stuck on tracks that don't offer a triangle junction.
Station Manifolds
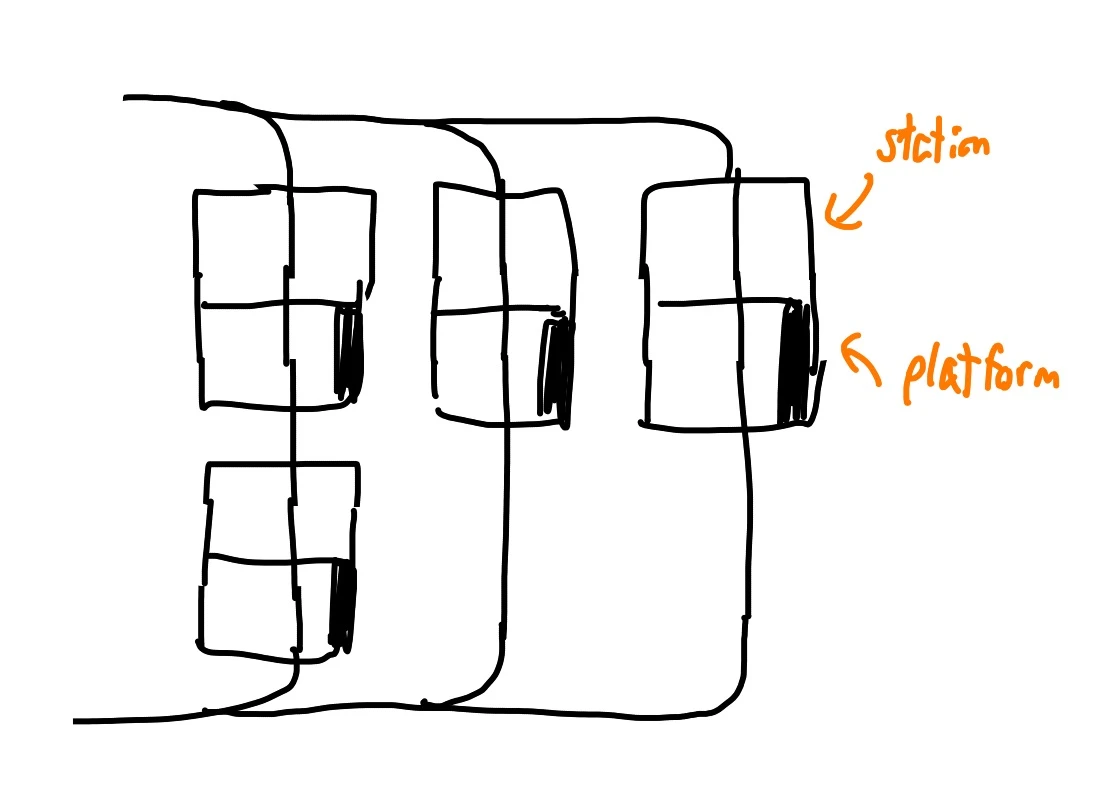
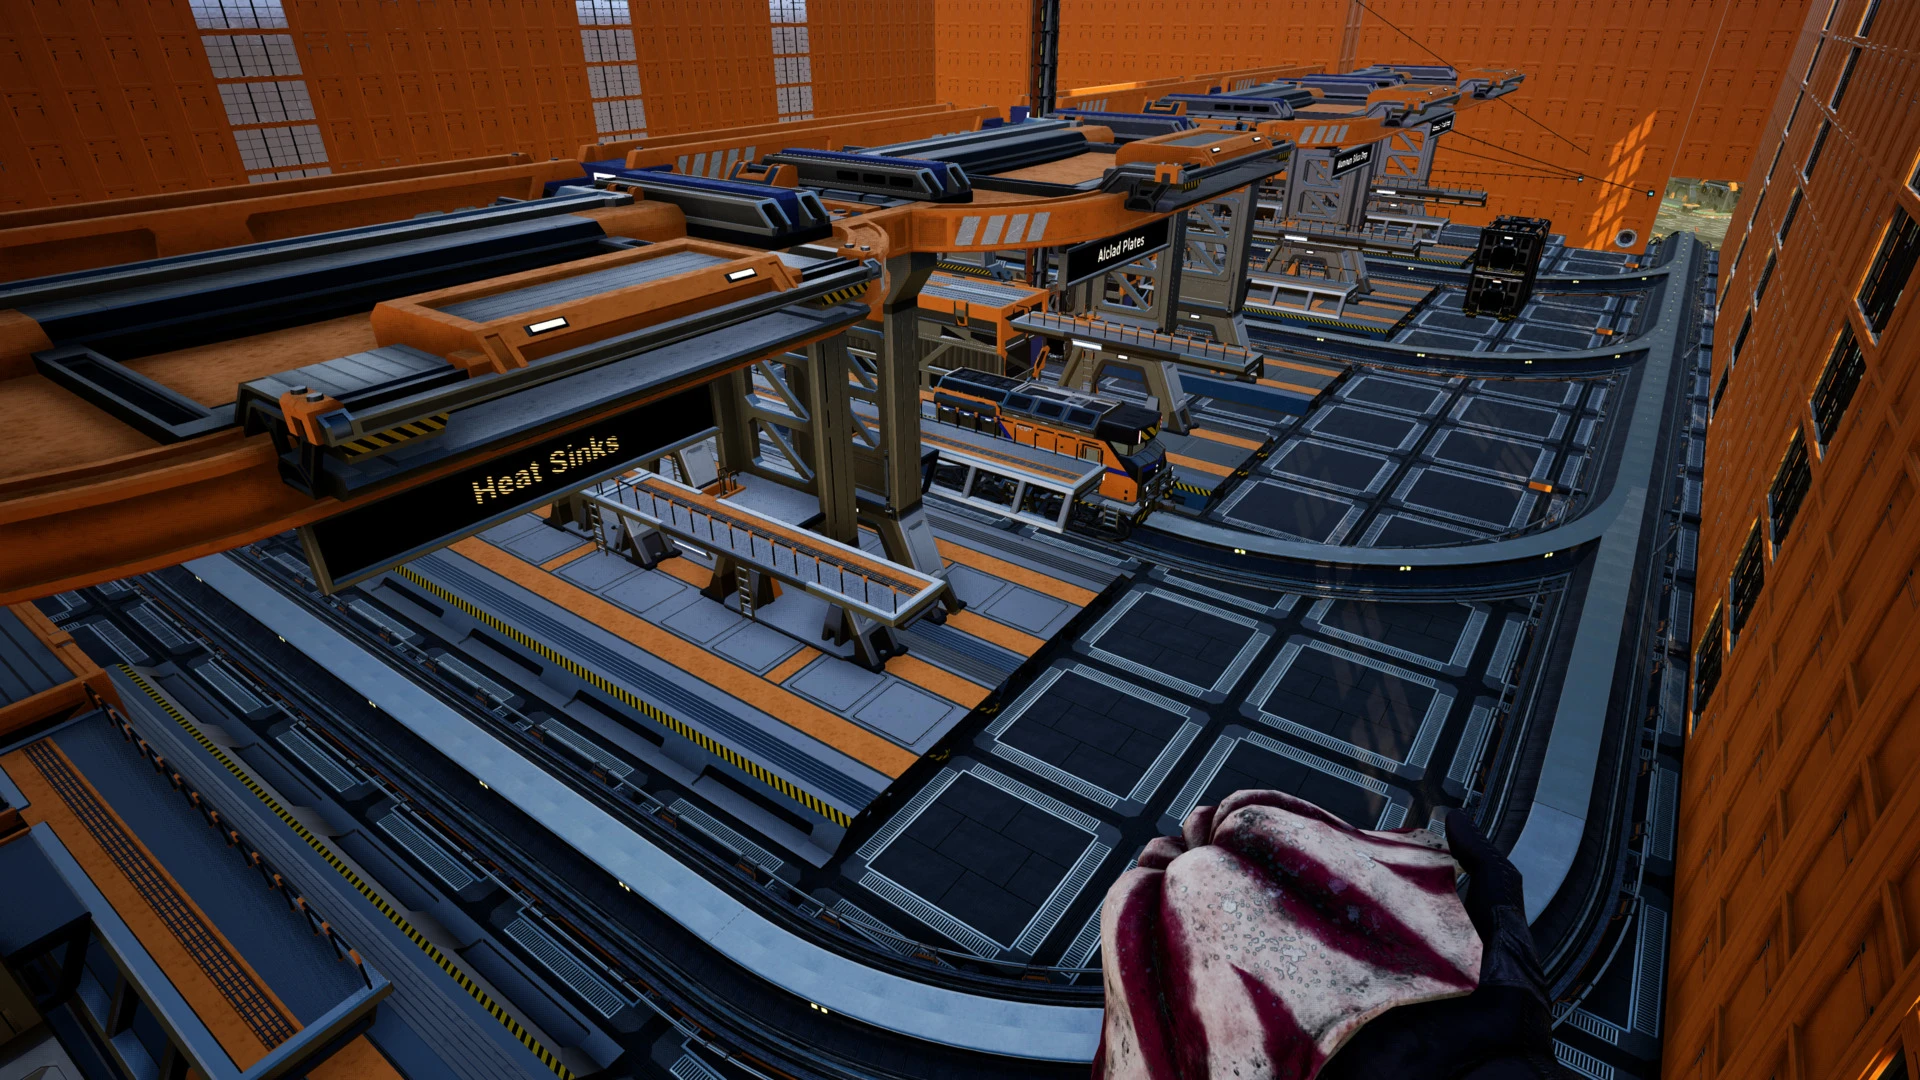
A factory with many stations (three to eight is typical) needs a compact arrangement. Place stations parallel and side-by-side, leaving just enough room between freight platforms to load and unload cargo, such as with vertical belts. Orient all stations the same direction for predictability and to make the local loop work. For added capacity at the cost of future expandability, place additional stations in line behind each other, separated by about two tiles of open track.
Feed the stations with a track that runs perpendicular across both their entrances and exits. Connect this main track to each station via a 1:2 fork that curves 90 degrees into the station. Then link the inbound and outbound ends of the manifold to the train network with one or two triangle junctions, forming a local loop.
Local Loops
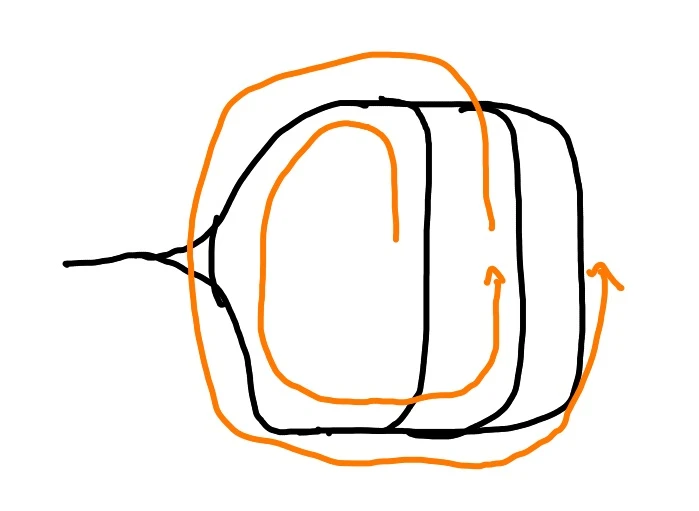
When a train makes multiple stops at a single factory, it wastes time leaving the factory, finding the nearest junction to turn around, and coming back. Each factory should have a local loop—a short track segment that lets a train exit the station manifold, turn around immediately, and re-enter. Triangle junctions create this loop implicitly; other junction types may require an explicit loop.
Power Distribution at Scale
With factory connections fixed, the next concern is reliable power generation and distribution.
The Main Grid
Independent power grids fail independently—a desirable trait in most systems, but not in Satisfactory. If a distant grid fails, you may not know it, and restarting requires traveling to a pole on that grid. Keep all main production on a single, unified power grid. That gives you instant awareness of faults and lets you restart from any location. It also lets surplus power from one factory cover deficits at another.
Use the train network to carry power across the main grid.
An Isolated Backup Grid
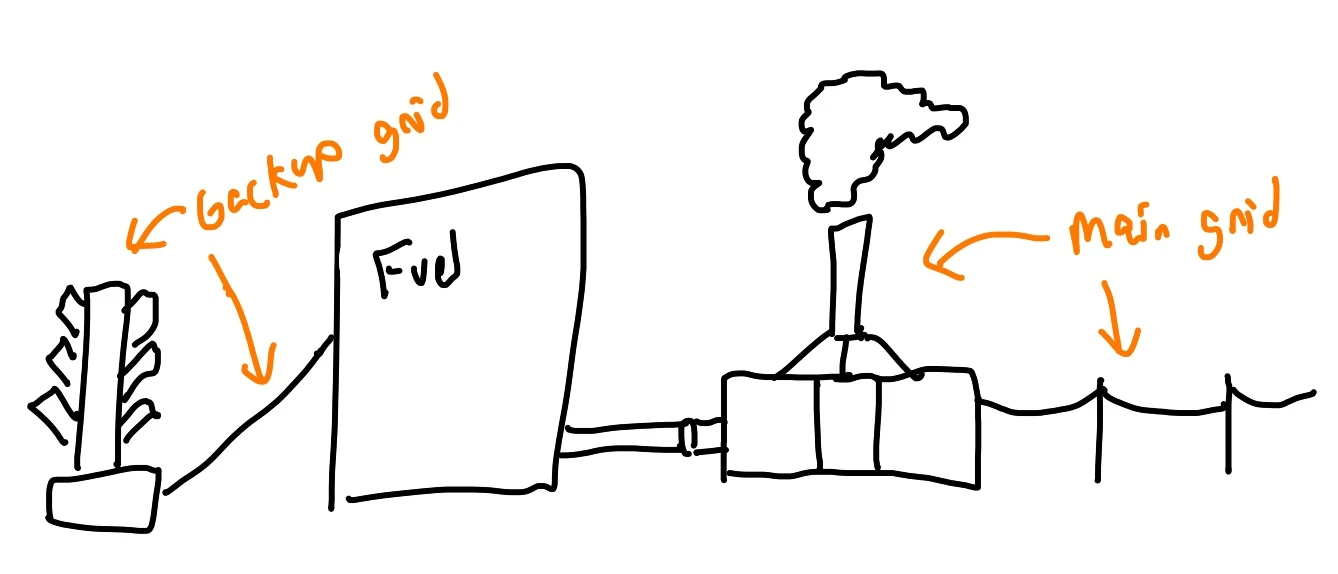
When the main grid fails, you hit a catch-22: mining coal and processing oil takes power, but you may have none left. Break that cycle with a dedicated set of fuel-production factories powered by a separate backup grid, fed by more reliable generation. Transmit the backup grid between sites with normal power poles. Paint backup-grid infrastructure a special color to avoid accidentally linking it to the main grid.
Early on, a biomass burner can kickstart coal or fuel production. In the late game, geothermal generators are ideal: they need no fuel and provide constant power—more than enough to run an entire nuclear fuel rod production line.
Transit for Outages
When the main grid fails, your personal train fails with it. You still need to move between home base and backup grid sites, which may be far apart. Build a dedicated hypertube network connecting key backup locations—miners, factories, and main-grid generators—plus home base. Connect those hypertube entrances only to the backup grid so you can travel comfortably even with main power down.
Single-Path Power
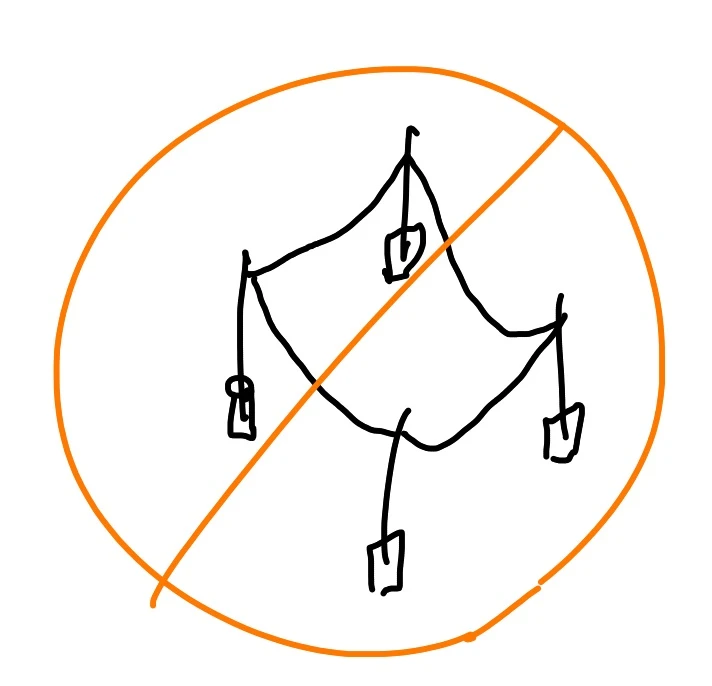
Redundancy works against you in Satisfactory's power system. When power runs low, you want to selectively power down whole factories, floors, or zones. Multiple power paths make that difficult. Ensure each logical unit of your factory has exactly one connection to the main grid. You can then bring a region back up incrementally by disconnecting and reconnecting single power lines.
Power poles should form a tree rather than a web, with a single train station as the root. Disconnect that station, and the entire factory powers down.
Facilities Beyond the Factory Floor
Not every building on the network produces parts. A handful of support structures handle logistics, respawning, and disposal. They occupy different spots on the map and serve different rhythms, but each one plugs into the same Train Network and hypertube grid as the factories themselves.
Home Base
Respawning drops you with low health and no equipment. Getting back to your death site, fully stocked, is the core loop of the game, and Home Base exists to make that loop short. The key is to cluster the services that support it—spawn point, equipment storage, and transit—in one place, ideally under one roof. Proximity invites extra amenities: workbenches, a research station, a truck station, a Shopping Mall, and a Recycling Drop all fit naturally in the same complex.
Site Home Base near the center of the map to shorten transit times in all directions. Power and materials should arrive via the Train Network rather than belts, since the base manufactures nothing and consumes modest volumes. Keep it isolated from large factories to minimize lag.
A Place to Spawn
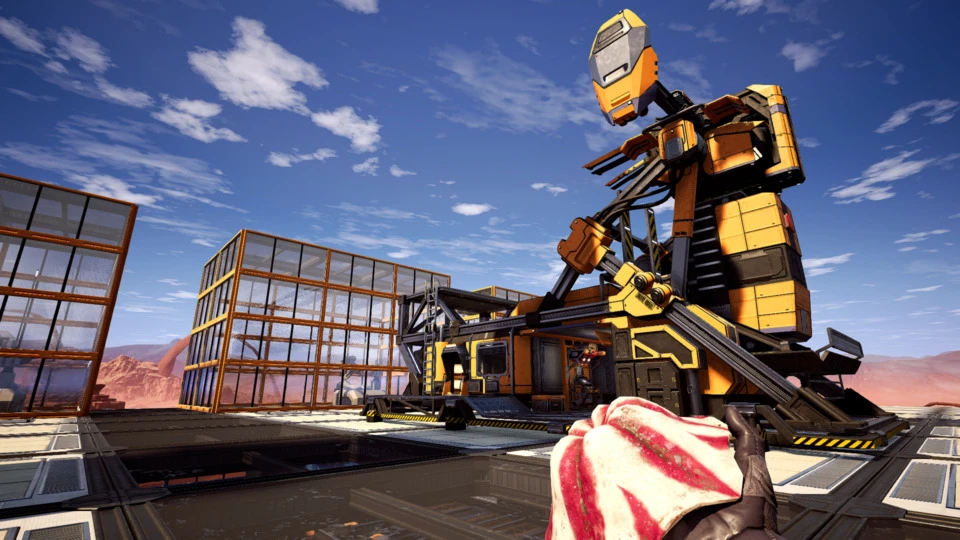
Once placed, the H.U.B. tends to stay put while the factory sprawls outward. The original trek from spawn to worksite gets longer without anyone noticing. Counter that by treating the H.U.B. as a dedicated element of Home Base. Put it as close as possible to the Shopping Mall so that a respawned player can gear up immediately.
Transit Hub
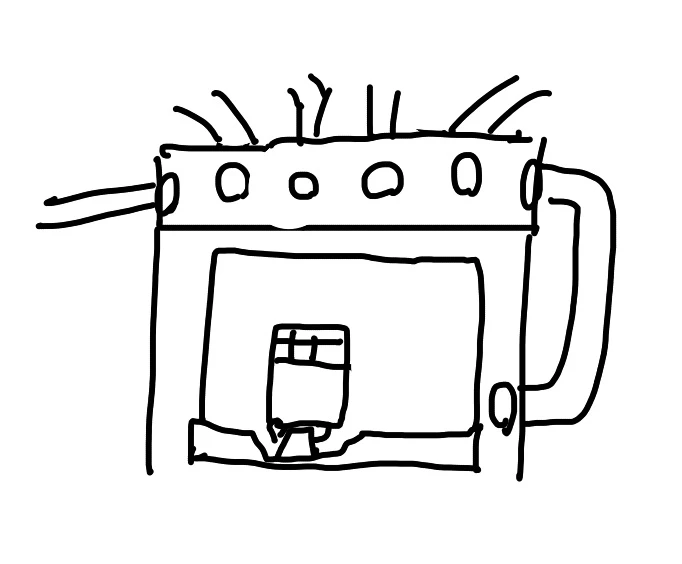
Movement happens by jetpack, hypertube, and train; trucks and belts add two more options. Every transport mode eventually needs to hand off to another—hypertube to train, or hypertube to hypertube at a junction. The Transit Hub is where those handoffs happen.
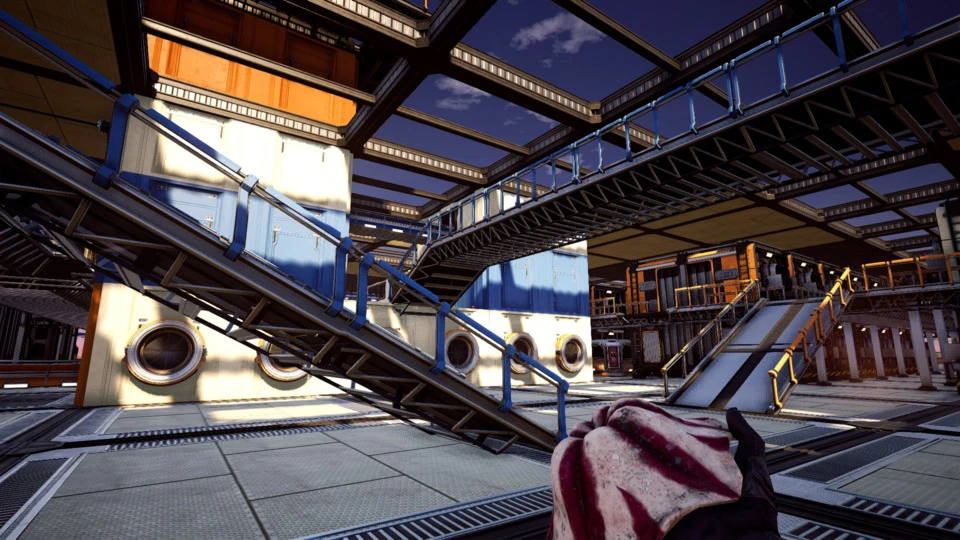
Give each site a Transit Hub in a central location. At Home Base, that means roughly in the middle of the Shopping Mall. Cluster hypertube entrances tightly to minimize transfer steps, and orient them to hint at their destinations. Separate local and remote tubes by position, height, orientation, or color so riders don't grab the wrong one. Train stations are large and track-bound; if they sit on another floor, run a short hypertube straight from the platform into the hub so the walk is only a few steps.
Quick orientation matters. Windows, paint, or a layout that points a distinct direction on arrival cuts down on accidental wrong turns. Out in the satellite factories, a Transit Hub can be as minimal as a hypertube exit that drops the rider into the middle of the floor. Along a route, use Hypertube Hop to decide where entrances go.
Hypertube Hop
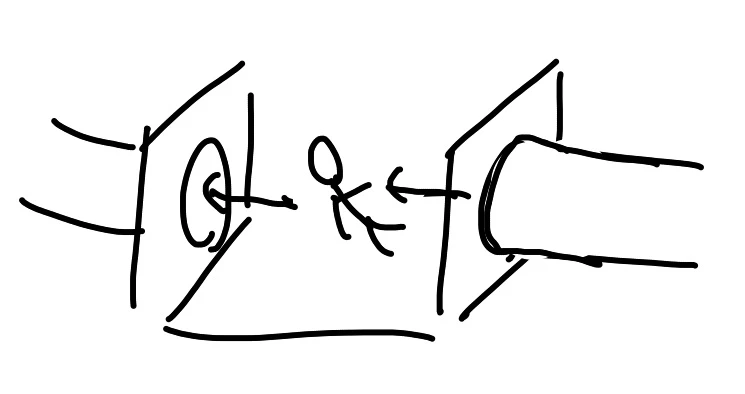
A stop along a hypertube line—at a factory or a hub—is an opportunity to let riders exit one tube and board the next without scrubbing their velocity. A rider can slow down inside the tube as they approach the stop to get off cleanly.
One approach is a vertical cluster of tubes that shoots riders upward; from the apex they steer toward the next destination. A U-Jelly pad cushions the landing. This is entertaining, but expect the occasional embarrassing death.
For hubs with a single clear path in and out, a safer layout places the inbound and outbound entrances facing each other a wall tile or two apart. Leaving one tube immediately launches you into the next, making long trips hands-free and building considerable speed.
Shopping Mall
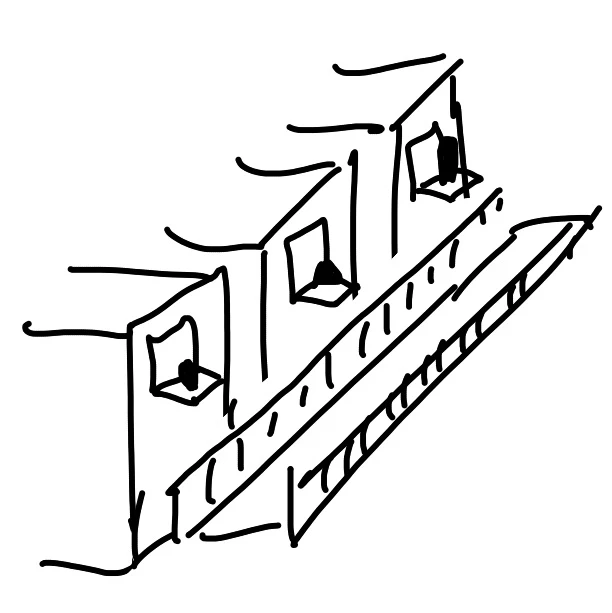
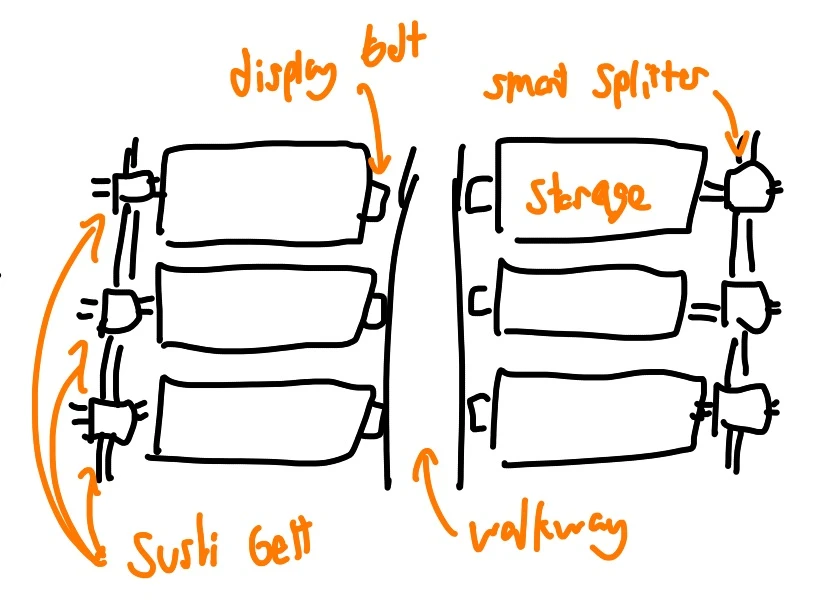
New construction, repairs, and respawns all call for a grab bag of parts and tools. The Shopping Mall supplies them from dense rows of belt-fed storage containers. A dedicated train on the network pulls materials from many stations; Sushi Belts feed individual containers, and Load Shedding discards surplus.
Home Base is the natural site for the main mall, but satellite malls cut travel for repeated supply runs. Put them adjacent to Transit Hubs to shorten the trip further. A proven layout alternates belt avenues with walkways and gives each container a short projecting belt—like a tongue—so the contents are visible. Group containers by category: tools, core building blocks, and so on. Connect the aisles with corridors so any container is reachable on foot; leaving headroom above the containers opens up a faster flying route. A Recycling Bin nearby rounds out the setup.
Recycling Bin
Players arrive at a mall both to pick up supplies and to clear inventory. Expeditions yield slugs, flowers, and other odds that need a home. A Recycling Bin answers both needs with containers that empty themselves—ideally straight into the mall. Once the mall's belts are live, wiring a bin in is trivial: merge its output into the input belt.
A discard-only variant feeds a container into an Item Sink, which is handy at construction sites for shedding bulk leftovers. The bin can also route components to a dedicated train station for shipment to a mall or to Not a Place of Honor.
Not a Place of Honor
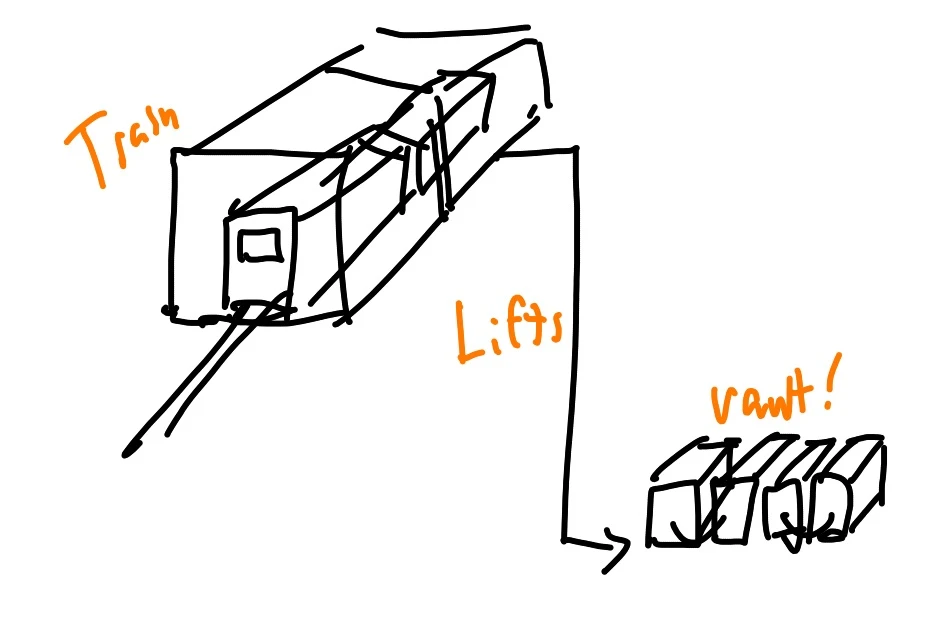
Long-term storage handles the waste streams that have nowhere else to go. Nuclear waste is the obvious candidate, but anything can be stored indefinitely if production stays low relative to capacity. Because nuclear waste is radioactive, the site must sit far from inhabited areas.
Pick a location away from resource nodes, Home Base, Transit Hubs, and routes players frequent. Vertical separation reduces the irradiated footprint—cliff faces and chasms offer excellent spots. Use a Container Chain for storage and feed it from local belts supplied by the Train Network. Leave an exit belt, possibly disconnected, for a future transfer out if the site must move. Local Hypertubes make inspection easy, and on-site PPE helps with maintenance.
Space Elevator
The Space Elevator consumes specialty parts like smart plating that no other machine uses, and many of those parts recur as ingredients in later elevator phases. Per the principles of localized production, those recipes belong next to the elevator itself.
Placing it beside Home Base is a habit, not a requirement—trips to the elevator are rare. Put it wherever it suits the map, letting the Train Network bring materials while a local factory feeds the elevator directly with its specialized components.
Structuring the Factory Floor
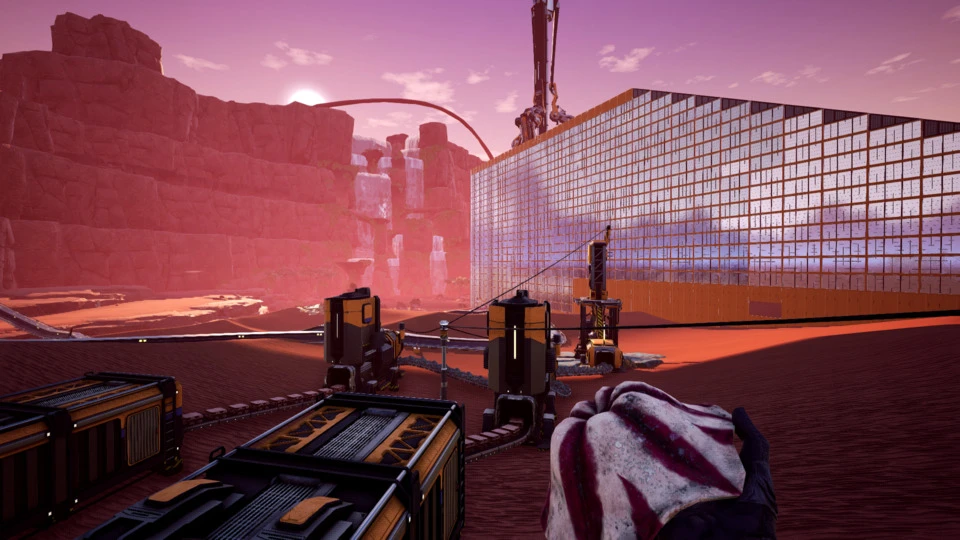
A factory site can be viewed as a set of production stages laid out across multiple floors, with each stage assigned to a specific zone. This arrangement makes it straightforward to expand individual stages without reworking the entire building.
Breaking Production into Stages
Per the principles of focused factories, each site typically produces one part or a small set of related parts, but the manufacturing process often involves multiple intermediate steps. Each of these steps is a stage, and it gets its own dedicated area. For example, a factory making encased industrial beams may have separate stages for producing steel, machining that steel into beams, mixing limestone into concrete, and finally assembling the encased beams from the concrete and steel beams.
Every stage should be independently expandable so that you can adjust output as demand changes, with belts (or pipes) linking one stage to the next. This is easiest when each stage has as few machines as possible—ideally a single machine per stage. An exception arises when belt throughput becomes a bottleneck, as with high-volume parts like screws. In that case, a stage may include two or three machines with minimal buffering between them, if that arrangement avoids a material-flow bottleneck.
Stages should flow in a cascade, with parts moving in one direction from raw inputs toward the final assembly stage. Keep belts short by placing each stage as close as possible to the stages that consume its output. The physical layout of a stage can be bounded by either a Floor or a Zone, depending on the building's overall shape.
Using Floors and Zones
Building directly on terrain quickly becomes unwieldy, so factories typically begin with a regular foundation of thin floor tiles. Layering floors gives you a natural way to separate stages: devote each floor to a single stage, or split a large floor into several zones for different purposes.
It is common for later stages to require far fewer machines than earlier ones, leaving excess floor space. To use that space efficiently, divide a floor into Zones separated by comfortable margins that allow easy routing between them. Zones accommodate individual stages, as well as dedicated spaces for train stations or transit infrastructure. Mark zone boundaries with belts, color-coding, or walkway paths to keep the layout legible.
The Building Core
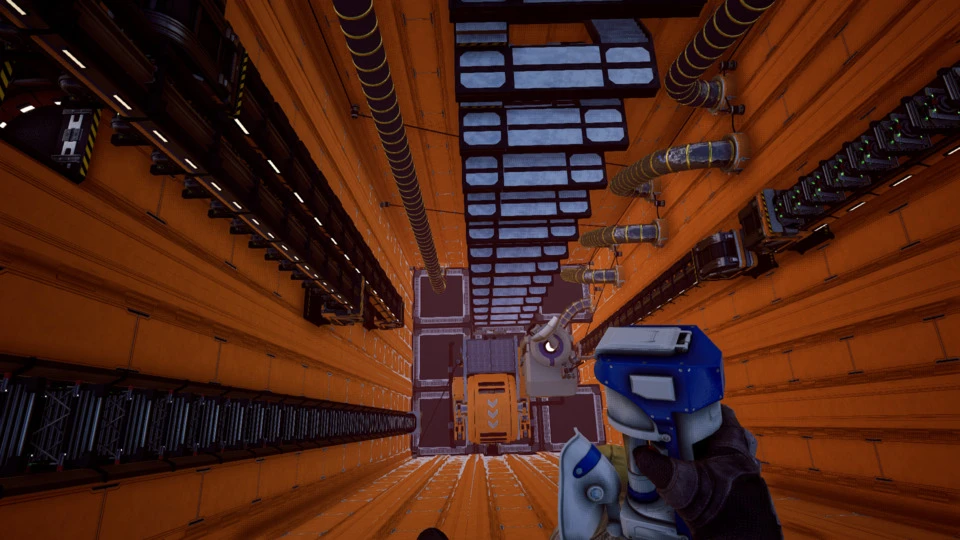
A building with many floors and zones needs an efficient way to move parts and people between its parts. Planning a Building Core early is critical: cores run through the whole building and are difficult to retrofit later. Large factories may need more than one core. A vertical core connects floors and can be as compact as a 1x1 shaft, though 1x3, 2x3, or full-height 3x3 chases are common. Alternatively, a horizontal core can expedite movement between zones on the same floor. Place cores at the corner or along a wall if compactness is not key, and site them near the transit hub so that elevators and stairs are convenient. Use the core for vertical and horizontal material movement via conveyor chases, and centralize power distribution within it to keep wiring organized without intruding on production space.
Ground-Level Inputs
Resource extraction necessarily happens at ground level. Site miners, water extractors, and oil extractors on the ground, optionally raised slightly onto a low floor, and route their output into the production cascade via belts or pipes through the core.
Train stations also typically belong near ground level, since rail has only a limited slope. If tracks arrive above grade, stations can be raised to meet them. Place stations near the transit hub and link them to production with belts or pipes, optionally using station-side buffers at the final assembly output. Expansions of the station manifold should anticipate new stations being added later in the direction of factory growth.
Deciding on the Building’s Form
Choosing a Site
Satisfactory rewards locating a factory close to the highest-volume resource inputs, and refineries often benefit from proximity to water sources when fluids are involved. Still, a station manifold alone can require at least 10 tiles in one direction, so allow ample horizontal space around the factory footprint—target 11x11 tiles minimum—and reserve area for sideways growth on one or two sides. Open fields, along cliff edges, or by shorelines all provide the breathing room needed for later expansion.
Orientation and Light
Align the foundation so that a flat edge faces the likely direction of expansion—parallel to a shore, cliff edge, or existing track approach. This also allows the longer axis of a station manifold to extend toward when new station capacity is needed.
Enclosing a factory completely in opaque walls can improve performance, but natural light makes any structure easier to build in and more pleasant to use. Orient the building to capture sunlight through windows or gaps on at least one facade.
Scale, Height, and Aesthetic Form
Minimum ground floor size is driven by station geometry. Because certain walkways and other pieces align to the center of a foundation, using odd outer dimensions such as 9, 11, or 15 tiles means the building’s center falls on a tile center—useful when symmetrically placing features.
Floor height is smallest adequate to enclose the tallest machine on that floor: refineries need about eight wall courses, manufacturers four, and constructors or assemblers three. Four-high floors add little cost and allow swapping a constructor for an assembler later. If crude expansion is ever needed, you can remove an entire floor and increase a single clearance.
Distinctive—but not necessarily, choose freely from a range of perspectives about monumental forms—elevations and massing help a building generate sense of place from a distance. Configure the overall volumes and proportions to frame a view of the landscape, and let the site's views of waterfalls, canyons, or sunrises inform where you place your windows.
Keep pump-heavy stages that process fluids low in the building to minimize reliance on vertical pumps, ideally on the ground floor where they can draw water directly from a nearby lake and feed gravity-driven flows onward.
Where the Core Goes
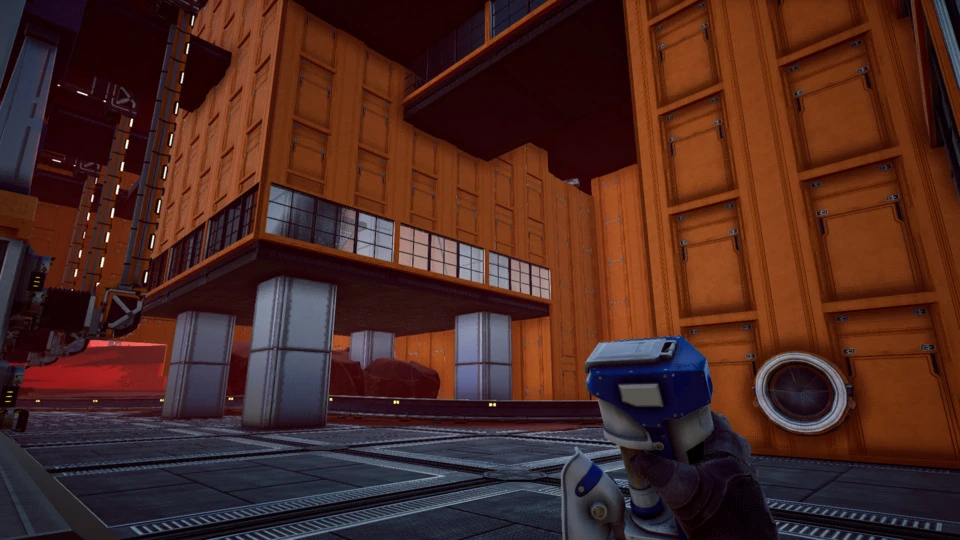
A building core is rarely an aesthetic asset. It tends to fill with machinery, pipes, and lifts that most players would rather hide behind opaque walls. That choice has consequences: it blocks views, limits light, and pins down where doors can go. It also forces people who need to cross floors to walk around it. For these reasons, a Central Core often works best in the middle of a factory floor, where its drawbacks are evenly distributed.
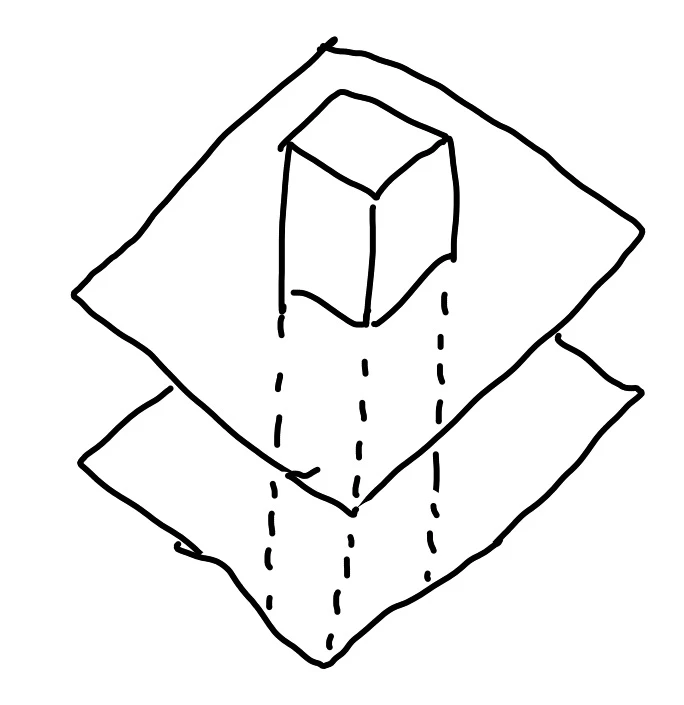
The main trade-off is that a central core splits the floor into separate zones. Belts and pedestrian paths must route around it, so it is wise to divide the floor into distinct zones on either side and leave extra margin for circulation. Central cores also constrain future expansion. If you expect the factory to grow linearly, a Wall Core is the safer choice.
In a Wall Core, you dedicate one or two tiles of depth along an entire wall to utilities and vertical circulation. The natural direction of expansion is away from that wall, so place it where expansion is impossible (next to a cliff or tree line) or unwanted. Since the wall is typically opaque, it will cut off light and scenic views on that side; rather than fight that, plan the core where you want to block sightlines anyway, or leave the structure exposed for visual interest.
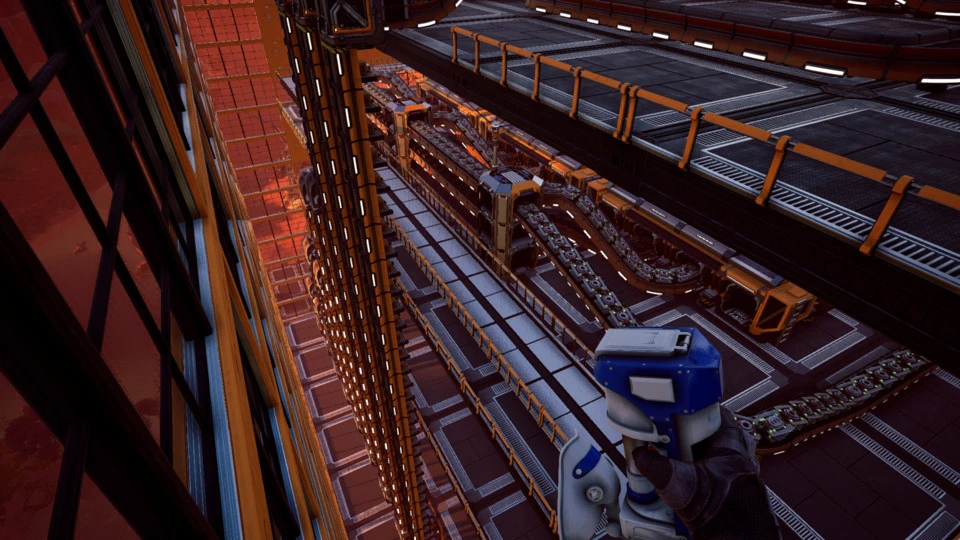
A Corner Core is a smaller variant. Instead of dedicating a full wall, you put compact cores at one or more corners of the building. This opens the rest of the wall for windows, train access, and views. It does pin the corners in place, so it is only a good pattern when you are confident about the building's final footprint.
Core Footprint
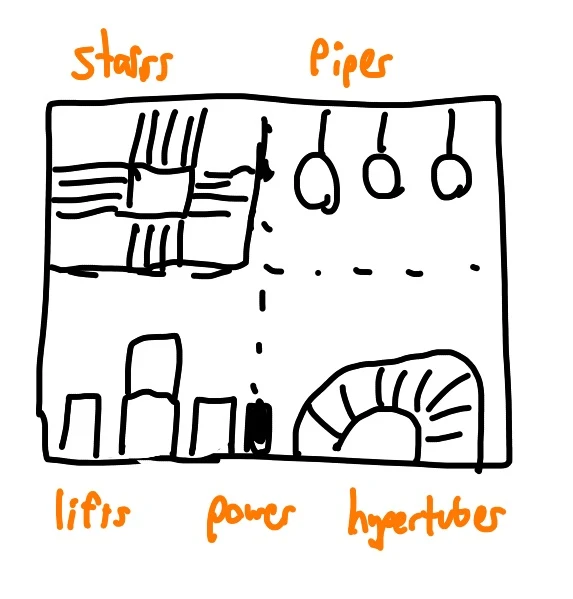
How deep should a core be? A single foundation tile can technically support one stairwell plus many vertical conveyors, pipes, or hypertubes. The trouble is that packing those items tightly makes them hard to reach later, and many vertical structures require wall attachment rather than open-air construction. The practical rule is to plan one vertical "track" per use and keep the core relatively shallow—one or two tiles deep rather than four or five. Extra empty space just accumulates junk.
There is a caveat for central cores. Pumps are wide, conveyor lifts need extra space to extend vertically, and hypertubes curve. Placing utilities on both sides of a single floor tile is possible but awkward. For a wall core, one to two tiles of depth is enough because access comes from only the inner face. For a central core with two or more faces, leave two to three tiles so equipment on opposite sides does not collide.
What Goes Inside
Several specialized sub-assemblies fill the core. Each has its own role and best practice. See the sections on Power Chase, Elevator Bank, Emergency Stairs, Lift Chase, and Pipe Chase for details.
Power Chase
Each floor needs power, and the Building Core is the obvious place to route it. Based on the Single Power Link principle, designate one core to carry power up the building. Use double-sided wall power outlets at each floor to connect this chase into the floor's local grid. Keep the chase visible—don't bury it under pipes or lifts—so you can disconnect or rewire sections without dismantling the wall.
Elevator Bank
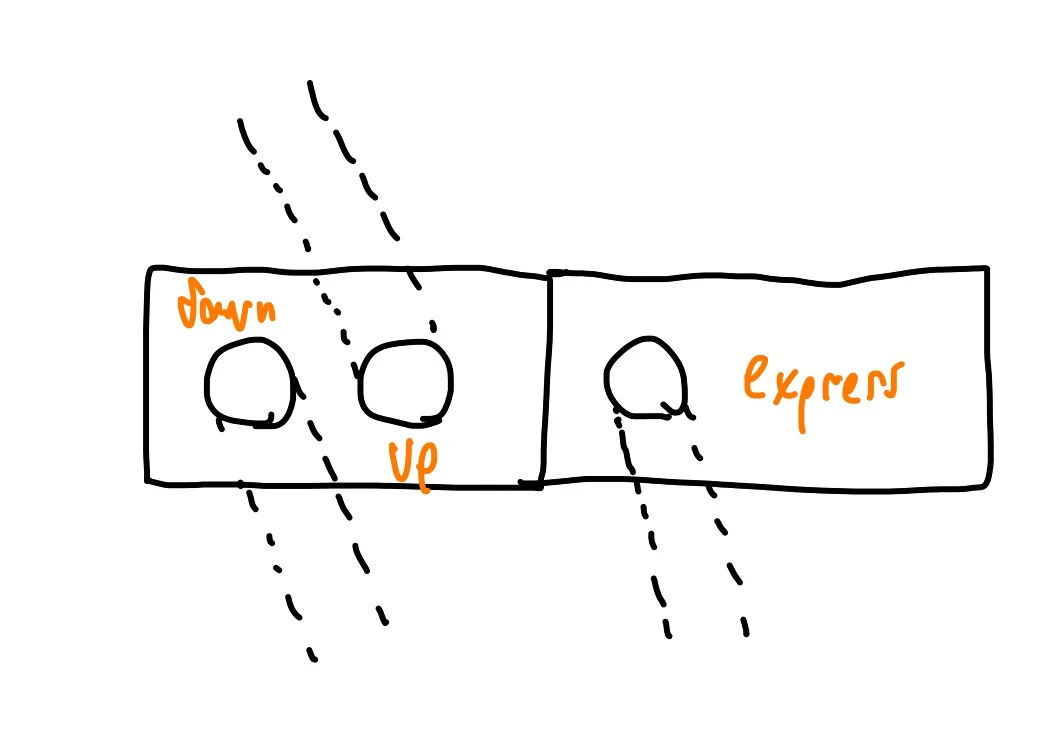
People move between floors via an Elevator Bank: a wall, within the core, with hypertube entrances for rapid vertical travel. For navigability, pick a convention (for example, the up hypertube always being the right one) and keep it consistent across every factory.
You can fit two entrances per wall tile if you center them on the two rectangular zones of the tile. Placing them closer risks a rider being pulled from one entrance directly into the adjacent one. Power the entrances from the Power Chase within the core.
In larger buildings, connect the Elevator Bank to a central Transit Hub so people can quickly transfer between intra-factory and inter-factory transport. For heavily trafficked routes, build dedicated express elevators that skip floors, rather than stopping at every level.
Emergency Stairs
Power failures will strand you between floors unless you have a manual route. Place at least one stairwell in the core, with doors at each floor. That same route doubles as maintenance access; consider widening it with walkways or platforms to make core work safer and easier.
Lift Chase
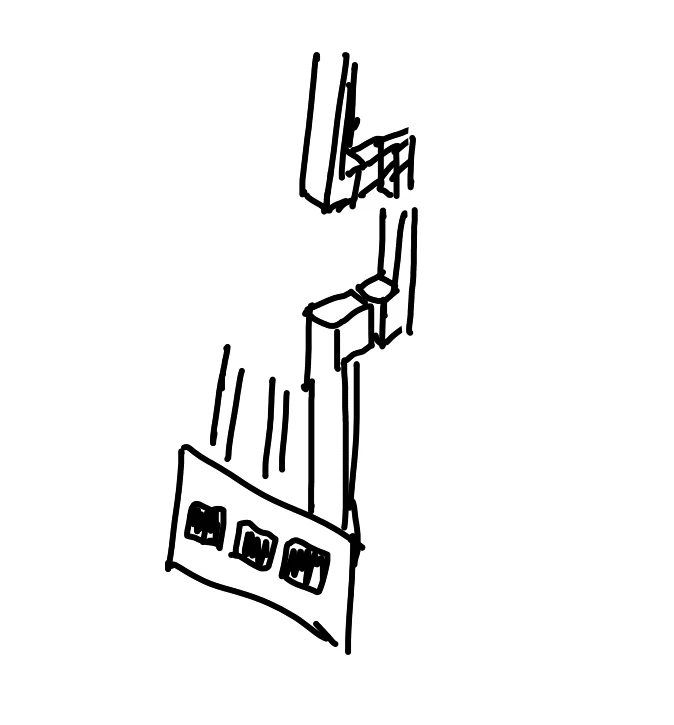
For vertical material movement, reserve a large part of the core for a Lift Chase: a stretch of wall dedicated to conveyor lifts. As Build Up implies, most material flows upward, except for finished products coming down to the ground floor station. Three-hole conveyor walls let you connect lifts to the factory floor. When a lift is not tall enough, connect them end-to-end. The core footprint guideline ensures sufficient clearance on joins.
Pipe Chase
Fluids move between floors similarly. Pipe Wall Holes connect the floor to the chase, and wall mounts keep pipes vertical. Three holes per wall, aligned with the lift chase pattern, is a practical layout for running both systems.
Use pumps for vertical lifts—but expect them to clip through walls. Check pump alignment carefully and attach pipes to the nearer or farther wall as needed to keep everything clean. Pumps need power from the Power Chase to run.
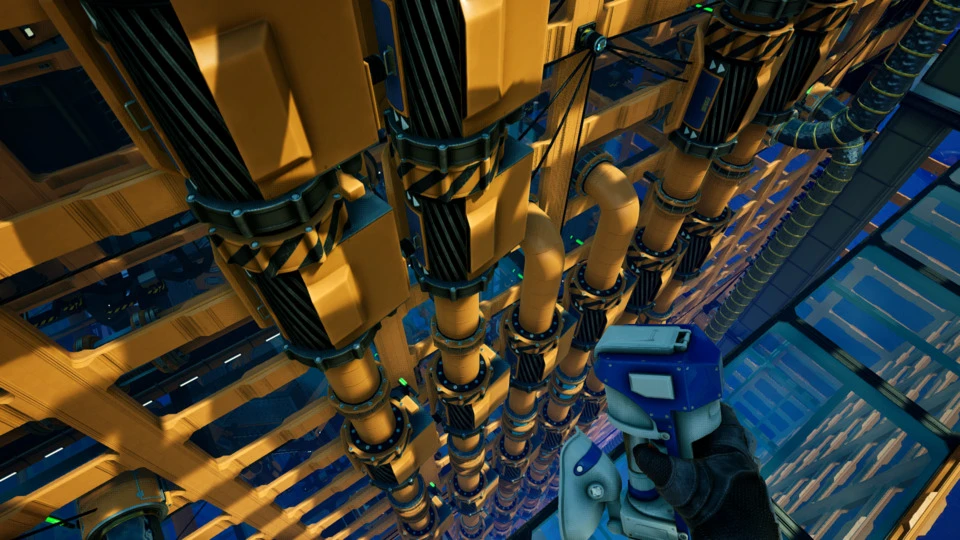
Making It a Place
Once core layout is settled, aesthetics return to the fore. Several tricks help the building feel intentional and liveable, not merely functional.

Entrance Transition
Entrances deserve particular attention. A sudden no-man's-land transition from outdoors to factory floor feels jarring. Christopher Alexander's pattern language suggests bringing in changes in level, light, surface, or direction at the entrance—use that to distinguish a clear edge. Transit hubs are often the first and last points of contact for players each journey, so make those the most considered.
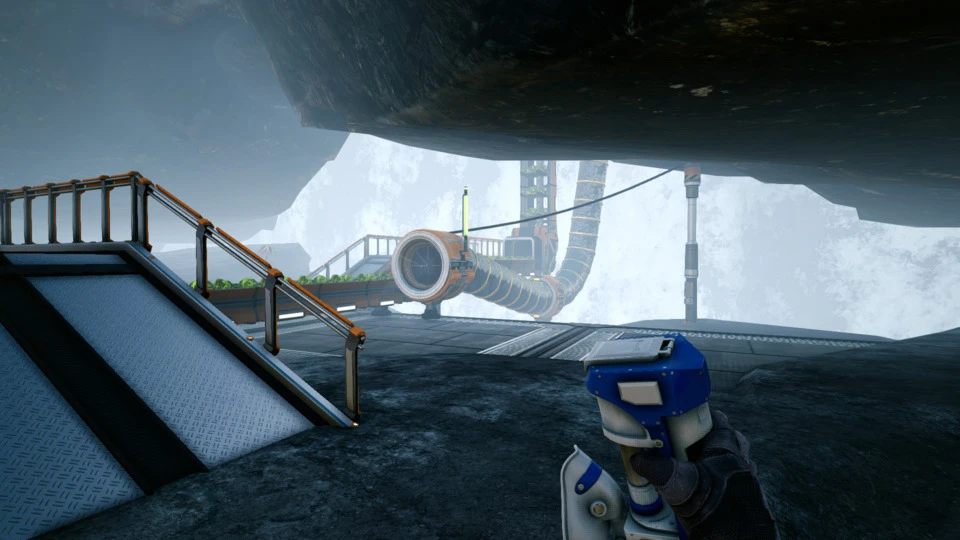
Trains offer a special case: pay attention to what players see both from the station and from the train's approach, and plan that view deliberately.
Ground Connection
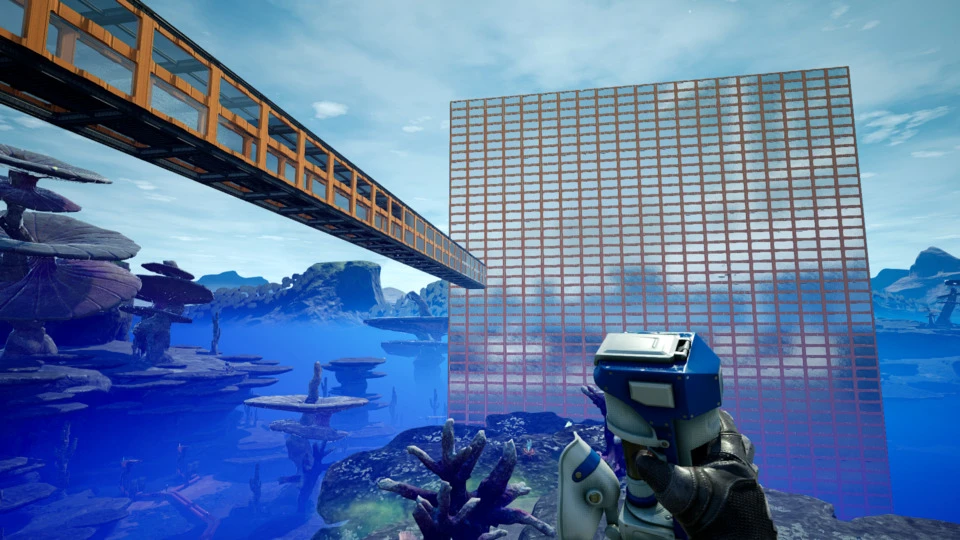
Floating buildings have their uses, but they rarely feel permanent. Connect buildings to the ground with columns, full-height walls, or pylons anchored into cliffs; when a building starts significantly above grade, extend the core down to ground level with a stair and an elevator, so a ground-floor entrance is always available.
Structural Expressionism
You do not need to hide the core behind opaque walls. Exposing it provides diagnostic access to critical components, brings in more light, and can keep sightlines to scenic views from one side of the structure, based on house preferences for such functional building spaces.
Element of Surprise
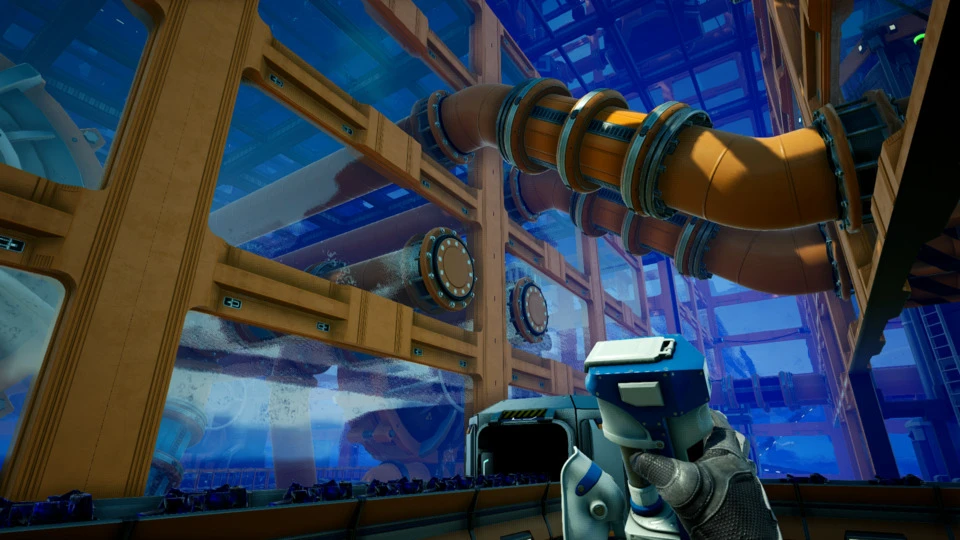
Fully visible, totally regular factories become forgettable once their novelty wears off. Selective concealment creates contrast, and sightlines reward a player who climbs to the right point. Use walls, floors, and terrain to hide parts of the factory or views, and reveal them from limited vantage points—a brief hypertube pass that shows the outside, sunny views through glass, a roof threshold, train rails looping behind a waterfall.
Material Flow Behind the Core
With vertical infrastructure in place, it is time to fill in the factory floor. The flow pattern from the Building Core to nearby production zone is straightforward and repeats for every zone on the floor.
Comfortable Margin
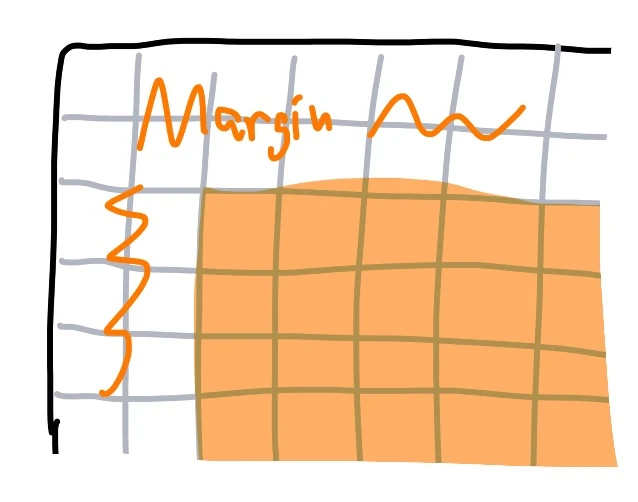
Factories inevitably accrete extra belts over their lifetime. Routing those through the middle of a production zone makes everything harder to reconfigure. Keep one tile—preferably two—between walls or between zones for later routing and for walking during maintenance.
Belts in the Margins
That margin is the main channel for inbound materials, outbound products, and support pipes. There are three practical arrangements for belts here: free-form belts, stackable supports, or splitters placed at corners.
Stacked Belts
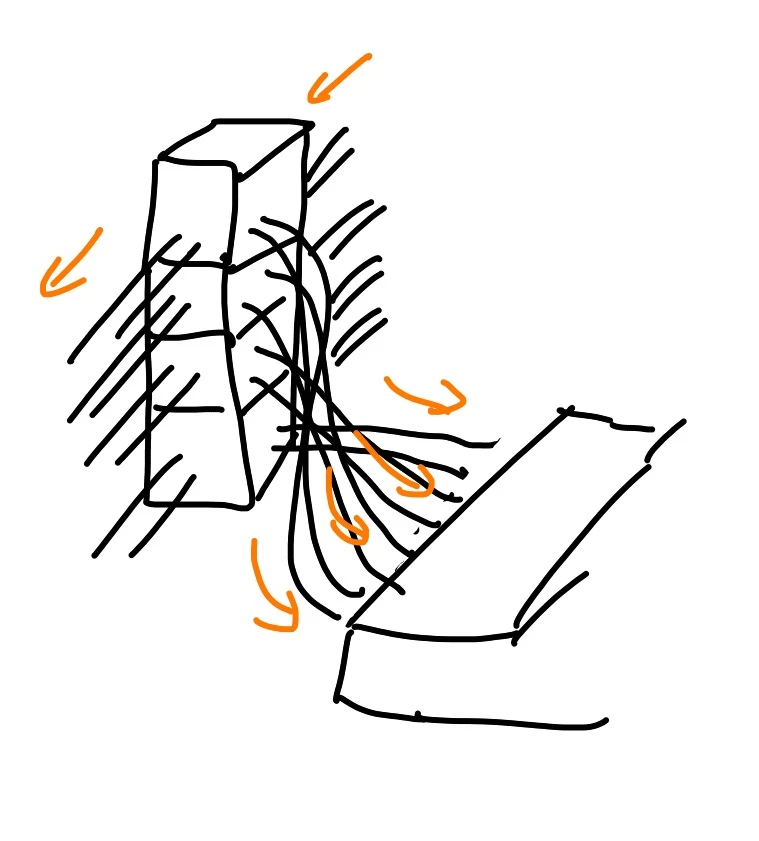
Running many belts side by side is tempting but inefficient. It eats more floor space, complicates later splits, and connects awkwardly to a manifold for feeding manufacturers. Prefer vertical stacking, via stackable belt supports or splitting towers, to fit more throughput into less space.
Where possible, keep one vertical belt level for a particular material rather than putting many parallel lines at the same level. That reduces the need for complex branch crossings later.
Splitters at the Corners
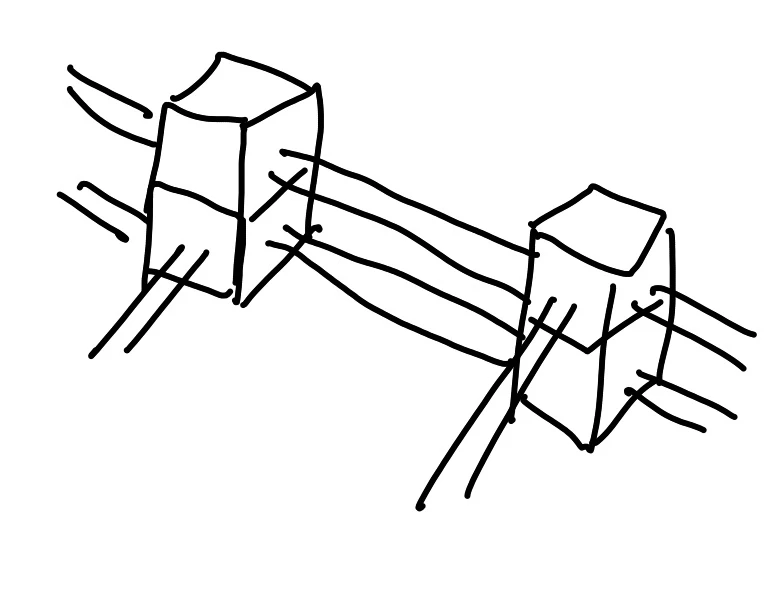
Turning a belt around means making a corner without immediate splitting—but future expansions will require splitters there, and injecting a splitter into densely packed belts is painful. Instead, plan splitters and mergers at every intended junction and corner of your network. Stack them in towers to move multiple materials, then connect small straight belt pieces. This reduces alignment guesswork and makes future inserts simple, giving a much easier system to change—matching an in-house preference for architectures that support reversible change.
Pipes Over Belts
Refineries mix fluids with materials. These can cross paths during routing, but avoid a cross-layer solution for crossings that requires perfect routing: place belts and splitters on the ground plane, and stack pipe runs above them. Splitters are easier to place on ground; pipes are easier to suspend overhead.
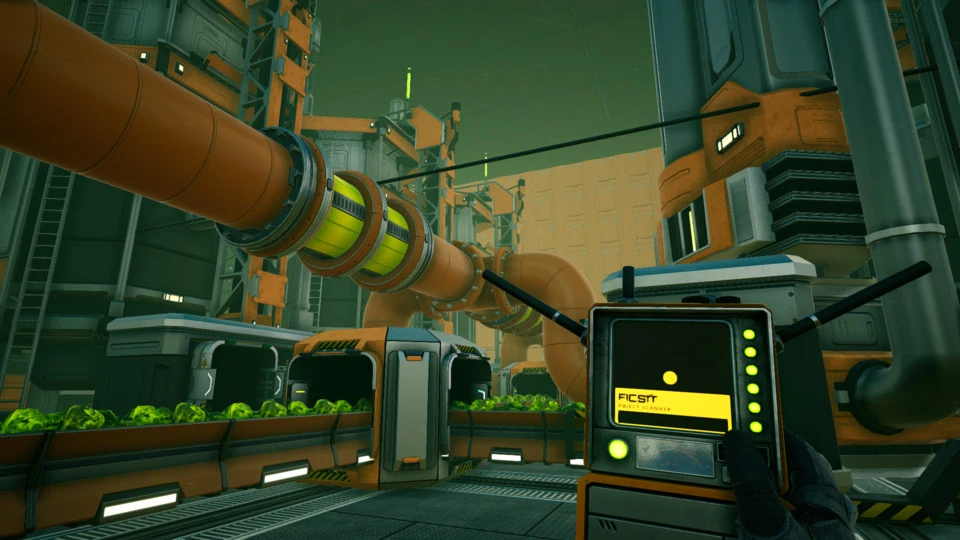
Pedestrian Paths
Designated walkways are useful even if you spend most of your time in the air. Leave room in margin space, or add walkways if no space exists; pedestrians circulate along the sides where you have already set the margin—and they need continuous routes. Treat other building assets as walkable surfaces: refinery tops, houses floors over storage containers, or points with equipment on them to serve as platforms and short-cuts. This often occurs without vertical structure in mind; plan aisle space the grid accommodates, since otherwise box-in leads to no place to work.
Zone Layout
Stage Cascade establishes the overall flow of materials between zones and what each zone produces. Filling in a zone comes down to the arrangement of machines and belts within it.
Expansion Axes
Design zones for later expansion. The site orientation and the position of Building Core(s) govern these expansion axes, so align each zone with room to grow and orient its Production Arrays accordingly.
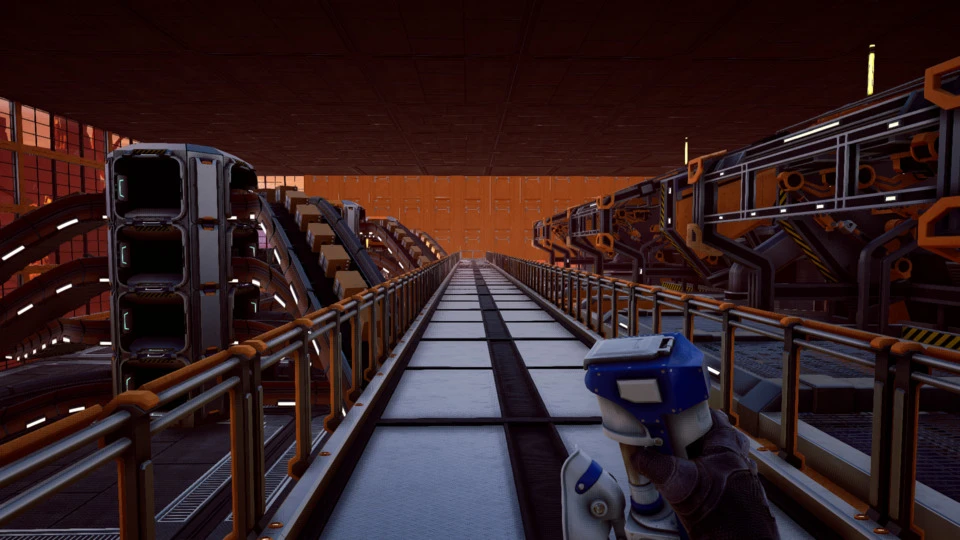
Production Array
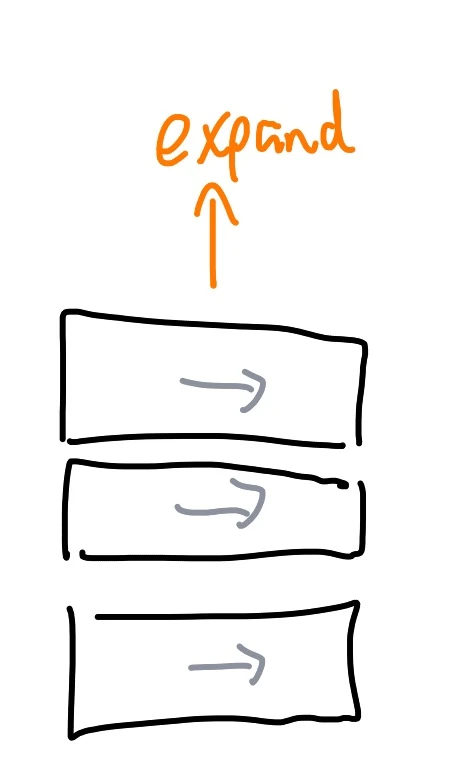
The Production Array is the basic unit of production: a series of machines (constructors, assemblers, and so on) arranged side by side in a readily expandable configuration. In general, pack machines in a Production Array as close together as possible to save space. High-volume parts may require a Production Array with multiple machines feeding each other; consider their ratios carefully when doing this.
Feed Production Arrays using a Belt Manifold or Sushi Belt.
Belt Manifold
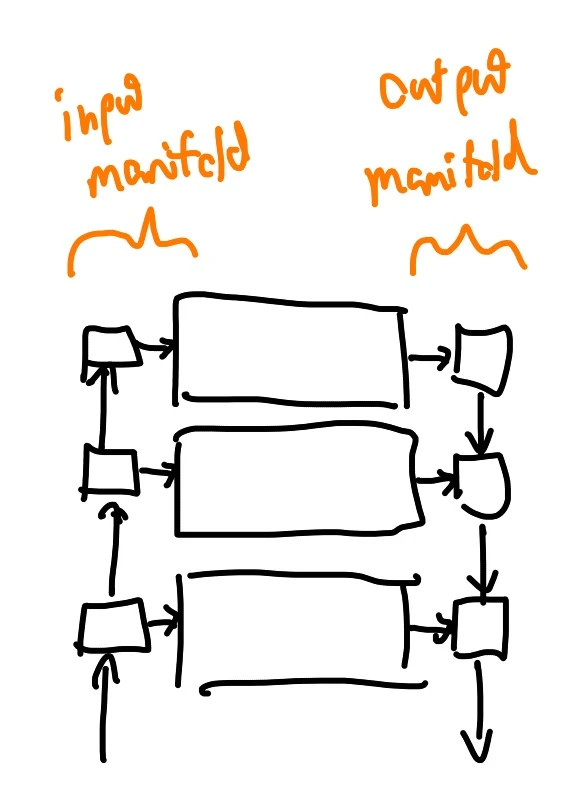
A Production Array is a surface through which materials flow and are transformed. Materials must flow efficiently across both sides of this surface. Except where belt throughput is insufficient, prefer a manifold: they are compact, easy to lay out, and readily expandable.
A Belt Manifold sends materials along a belt (or pipe) in a straight line along the axis of expansion, at right angles to the machines in the array. At each machine, use a splitter to feed that machine’s inputs. Use Splitters at the Corners to make the layout easy, and Stacked Belts to keep it compact. Connect each manifold to Belts in the Margins via splitters.
On the output side, place another manifold composed of mergers to gather finished products from each machine in the Production Array. Belt Manifolds can also serve trains or storage systems.
Corrugated Manifold
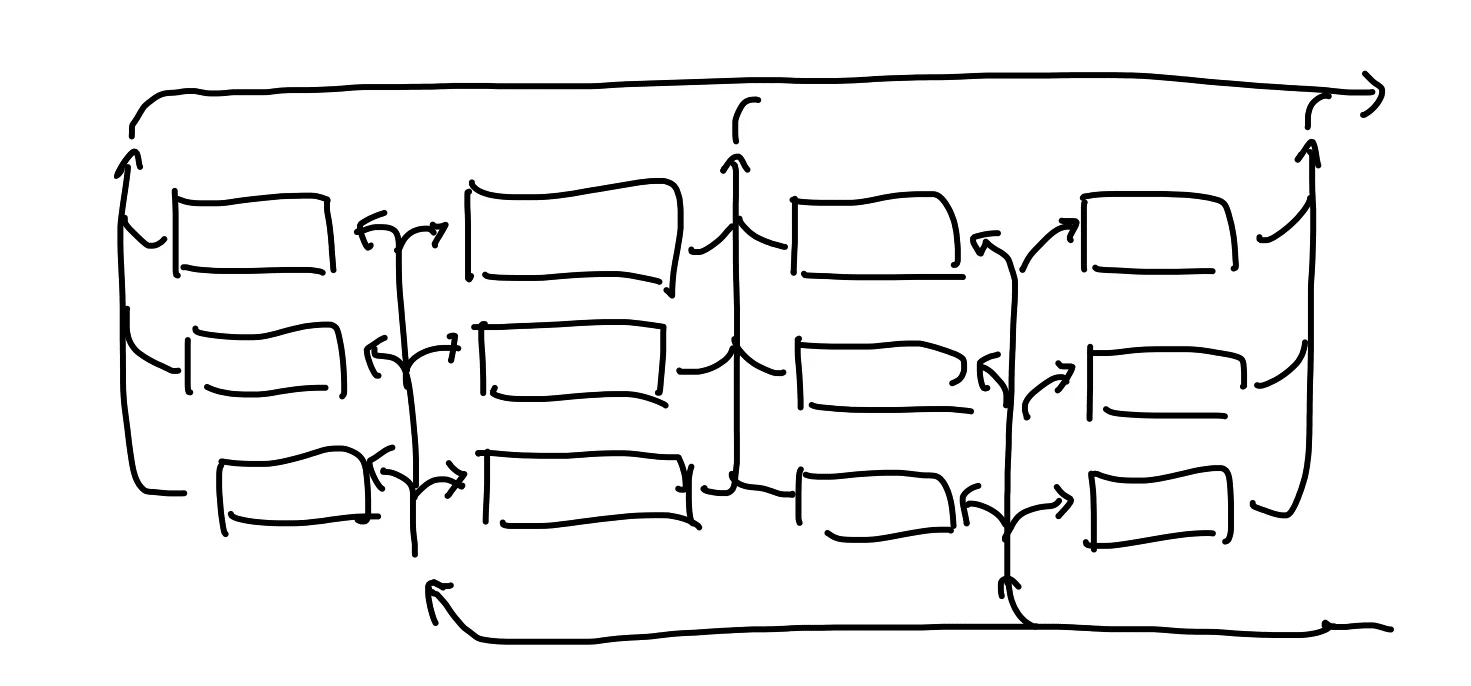
Where multiple Production Arrays sit side-by-side and belt capacity is sufficient, adjacent arrays can share Production Manifolds. This requires adjacent Production Arrays to face in opposite directions. The resulting input and output manifolds alternate in a crinkled “corrugated” pattern. Input and output lines need not face opposite directions: lay them on top of each other using Stacked Belts, to one side, to facilitate expansion.
Sushi Belt
Some factories need diverse parts or low volumes, or must fit in a compact space without high efficiency. A Sushi Belt suits these cases: combine many part types onto a single belt, and use Smart Splitters to feed specific parts to machines. This works well for manufacturing filters, ammunition, and similar items, perhaps drawing on the same input as a Shopping Mall. Collect produced components via a dedicated Belt Manifold, or return them to the Sushi Belt.
Sushi Belts deadlock under backpressure. Each splitter should use an overflow setting to let excess parts flow along the main belt line, and discard excess components via Load Shedding.
Sushi Belts are inefficient if materials are poorly interleaved. Consider a storage container for each object type, with a Belt Manifold merging their contents.
Overflow Chain
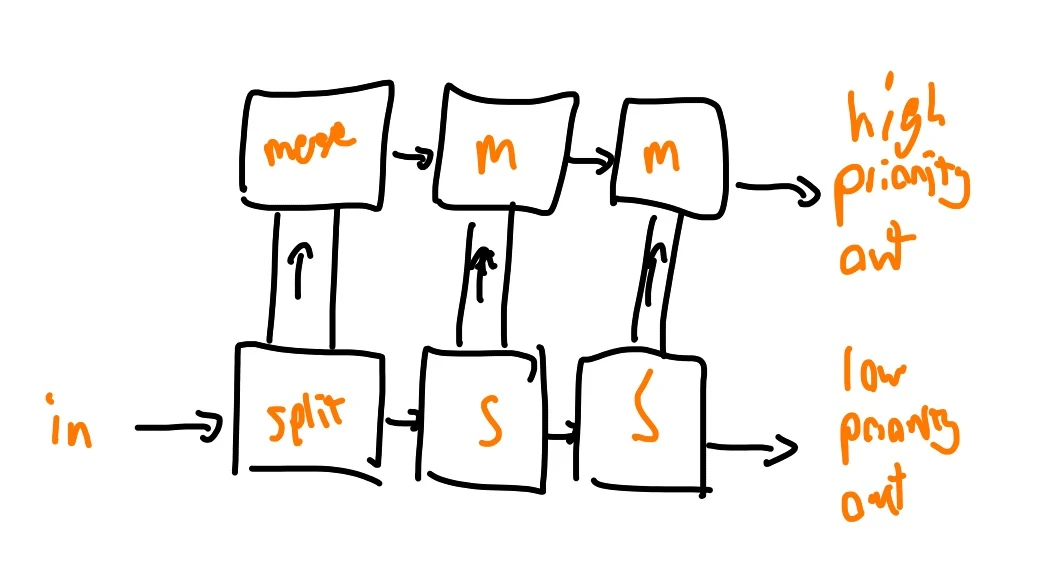
Sometimes item priority matters—for instance, feeding only excess materials from a Shopping Mall to an Item Sink. Programmable or smart splitters with the “overflow” option handle this, but so does an Overflow Chain, which preferentially splits or combines belts using only plain splitters or mergers.
For a splitter chain, construct n (for example, three) splitters in a row, with n mergers placed above or below them. Connect each splitter to the merger above it via a pair of conveyor lifts on each side. The final output of the splitter chain becomes the low-priority output, and the merger output is the high-priority output. When both are free, 1/(3^n) of the items reach the low-priority output and the remainder take the high-priority path. If the high-priority output stalls, items flow onto the low-priority output as overflow.
Inverting the technique—send items into the merger chain and withdraw from the final merger—makes items preferentially drawn from the splitter input.
Container Chain
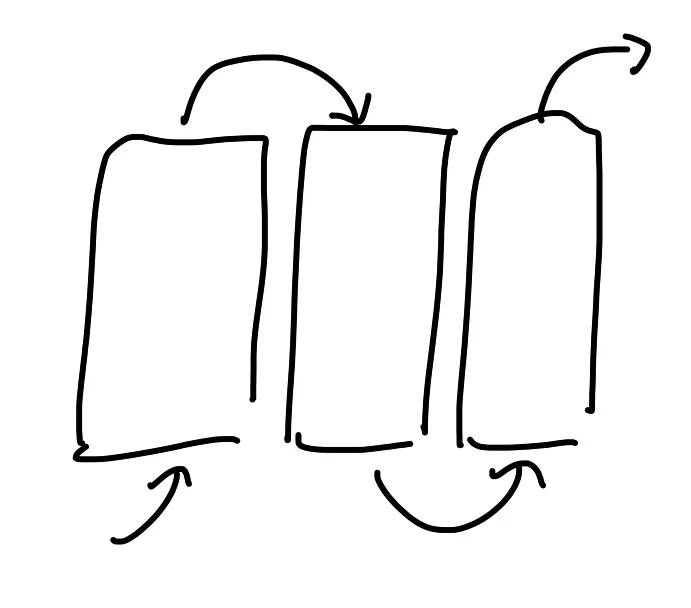
Storage containers are convenient but small. To store large volumes (for local construction or This Is Not a Place of Honor), place many containers side by side facing opposite directions, connecting each container’s output to the next container’s input. This ensures items always flow toward the final container.
A chain, rather than a manifold, permits incremental expansion and contraction: add new containers to either end, and delete containers from the start of the chain since they will be empty. The chain can also drain from a single point.
Local Power
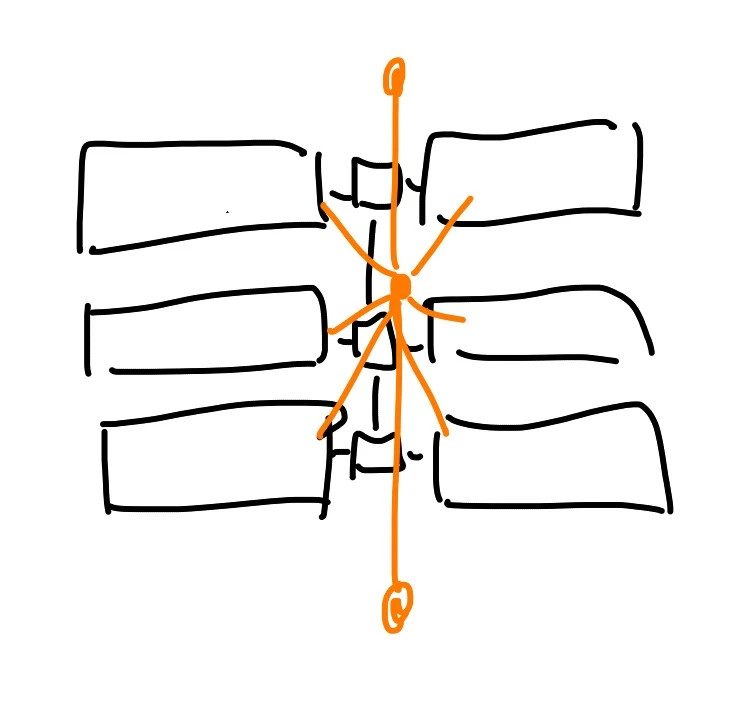
After placing machines, storage, and belts, attach power lines. Wall power poles route power along factory walls, but individual machines often need free-standing poles. Place these along the Expansion Axis between two Production Arrays, spacing poles so a single line of poles powers machines on each side. Use tier 2 or 3 power poles to reduce pole count.
Single Power Link instructs that these power lines link to the Power Chase and then to the Main Grid via a single path: avoid mesh-like power grids.
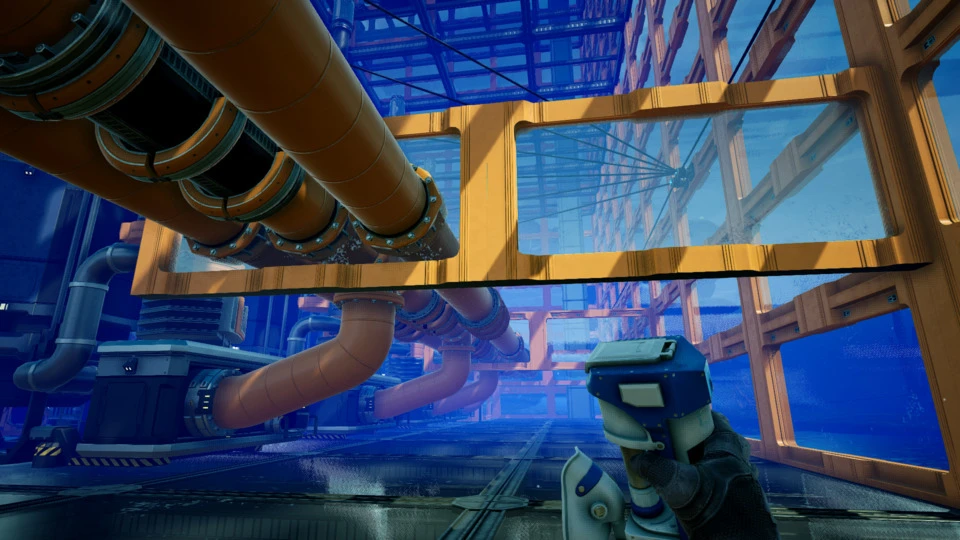
Refineries
Refineries present special challenges beyond most machines.
Dealing With Double Outputs
Most machines in Satisfactory take n inputs and produce only a single output. This means no acyclic graph of such machines (so long as Immiscible Materials is followed) can deadlock. Refineries break this rule: some produce two outputs. When one output fills, the refinery stalls, potentially taking down an entire production chain.
Adding buffers usually obscures the problem by slowing system response to control inputs, and the extra storage rarely resolves the underlying imbalance. Burning fuel can discard some refinery products but requires power, which may not suffice.
Find a way to independently consume or discard every double-output refinery product: feed a factory needing only that refinery item (rather than both, which could deadlock), send excess to an item sink, or route it to a Recycling Train.
Recirculating Refinery
For excess heavy oil residue, fuel, plastic, or rubber, a peculiar solution exists. It relies on alternate recipes to build a factory that takes at least two units of plastic as a one-time primer and, after an initial ramp-up, converts arbitrary volumes of input heavy oil residue, fuel, rubber, and plastic into arbitrary volumes of rubber and plastic. Consuming either product (or any combination) from this factory prevents deadlock. The process demands substantial power and space but is remarkably material efficient.
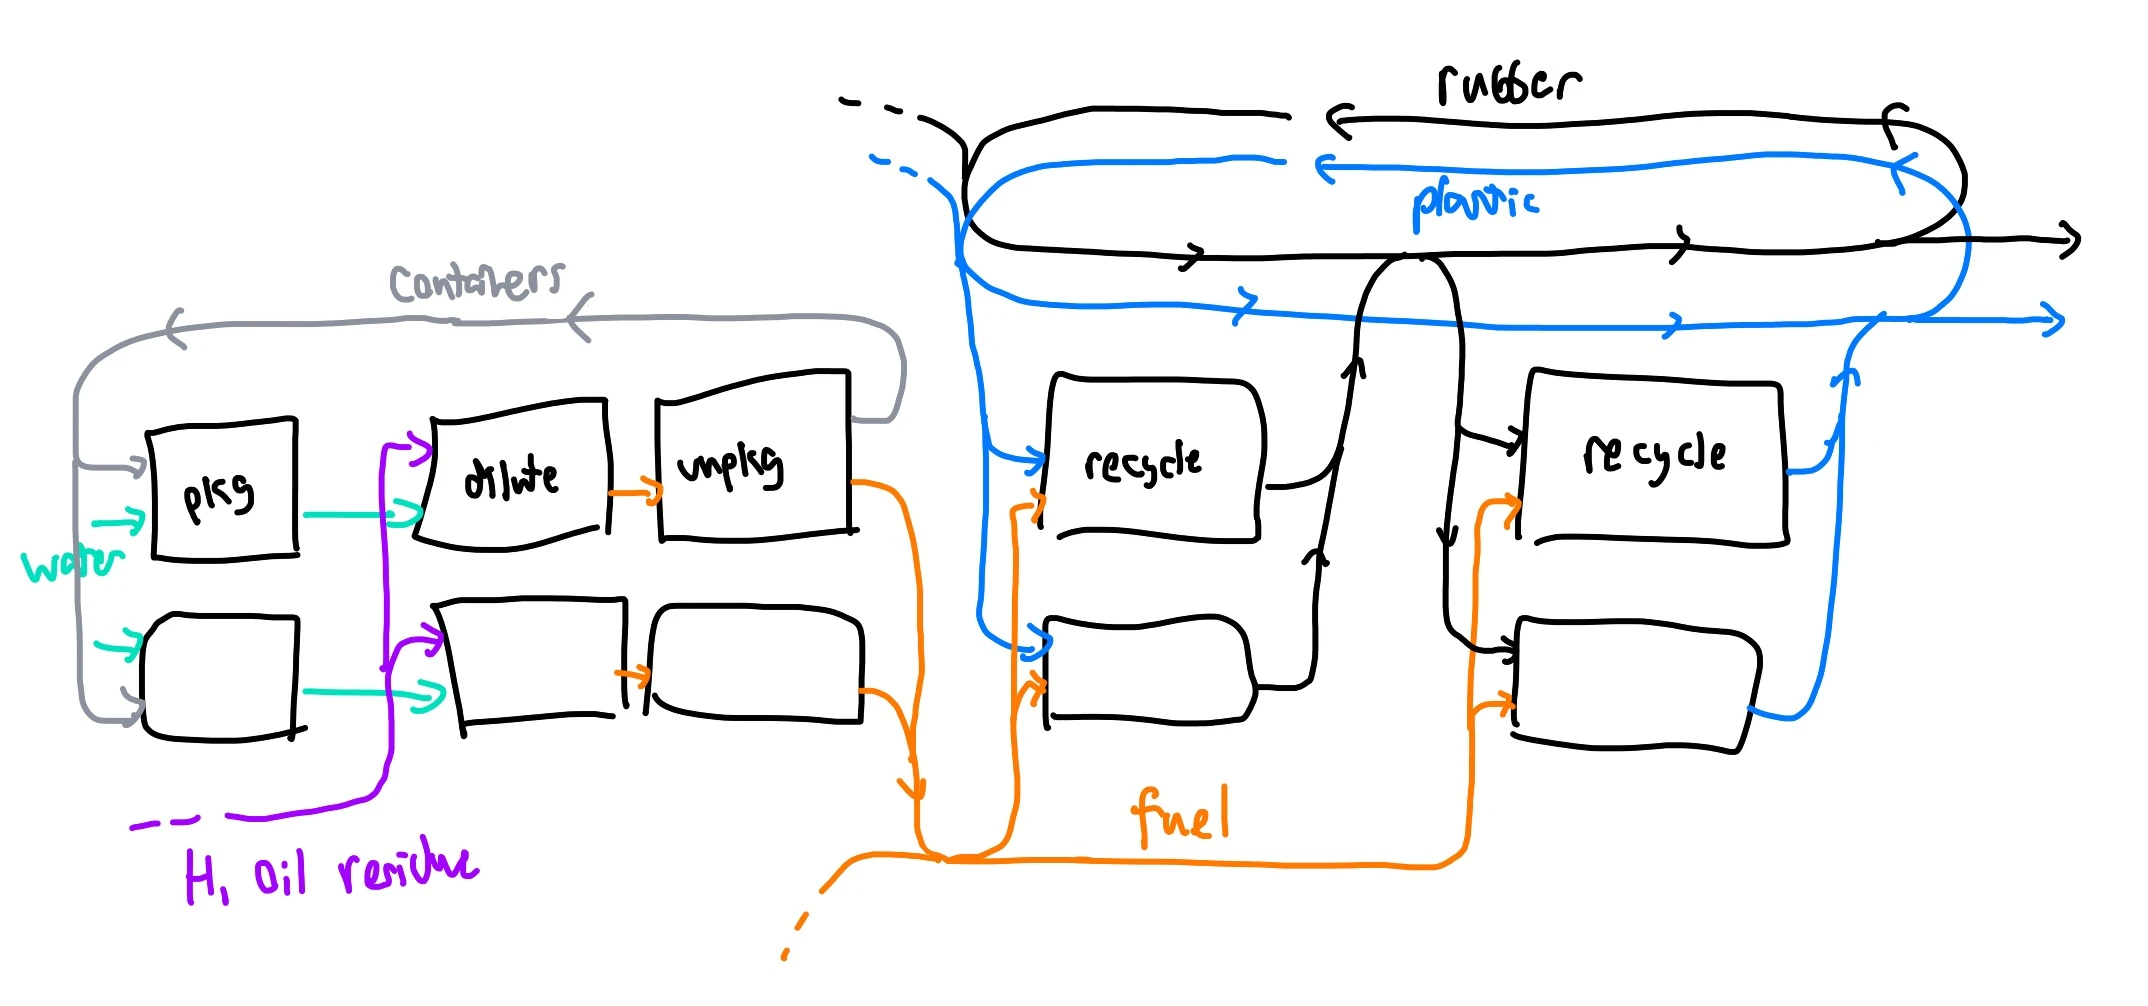
Two alternate recipes make this work: one consumes fuel to convert 1 rubber into 2 plastic, the other converts 1 plastic into 2 rubber. Connecting them in a loop, with some seed plastic (or rubber) to kickstart the process, the factory consumes fuel and fills both loops with rubber and plastic. Bleed off either or both loops via a splitter to send products to other factories.
For heavy oil residue consumption, use the Diluted Fuel recipe in a closed loop: a water extractor feeds a water-packaging refinery. The bottled water combines with heavy oil residue to yield packaged fuel, which is immediately unpackaged and fed into the refinery loop. Reuse the empty canisters for the next round of water bottling. After an initial ramp-up with injected canisters, this factory is self-sustaining.
Finishing Work
With the building laid out, finishing touches fill gaps and connect disjoint parts.
Walls Come Last
Walls serve essentially no structural purpose in Satisfactory. Building without walls is entirely legitimate—unclad factories are easier to expand. When expansion goals are met, though, cladding a building in walls improves performance or just looks. Do this once the basic floor layout is solid so you do not undo your work. Place windows at this time, following Access to Light, Scenic View, Element of Surprise, and similar principles.
Maintenance Access
Crawlspaces, miners, Building Cores, and other concealed spaces are easy to wall off and forget—but that complicates repairs and improvements later. Set aside room for maintenance access: doors and stairwells reaching those spaces. Jetpacks have limited fuel: in vertical spaces, place ledges, foundations, and walkways to give stable perches while working.
On-Site PPE
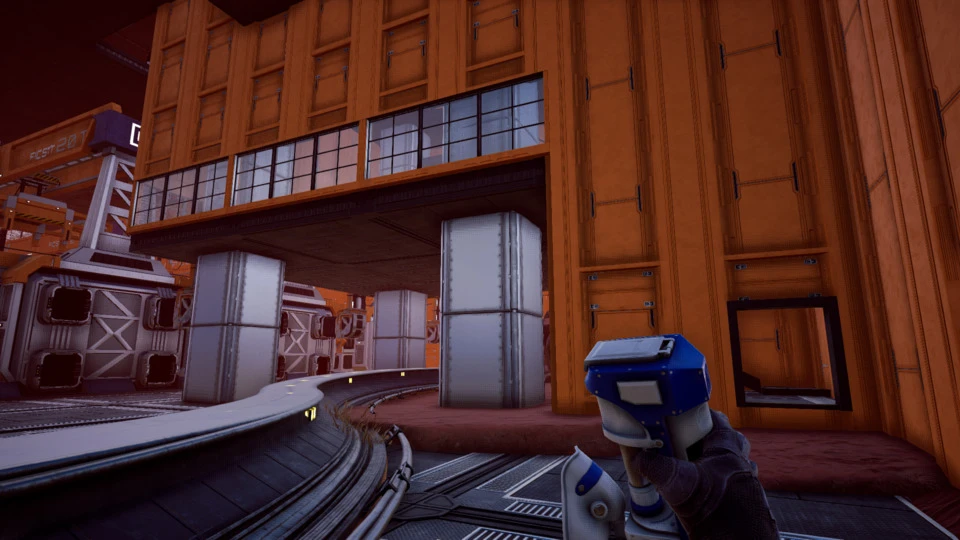
Arriving at a factory only to face nuclear radiation, hostile creatures, or gas without proper equipment forces a frustrating round trip to the nearest Shopping Mall. Stock a local chest with relevant protective gear—hazmat suit, filters, and so on—instead. Position this chest outside the hazardous area, near the Transit Hub or Entrance Transition.
Final Thoughts
Satisfactory is good.