
Building a REST API with GitHub Copilot
In this installment of our GitHub for Beginners series, we’re using GitHub Copilot to scaffold a backend REST API. We’re building the API for Planventure, a travel itinerary builder. The goal is an MVP that handles user authentication and trip management, ready for a frontend to consume in a future episode.
What we’re building:
- A Flask-based REST API
- SQLAlchemy for database support
- User authentication with password hashing and JWTs
- CRUD operations for trips, where each trip has a destination, start/end dates, and itinerary coordinates
Setting Up the Environment
Start by forking and cloning the planventure repository, then cd into the planventure-api directory and switch to the api-start branch. Next, create and activate a Python virtual environment:
python3 -m venv venv
source venv/bin/activate
venv. Then install dependencies:
pip install -r requirements.txt
flask run --debug
GET request to 127.0.0.1:5000 using Bruno should return the welcome message. Be sure venv/ is in your .gitignore.
Generating the Database Setup
With the environment ready, we can let Copilot generate code. Open app.py and Copilot Chat, choose Ask, and enter:
@workspace Update the Flask app with SQLAlchemy and basic configurations
Then return to Copilot Chat and ask it to:
@workspace update requirements.txt with the necessary packages for Flask API with SQLAlchemy and JWT
requirements.txt.
Creating the Models
At this point, we can use Copilot Edits to create the data models. The requirements are defined in a GitHub issue: the User model needs an email, a password with hashing, and timestamps; the Trip model needs a destination, start and end dates, coordinates, an itinerary, and a relationship to the user.
Open app.py and requirements.txt, then drag them into the chat window. Select Copilot Edits, choose the Claude 3.5 Sonnet model, and send:
Create SQLAlchemy User model with email, password_hash, and timestamps. Add code in new files.
Next, ask Copilot Edits to create the database tables by generating a Python script:
Update code to be able to create the db tables with a python shell script.
python3 init_db.py
With the User model working, ask Copilot Edits to build the Trip model:
Create SQLAlchemy Trip model with user relationship, destination, start date, end date, coordinates, and itinerary
python3 init_db.py
trips table exists.
With both models in place, stage all the changes and use Copilot’s sparkle button to generate a commit message for you, then click Commit.
Securing the API with authentication
The next milestone, described in this issue, is adding authentication to the API. The requirements call for password hashing with salt. Return to Copilot Edits and send the following prompt:
Create password hasing and salt utility functions for the User model.
Review the summary Copilot provides, then inspect each file for the relevant changes before saving. Next, set up JWT token generation and validation with this prompt:
Setup JWT token generation and validation functions.
Because Copilot's responses vary between runs, the exact changes may differ from what you expect. Take the time to review all suggestions carefully and ensure you understand what the code does before saving.
Now add the registration route with Copilot Edits:
Create auth routes for user registration with email validation.
After accepting the changes, test the route in Bruno. Create a new POST request using the same URL you used for the earlier server check, appending /auth/register. For example, if your base URL is 127.0.0.1:5000, the full URL becomes 127.0.0.1:5000/auth/register. Under the Body tab, select JSON from the dropdown and enter the following:
{
  "email": "[email protected]",
  "password": "test1234"
}
This password is only for demonstration — use something stronger for real accounts. You don't need to supply an auth token yet, because the server returns an access token when you register. In the Headers tab, add Content-Type with the value application/JSON. Send the request; a 200 response confirms everything is wired up correctly.

Back in VS Code, open planventure.db, refresh it, and select the users table — your new user should appear there.

Next, create the login route with Copilot Edits:
Create login route with JWT token generation.
Once the route is in place, test it in Bruno by right-clicking the POST register request in the left panel, selecting Clone, and renaming the copy to login. Send the request — a successful response indicates the login works.
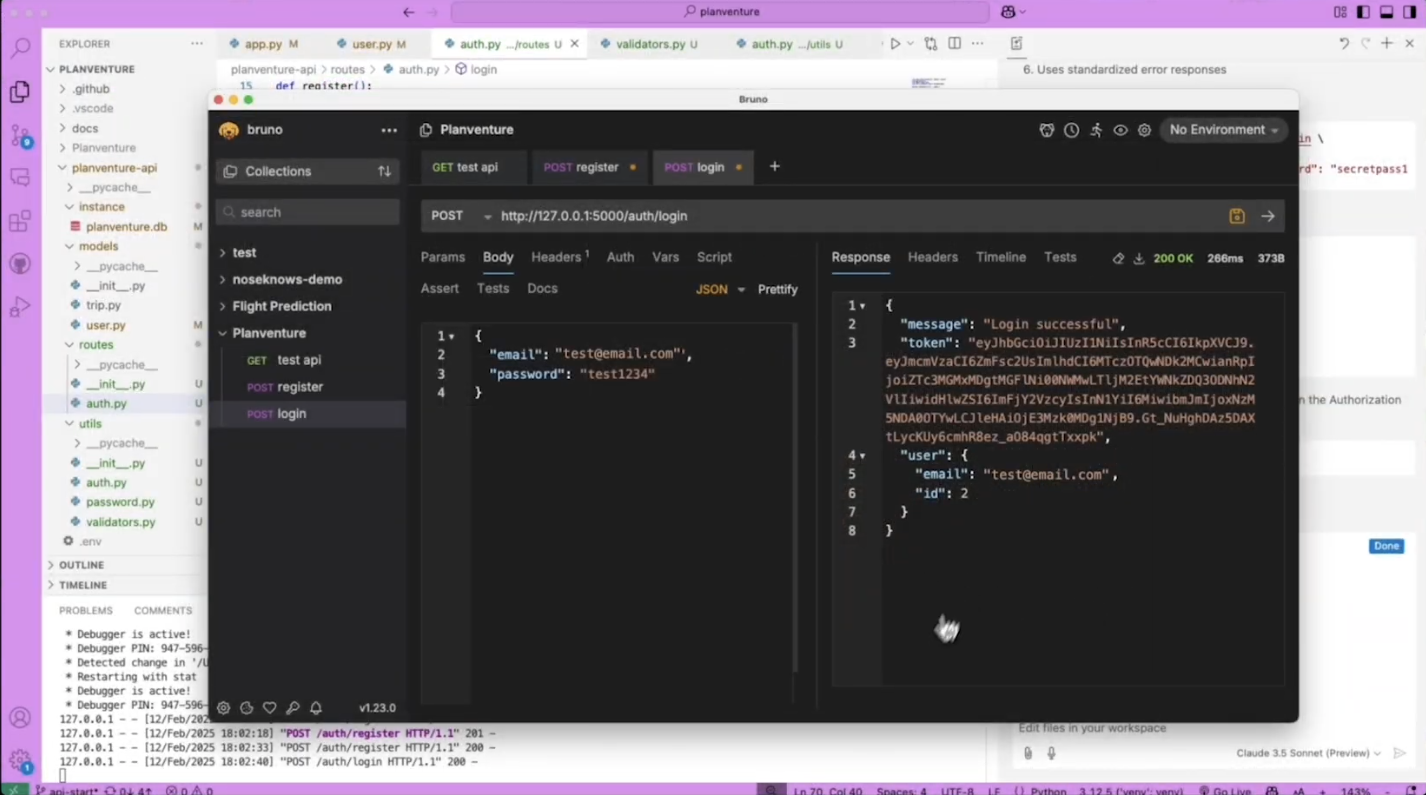
The last piece of authentication is a middleware to protect your routes. Send this prompt to Copilot Edits:
Create auth middleware to protect routes.
After reviewing and accepting the changes, test the POST login request again in Bruno. If it still returns a success message, the middleware is functioning properly. Commit your changes and push to GitHub, using the sparkles button to have Copilot draft the commit message (review it before submitting).
Building trip functionality
With users able to register and log in, the next step is letting them add trips. The requirements in this issue call for full CRUD operations on trips with a default itinerary template. Keep using Copilot Edits and send this prompt:
Create Trip routes blueprint with CRUD operations.
This should generate the CREATE, READ, UPDATE, and DELETE routes. Review the changes to understand what was added, make any adjustments, and save the files.
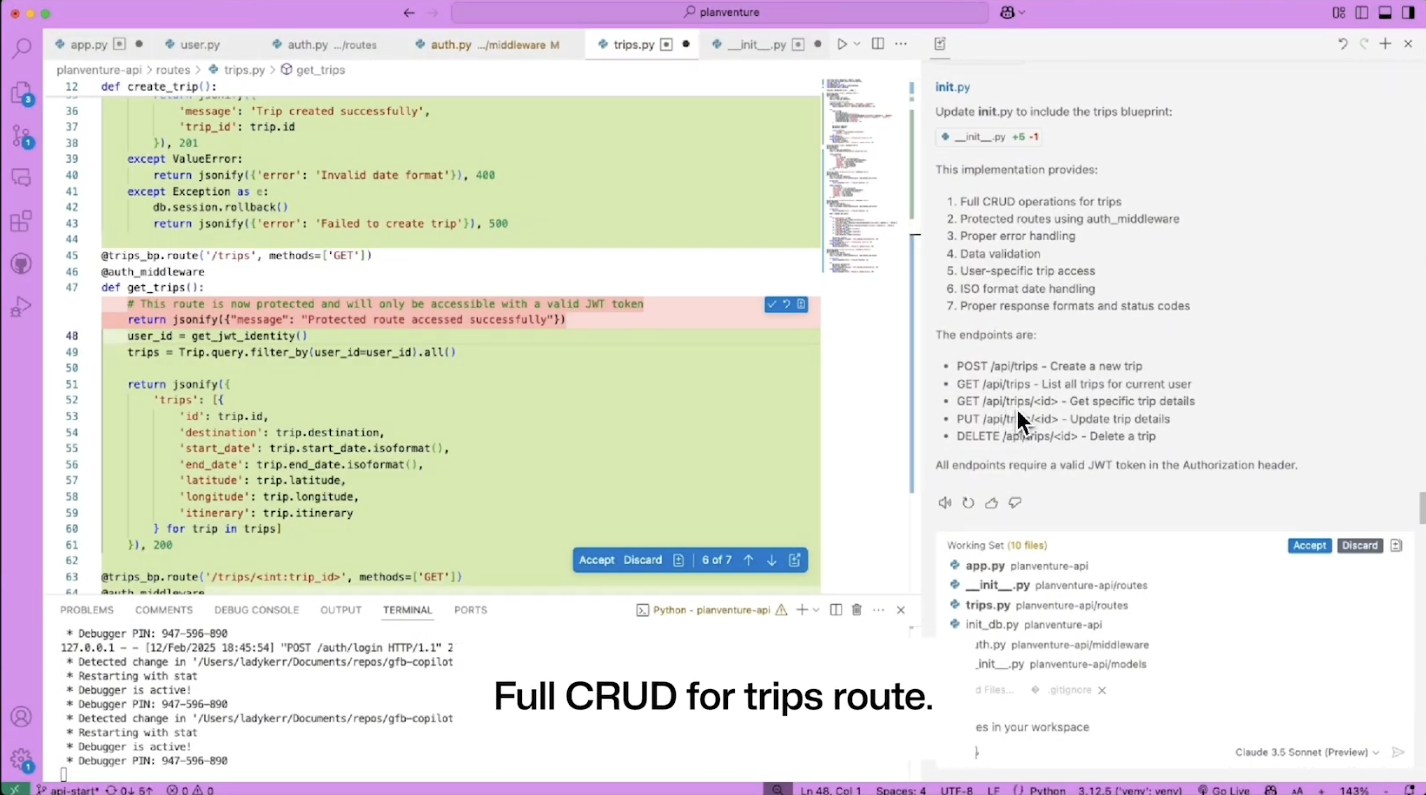
Now use Copilot Chat to generate sample data for testing. Open the chat window and send this prompt:
Create example json to test the trips route
Copy the generated JSON, then clone the POST login request in Bruno. Rename it CREATE trip, change the URL from <IP>/auth/login to <IP>/api/trips, and replace the body under the Body tab with the copied JSON.
Before sending, you need the authorization token. Navigate back to the POST login request, send it, and copy the token value from the response. Return to the POST CREATE trip tab, open the Auth tab, select Bearer Token as the type, and paste the token.
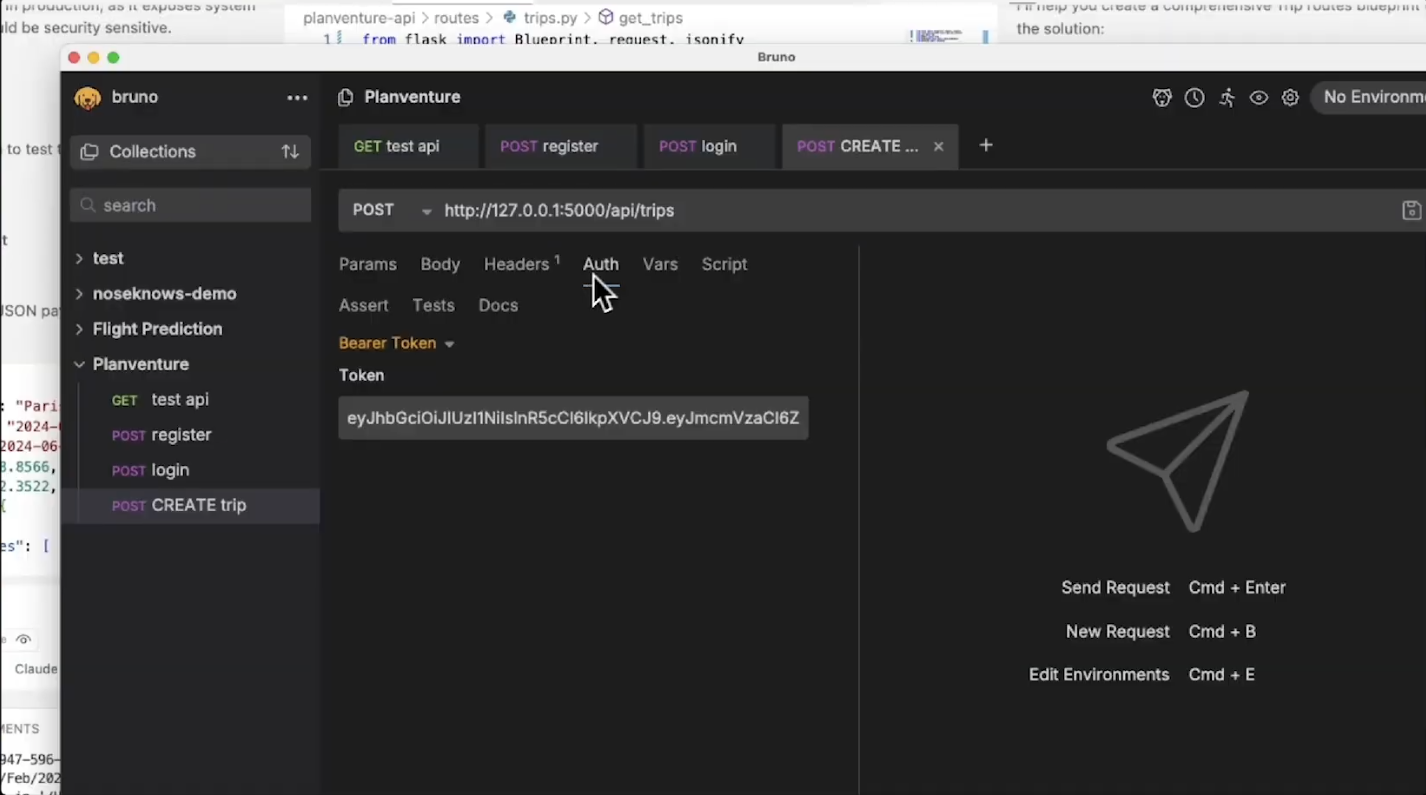
If the request fails, copy the error message and use the /fix slash command in Copilot Chat to debug it. Once you receive a success response, verify the trip exists by refreshing planventure.db in VS Code and checking the trips table.
To test fetching a single trip, clone the POST CREATE trip request, rename it to GET trip id, switch the method from POST to GET, delete the body, and update the URL to include the trip ID — for example, 127.0.0.1:5000/api/trips/1. Send the request, and you should get back all data for that trip in the response.

Finally, add the default itinerary template. Use Copilot Edits with this prompt:
Create function to generate default itinerary template.
Review the changes, save, and test by editing the POST CREATE trip request body — change something like the destination — and sending it. If errors come up, use Copilot Chat to debug. After adding a new trip, fetch it with the GET trip id request (updating the URL to match the new trip's ID) and confirm the response includes the default itinerary. Then commit your changes.
Wrapping up the MVP
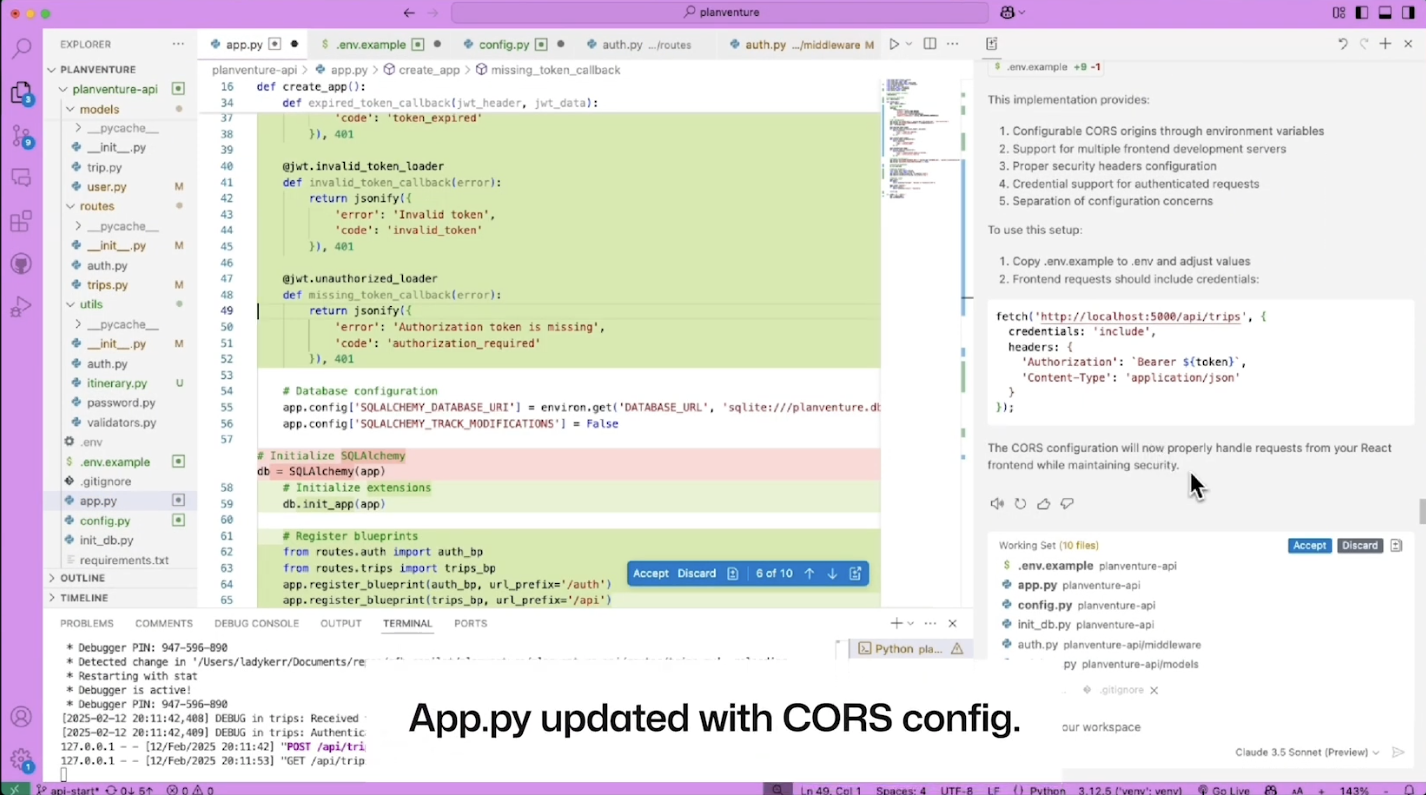
Before calling this a finished MVP, add a basic health check endpoint and CORS support with Copilot Edits:
Setup CORS configuration for React frontend.
Review and accept the changes. This completes the API MVP — you've built a functioning API using GitHub Copilot.
Finish by adding documentation to the README. Use Copilot Chat with this prompt:
@workspace create a detailed README about the Planventure API
Copilot will draft README content explaining how the API works. Hover over the generated text, click the ... button, select Insert into New File, and save it as README.md. Writing tests is also worth doing before calling the project complete — Copilot Chat's /tests slash command can help there (a topic for a future episode).
Next steps
You've built an entire API and used Copilot to create documentation along the way. To build this project yourself, check out the repo and read the README for the correct starting branch. You can use GitHub Copilot for free, and questions are welcome in the GitHub Community thread. The next episode in this series builds a complete application on top of this API. Happy coding!