

Building the Planventure React Client
This installment of our GitHub for Beginners series picks up where the previous episode left off. We built a backend REST API for Planventure, a travel itinerary builder; now we're creating a React frontend that connects to it. The full project description is available in the Planventure repository, where you'll want to switch to the client-start branch before beginning.
Prerequisites and project setup
You'll need VS Code (or another code editor), the latest version of Node.js, npm, and access to GitHub Copilot. If you prefer to work in the cloud, you can spin up a GitHub Codespace from the repository—Copilot access is still required in that environment.
For the React client we're using React with Material UI as our component library. The app we're building will authenticate users, protect routes, and let users add and edit trips and itinerary information.
To get your environment ready:
- Clone the Planventure repository from your editor's terminal.
git clone https://github.com/github-samples/planventure- Move into the planventure-client directory and check out the
client-startbranch.
cd planventure-client
git switch client-start- Install the dependencies.
npm install- Start the development server.
npm run dev- Open http://localhost:5173 to confirm the app is running.
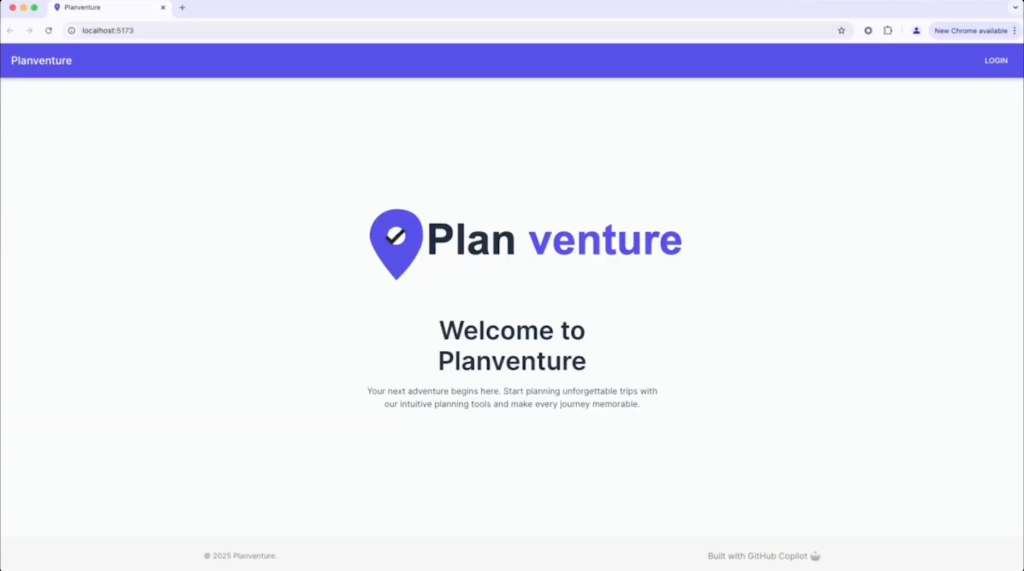
Several basic components are already installed and configured in the starter code. To get a quick orientation, ask Copilot Chat to summarize the existing files before you start making changes:
@workspace Tell me about the configuration setup in the react app.The GitHub issue tied to this work contains the detailed requirements for the client.
Adding authentication UI
We'll start with the login and registration forms. First, we need an AuthLayout component that will wrap all authenticated routes.
- In Copilot Chat, select the Claude Sonnet 3.5 model from the model selector.
- Send Copilot a prompt to create the layout component.
@workspace Create AuthLayout component with navigation and centered content.- When Copilot presents its solution, click … on the proposal and choose Insert into New File.
- Review the code, then save the file. It's important to understand what Copilot generates—treat it as a starting point, not a final answer.
With the layout in place, we'll build a login form that uses it.
- Send Copilot Chat a request for a login form component.
@workspace Build a LoginForm component with email/password fields and validation.- Create an auth folder under src/components.
- Back in Copilot Chat, insert the proposed solution into a new file and save it in the auth folder.
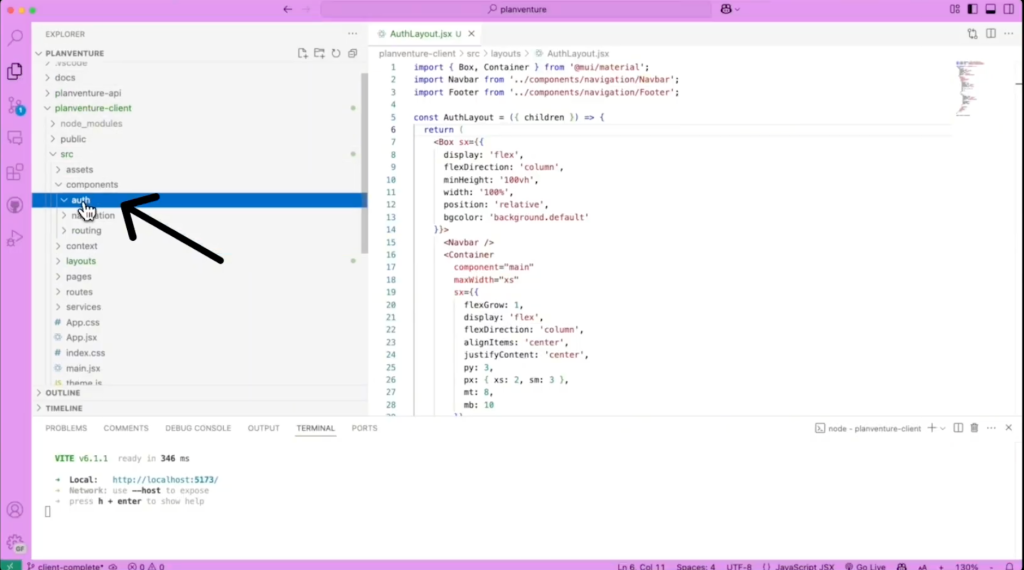
- Switch Copilot Chat to Edits mode.
- Use Add Files to include AuthLayout.jsx, LoginForm.jsx, and Routes.jsx in the working set.
- Send a prompt asking Copilot Edits to wire the login form into the app's routing.
Create a new loginPage. Update route and authLayout as needed.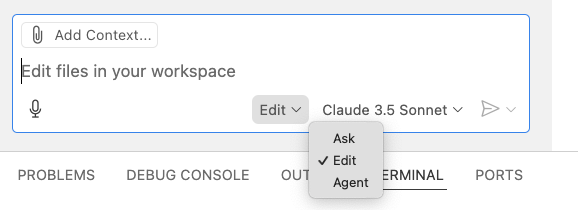
- Review and apply the changes, then save the files.
- Ask Copilot Edits to update the
Homecomponent so the UI reflects the new login flow.
Update the navbar to use the new loginpage and add a get started button to the home page that routes to the login page.- Review the changes, save everything, then refresh your browser.

- Commit your work. In VS Code's commit message box, use the sparkle icon to let Copilot generate a commit message for you.

Now the UI shows a Get started button that takes users to a login page. Next we need a registration page.
- Ask Copilot Chat to create both a
SignupFormin the auth folder and aSignupPagein the pages folder.
@workspace Create SignupForm component matching the login form style and a new SignUpPage. Be sure to update routing.- For each proposed file, insert it into a new file and save it.
- For any remaining proposed edits, open each affected file, click Apply in editor on the proposal, review the change, and save.
- Refresh the browser and test the signup flow.
- Commit the changes.
Last piece of the authentication UI: AuthContext.jsx in the context folder.
- Open AuthContext.jsx.
- Send Copilot Chat a prompt to update the auth context so it tracks the logged-in user and exposes the needed methods.
Setup authentication context and token management #file:ProtectedRoute.jsx- Apply, review, and save each proposed change.
- Commit your work.
Connecting authentication to the API
The forms exist, but they're not talking to the backend yet. We need to edit three files in concert to register and log in users—Copilot Chat can handle multi-file edits for this.
- Send Copilot Chat a prompt describing the API integration requirements.
@workspace Setup api service functions for login and register routes. Update login and signup forms to use api service. #file:SignupForm.jsx- Work through each proposed change: open the file, click Apply in editor, review, and save.
- Open a second terminal,
cdinto the planventure-api directory, and launch the backend server.
flask run --debug- Refresh the browser and try logging in. If something fails, debug it with Copilot's help—the video version of this episode walks through a few likely trouble spots.
- Register a new user and handle any errors that surface.
Once login and signup work, we'll add a logout control to the navigation bar.
- Request the change from Copilot Chat.
@workspace update navbar to include the logout function- Apply, review, and save all proposed edits.
- Refresh the browser and test the Logout button. It only appears while logged in.
- Commit your changes.
User authentication is now fully wired up.
Dashboard and trip components
For the final stretch, users need a dashboard with sidebar navigation so common actions are always within reach.
- Click the Copilot icon at the top of the window and select Open Copilot Edits.
- Add these files to the working set: App.jsx, AuthContent.jsx, AuthLayout.jsx, LoginForm.jsx, Navbar.jsx, and SignupForm.jsx.
- Send Copilot Edits a prompt to create the dashboard layout with sidebar navigation.
Build a dashboard layout component with sidebar navigation.- Review and apply the changes, then save all files.
- Refresh your browser to see the new dashboard structure.
With the layout settled, we need components to display the user's trips.
- Ask Copilot Edits to create a
TripCardand aTripListcomponent.
Create TripCard and TripList components for displaying trips with loading states.- Review and accept the proposed code.
- Ask Copilot Edits to build a dashboard component that renders those trips.
Create a dashboard component that displays the trips that users are routed to on login.- Review and accept the changes.
- New users should see a welcome message when they have no trips yet; we also want a clear message if login fails. Send Copilot Edits a prompt covering both states.
Update the dashboard coponent to show a welcome message to users if they have no trips. If there is an error receiving trips, display the image with a message that's quirky and apologetic.- Review and apply the changes.
- Now let's load real data. Send a prompt asking Copilot Edits to fetch trips from the backend API.
Update to fetch trips from the flask api.- Review and apply the suggested changes, then save.
- Refresh the browser and log in.
- You should see one of three states: your trips, a welcome message, or an error. Try to trigger each one.
- Debug what breaks, then commit your completed work.
With the dashboard rendering trips pulled from the API, the Planventure client is feature-complete. The next episodes in this series will build on this foundation.
Building the trip management features
The MVP needs to handle more than just displaying trips. With Copilot Edits, you can add a complete CRUD workflow for trips, including a dedicated form for creating new entries.
- In your terminal, install the required dependencies.
npm install dayjs @mui/x-date-pickers- Run the following prompt in Copilot Edits to build the trip creation form and wire it to the
/trips/newroute.
Create NewTripForm with destination and date inputs. Use the dayjs library.- Review the suggested changes, accept them, and save the files.
- Refresh the browser and click the ADD NEW TRIP button to test the form.
- Commit your changes once everything works.
Managing itineraries
Next, give users a way to organize each trip by day or activity. Copilot can scaffold an itinerary editor, and you can add a prompt to encourage users to actually fill it out.
- Send Copilot Edits the prompt for itinerary management.
Create ItineraryDay and TimeSlot components for managing daily activities with editing capabilities.- Accept the suggested code, save the files, and then run a follow-up prompt to include an itinerary prompt inside the app.
If the user doesn't have an itinerary for their trip, prompt them to add an itinerary. Also include a default itinerary template.- Save the changes, refresh the page, and open a trip's VIEW DETAILS.
- Click the ITINERARY tab. You should see a prompt asking you to create an itinerary, and adding one should produce a default template.
To round out the core experience, add in-place editing and the ability to capture stay and transport details.
- Send Copilot Edits a prompt that lets users edit an existing trip.
Allow users to edit their trip details.- Accept, save, refresh, and confirm you can modify trip details.
- Send a final prompt for accommodation and travel preference fields.
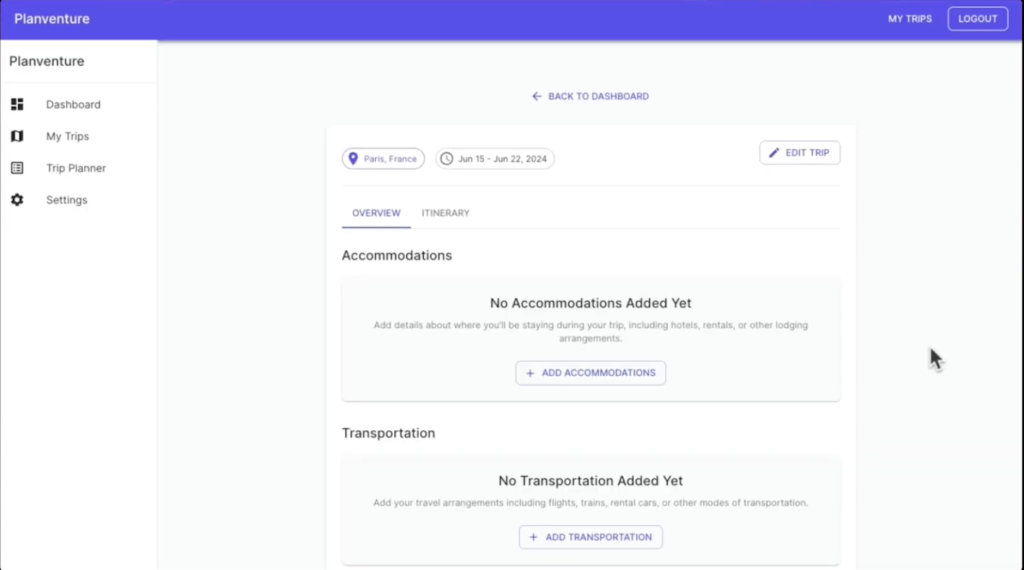
Allow users to add their accommodations and transportation details to the Overview page.- Refresh and test the new fields in the browser.
- Commit all pending changes.
With that, you have a working MVP you can demo, extend, or hand off. The chat-driven workflow you just used—prompt, review, accept, commit—is the same pattern you can apply to any CRUD-heavy front-end feature. If you get stuck, the GitHub Community thread is the place to ask, and you can continue building on this project in the next part of the series.