

From Design Mockup to Working Landing Page with Copilot Agent Mode
GitHub Copilot’s agent mode in VS Code is an interactive chat experience that treats Copilot as an active collaborator rather than a code autocomplete. Given a prompt, agent mode autonomously iterates on code, fixes errors it encounters, suggests and runs terminal commands, and resolves runtime issues on its own. It also accepts image attachments, file references, and natural language instructions, modifying project files directly.
To put the workflow through its paces, one developer built a developer-focused landing page from scratch—starting with a product requirements document and ending with a deployable Astro site—in under 30 minutes. The build used Copilot agent mode with GPT-4o initially, then Claude 3.5 Sonnet for design generation.
Starting With a PRD and Visual Design
The author first used GitHub Copilot on GitHub.com to draft a lightweight PRD. The prompt was simply: “Describe a landing page for developers in simple terms.” Copilot returned a structured outline covering typical landing page elements. That PRD was then passed to Claude 3.5 Sonnet, which generated a complete visual design based on the outline.
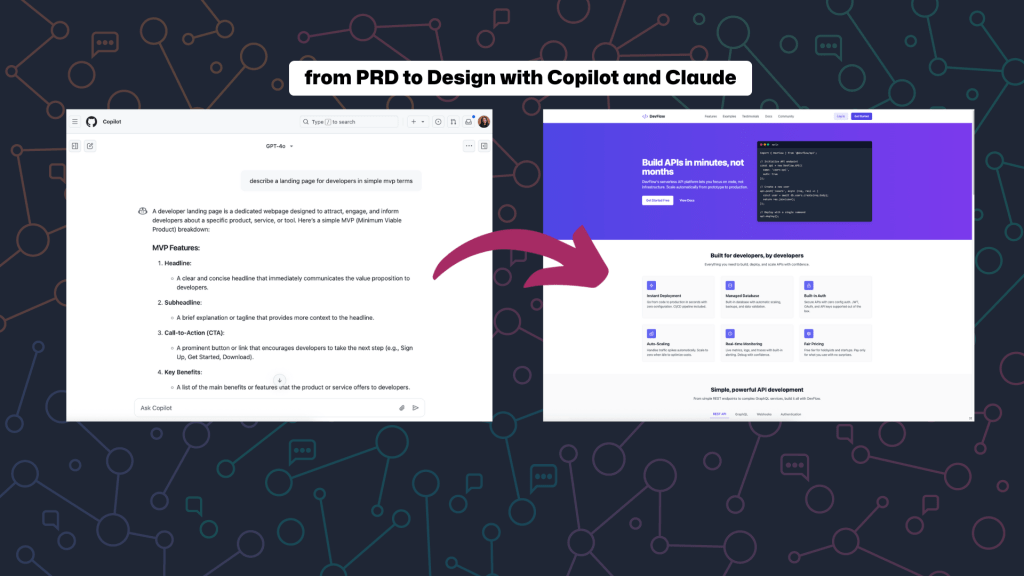
Claude produced a clean layout with standard landing page sections: hero, feature list, API examples, and a dashboard preview. The full design mockup was exported and used as the visual reference throughout the build.
Project Setup: Astro, Tailwind, React
The tech stack chosen was Astro for performance and flexibility, paired with Tailwind CSS and React for styling and component structure. Starting in a blank directory, the setup commands were:
npm create astro@latest
npx astro add react
npx astro add tailwind
After initialization and Tailwind configuration, the project was opened in VS Code with Copilot agent mode enabled. Once the dev server was running, the build phase began.
Translating Screenshots into Components
Agent mode’s key advantage in this workflow is its ability to understand both image context from attached screenshots and the existing code in the project. The author took screenshots of each section from Claude’s design and dropped them directly into Copilot’s context window, then asked for the corresponding component.
| 💡 Pro tip: When building from a visual design like this, I recommend working on one section at a time. This not only keeps the context manageable for the model, but also makes it easier to debug if something goes off track. You’ll know exactly where to look! |
Hero and Navigation
Starting with the primary page file, the author attached the design screenshot and prompted: “Update index.astro to reflect the attached design. Add a new navbar and hero section to start the landing page.” Copilot agent mode responded by:
- Creating
Navbar.astroandHero.astro - Updating
index.astroto render the new components - Applying Tailwind styling based on the visual layout
Opened in the browser, the result closely tracked the original design mockup. Minor differences — such as a missing placeholder image on the right side — were deferred for later iteration.
Custom Instructions Improve Output Accuracy
For multi-file projects, Copilot’s suggestions improve significantly when the repository includes custom instructions: short structured notes describing the tech stack, project structure, and conventions. Rather than repeating context in every chat request, the author created a CopilotInstructions.md file describing the stack:
- Astro v5
- Tailwind CSS v4
- React
- TypeScript
# GitHub Copilot Project Instructions

## Project Overview
This is an Astro project that uses React components and Tailwind CSS for styling. When making suggestions, please consider the following framework-specific details and conventions.

## Tech Stack
- Astro v5.x
- React as UI library
- Tailwind CSS for styling (v4.x)
- TypeScript for type safety

## Project Structure
```
├── src/
│   ├── components/     # React and Astro components
│   ├── layouts/        # Astro layout components
│   ├── pages/          # Astro pages and routes
│   ├── styles/         # Global styles
│   └── utils/          # Utility functions
├── public/             # Static assets
└── astro.config.mjs    # Astro configuration
```

## Component Conventions

### Astro Components
- Use `.astro` extension
- Follow kebab-case for filenames
- Example structure:

```astro
---
// Imports and props
interface Props {
  title: string;
}

const { title } = Astro.props;
---

<div class="component-wrapper">
  <h1>{title}</h1>
  <slot />
</div>

<style>
  /* Scoped styles if needed */
</style>
```
With this file in place, agent mode referenced it automatically, and generated code became more aligned with the project setup.
Iterating with Prompts and Screenshots
The same screenshot-plus-prompt pattern was repeated for every additional section:
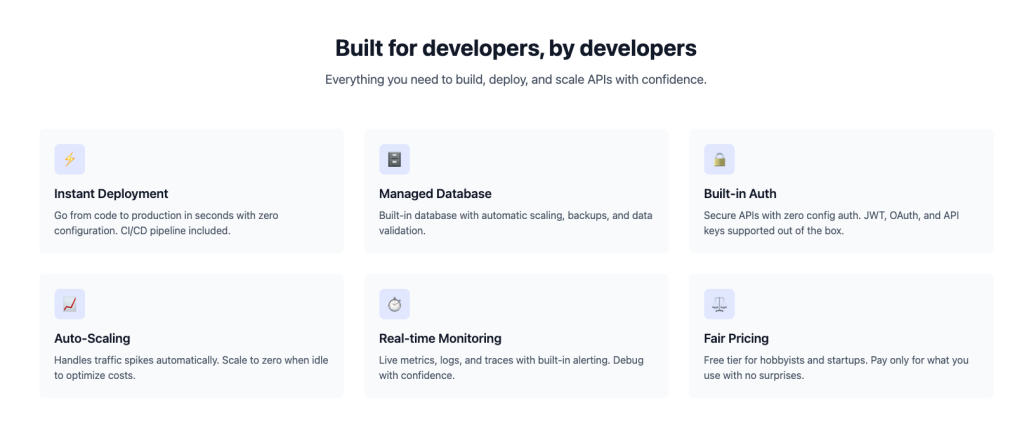
“Built by Developers” Section
Prompt: “Add a new section to the landing page called ‘By Developers’ and follow the attached design.” Copilot generated a reusable component with feature cards arranged in a Tailwind-styled grid.
API Development Section
Prompt: “Add the API development section based on the design.” The design shown featured interactive tabbed code samples; agent mode inferred the required tab-switching UI logic from the screenshot and built it without additional instructions.
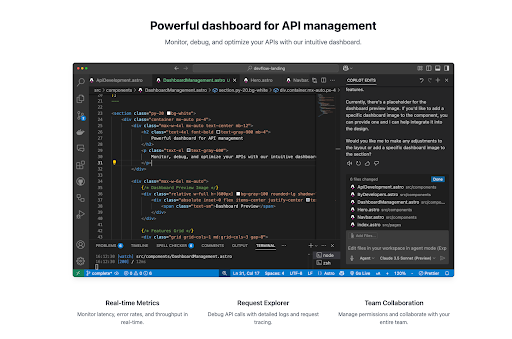
Dashboard Preview Section
Prompt: “Now add the dashboard management section on the landing page based on the design.” The author uploaded a screenshot of the code editor as a placeholder image, and Copilot incorporated it into the new component seamlessly.
Autonomous Problem Solving
For the remaining sections (“Trusted by Developers,” “Try it Yourself”), agent mode filled in placeholder images, added semantic HTML, and applied Tailwind styling from a single image and prompt. When the hero section was later adjusted to match the original design more closely, Copilot flagged and fixed TypeScript issues without explicit prompting.

The distinction matters: agent mode was not just following instructions. It was reading the codebase, checking the terminal output, identifying issues, and resolving them in real time. That reduced the need for context switching and let the author focus on the build itself.
Committing Early, Finishing the Project
Frequent commits are part of the recommended flow, and Copilot can assist there too. After staging changes in the Source Control panel, clicking the sparkles icon generates a commit message automatically.
| 💡 Pro tip: When building with AI tools, commit early and often. I’ve seen too many folks lose progress when a prompt goes sideways. |
Result: a complete, responsive Astro landing page built with modern tooling, driven primarily by natural language prompts and visual references.
Next Steps
While the prototype is fully functional, several extensions remain straightforward:
- Deploy via GitHub Pages, Netlify, or another host
- Set up GitHub Actions for CI/CD
- Add unit tests and accessibility checks
- Replace placeholder placeholder images with real assets
- Add additional pages linked from the navbar
Taking Agent Mode Into Your Own Builds
Copilot agent mode is a tool whose output quality tracks the quality of its inputs. Adding context files, being explicit in prompts, and committing regularly all make a measurable difference. A reliable starting workflow:
- Generate a PRD with Copilot on GitHub.com
- Turn the PRD into a visual design with Claude
- Use Copilot agent mode in your IDE, coding section by section with attached screenshots
The fully working example lives in the public repository, with setup instructions and a live demo available for anyone who wants to inspect the workflow in detail.