

Bringing GitHub into your terminal
You already know that Git works well from the command line. What you might not know is that GitHub itself can now be operated from the same place. Instead of juggling a terminal window for Git and a browser tab for GitHub, the GitHub CLI (gh) collapses that split into a single workflow. Creating issues, reviewing pull requests, and editing repositories can all be done without ever leaving your shell, which means fewer context switches and more time spent actually writing code.
The GitHub CLI works on Windows, macOS, and Linux, so it is available no matter which OS you use for development. The installation process is straightforward: head over to the GitHub CLI repository or the official documentation and follow the instructions specific to your operating system.
Installing and authenticating
After installation, open up a terminal and run gh to confirm that the CLI is correctly set up. On Windows, a successful install will produce a command output rather than a system error telling you the command is not recognized:

It’s always a good idea to verify you are on the latest version, especially since new features and commands are added frequently. The command gh --version will tell you exactly which version you’re running:

Before you can do anything useful, the CLI needs to know who you are. Run gh auth login and follow the interactive prompts. The process will walk you through the necessary authentication steps and ensure you are signing in with an account that has the right permissions for the repositories you plan to work on.
Managing your workflow from the shell
Once you are authenticated, the CLI becomes a hub for your GitHub activity. The most common tasks—like viewing, creating, and managing issues and pull requests—are mapped to intuitive commands that are easy to remember and chain together with your regular Git workflow. The point isn’t to replace Git; it’s to complement it so that a full cycle of pushing code, opening a pull request, and responding to review feedback never has to leave the terminal.
With GitHub CLI installed, you can say goodbye to the constant tab-switching that slows down your development pace. Every one of your GitHub actions is now a few keystrokes away.
Core GitHub CLI commands worth memorizing
These are the commands you’ll reach for on a near-daily basis when working with GitHub from the terminal. Examples below are shown in Windows PowerShell.
Create and clone repositories
Starting a new project usually means creating a remote repo first. Navigate to the directory where you want the project to live and run gh repo create:

You can then clone that empty repository:

To clone an existing repository owned by someone else, use gh repo clone <OWNER/REPO>. For instance, gh repo clone cli/cli pulls down the source for GitHub CLI itself — the tool is open source.

Using gh repo clone rather than plain git clone simplifies authentication and Git configuration, cutting out manual setup steps. Other repo commands worth knowing:
gh repo list— lists all repositories owned by the given username.gh repo edit <OWNER/REPO>— changes settings for a specific repository.gh repo delete <OWNER/REPO>— removes a repository.
More repo-related commands are available in the GitHub CLI docs.
View, create, and edit issues
Issues act as tracking items for features, bugs, and other work. You can run all issue management from the terminal without opening the web UI.
Run gh issue list to see all currently open issues in the repository your terminal points to:

Note that the working directory matters: you’ll need to be inside the repo you care about, e.g. .\cli for the CLI source or .\my-awesome-project for the repo you just created.
gh issue create starts an interactive prompt that lets you file an issue, optionally opening a notepad for the body text. gh issue view displays a specific issue, and gh issue edit lets you modify one:

For a quick overview of what’s actionable for you, gh issue status shows the state of all open issues relative to your account:

Additional issue commands are listed in the GitHub CLI documentation.
Checkout, review, and merge pull requests
Pull request workflows have traditionally been web-browser territory, but github CLI handles them from the terminal as well. Run gh pr list to see open PRs in the repo (including drafts):

Grayed-out entries are draft pull requests — PRs created while work is still in progress but not yet ready to merge. Drafts let collaborators start reviewing early without code needing to be fully polished.
To open a new PR, switch to the relevant branch with git checkout, then use gh pr create. The prompts will lead you through the process, including choosing draft status and writing the body via a text editor. Running gh pr list again confirms the new PR shows up:

Three more PR-related commands round out the most common workflows:
gh pr status— shows PR state as it relates to you.gh pr checkout— switches to the branch for a specific PR and shows its details. An especially handy review tool: you can pull down a PR branch and test it locally before approving or merging.gh pr merge— merges the PR.
The GitHub CLI docs have the complete list of PR commands with all flags.
Manage releases
Releases package your software along with release notes and binary files for downstream use. Launch gh release create and answer the interactive prompts to produce a new release:

gh release list displays releases for the current repo and gh release view shows details for a particular release.
Kick off and inspect GitHub Actions workflows
GitHub Actions lets you automate tasks like build, test, and deploy. The CLI can orchestrate those workflows without you leaving the shell.
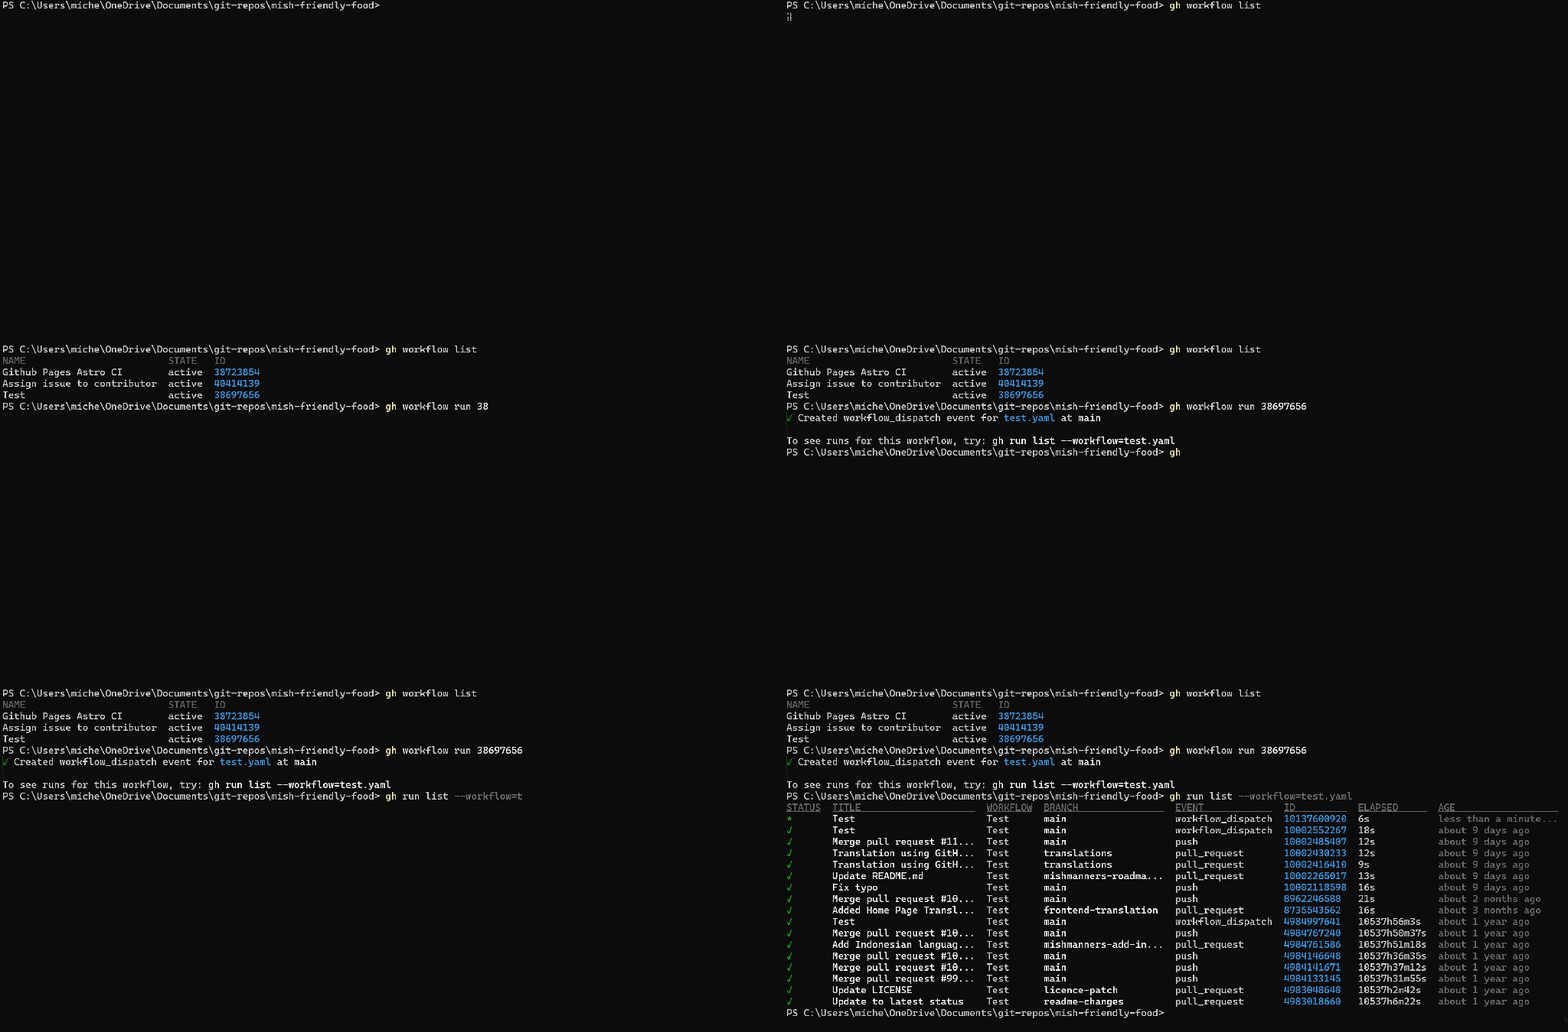
Run gh workflow list to see workflows defined in the repository:

Repo owners define the available set of workflows. To trigger one, use gh workflow run followed by the workflow ID — e.g., gh workflow run 1208059 for the “code scanning” workflow in the example. Running workflows requires admin rights on the repo. Below is an example of running a workflow and checking its runs:
Manage labels
Labels give issues visual grouping and help with triage. List them with gh label list, create a new one via gh label create, and change an existing one with gh label edit:

Check the GitHub status of everything assigned to you
gh status is a single-shot personal dashboard. It shows issues and pull requests assigned to you, open PRs waiting for your review, and other repo activity that involves your account:

Extend the CLI
The GitHub CLI is open source, and third-party developers have built extensions that sit on top of it. Browse them from your terminal with gh ext browse, which presents a browsable list with a short description for every extension registered under the gh-extension topic:

When you find one you want, install it with gh ext install <OWNER/REPO>.
When in doubt, ask for help
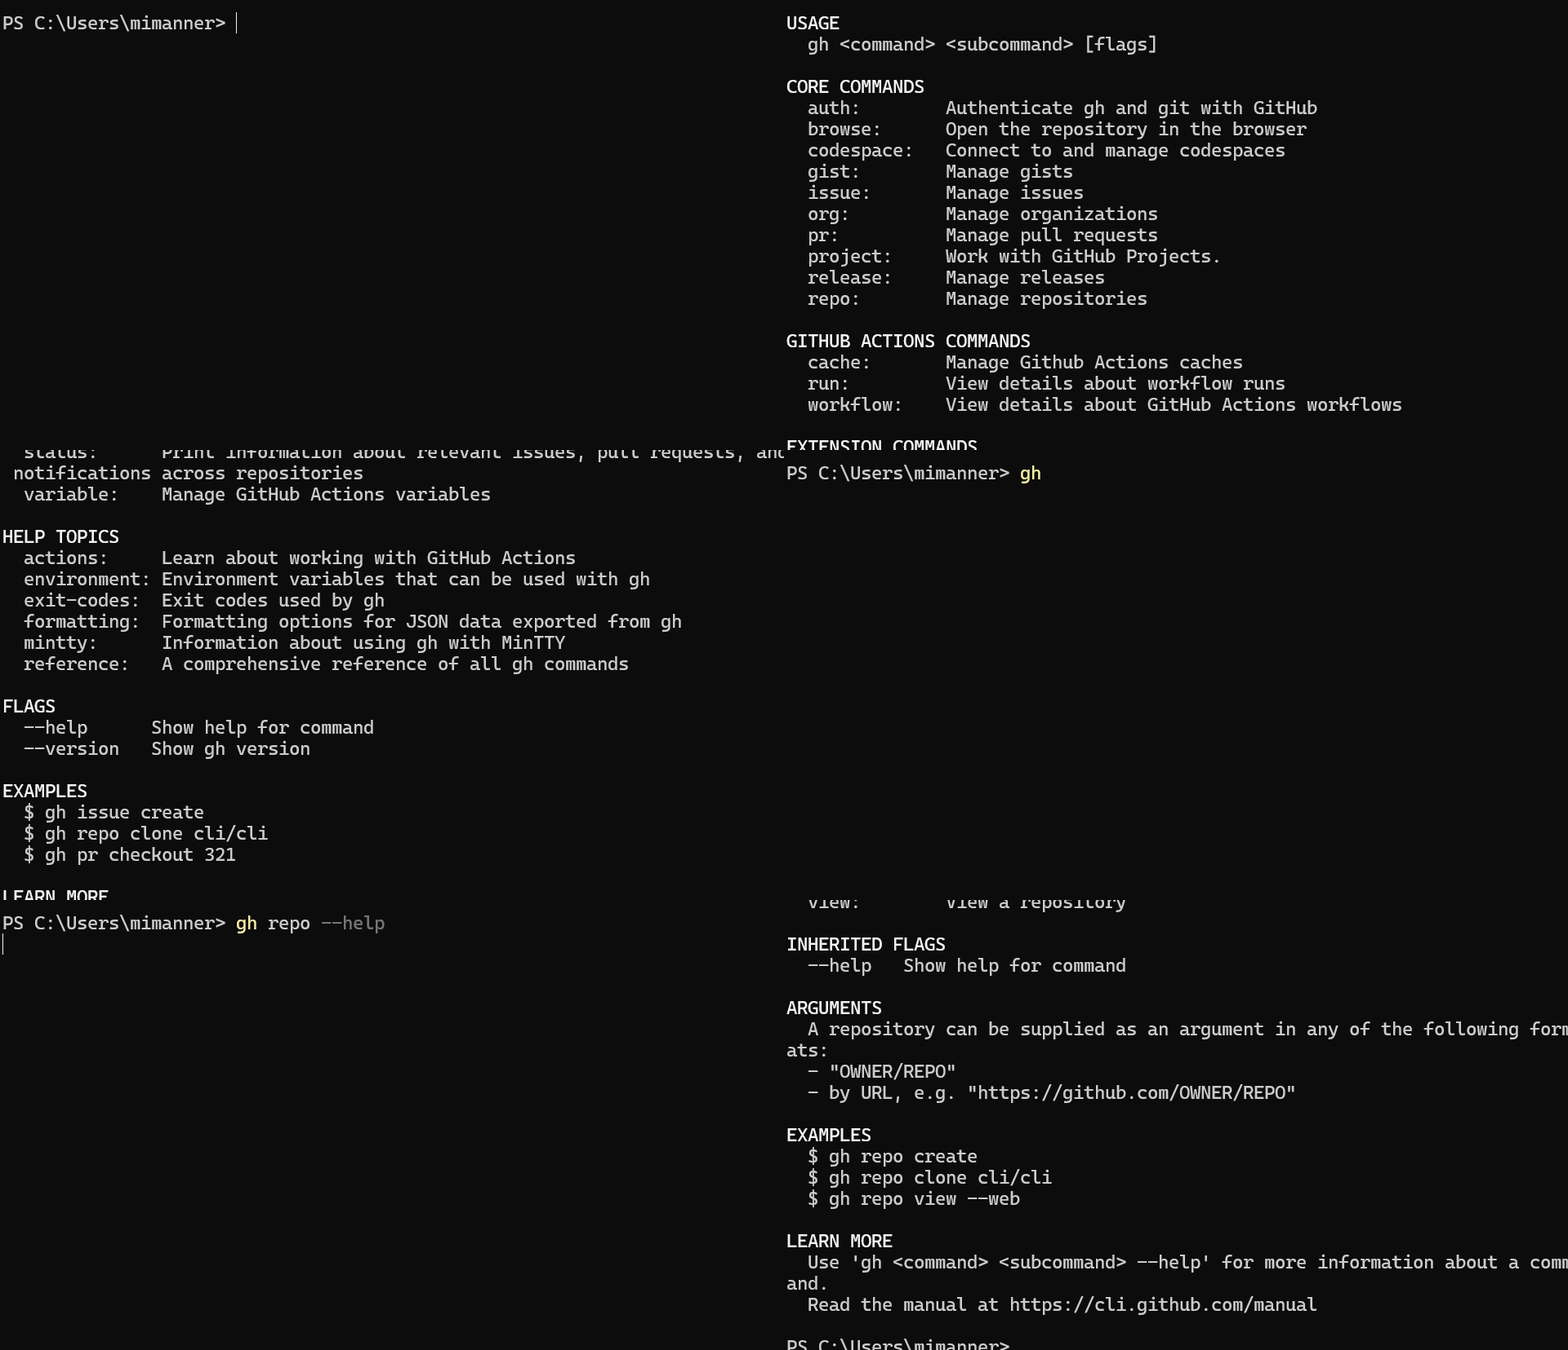
Can’t recall an exact invocation? gh help prints the main command groups:
Getting unstuck
The quickest way to get comfortable with these commands is to practice them as you go. For moments where you hit an error or draw a blank, gh help gets you part of the way; for more that can also help, consider asking GitHub Copilot in the CLI, which was made available in general availability from the CLI in March 2024 and can guide you through exactly what’s failing when a command isn’t behaving as expected.



