
Dev Containers: Fixing the Pain of Environment Setup
Anyone who has spent days wrestling with dependency versions, missing packages, or forgotten environment variables knows the frustration of local environment setup. Even after a successful initial configuration, a new clone or a different machine can bring a fresh wave of errors—wrong Node version, uninstalled dependencies, or a missing README step. Dev containers, paired with GitHub Codespaces, offer a way to encode that entire setup process so it runs consistently every time you open a repository.
You can automate almost all the steps required to get a project running by adding a devcontainer.json file to your repository and opening it in GitHub Codespaces. This gives you a pre-configured, isolated environment that handles the heavy lifting, from installing dependencies to starting local servers.
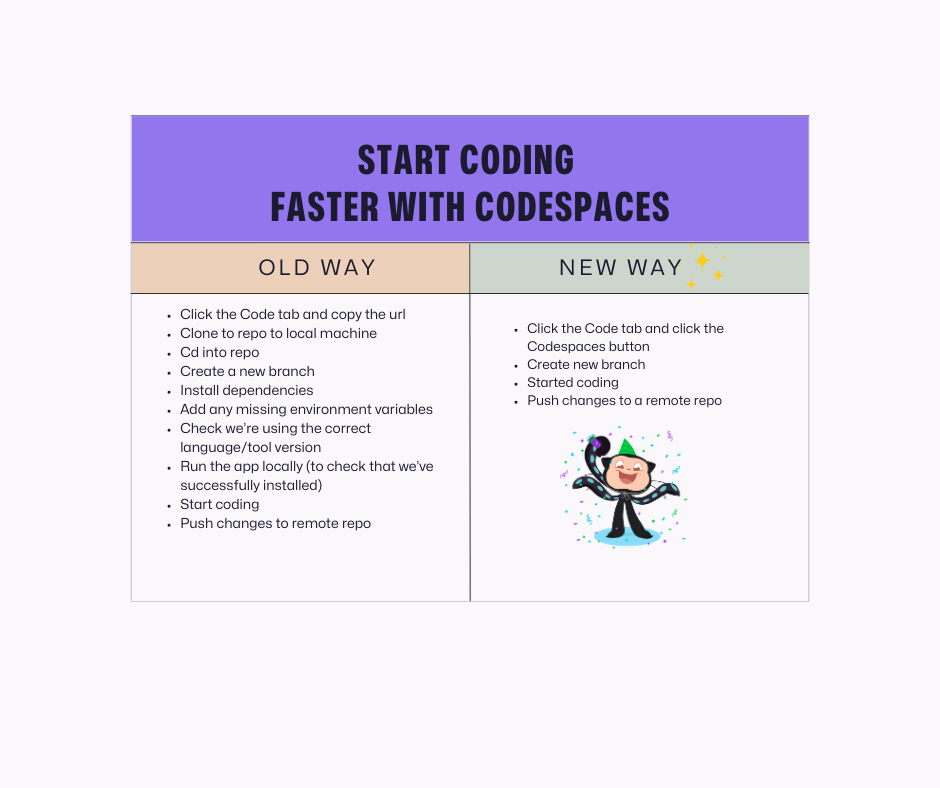
For a TLDR of this post, GitHub Codespaces enables you to start coding faster when coupled with dev containers. See image below for a summary of how:
What You're Working With
GitHub Codespaces is GitHub's cloud-hosted development environment. It runs in an isolated Docker container on a virtual machine, which means your project runs in a consistent environment regardless of the hardware you're using. Individual developers currently get 60 hours of free Codespaces usage per month.
Dev containers are the mechanism that makes this possible. They let you define your development environment directly in your repository. Everything is configured upfront via a devcontainer.json file, so you get a reliable, repeatable environment each time—no more manual configuration steps or missing tools.
The devcontainer.json file itself is the blueprint. It specifies how your project should be built, what tools should be installed, and how the environment should behave. For example, if you include the ESLint extension for VS Code in the file, it will be installed automatically whenever you open that workspace.
You don't strictly need a devcontainer.json file to use GitHub Codespaces. By default, Codespaces uses the universal dev container image, which supports a wide range of languages and tools. This means you can open a codespace and start coding almost instantly, even without any custom configuration. Adding a devcontainer.json file, however, takes things further by letting you tailor the environment to your project's specific needs and automate your typical startup workflow.
The Typical Local Workflow
To see the difference, consider a sample open-source project like Tech is Hiring. It relies on Next.js, Tailwind CSS, Chakra UI, TypeScript, Storybook, Vite, Cypress, Axios, and React. Running this locally requires several manual steps.
- Clone the repository and cd into the project.
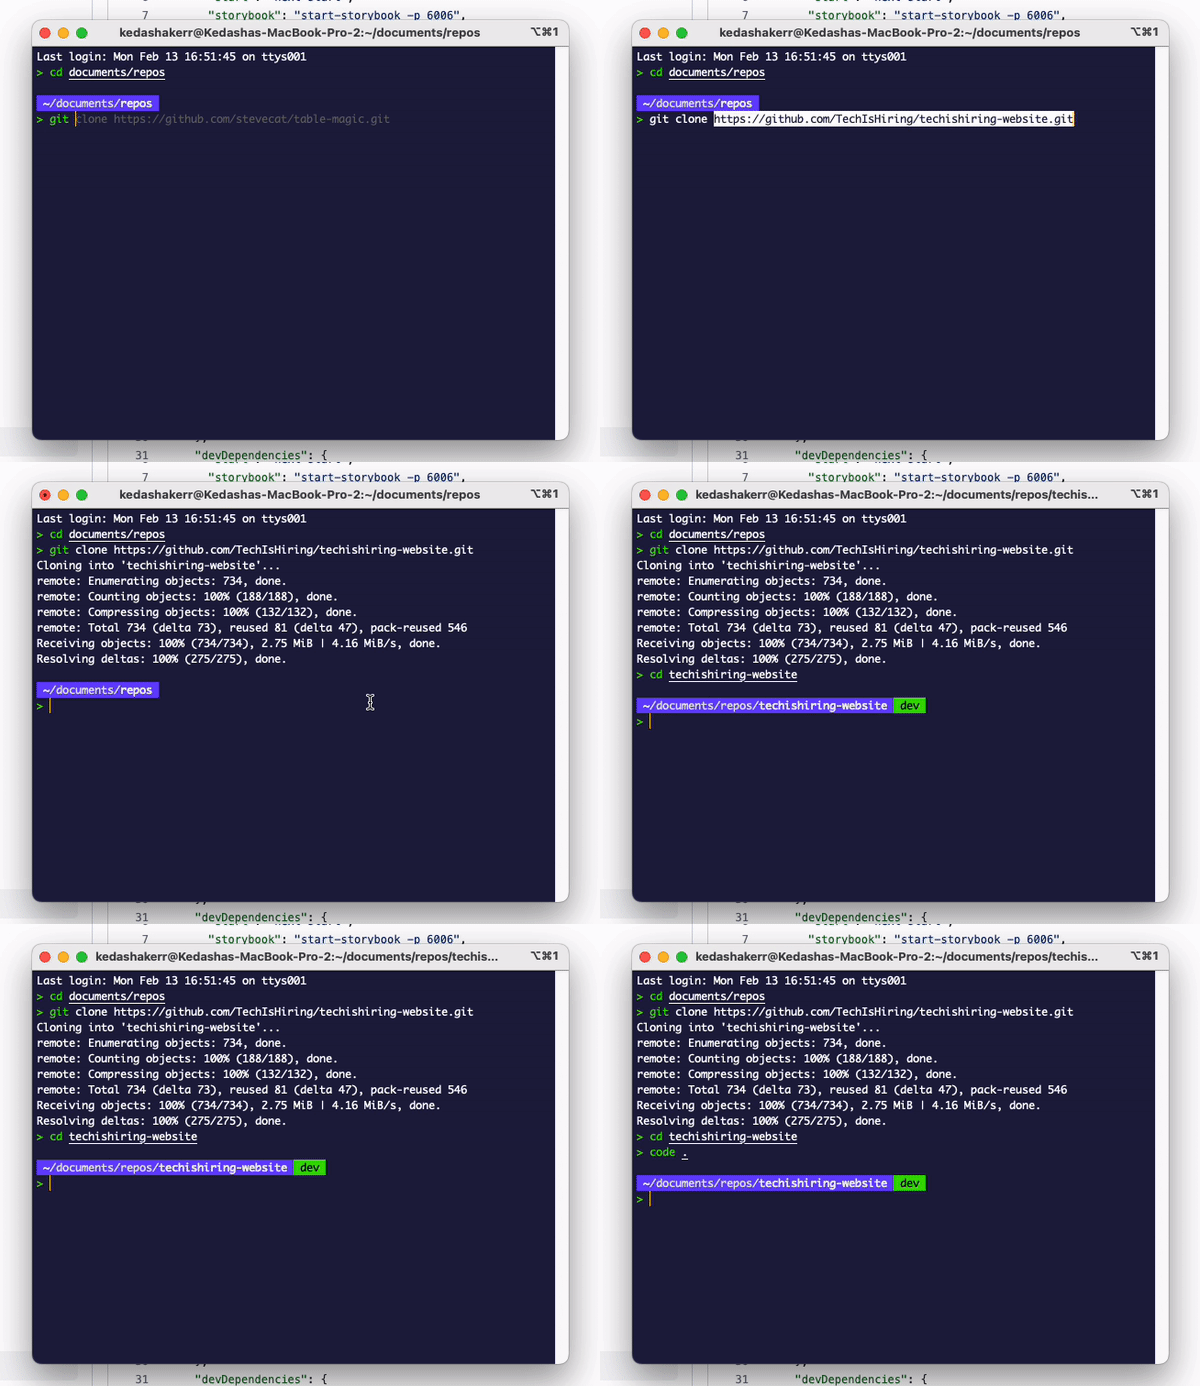
- Install the dependencies needed to run the project.
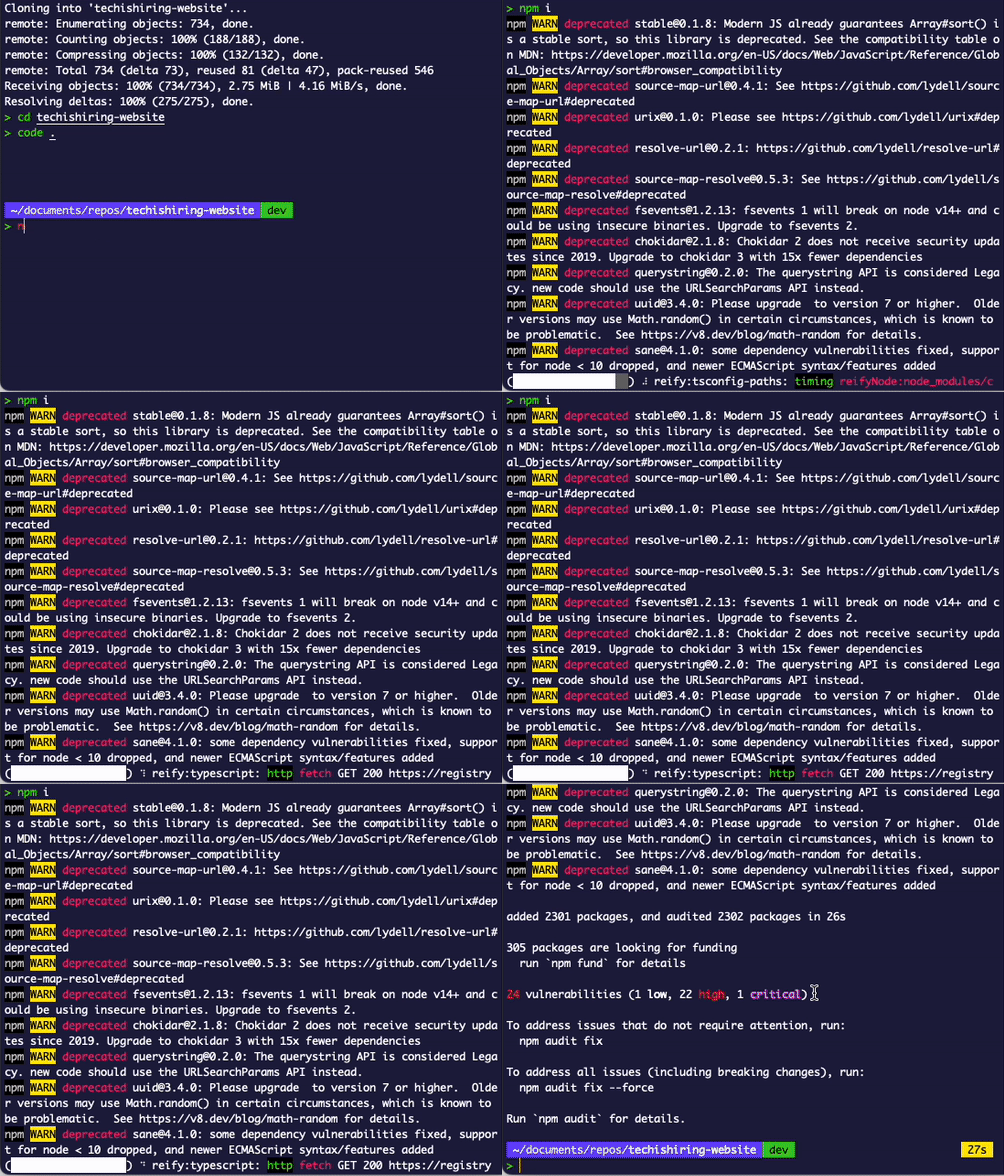
- Start the app and Storybook locally.
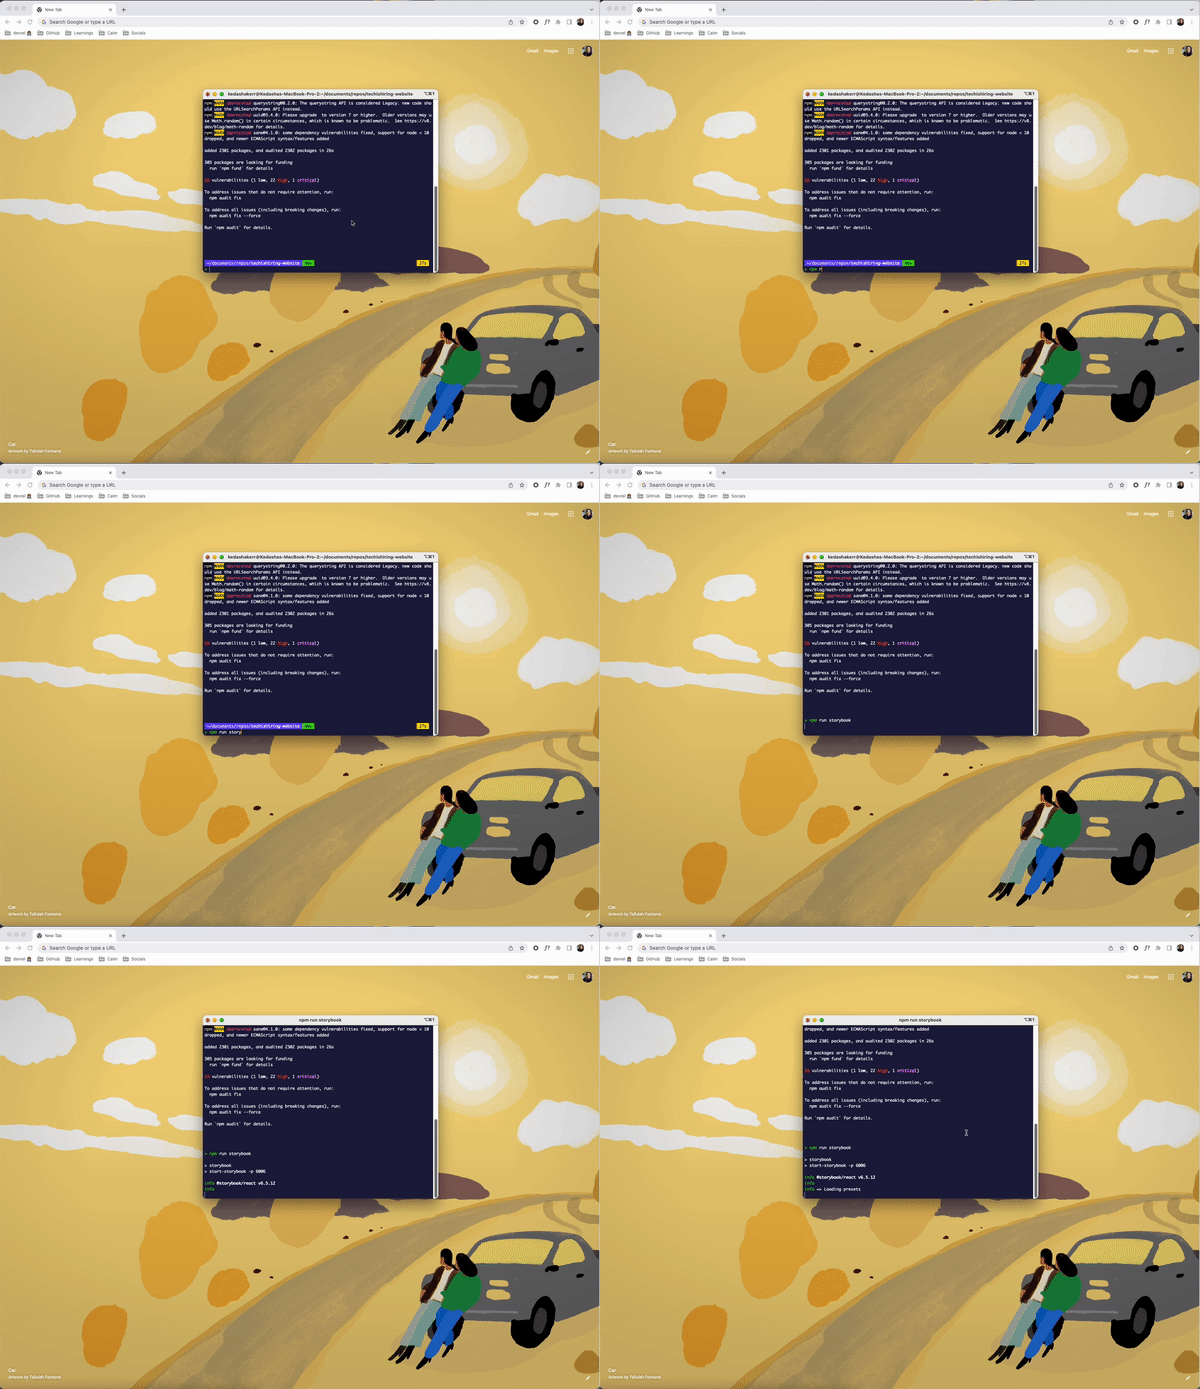
Even after all that, you still need to verify the Node version, check for any required environment variables, and troubleshoot runtime errors. It's doable, but it takes time—time that is spent on setup rather than actual development.
The Automated Path with Codespaces
Adding a devcontainer.json file automates most of this. You can either generate a pre-existing configuration using the VS Code command palette or write the file yourself. Here's the manual approach:
- Create a
.devcontainerfolder in the project root, and add adevcontainer.jsonfile inside it.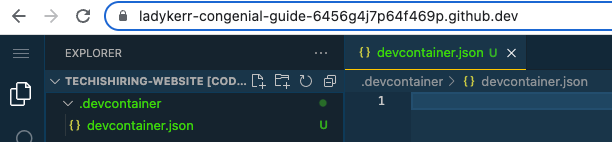
- Configure the file to automate dependency installation, start the dev server on port 3000, and install the VS Code extensions you need. The final file should look like this:
{ // image being used "image": "mcr.microsoft.com/devcontainers/universal:2", // set minimum cpu "hostRequirements": { "cpus": 4 }, // install dependencies and start app "updateContentCommand": "npm install", "postAttachCommand": "npm run dev", // open app.tsx once container is built "customizations": { "codespaces": { "openFiles": [ "src/pages/_app.tsx" ] }, // install some vscode extensions "vscode": { "extensions": [ "dbaeumer.vscode-eslint", "github.vscode-pull-request-github", "eamodio.gitlens", "christian-kohler.npm-intellisense" ] } }, // connect to remote server "forwardPorts": [3000], // give port a label and open a preview of the app "portsAttributes": { "3000": { "label": "Application", "onAutoForward": "openPreview" } } } - Commit the file to your main branch, then open the project in GitHub Codespaces.
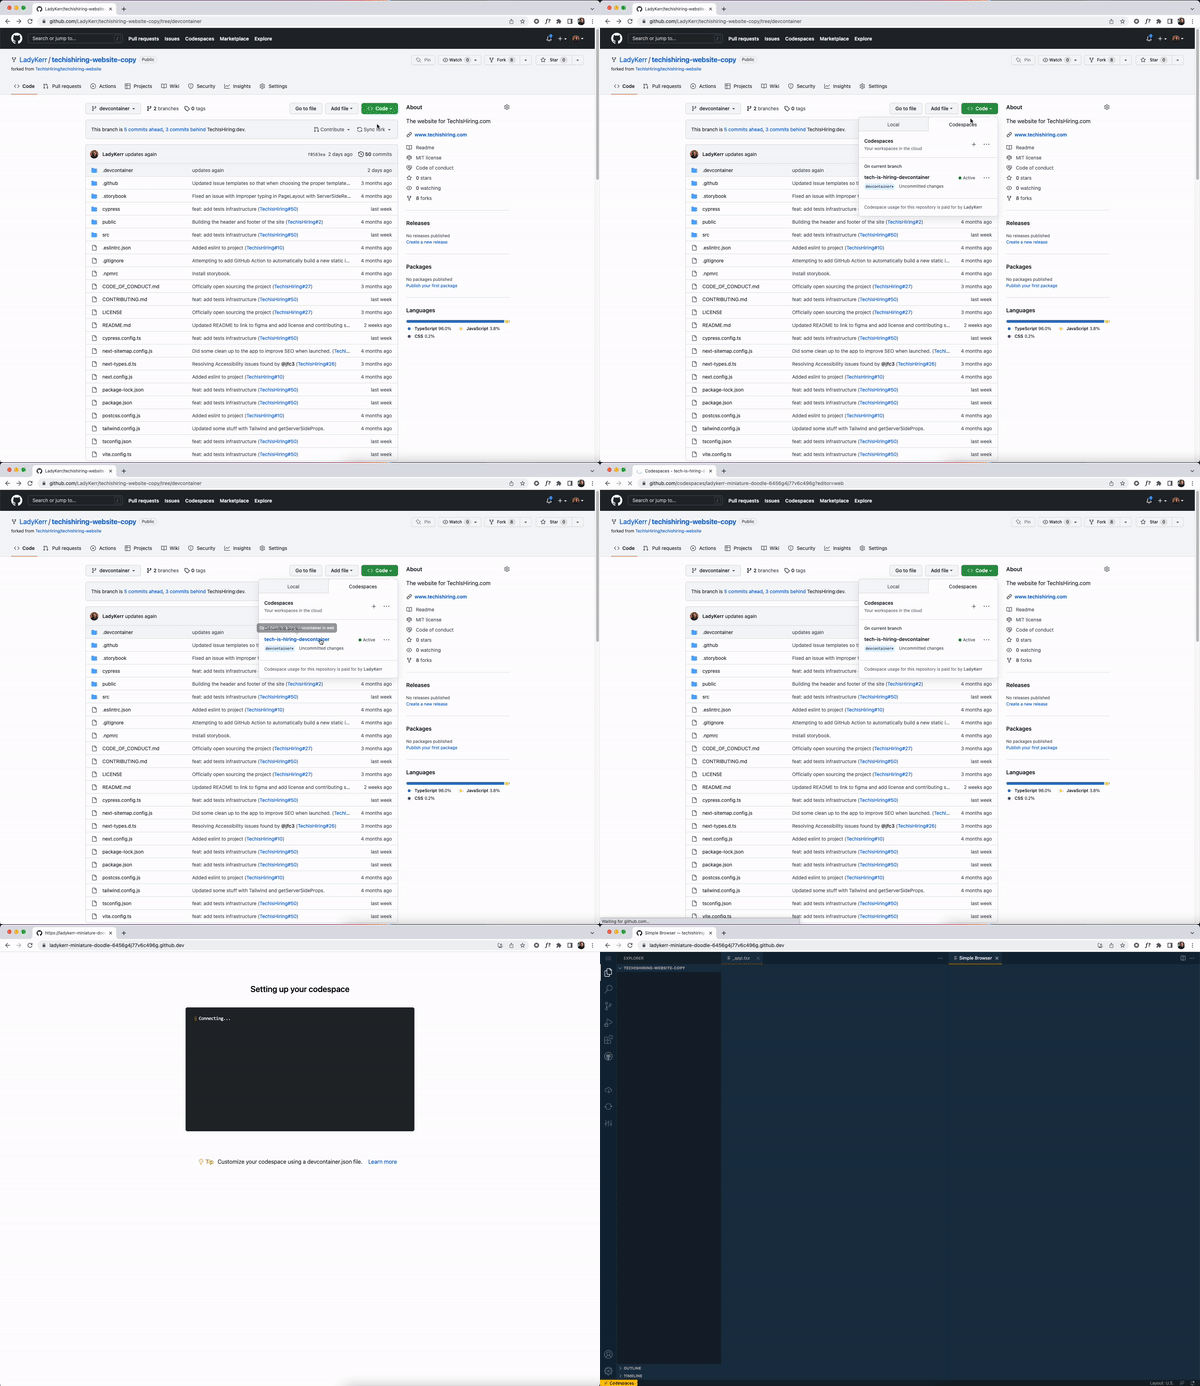
When the codespace loads, the dependencies are installed, the server starts, and a preview opens automatically. Environment variables declared as repository secrets on GitHub are also applied. This approach saves time and keeps node_modules off your local machine entirely.
The Bottom Line
The workflow with Codespaces and dev containers comes down to three simple actions:
- Click the GitHub Codespaces button on the repository.
- Wait for the environment to spin up, with everything installed per the JSON file.
- Start coding.
There are many more customization options available in the devcontainer.json reference. The main benefit is that your repository itself contains the setup logic, so anyone—or any machine—can pick it up and run with it immediately. It also frees you from being tied to a single configured machine. A project that lives in the cloud can be opened from any device with a browser and a network connection, making it easier to work on side projects from anywhere.



