

Axios and Nuxt.js: Data Fetching on the Server and Client
Axios is a promise-based HTTP client that operates in both the browser and Node.js environments. In practice, it is the tool you use to make API calls from your client-side applications. The Nuxt.js Axios module wraps this functionality for seamless integration, providing features like automatic base URL configuration for client-side and server-side requests, proxy request headers in SSR, fetch-style requests, and built-in integration with the Nuxt.js progress bar during requests.
To get started, install the module using your package manager of choice:
YARN
yarn add @nuxtjs/axiosNPM
npm install @nuxtjs/axiosNext, register the module and configure it in your nuxt.config.js file:
modules: [
    '@nuxtjs/axios',
  ],

  axios: {
    // extra config e.g
    // BaseURL: 'https://link-to-API'
  }
The modules array lists Nuxt.js modules like dotenv, auth, and axios. Within the axios property, you can set configurations such as the baseURL for both client and server. Once configured, you can access Axios anywhere in your application via this.$axios.method or this.$axios.$method, where method could be get, post, or delete.
Making Your First Axios Request
We will use a sample application to demonstrate these concepts. After cloning the repository, navigate to the start folder and install the necessary packages:
npm installStart the application with npm run dev and visit localhost:3000 to see the initial state.
Create a .env file in the root of the project to store your API URL. This prevents hardcoding and allows you to easily switch between development and production APIs. Add the environment variable to the Axios configuration in your nuxt.config.js file to set the baseURL for all requests.
/*
   ** Axios module configuration
   */
  axios: {
    // See https://github.com/nuxt-community/axios-module#options
    baseURL: process.env.API_URL,
  },
Now, create a method in your page component to fetch data. In index.vue, add an async method called getIncidents() that dispatches an action to the Vuex store and assigns the response to a local property. Trigger this method when the component mounts using the mounted lifecycle hook. The corresponding store action, getIncidents, awaits the Axios response from the server:
async getIncidents() {
  let res = await this.$store.dispatch("getIncidents");
  this.incidents = res.data.data.incidents;
}
mounted() {
this.getIncidents()
}export const actions = {
async getIncidents() {
let res = await this.$axios.get('/incidents')
return res;
}
}With this in place, refreshing the application will render a long list of incidents. We have successfully made our first request with the Axios module. Next, we will explore the Nuxt.js-specific asyncData and fetch methods, which offer distinct approaches to server-side data fetching.
asyncData
The asyncData method fetches data on the server before the page component is loaded. Because it runs so early, it does not have access to the component's this context, which is only available after the created hook. Nuxt automatically merges the data returned from asyncData into the component's data.
Using asyncData is beneficial for SEO as it pre-renders your content on the server, leading to faster perceived load times. Note that asyncData can only be used in page components found in the pages folder, not in regular components in the components folder, due to its early execution timing.
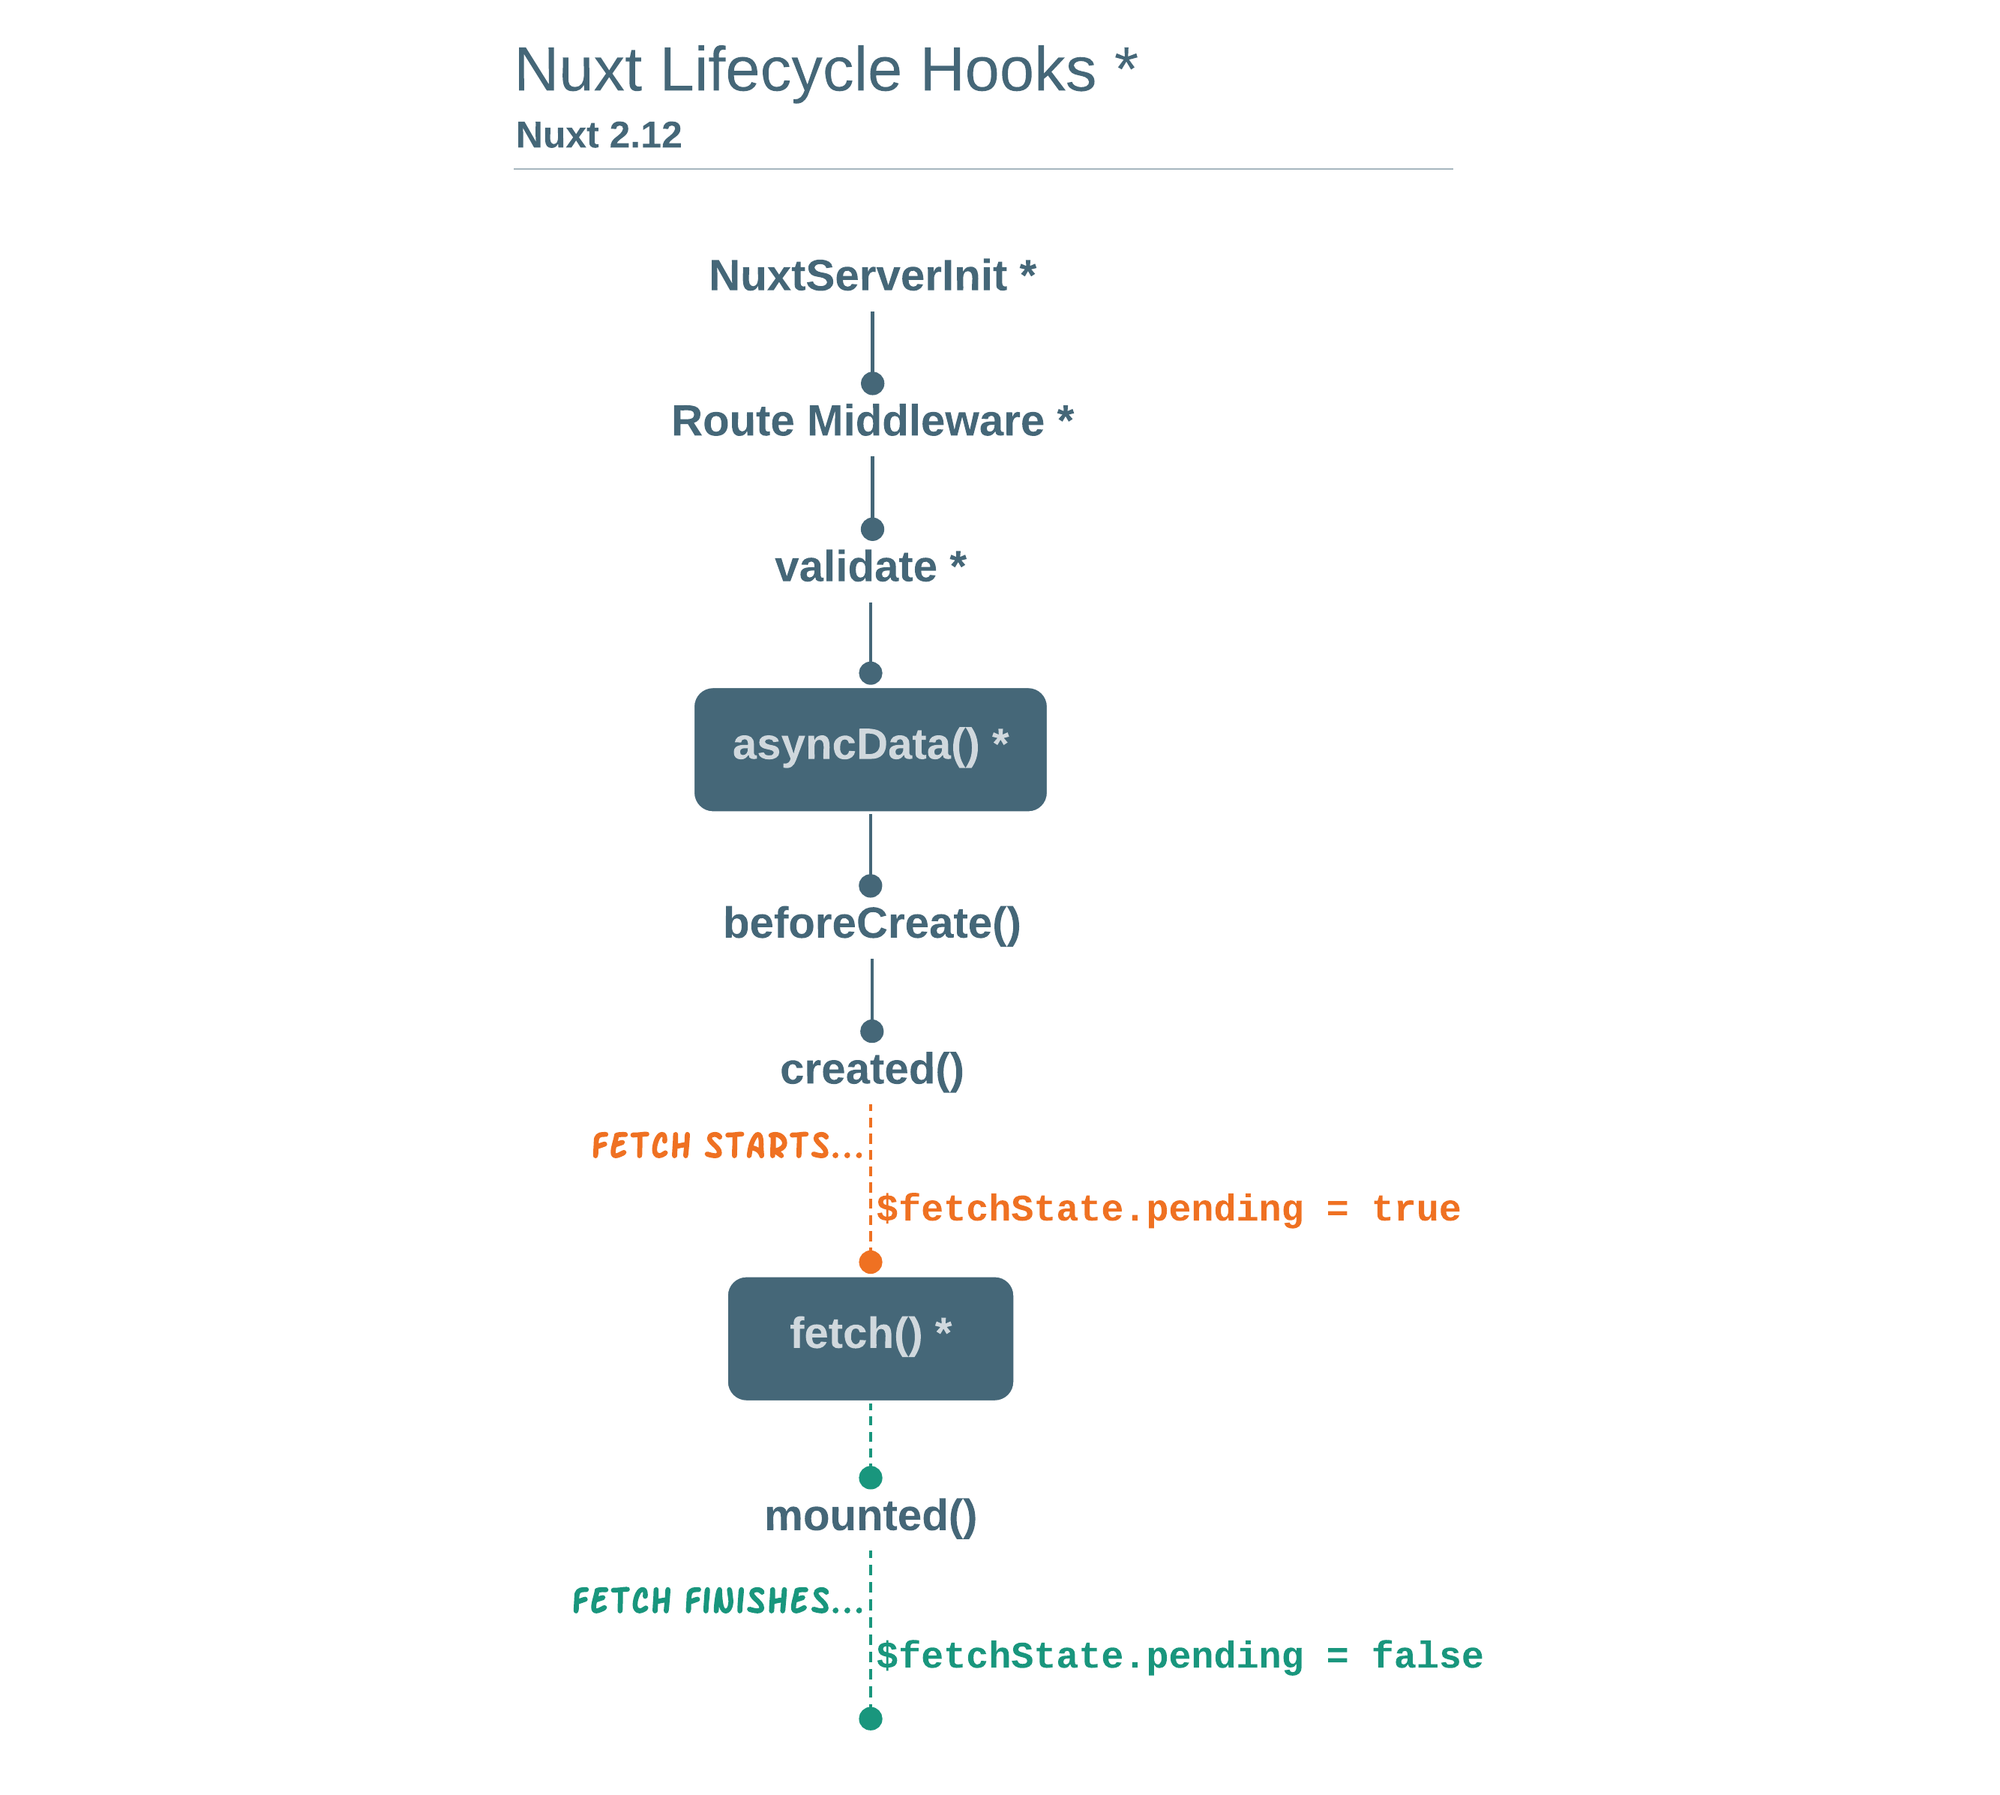
To see this in action, add asyncData to your index.vue file and remove the mounted hook. The method receives the $axios property from the Nuxt context and uses it to fetch the list of incidents:
async asyncData({ $axios }) {
    let { data } = await $axios.get("/incidents");
    return { incidents: data.data.incidents };
  },
  // mounted() {
  //   this.getIncidents();
  // },
The returned data is automatically injected back into the component. On refresh, you'll notice the content loads almost instantly, with no moment where the data is missing.
The Fetch Method
The fetch method also facilitates server-side requests, but it is called after the component's created hook, granting it access to the component's state. Fetch can be used in all .vue files and also works with the Vuex store. This means you can easily modify properties defined in your data() function, like id or gender, using this.id or this.gender.
Extending Axios with Plugins
In many projects, you may need to add advanced functionality to Axios, such as interceptors. This is achieved by extending Axios within a Nuxt plugin. To do this, create a plugin file, such as axios.js, in your plugins folder:
export default function ({
  $axios,
  store,
  redirect
}) {
  $axios.onError(error => {
    if (error.response && error.response.status === 500) {
      redirect('/login')
    }
  })
  $axios.interceptors.response.use(
    response => {
      if (response.status === 200) {
        if (response.request.responseURL && response.request.responseURL.includes('login')) {
          store.dispatch("setUser", response);
        }
      }
      return response
    }
  )
}
This plugin function receives the Nuxt context, providing access to $axios, store, and redirect. As an example, you can use $axios.onError to listen for status errors, like a 500, and redirect the user. Additionally, an interceptor can inspect every request response. In the example, it checks for a 200 status, examines if the response.request.responseURL exists and contains login, and if so, dispatches the response to the Vuex store to mutate its state. To enable this, register the plugin in your nuxt.config.js:
plugins: [
    '~/plugins/axios'
  ]
Adding Authentication with the Auth Module
For user authentication, Nuxt provides a dedicated module that integrates with Axios. This module can be accessed via $this.auth in your Vue components or as $auth in the Nuxt context object, which is available in areas like fetch, asyncData, and middleware. Install it via Yarn or npm:
YARN
yarn add @nuxtjs/authNPM
npm install @nuxtjs/authThen add it to your nuxt.config.js file, where the auth property accepts options such as strategies and redirect. The strategies section defines your authentication method, including:
local: for username/email and password flows.facebook: for Facebook account login.Github: for GitHub account login.Google: for Google account login.- Auth0 and Laravel Passport.
The redirect property specifies a set of routes: the login route users are sent to when authentication is required, the logout route for protected pages after logout, and the home route users see post-login. Add the following configuration to your file:
/*
 ** Auth module configuration
 */
auth: {
  redirect: {
    login: '/login',
    logout: '/',
    home: '/my-reports'
  },
  strategies: {
    local: {
      endpoints: {
        login: {
          url: "/user/login",
          method: "post",
          propertyName: "data.token",
        },
        logout: false,
        user: false,
      },
      tokenType: '',
      tokenName: 'x-auth',
      autoFetchUser: false
    },
  },
}
Within the auth config, there are several other useful properties. The tokenType defines the Authorization type in your Axios request header and defaults to Bearer; for APIs without a token type, set it to an empty string. The tokenName specifies the header property where the token is attached, defaulting to Authorization, which you might change to something like x-auth. The autoFetchUser property, when true, will fetch user data after login using a user endpoint; for this tutorial's API without such an endpoint, set it to false.
This tutorial uses the local strategy, so we define its configuration under strategies. The setup includes a login endpoint, but the auth module does not handle registration. Therefore, we implement a standard registration form and redirect the user to login afterwards. Authentication is performed with the this.$auth.loginWith method, which accepts the strategy name (like local) and an object containing the authentication data:
let data {
          email: '[email protected]',
          password: '123456'
}
this.$auth.loginWith('local', { data })
Wiring Up Registration and Login with the Auth Module
With the auth module configured, the registration form at/register is ready to be connected to the backend. The form's submit handler calls an async function named registerUser, which makes an Axios POST request to the /user/create endpoint inside a try/catch block. A successful response sends the visitor to /login; a failure triggers a visible error message.
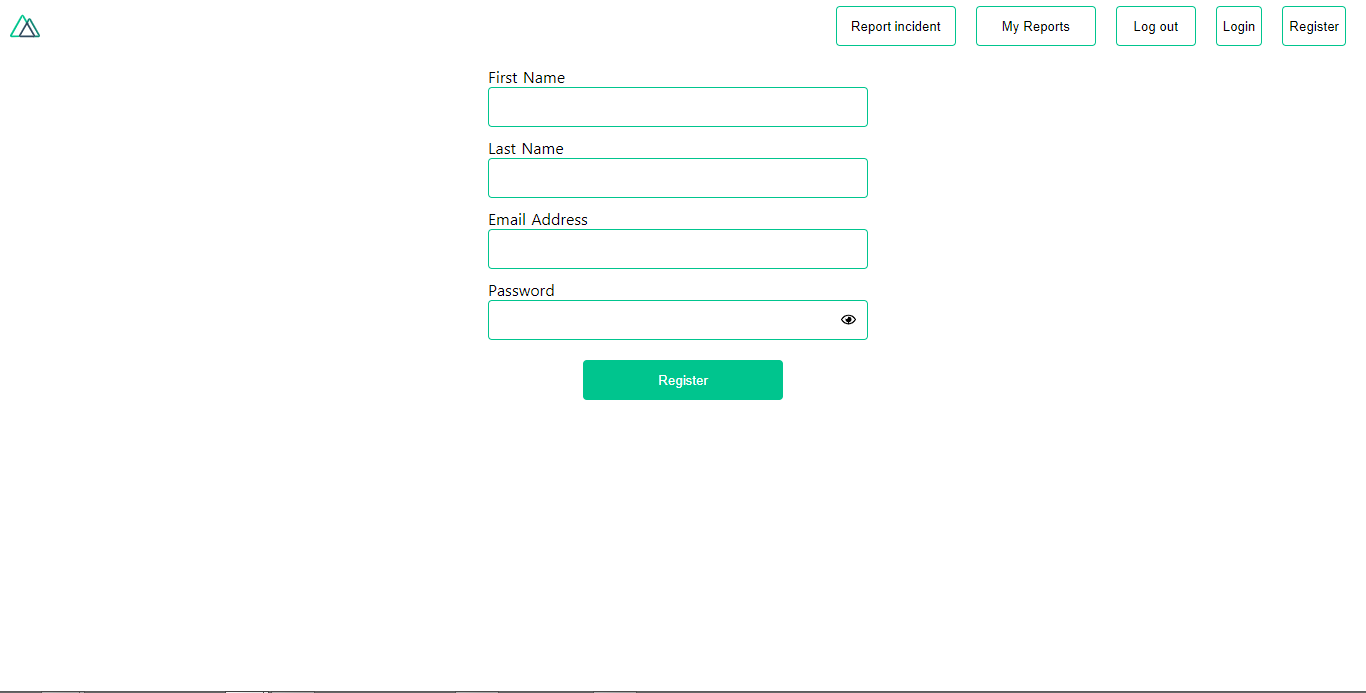
methods: {
  async registerUser() {
    this.loading = true;
    let data = this.register;
    try {
      await this.$axios.post("/user/create", data);
      this.$router.push("/login");
      this.loading = false;
      this.$notify({
        group: "success",
        title: "Success!",
        text: "Account created successfully"
      });
    } catch (error) {
      this.loading = false;
      this.$notify({
        group: "error",
        title: "Error!",
        text: error.response
          ? error.response.data.error
          : "Sorry an error occured, check your internet"
      });
    }
  }
}login.vue relies on the auth instance rather than raw Axios. The logIn function first invokes this.$auth.loginWith('local', loginData). If that call succeeds, it assigns the returned user data to the auth state with this.$auth.setUser(userInfo), then navigates to /my-report.
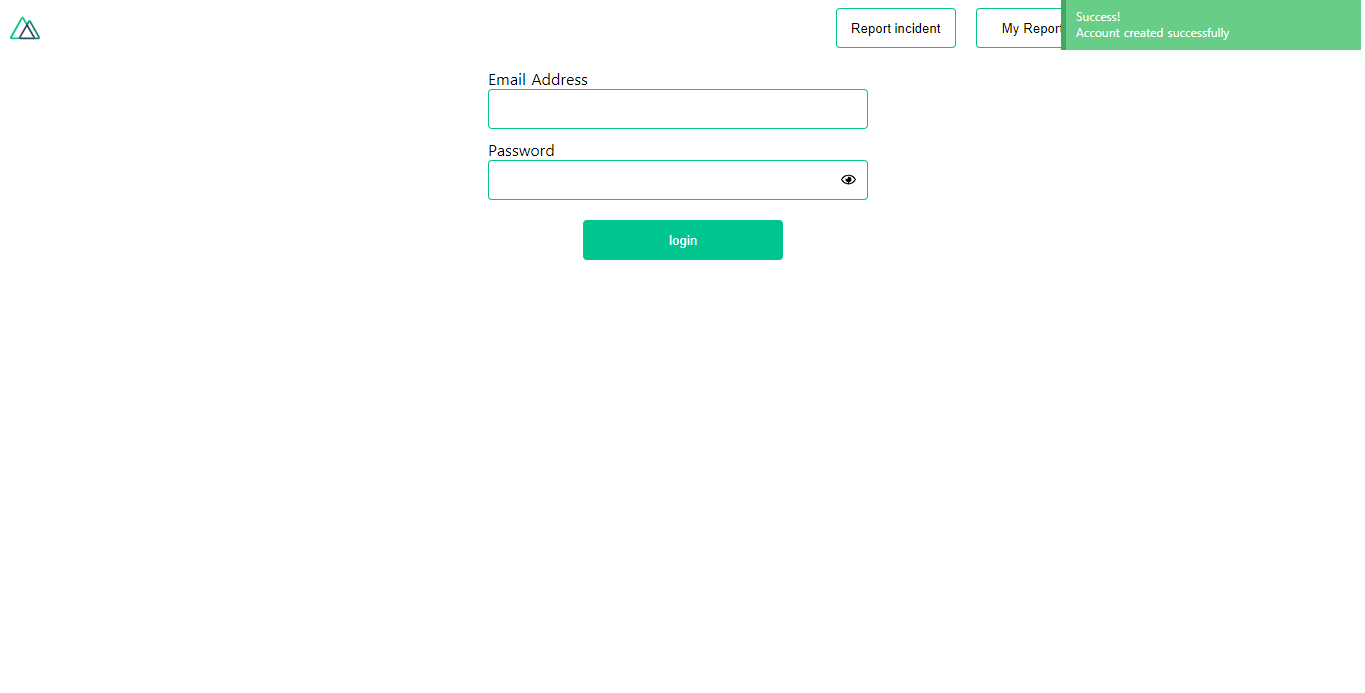
methods: {
  async logIn() {
    let data = this.login;
    this.loading = true;
    try {
      let res = await this.$auth.loginWith("local", {
        data
      });
      this.loading = false;
      let user = res.data.data.user;
      this.$auth.setUser(user);
      this.$notify({
        group: "success",
        title: "Success!",
        text: "Welcome!"
      });
    } catch (error) {
      this.loading = false;
      this.$notify({
        group: "error",
        title: "Error!",
        text: error.response
          ? error.response.data.error
          : "Sorry an error occured, check your internet"
      });
    }
  }
}this.$auth.user or through Vuex with this.$store.state.auth.user. Inspecting this.$store.state.auth in the console reveals more properties, including loggedIn, which is a boolean indicating the authenticated status.
{
  "auth": {
    "user": {
      "id": "d7a5efdf-0c29-48aa-9255-be818301d602",
      "email": "[email protected]",
      "lastName": "Xo",
      "firstName": "Tm",
      "othernames": null,
      "isAdmin": false,
      "phoneNumber": null,
      "username": null
    },
    "loggedIn": true,
    "strategy": "local",
    "busy": false
  }
}auth.loggedIn is used in the template to render sign-in links only for guests and the user's email plus a logout button only when authenticated. The email is mapped into the component's computed properties via Vuex's mapState helper. Clicking logout calls a logOut() method that dispatches a Vuex action, which relies on the auth package's logout method. That method clears user data, removes tokens from localStorage, and sets loggedIn to false.
<template>
  <header class="header">
    <div class="logo">
      <nuxt-link to="/">
        <Logo />
      </nuxt-link>
    </div>
    <nav class="nav">
      <div class="nav__user" v-if="auth.loggedIn">
        <p>{{ auth.user.email }}</p>
        <button class="nav__link nav__link--long">
          <nuxt-link to="/report-incident">Report incident</nuxt-link>
        </button>
        <button class="nav__link nav__link--long">
          <nuxt-link to="/my-reports">My Reports</nuxt-link>
        </button>
        <button class="nav__link" @click.prevent="logOut">Log out</button>
      </div>
      <button class="nav__link" v-if="!auth.loggedIn">
        <nuxt-link to="/login">Login</nuxt-link>
      </button>
      <button class="nav__link" v-if="!auth.loggedIn">
        <nuxt-link to="/register">Register</nuxt-link>
      </button>
    </nav>
  </header>
</template>
<script>
import { mapState } from "vuex";
import Logo from "@/components/Logo";
export default {
  name: "nav-bar",
  data() {
    return {};
  },
  computed: {
    ...mapState(["auth"])
  },
  methods: {
    logOut() {
      this.$store.dispatch("logOut");
      this.$router.push("/login");
    }
  },
  components: {
    Logo
  }
};
</script>
<style></style>
export const actions = {
// ....
logOut() {
this.$auth.logout();
}
}/my-reports and report-incident remain open to guests, which is not the intended behavior. Nuxt does not ship with a built-in navigation guard for route protection; however, the auth module includes its own middleware that can be applied either per route or globally from nuxt.config.js.
router: {
  middleware: ['auth']
}auth.js file in the middleware folder. Adding the middleware to both my-reports.vue and report-incident.vue is done by listing it in the component's middleware property.
middleware: 'auth'auth.loggedIn is false) will be redirected to the login page.
## Submitting Incident Reports
The report-incident page renders a form for the user to submit a new incident. The form binds input fields for a title, location, and comment with v-model. A click handler on the submit button triggers the reportIncident method.
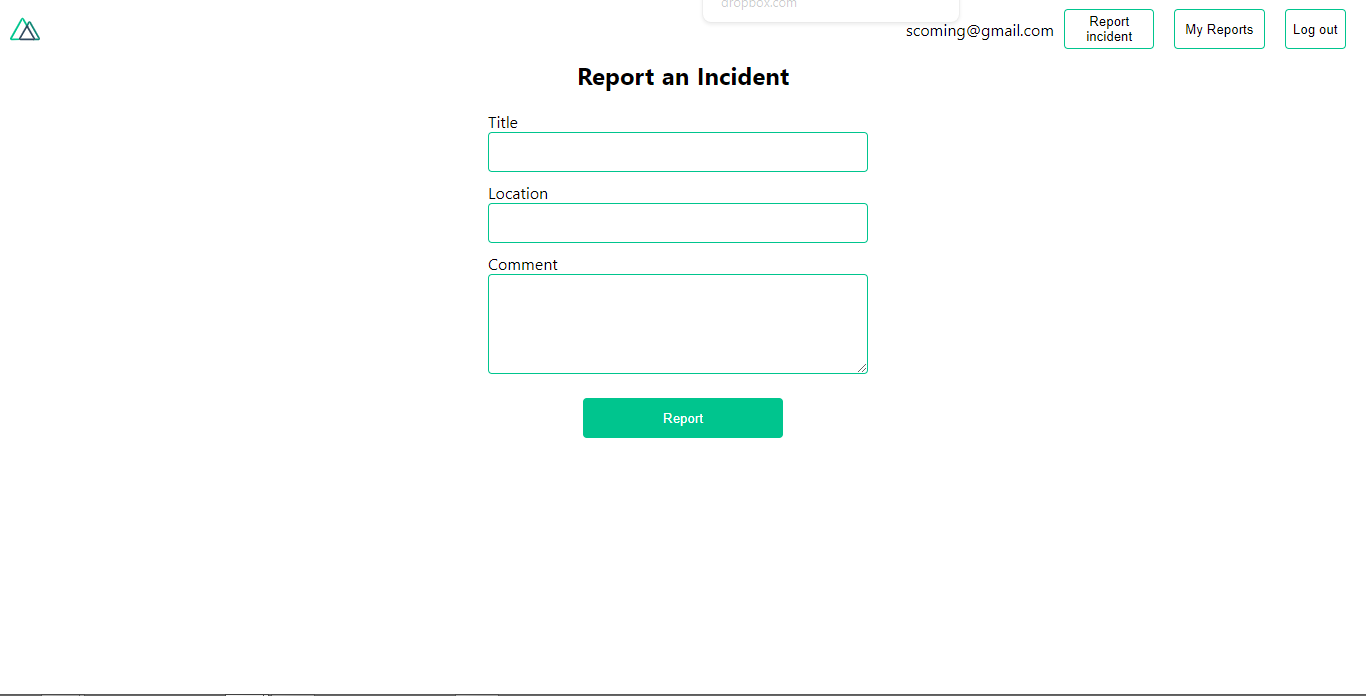
<template>
  <section class="report">
    <h1 class="report__heading">Report an Incident</h1>
    <form class="report__form">
      <div class="input__container">
        <label for="title" class="input__label">Title</label>
        <input
          type="text"
          name="title"
          id="title"
          v-model="incident.title"
          class="input__field"
          required
        />
      </div>
      <div class="input__container">
        <label for="location" class="input__label">Location</label>
        <input
          type="text"
          name="location"
          id="location"
          v-model="incident.location"
          required
          class="input__field"
        />
      </div>
      <div class="input__container">
        <label for="comment" class="input__label">Comment</label>
        <textarea
          name="comment"
          id="comment"
          v-model="incident.comment"
          class="input__area"
          cols="30"
          rows="10"
          required
        ></textarea>
      </div>
      <input type="submit" value="Report" class="input__button" @click.prevent="reportIncident" />
      <p class="loading__indicator" v-if="loading">Please wait....</p>
    </form>
  </section>
</template>
<script>
export default {
  name: "report-incident",
  middleware: "auth",
  data() {
    return {
      loading: false,
      incident: {
        type: "red-flag",
        title: "",
        location: "",
        comment: ""
      }
    };
  },
  methods: {
    async reportIncident() {
      let data = this.incident;
      let formData = new FormData();
      formData.append("title", data.title);
      formData.append("type", data.type);
      formData.append("location", data.location);
      formData.append("comment", data.comment);
      this.loading = true;
      try {
        let res = await this.$store.dispatch("reportIncident", formData);
        this.$notify({
          group: "success",
          title: "Success",
          text: "Incident reported successfully!"
        });
        this.loading = false;
        this.$router.push("/my-reports");
      } catch (error) {
        this.loading = false;
        this.$notify({
          group: "error",
          title: "Error!",
          text: error.response
            ? error.response.data.error
            : "Sorry an error occured, check your internet"
        });
      }
    }
  }
};
</script>
<style>
</style>FormData object. This data is dispatched to a Vuex action via this.$store.dispatch. Sending payloads this way is necessary because the API accepts images and videos, not just plain JSON. On success, the user is redirected to /my-reports with a success notification; an error shows a message.
Since the reportIncident action doesn't exist in the store yet, trying to submit the form will produce a console error.
![error message that reads ‘[Vuex] unknown action type: reportIncident'](https://archive.smashing.media/assets/344dbf88-fdf9-42bb-adb4-46f01eedd629/3f5d686f-0554-4ab4-aae5-0b3f154a0abb/07-action-error-message.png)
index.js fixes that. The action receives the form data, attaches it to an Axios post request designed to create an incident, and returns the response to the Vue component.
export const actions = {
  // ...
  async reportIncident({}, data) {
    let res = await this.$axios.post('/incident/create', data)
    return res;
  }
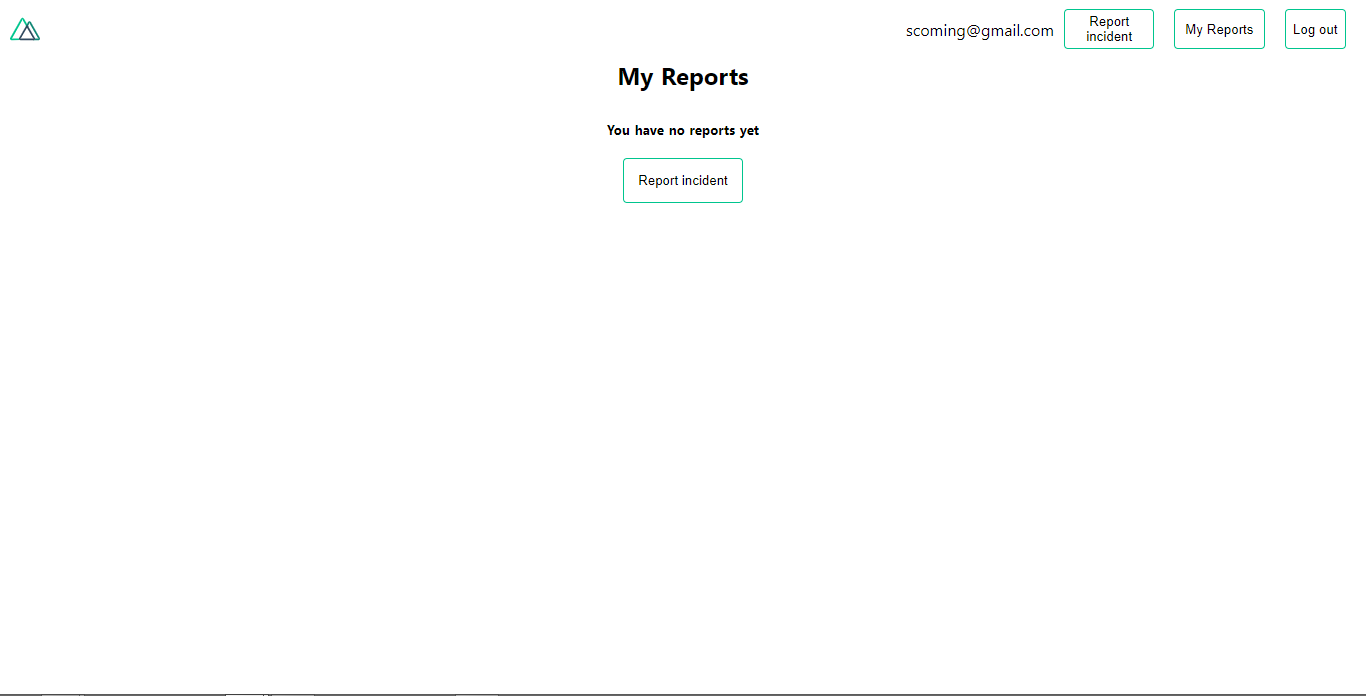
}/my-reports page. That page is meant to list only incidents the current user created, though at this stage it shows nothing because its data-loading logic isn't implemented yet.
Similar to the asyncData method, the component uses Nuxt's fetch hook to get this list. When fetch runs, it calls the API to request user-specific incidents and assigns the response to a component data property for rendering the list.
<script>
import incidentCard from "@/components/incidentCard.vue";
export default {
  middleware: "auth",
  name: "my-reports",
  data() {
    return {
      incidents: []
    };
  },
  components: {
    incidentCard
  },
  async fetch() {
    let { data } = await this.$axios.get("/user/incidents");
    this.incidents = data.data;
  }
};
</script>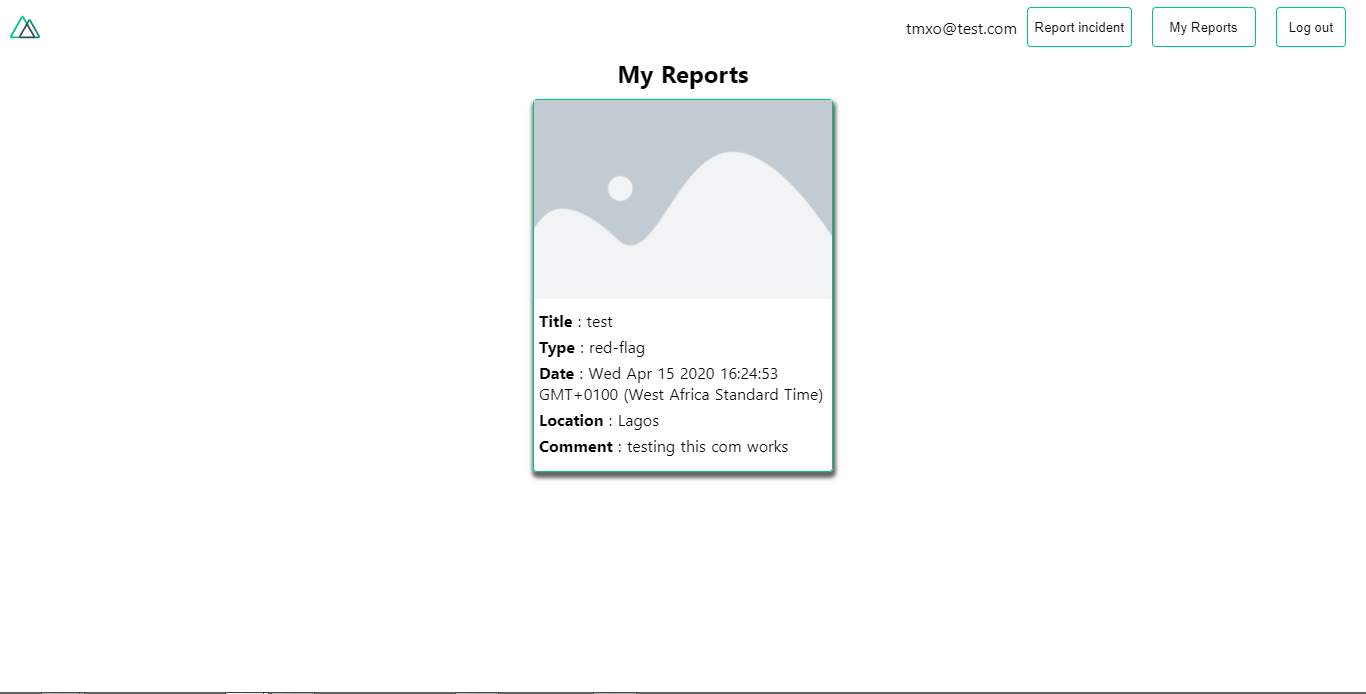
fetch populates component data after the page loads, whereas asyncData loads data before the component is created.
Summary
In practice, the Nuxt Axios module simplifies HTTP requests, and paired with Nuxt'sasyncData and fetch hooks, it provides a direct path for building data-driven views. Adding the auth module on top of that gives you a ready-made solution for registration, login, session management, and protecting routes with middleware. For further guidance, the official docs cover topics such as Nuxt meta tags, the dotenv module, fetching data in Nuxt 2.12+, and the Vue lifecycle diagram. The auth module and Axios module documentation are both useful references for what we have set up here.



