The Shape-Shifter of SVG: Why Paths Matter
For many developers, the SVG <path> element feels like a rite of passage. Its syntax can initially appear as cryptic as a Regex pattern, often triggering that familiar “what on earth?” reaction. Yet, beneath that opaque exterior lies one of the most powerful tools in the vector graphics toolbox. Paths are the only way to draw true curved shapes in SVG—anything beyond a basic ellipse—and they are essential for everything from custom icons to complex illustrations.
This guide demystifies the core commands, breaking down how they function step by step. We will build a practical intuition for the mechanics, avoiding the abstract theory in favor of a hands-on understanding of how these coordinates and instructions actually paint a picture.
The Pen and Paper Model
Conceptually, the <path> element operates much like a physical ink pen on a piece of paper. It allows us to chain a series of discrete drawing actions together. Every command in the d attribute—which curiously stands for “data”—consists of a single letter representing the action (like grabbing the pen, or dragging it across the page) followed by the numeric coordinates required to execute it.
Consider this elementary example which draws a simple shape:
<svg viewBox="0 0 16 16">
  <path
    d="
      M 12,4
      L 4,12
      M 6,4
      L 12,4
      L 12,10
    "
  />
</svg>
Here, the M command lifts the imaginary pen and moves it to a new starting location. The L command then drags that pen in a straight line to a specified point. By sequencing these commands—move, draw, move, draw—we construct a complete figure. A visual breakdown of that process looks like this:
<svg viewBox="0 0 16 16">
<path
d="
M 12,4
L 4,12
M 6,4
L 12,4
L 12,10
"
/>
</svg>
You can think of this attribute as a procedural recipe. Just as a cooking instruction says “chop the carrots, boil the broccoli,” each letter defines a new step, and the trailing numbers act as arguments passed to that specific function.
The critical concept here is that each instruction flows into the next. A common stumbling block for beginners is the expectation that a line command requires two points: a start and an end. In SVG, it does not. The start point is always inherited from the tail end of the previous command. This stateful chaining is what makes the syntax compact, but it is also the core mental shift required to master it.
Understanding the Coordinate System
To visualize how these commands operate, it helps to map them onto a grid. In the default SVG canvas, the origin point (0, 0) is situated in the top-left corner. As you move along the X-axis (the first number), you travel horizontally to the right. As you move along the Y-axis (the second number), you travel vertically downwards.
Therefore, a command like M 10 10 does not place the pen in the center of the screen, but rather 10 pixels from the left edge and 10 pixels from the top edge. This coordinate system remains constant across all path commands, so understanding this spatial layout is crucial before we begin drawing complex lines and curves.
Lines, Shortcuts, and Closures
While L (Line to) is the fundamental drawing tool, SVG provides shortcuts to simplify writing common trajectories. Frequently, users need to draw perfectly horizontal or vertical lines. Rather than computing the missing X or Y value manually, you can use H (horizontal line) and V (vertical line). For instance, H 50 will draw a line from your current position to the X-coordinate of 50 while keeping the Y-coordinate unchanged.
Another vital command is Z (Close Path). This command draws a straight line from your current position all the way back to the initial starting point of the shape. This ensures that the figure is perfectly sealed, which is essential when you plan to apply a fill color—it prevents tiny gaps at the corners.
Thanks to the "pen" model, these commands operate in absolute coordinates relative to the SVG grid. However, for drafting shapes, we often want to work with relative movements. SVG addresses this by using lowercase letters for all commands. Lowercase commands (m, l, h, etc.) interpret their parameters as offsets from the current pen position, rather than absolute coordinates. This makes it easier to draw symmetrical shapes or repeat patterns without manually calculating each point.
Drawing Curves
Now that straight lines are handled, we enter the realm of curves. SVG offers three distinct types of curve commands, each with its own metaphoric mechanical control:
- Cubic Bezier (
C): This is the industry-standard curve used in design software. It has two control points, which act as handles for shaping the curve. The notation isC x1 y1, x2 y2, x ywherex1 y1andx2 y2are the control points, andx yis the end point. - Smooth Cubic (
S): A shortcut to create continued smooth curves. If used after a cubic curve, it automatically mirrors the previous control point, meaning you only need to specify the second control point and the end point. - Quadratic Bezier (
Q): A simpler curve that uses a single control point pulling the line from the start to the end. The notationQ x1 y1, x yrequires only one control point, making it lighter to compute efficiently.
Once you master these control points, you can create fluid, organic shapes that are impossible with standard geometric primitives. The control points act like magnets, dragging the connecting line toward them without actually touching them.
The Infamous Arc Command
The final major tool in the basic set is the Arc (A). It is often viewed as the most intimidating. Rather than drawing a free-form curve, an arc draws a segment of a circle or an ellipse. The command is verbose, requiring seven parameters: A rx ry x-axis-rotation large-arc-flag sweep-flag x y.
Here is a breakdown of each parameter:
rxandry: The horizontal and vertical radii of the ellipse to draw.x-axis-rotation: The angle at which the ellipse is rotated relative to the horizontal axis.large-arc-flag: Set to 1 if you want the longer path around the ellipse, or 0 for the shorter one.sweep-flag: Set to 1 if you want a positive-angle (clockwise) path, or 0 for a negative-angle (counter-clockwise) path.xandy: The final endpoint of the arc.
While the rx and ry values describe the theoretical ellipse, the given start and end points often cannot specify a unique ellipse. This is where the flags become crucial. The large-arc-flag dictates whether to take the inner route (under 180 degrees) or the outer route (over 180 degrees). The sweep-flag dictates which side of the line the arc bulges toward.
Rather than trying to visualize this in your head, consider what occurs when you set these flags:
- Sweep Direction: With the same start and end points, setting
sweep-flagto 1 will draw a curve bending one way, while setting it to 0 will bend the opposite direction, effectively producing a mirror image. - Arc Size: Keeping the start and end points identical, toggling
large-arc-flagfrom 0 to 1 changes the drawing from the minor arc (the shorter cut) to the major arc (the scenic route covering more than half the circle).
Because these flags often create inverse scenarios, they are the source of most confusion. A great way to internalize them is to use an interactive visualizer that allows you to drag points and toggle flags to see the immediate impact on the rendered shape.
Practical Application
Understanding path syntax unlocks the ability to create icons, charts, and brand elements from scratch rather than relying on icon-fonts or stock assets. For example, you can construct a speech bubble by combining a rounded rectangle (via H, V, and Z) with a small triangle pointer—all inside a single path. This makes your SVGs significantly lighter on the DOM, easier to scale, and less expensive for the browser to render.
Trying to construct these complex shapes step-by-step can be tedious, but practicing by deconstructing existing paths in developer tools is an excellent way to train your eye. Over time, reading the d attribute becomes a second language, and drawing complex curves feels less like wrestling with Regex and more like sketching with your keyboard.
Drawing With Path Commands
The SVG <path> element exposes a set of drawing commands. Each command letter is followed by one or more coordinates or parameters, and commands can be chained together to build complex shapes.
The Move Command
The M command moves the drawing point to a new location on the canvas. It takes two numbers: an X coordinate and a Y coordinate.
<path d="M 10,10" />The Move command does not draw anything. Think of it like lifting the pen off the paper and repositioning it before starting a stroke. Every path must begin with a Move command so the browser knows where drawing starts.
Line Segments
Straight lines are drawn with the L command:
<svg viewBox="0 0 16 16">
  <path
    d="
      M 2,2
      L 14,14
      M 2,14
      L 14,2
    "
  />
</svg>
Here is a visualization of that command sequence:
<svg viewBox="0 0 16 16">
<path
d="
M 2,2
L 14,14
M 2,14
L 14,2
"
/>
</svg>
Bézier curves
If you have worked with CSS transitions, you have likely used Bézier curves to control easing. In SVG, the same mathematical curves are rendered visually. There are two flavors available in paths: quadratic and cubic.
Quadratic Bézier curves
The Q command produces a quadratic Bézier curve, which has a single control point.
Quadratic curves require three pieces of information:
- The starting point, taken from the previous command.
- The control point, which pulls the line into a curve.
- The end point, where the line finishes.
Like the L command, the starting position is inherited from whatever came before.
<svg viewBox="0 0 16 16">
<path
d="
M 2,2
Q 2,14
14,14
"
/>
</svg>
Cubic Bézier curves
The C command creates a cubic Bézier curve, adding a second control point.
The terms "quadratic" and "cubic" only refer to the number of control points: one versus two. Choose cubic over quadratic when the curve needs an S-bend, or when you need more precision over the curve's shape. Moving the two control points close together tightens the bend in ways a single control point cannot.
<svg viewBox="0 0 16 16">
<path
d="
M 2,2
C 2,14
14,2
14,14
"
/>
</svg>
<svg viewBox="0 0 16 16">
<path
d="
M 2,2
C 2,15
1,14
14,14
"
/>
</svg>
Arcs
Elliptical arcs are the most complex path command. The full syntax carries many parameters:
<path
  d="
    M [start-x],[start-y]
    A [rx],[ry] [rotation] [large-arc-flag] [sweep-flag] [end-x],[end-y]
  "
/>
Before diving into the syntax, it helps to understand the geometric problem arcs solve. The A command draws an elliptical curve between a start point and an end point. Unlike the <ellipse> element, which is positioned by its center using cx and cy, arcs require the browser to invent a hypothetical ellipse that contains both endpoints on its circumference.
That design choice introduces several ambiguities that explain the parameter list.
Controlling the Ellipse Size
The browser computes a complete hypothetical ellipse before drawing the arc. You can specify the horizontal radius (rx) and vertical radius (ry) independently. These values determine how deep or shallow the arc appears: smaller radii produce deeper arcs, larger radii produce flatter ones.
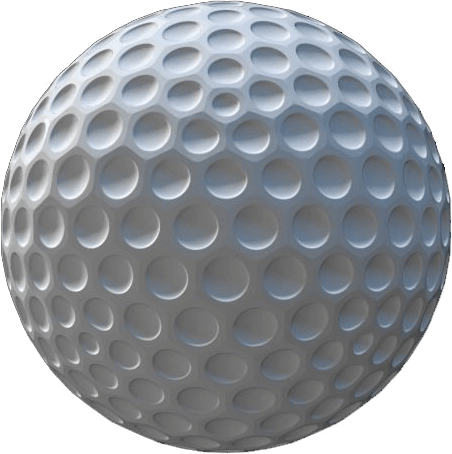
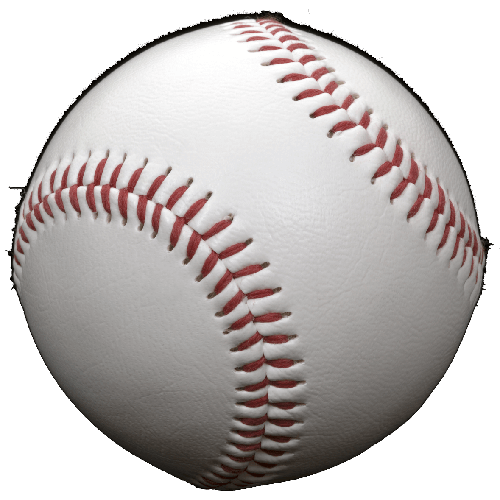
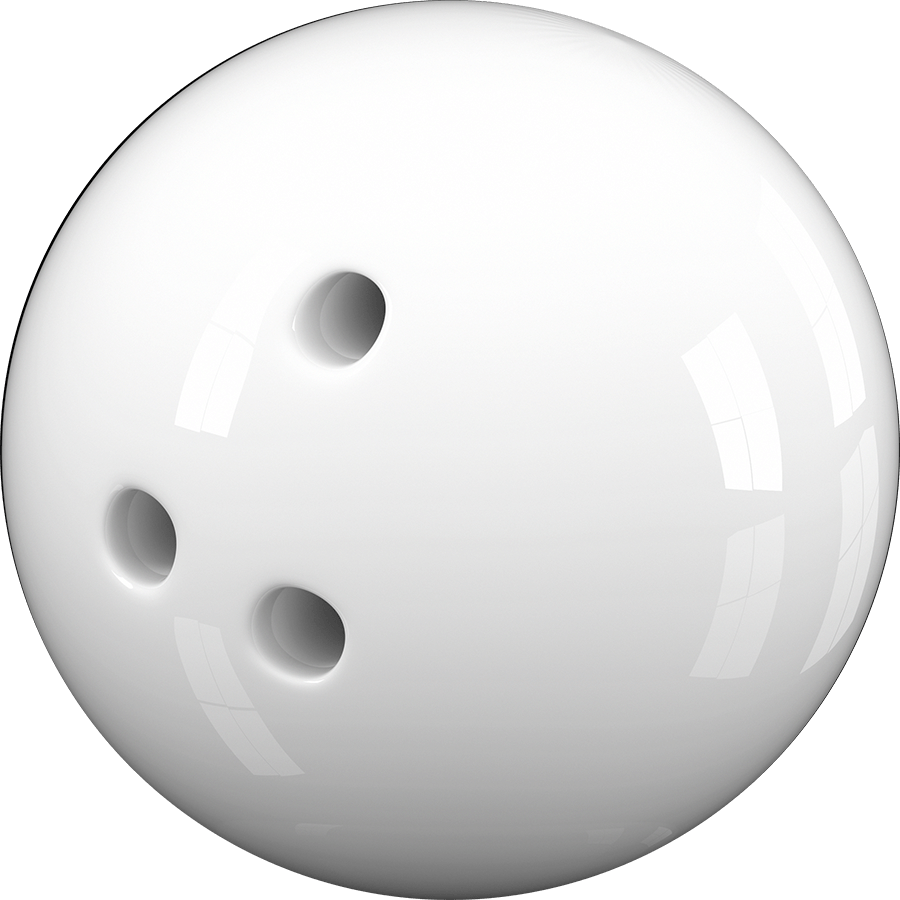
A useful mental model: imagine a ball resting in a small hole on a table. The curved portion of the ball below the table's surface is the arc. A golf ball sinks deeper, making a pronounced curve. A bowling ball sits almost flat on top of the hole, so the arc is nearly straight.
Large vs. Small Arcs
Given a fixed ellipse and two endpoints, there are still two separate routes from the start to the end point. The large arc flag selects between them: setting it to 0 takes the short path, while 1 follows the long way around.
The Sweep Flag
When the chosen radius is larger than the distance between the two endpoints, there are two possible ellipses that can connect them. The sweep flag picks which one the browser uses: 0 follows the counter-clockwise arc, and 1 follows the clockwise route.
Rotation
The final parameter rotates the hypothetical ellipse before the connecting arc is drawn. If rx and ry are equal, rotation has no visible effect, since rotating a perfect circle changes nothing. The practical use case is aligning the arc with a shape drawn at an angle, such as the brim of a hat tilted 45 degrees. In most situations, it is easier to draw the path straight-on and rotate the whole shape with transforms.
Arc Syntax in Full
With that context, the parameter list becomes clear:
<path
  d="
    M [start-x],[start-y]
    A [rx],[ry] [rotation] [large-arc-flag] [sweep-flag] [end-x],[end-y]
  "
/>- The arc inherits its start position from the previous command.
rxandryset the horizontal and vertical radius of the hypothetical ellipse.rotationrotates the ellipse, measured in degrees. Leave at0for no rotation.large-arc-flagpicks the short path (0) or the long path (1).sweep-flagchooses the counter-clockwise (0) or clockwise (1) arc.end-xandend-yset the endpoint.
Every parameter is mandatory, even if you leave rotation at 0 or the radii set to the same value.
<svg viewBox="0 0 16 16">
  <path
    d="
      M 2,2
      L 5,5
      A 4,4 0 0 0 11,11
      L 14,14
    "
  />
</svg>
Syntactic sugar for smoother paths
A few extra commands and conventions can make SVG paths much easier to write and maintain. These aren’t new drawing primitives — they’re conveniences that cut down on repetitive coordinate math or manual fine-tuning.
Sealing a path with Z
Paths are open by default. The Z command closes one by drawing a straight line back to the starting point of the initial M command. In practice, a path that starts at (4,4) and ends elsewhere can be closed with Z instead of explicitly tracing a line back with something like L 4,4.
<svg viewBox="0 0 16 16">
  <path
    d="
      M 4,4
      L 4,12
      L 12,12
      Z
    "
  />
</svg>
Relative commands for a different coordinate model
Every uppercase command like L or A has a lowercase counterpart. Uppercase commands use absolute coordinates based on the SVG root, where (0,0) is the top-left corner. Lowercase commands are relative: they anchor to the previous command’s endpoint.
<svg viewBox="0 0 16 16">
  <path
    d="
      M 4,4
      l 4,8
      l 4,-8
    "
  />
</svg>
Consider a path that starts at (4,4) and then uses a relative line. If that line adds 4px horizontally and 8px vertically, it ends at (8,12), which is equivalent to the absolute command L 8,12. Negative values, naturally, move in the opposite direction. A subsequent relative line that adds 4px to X but subtracts 8px from Y would take the path from (8,12) to (12,4).
Relative commands offer a different mental model for shaping paths, which can suit certain illustrations. They also make it easier to reposition a group of points: moving the anchor shifts the whole path rather than deforming its shape. That said, for most real-world cases, a transform: translate(x, y) on the element is a simpler way to slide a path around without recalculating coordinates.
Chaining curves without kinks
Connecting two Bézier curves is notoriously fiddly. Without careful planning, the joint between them shows a visible “elbow” where the tangents don’t line up. There’s no built-in smoothing, so matching the angle of the incoming curve to the outgoing one is entirely up to you.
<svg viewBox="0 0 16 16">
  <path
    d="
      M 4,4
      Q 4,10
        8,8
      Q 14,0
        12,12
    "
  />
</svg>
That elbow is easy to spot up close:
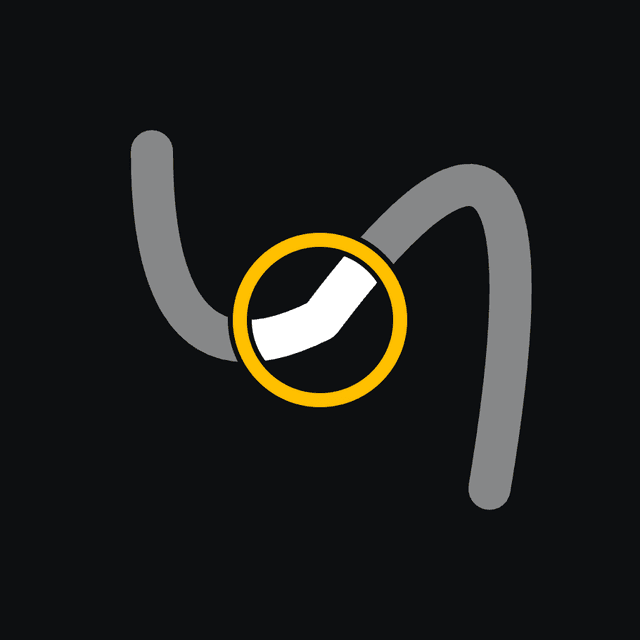
Two commands exist to handle this automatically. The T command draws a Quadratic Bézier curve like Q, but it only takes an endpoint — no control point. The control point is mirrored from the previous curve’s, which keeps the path smooth and kink-free. The same idea applies to cubic Béziers with the S command, which omits the first control point and derives it for you.
<svg viewBox="0 0 16 16">
  <path
    d="
      M 4,4
      Q 4,10
        8,8
      T 12,12
    "
  />
</svg>
That saves the trial and error of hunting for a control point that won’t produce a joint. Still, if a shape relies on many chained curves, professional vector software is often the more practical tool.


