
Why local HTTPS matters
For most development work, http://localhost behaves like HTTPS. But specific scenarios—custom hostnames or secure cookies across browsers—require your local site to genuinely run over HTTPS so it accurately reflects production behavior. If your production site doesn't yet use HTTPS, moving it to HTTPS should be a priority.
This guide walks through setting up HTTPS for local development using mkcert, a cross-platform tool that creates and signs certificates trusted by your device and browser.
Setting up mkcert
To access https://localhost or a custom hostname like https://mysite.example, your development server needs a TLS certificate signed by a trusted certificate authority (CA). Browsers verify this signature before establishing an HTTPS connection.
Most operating systems ship with certificate libraries such as openssl, but these are more complex, less reliable, and not necessarily cross-platform—making them harder to use across larger teams. mkcert avoids those issues.
Installation and configuration
Follow the mkcert installation instructions for your OS. On macOS:
brew install mkcert
brew install nss # if you use Firefox
Next, add mkcert to your local root CAs. This creates a local CA that is only trusted on your device:
mkcert -install
Now generate a certificate, signed by mkcert, from your site's root directory (or wherever you want to keep the certificate):
mkcert localhost
For a custom hostname like mysite.example:
mkcert mysite.example
This command generates a certificate for the specified hostname and lets mkcert sign it. The certificate is now ready and recognized by your browser as trustworthy.
Configuring your server
How you enable HTTPS with the certificate depends on your server. Here are common examples.
Node.js
In server.js, replace {PATH/TO/CERTIFICATE...} and {PORT}:
const https = require('https');
const fs = require('fs');
const options = {
  key: fs.readFileSync('{PATH/TO/CERTIFICATE-KEY-FILENAME}.pem'),
  cert: fs.readFileSync('{PATH/TO/CERTIFICATE-FILENAME}.pem'),
};
https
  .createServer(options, function (req, res) {
    // server code
  })
  .listen({PORT});
http-server
Start the server with these flags, replacing {PATH/TO/CERTIFICATE...}:
http-server -S -C {PATH/TO/CERTIFICATE-FILENAME}.pem -K {PATH/TO/CERTIFICATE-KEY-FILENAME}.pem
-S runs the server with HTTPS, -C specifies the certificate, and -K specifies the key.
React development server
Edit package.json, replacing {PATH/TO/CERTIFICATE...}:
"scripts": {
"start": "HTTPS=true SSL_CRT_FILE={PATH/TO/CERTIFICATE-FILENAME}.pem SSL_KEY_FILE={PATH/TO/CERTIFICATE-KEY-FILENAME}.pem react-scripts start"
For a certificate created for localhost in the site's root directory:
|-- my-react-app
    |-- package.json
    |-- localhost.pem
    |-- localhost-key.pem
    |--...
The start script then looks like:
"scripts": {
    "start": "HTTPS=true SSL_CRT_FILE=localhost.pem SSL_KEY_FILE=localhost-key.pem react-scripts start"
For other frameworks, see the Angular development server or Python documentation.
After configuration, open https://localhost or https://mysite.example in your browser. No warnings should appear because your browser trusts mkcert's local CA.
Alternative approaches
mkcert is the recommended path. Other options exist but generally bring more complexity or risk.
Self-signed certificates
You can skip a local CA and sign your own certificate. This approach has notable pitfalls:
- Browsers don't trust you as a CA, so they display warnings you must bypass manually. Chrome's
#allow-insecure-localhostflag can bypass these warnings automatically forlocalhost. - It is unsafe on an insecure network.
- It isn't necessarily faster or simpler than using a local CA.
- Self-signed certificates don't behave identically to trusted ones.
- Outside a browser, you must disable certificate verification for the server—and forgetting to re-enable it in production creates security vulnerabilities.
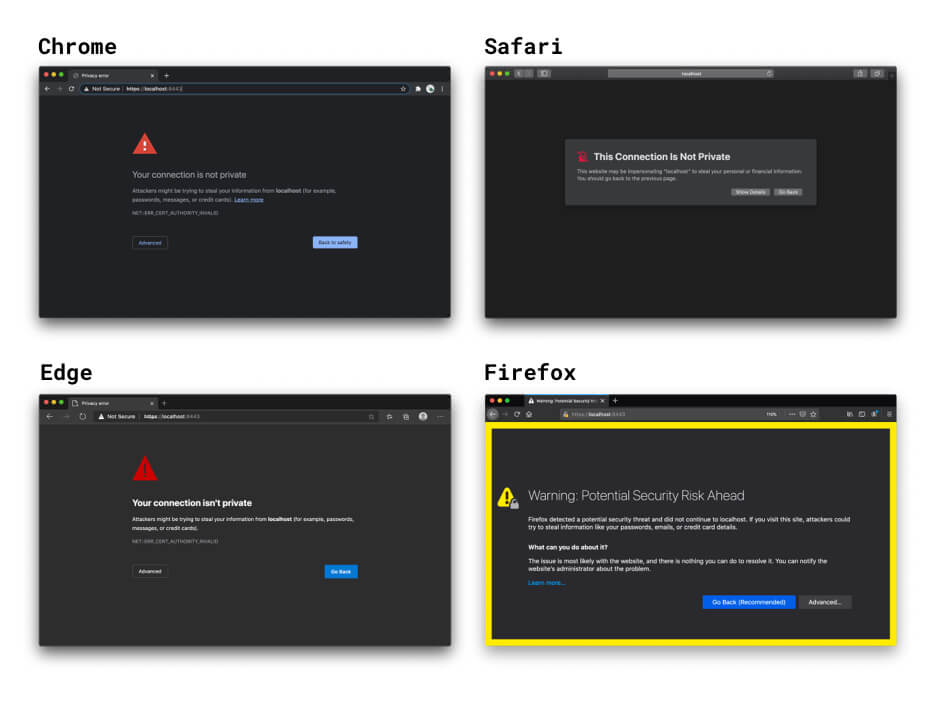
React's and Vue's development servers generate a self-signed certificate if none is specified. That's quick, but brings the same browser warnings and other issues. A better approach is using these frameworks' built-in HTTPS option with a locally trusted certificate from mkcert.
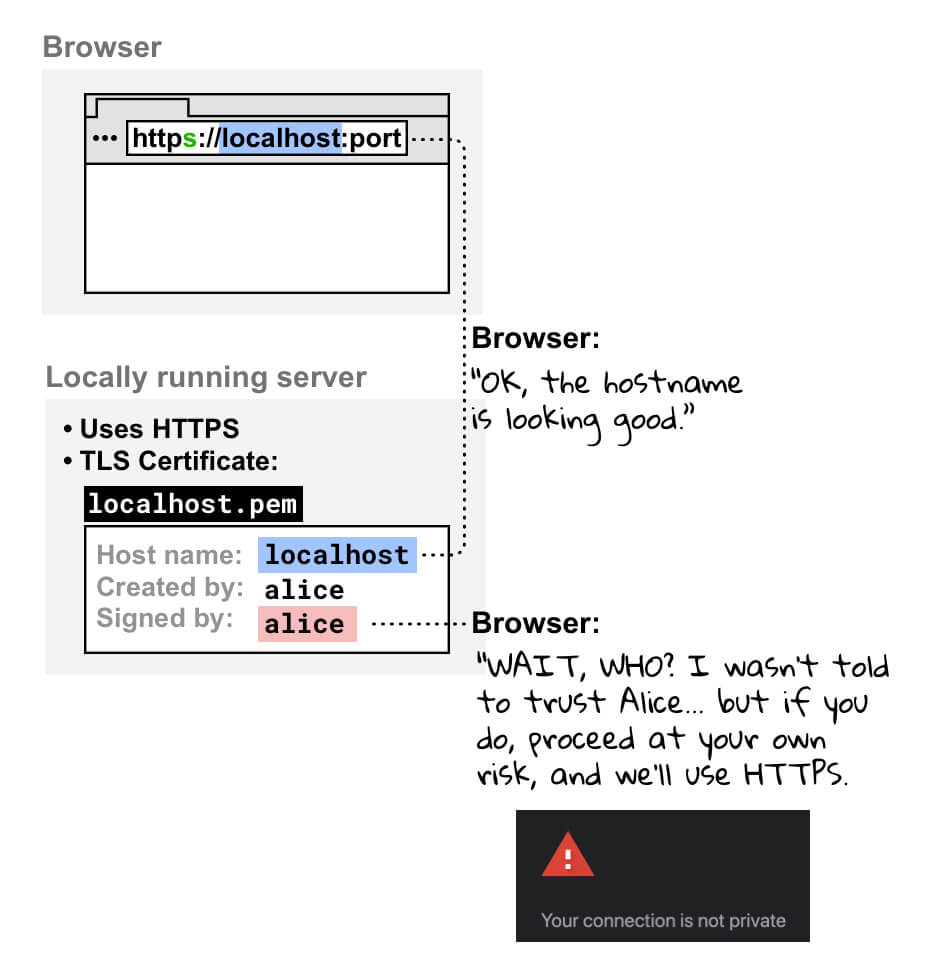
Why aren't self-signed certificates trusted? When your browser connects via HTTPS to a local site, it checks the server's certificate. On seeing a self-signed cert, the browser verifies if you're a registered CA. Since you aren't, it warns that the connection isn't secure. You can still proceed, but you do so at your own risk.
Certificates from official CAs
Using a certificate from an official CA is viable but includes complications:
- More setup work than with a local CA like mkcert.
- Requires a valid domain name you control. Official CAs cannot sign for
localhostor reserved names likeexampleortest, nor for domains you don't control or with invalid top-level domains.
Reverse proxies
A reverse proxy such as ngrok can expose a local HTTPS URL. Considerations:
- Anyone with the proxy URL can access your local site. This is useful for client demos but also allows unauthorized access to sensitive data.
- Many reverse proxy services are paid.
- New browser security measures may affect how these tools function.
Browser flags
For Chrome, a flag can force a custom hostname like mysite.example to be treated as secure. This is not recommended because:
- You must guarantee
mysite.examplealways resolves locally; otherwise production credentials risk leaking. - The flag is Chrome-only, so cross-browser debugging isn't possible.
Quick reference
To run your local site over HTTPS with mkcert:
Set up mkcert. Install it (macOS shown below), then create a local CA:
brew install mkcert
mkcert -install
See the mkcert installation docs for Windows and Linux.
Create a trusted certificate:
mkcert {YOUR HOSTNAME e.g. localhost or mysite.example}This creates a valid certificate that mkcert signs automatically. Then configure your server to use it.
Test in your browser by visiting
https://{YOUR HOSTNAME}:</div>


