Push messages and notifications: the basics
Push notifications let you reach users with timely information even when they aren't actively viewing your site. The term combines two separate technologies: push messages, which carry data from your server to a user's device, and notifications, which present that data to the user through the operating system's UI. While it's possible to use notifications without push messages, browsers currently don't support silent push—sending messages without displaying a notification—so in practice the two are used together.
The appearance of notifications varies by platform, but the underlying workflow is the same regardless of device or browser.
Why implement push notifications?
For users, push notifications are a channel for receiving timely, relevant, and precise information. For site owners, they're a mechanism for increasing engagement.
The push notification workflow
Implementing push notifications involves three high-level steps:
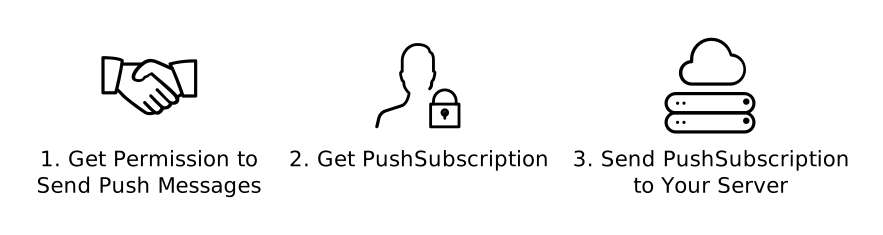
- Build client logic that requests permission and sends subscriber identifiers to your server for storage.
- Build server logic that sends messages to client devices.
- Build client logic that receives the pushed messages and renders them as notifications.
The details of each step are described below.
Requesting permission
Permission requests must be triggered by a user gesture—for example, clicking a button next to a Do you want to receive push notifications? prompt. After that interaction, call Notification.requestPermission(). The browser or operating system will likely display its own confirmation UI, which varies by platform.
Subscribing the client
Once permission is granted, your site initiates the subscription through the Push API in JavaScript. You'll need to provide a public authentication key during this process. The browser then contacts an external web service known as a push service to complete the subscription.
If subscription is successful, the browser returns a PushSubscription object. You need to persist this data long-term, typically by sending it to a server you control for database storage.
Sending messages
Your server does not deliver messages directly to client devices. Instead, you make a web service request to a push service—a service managed by the user's browser vendor. This web push protocol request must include:
- The message payload.
- The target client identifier.
- Delivery instructions, such as a maximum delivery window.
You'll typically make this request from a server you control. Libraries like the web-push-libs project can handle constructing the raw request, but the underlying mechanism is an HTTP web service call.
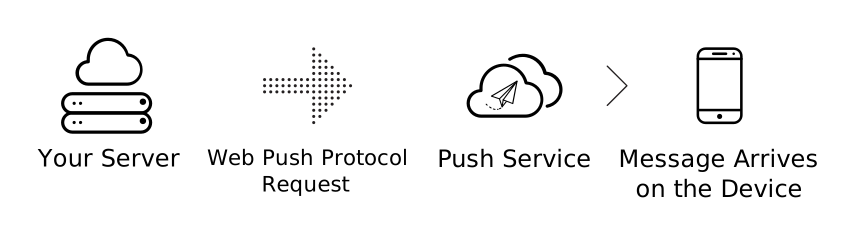
The push service authenticates your request and routes the message to the correct client. If the client is offline, the push service queues the message until the browser reconnects.
Each browser vendor chooses its own push service; you have no control over that choice. This isn't a problem because the web push protocol is standardized: as long as your request follows the spec—including the required headers and byte-stream data format—you don't need to know which push service a given browser uses. You do, however, need to send the request to the right endpoint. That information comes from the PushSubscription object returned during subscription:
{
  "endpoint": "https://fcm.googleapis.com/fcm/send/c1KrmpTuRm…",
  "expirationTime": null,
  "keys": {
    "p256dh": "BGyyVt9FFV…",
    "auth": "R9sidzkcdf…"
  }
}
The domain of the endpoint identifies the push service, while the path provides the client identifier. The keys object is used for encryption.
Encryption and authentication
Data sent to a push service must be encrypted so the service itself cannot read the message contents. Your server uses the keys from the PushSubscription to encrypt each web push protocol request.
Web push requests should also be signed to prevent third parties from sending messages to your users. This is required for the simplest implementation on Chrome, optional on Firefox, and may be required by other browsers in the future.
This authentication flow depends on a public/private key pair unique to your application:
- You generate a one-time application server key pair—also known as VAPID keys, per the spec that defines this process.
- When subscribing a client, you provide the public key, which the push service associates with that client's
endpoint. - When sending a web push protocol request, you sign JSON metadata with your private key.
- The push service validates the signature against the stored public key to confirm the request's origin.
Customizing delivery
The web push protocol also defines parameters for controlling how the push service delivers messages:
- Time to live (TTL): how long the push service should keep retrying delivery.
- Urgency: useful when the push service conserves battery by prioritizing high-priority messages.
- Topic: a label that causes a new message to replace any pending message with the same topic.
Receiving messages and displaying notifications
After sending a web push protocol request, the push service queues it until either the client comes online and receives the message, or the message expires.
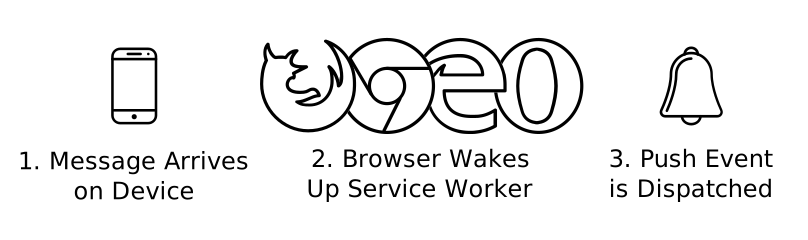
When a client browser receives a pushed message, it decrypts the payload and dispatches a push event to your service worker—JavaScript that runs in the background even when your site isn't open or the browser is closed. Inside the service worker's push event handler, you call ServiceWorkerRegistration.showNotification() to render the notification.