
WordPress hosting without the AWS plumbing
A typical AWS deployment stitches together EC2 for compute, S3 for object storage, and CloudFront for content delivery — each with its own console, permissions model, and billing. That is the right architecture for large, distributed workloads, but it is overkill
when the goal is simply to stand up a WordPress site quickly, show a prototype to a client, or test a plugin.
Amazon Lightsail wraps those services in a single interface, pre-installs the software stack, and charges a flat monthly rate instead of metered per-second, per-GB, and per-request pricing. The trade-off is less granular control; the payoff is that a WordPress site can be live in a few minutes. Here is the workflow from a clean AWS account to a running site with a custom domain, SSL, and off-server media storage.
Launching the instance
After logging in at lightsail.aws.amazon.com, the dashboard shows no instances. Click “Create instance” to begin. You will need to make four choices:
- Location. Pick a region close to your audience to minimize latency.
- Platform and blueprint. Choose Linux/Unix, then select the WordPress blueprint. The blueprint installs the latest WordPress version; separate blueprints exist for single-site and multisite.
- Instance size. A $3.50/month plan is adequate for testing, while $5 or $10/month plans suit production workloads. Monitor traffic and scale up only if needed.
- Instance name. This is required for creation.

The instance status moves from “Pending” to “Running” in under a minute. Note the “Terminal” icon next to the instance name — you will use it to open an SSH session in the browser for several configuration steps later.
Attaching a static IP and logging in
Lightsail assigns an elastic IP at creation, which can change on reboot. To keep the address stable, go to the Networking tab, click “Attach static IP” under Public IP, name the IP, and confirm with “Create and attach.”

The WordPress admin username is user. The password is not shown in the console; instead, retrieve it from the server:
- Open the terminal icon next to the instance name.
- Execute the command that prints the password to the screen.
- Copy it using the clipboard icon in the pop-up window.
Log in at http://{PUBLIC_IP}/wp-login.php with username user and the retrieved password.
Custom domain and SSL
Serving the site by IP address is fine for testing, but a custom domain is better for anything real. Create an A record at your DNS provider pointing the domain (or subdomain) to the instance’s static IP. Any DNS service works; if you do not have a domain, Lightsail can register one through Route 53.
HTTPS is not enabled by default. To install a Let's Encrypt certificate, log into the terminal and run the command that launches the certificate setup:
sudo /opt/bitnami/bncert-tool
The script asks for the domains to include in the certificate (for example, yourdomain.com and www.yourdomain.com), your email address, and whether to redirect HTTP to HTTPS — which is recommended. Once complete, HTTPS requests work, but WordPress still needs to know about the secure URL. The General Settings screen shows that the “WordPress Address (URL)” and “Site Address (URL)” fields are locked. Edit wp-config.php from the terminal instead:
sudo nano /opt/bitnami/wordpress/wp-config.php
Open the file in the nano editor, scroll to the section defining the site URLs, and replace those definitions with the HTTPS equivalents. Save with Ctrl + O, exit with Ctrl + X, and reload the General Settings screen — the URLs will now show https.
Changing the admin username
WordPress does not allow renaming a user after registration, and Lightsail defaults the admin to user. To change it, update the MySQL database directly. Running the update command from the terminal — replacing the username with the desired value, e.g., leo — is sufficient; the change is reflected in the user’s profile screen.
mysql -u root -p$(cat /home/bitnami/bitnami_application_password) -e 'UPDATE wp_users set user_login = "leo" where ID = 1;' bitnami_wordpress
Keeping media in an S3 bucket
WordPress stores uploaded images under wp-content/uploads on the instance. That location is a liability in two scenarios:
- Server failure. Snapshots capture the filesystem at a point in time; anything uploaded after the last snapshot is lost. The server should be expendable.
- Scaling out. If traffic grows, the fix is to run multiple instances behind a Lightsail load balancer, all reading from a shared managed database. But media stays on the instance that uploaded it, so requests routed to another server return missing images.
Moving the WordPress media library to an S3 bucket solves both problems. In Lightsail, open the Storage tab and click “Create bucket.” Plans are flat-rate at $1, $3, or $5 per month depending on storage and transfer needs. Choose the same region as the instance, provide a unique bucket name, and create it.
Then configure bucket permissions:
- Open the bucket and go to the Permissions tab.
- Select “Individual objects can be made public and read-only.”
- Under Resource access, attach the WordPress instance so the site can write to the bucket without hard-coded AWS credentials.

On the WordPress side, install and activate the free WP Offload Media Lite plugin from the plugins screen. In Settings > WP Offload Media, configure the connection method as “My server is on Amazon Web Services, and I’d like to use IAM Roles,” then save. Next, add the configuration snippet to wp-config.php that enables the integration:
define( 'AS3CF_SETTINGS', serialize( array(
    'provider' => 'aws',
    'use-server-roles' => true,
) ) );
Back in the plugin settings, choose the bucket you created under the Storage Provider > Bucket tab. On the following screen, either adjust permissions or select “Keep Bucket Security As Is.” Finally, in the Delivery Settings tab, select “Force HTTPS” and save changes.
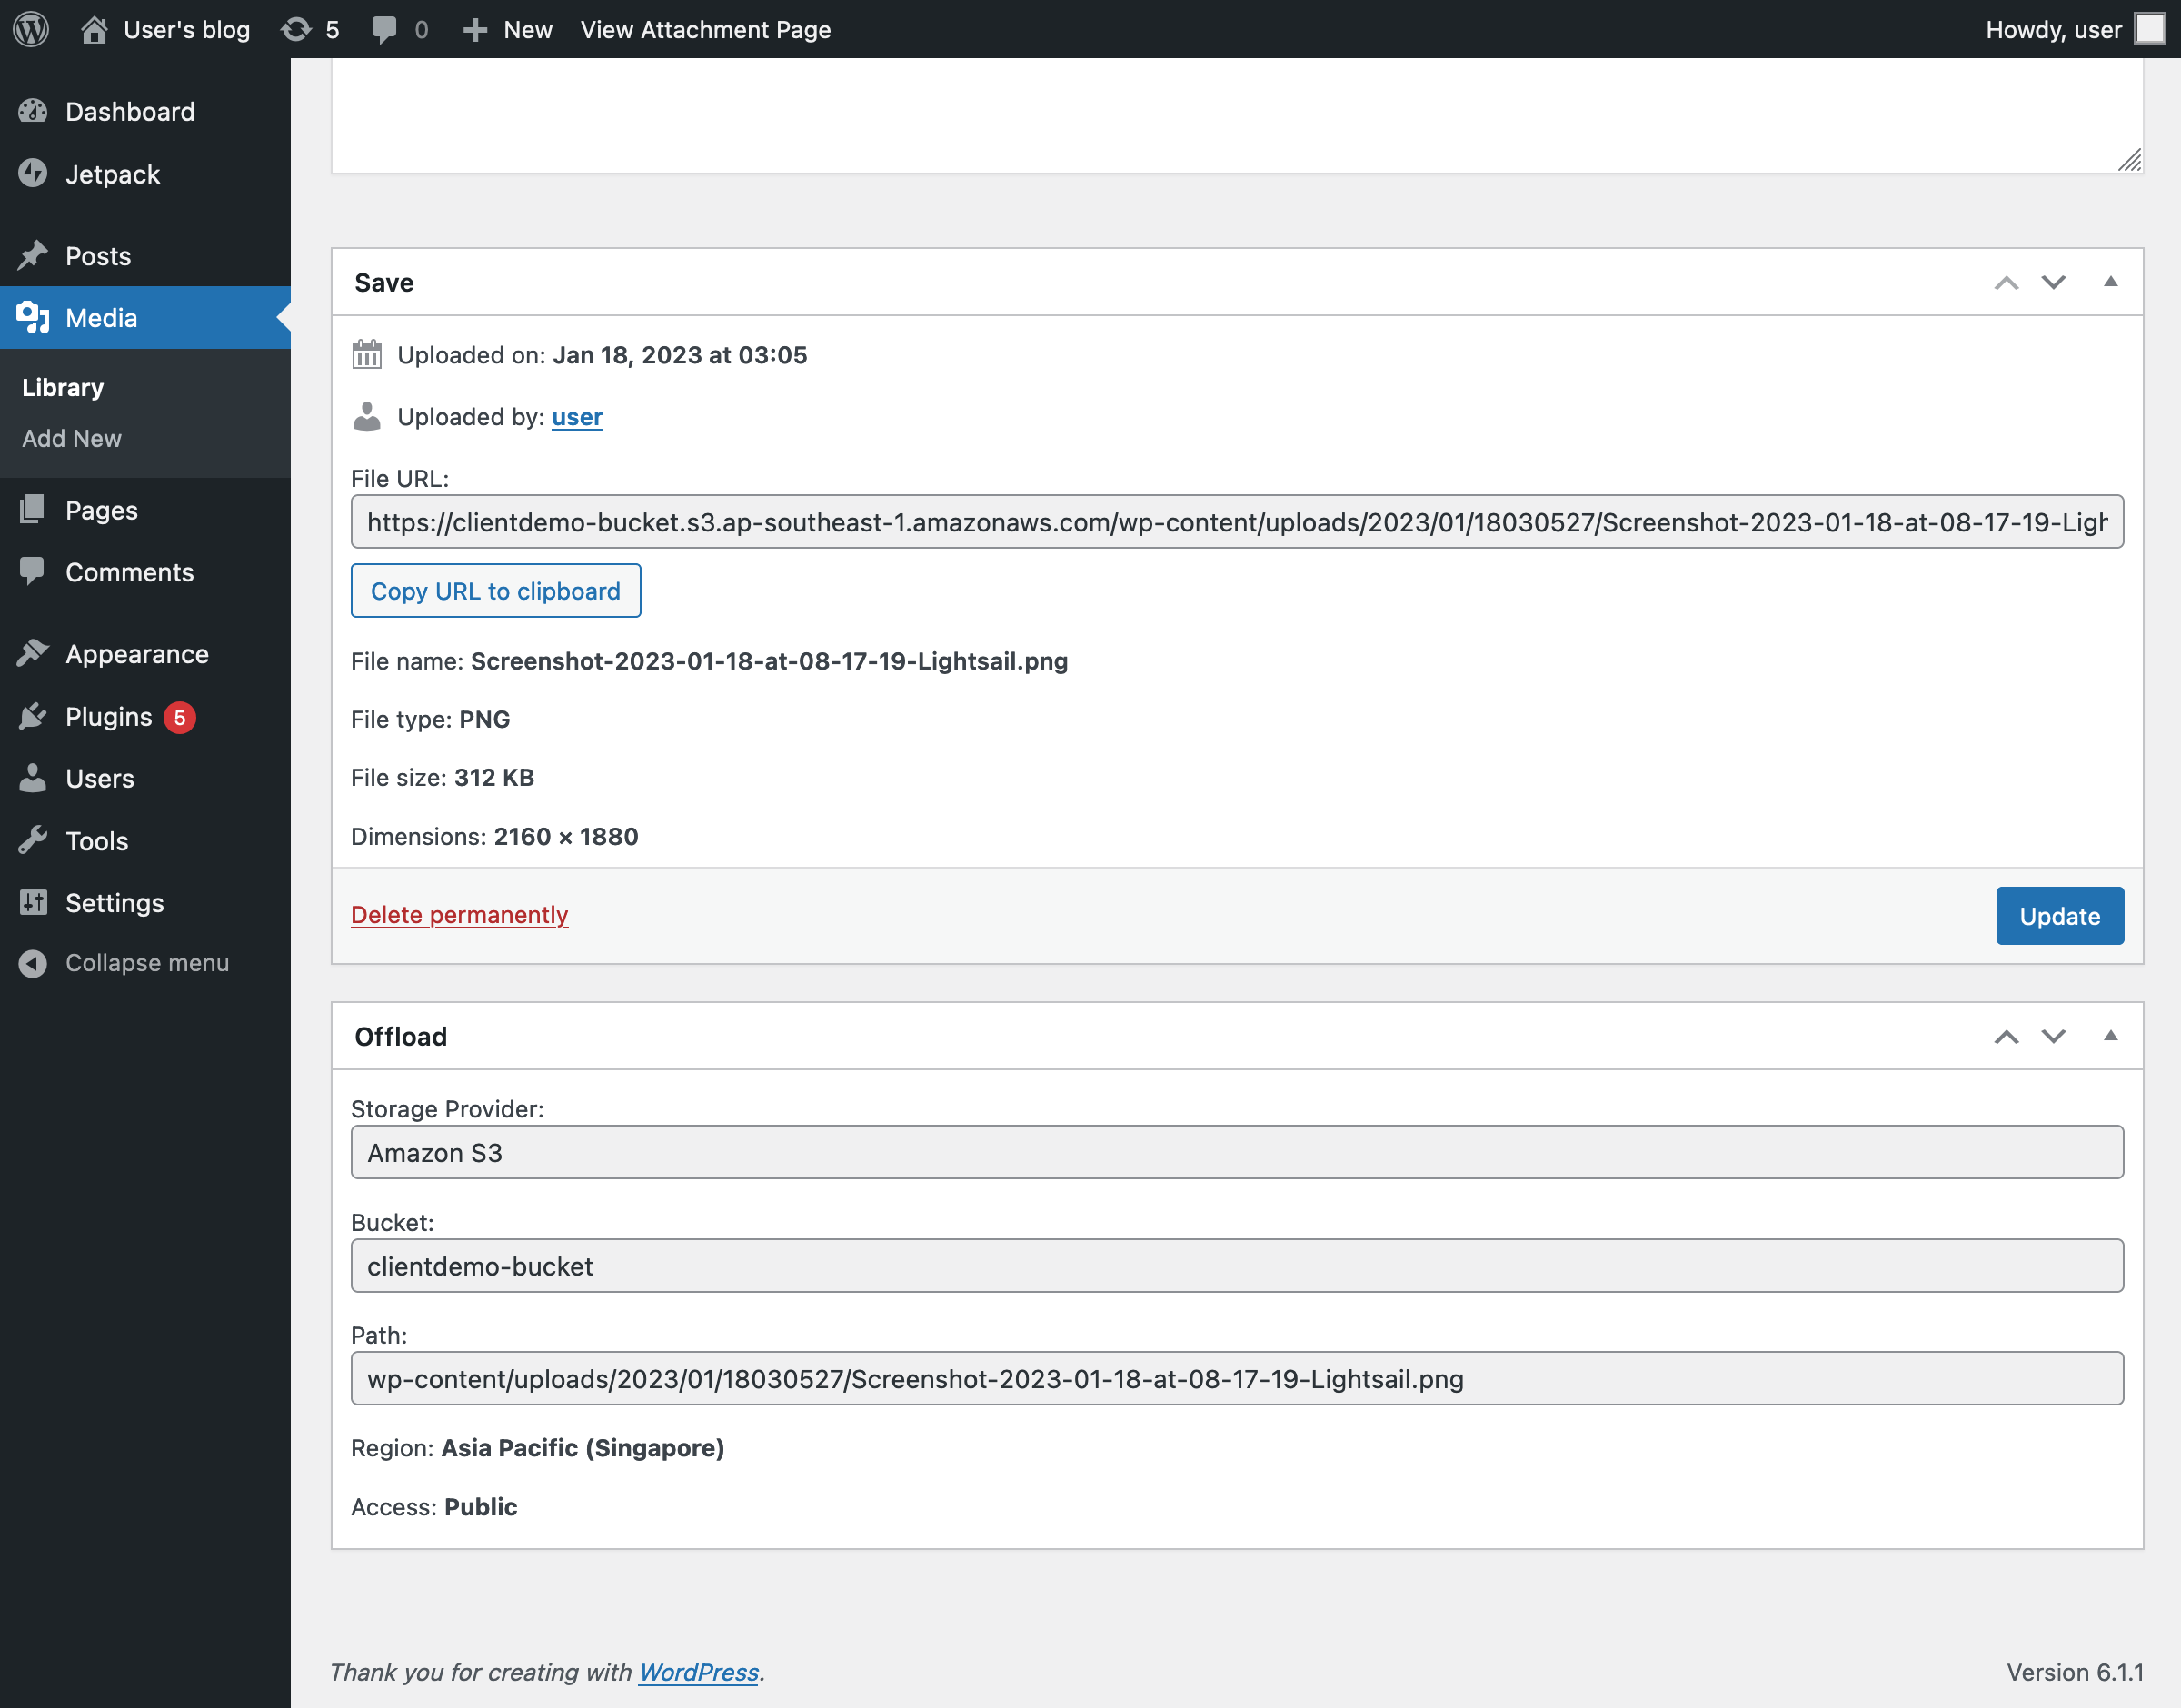
To verify, upload an image via Media > Add New; the file’s URL should point to the bucket rather than the instance.
Serving Assets Through CloudFront
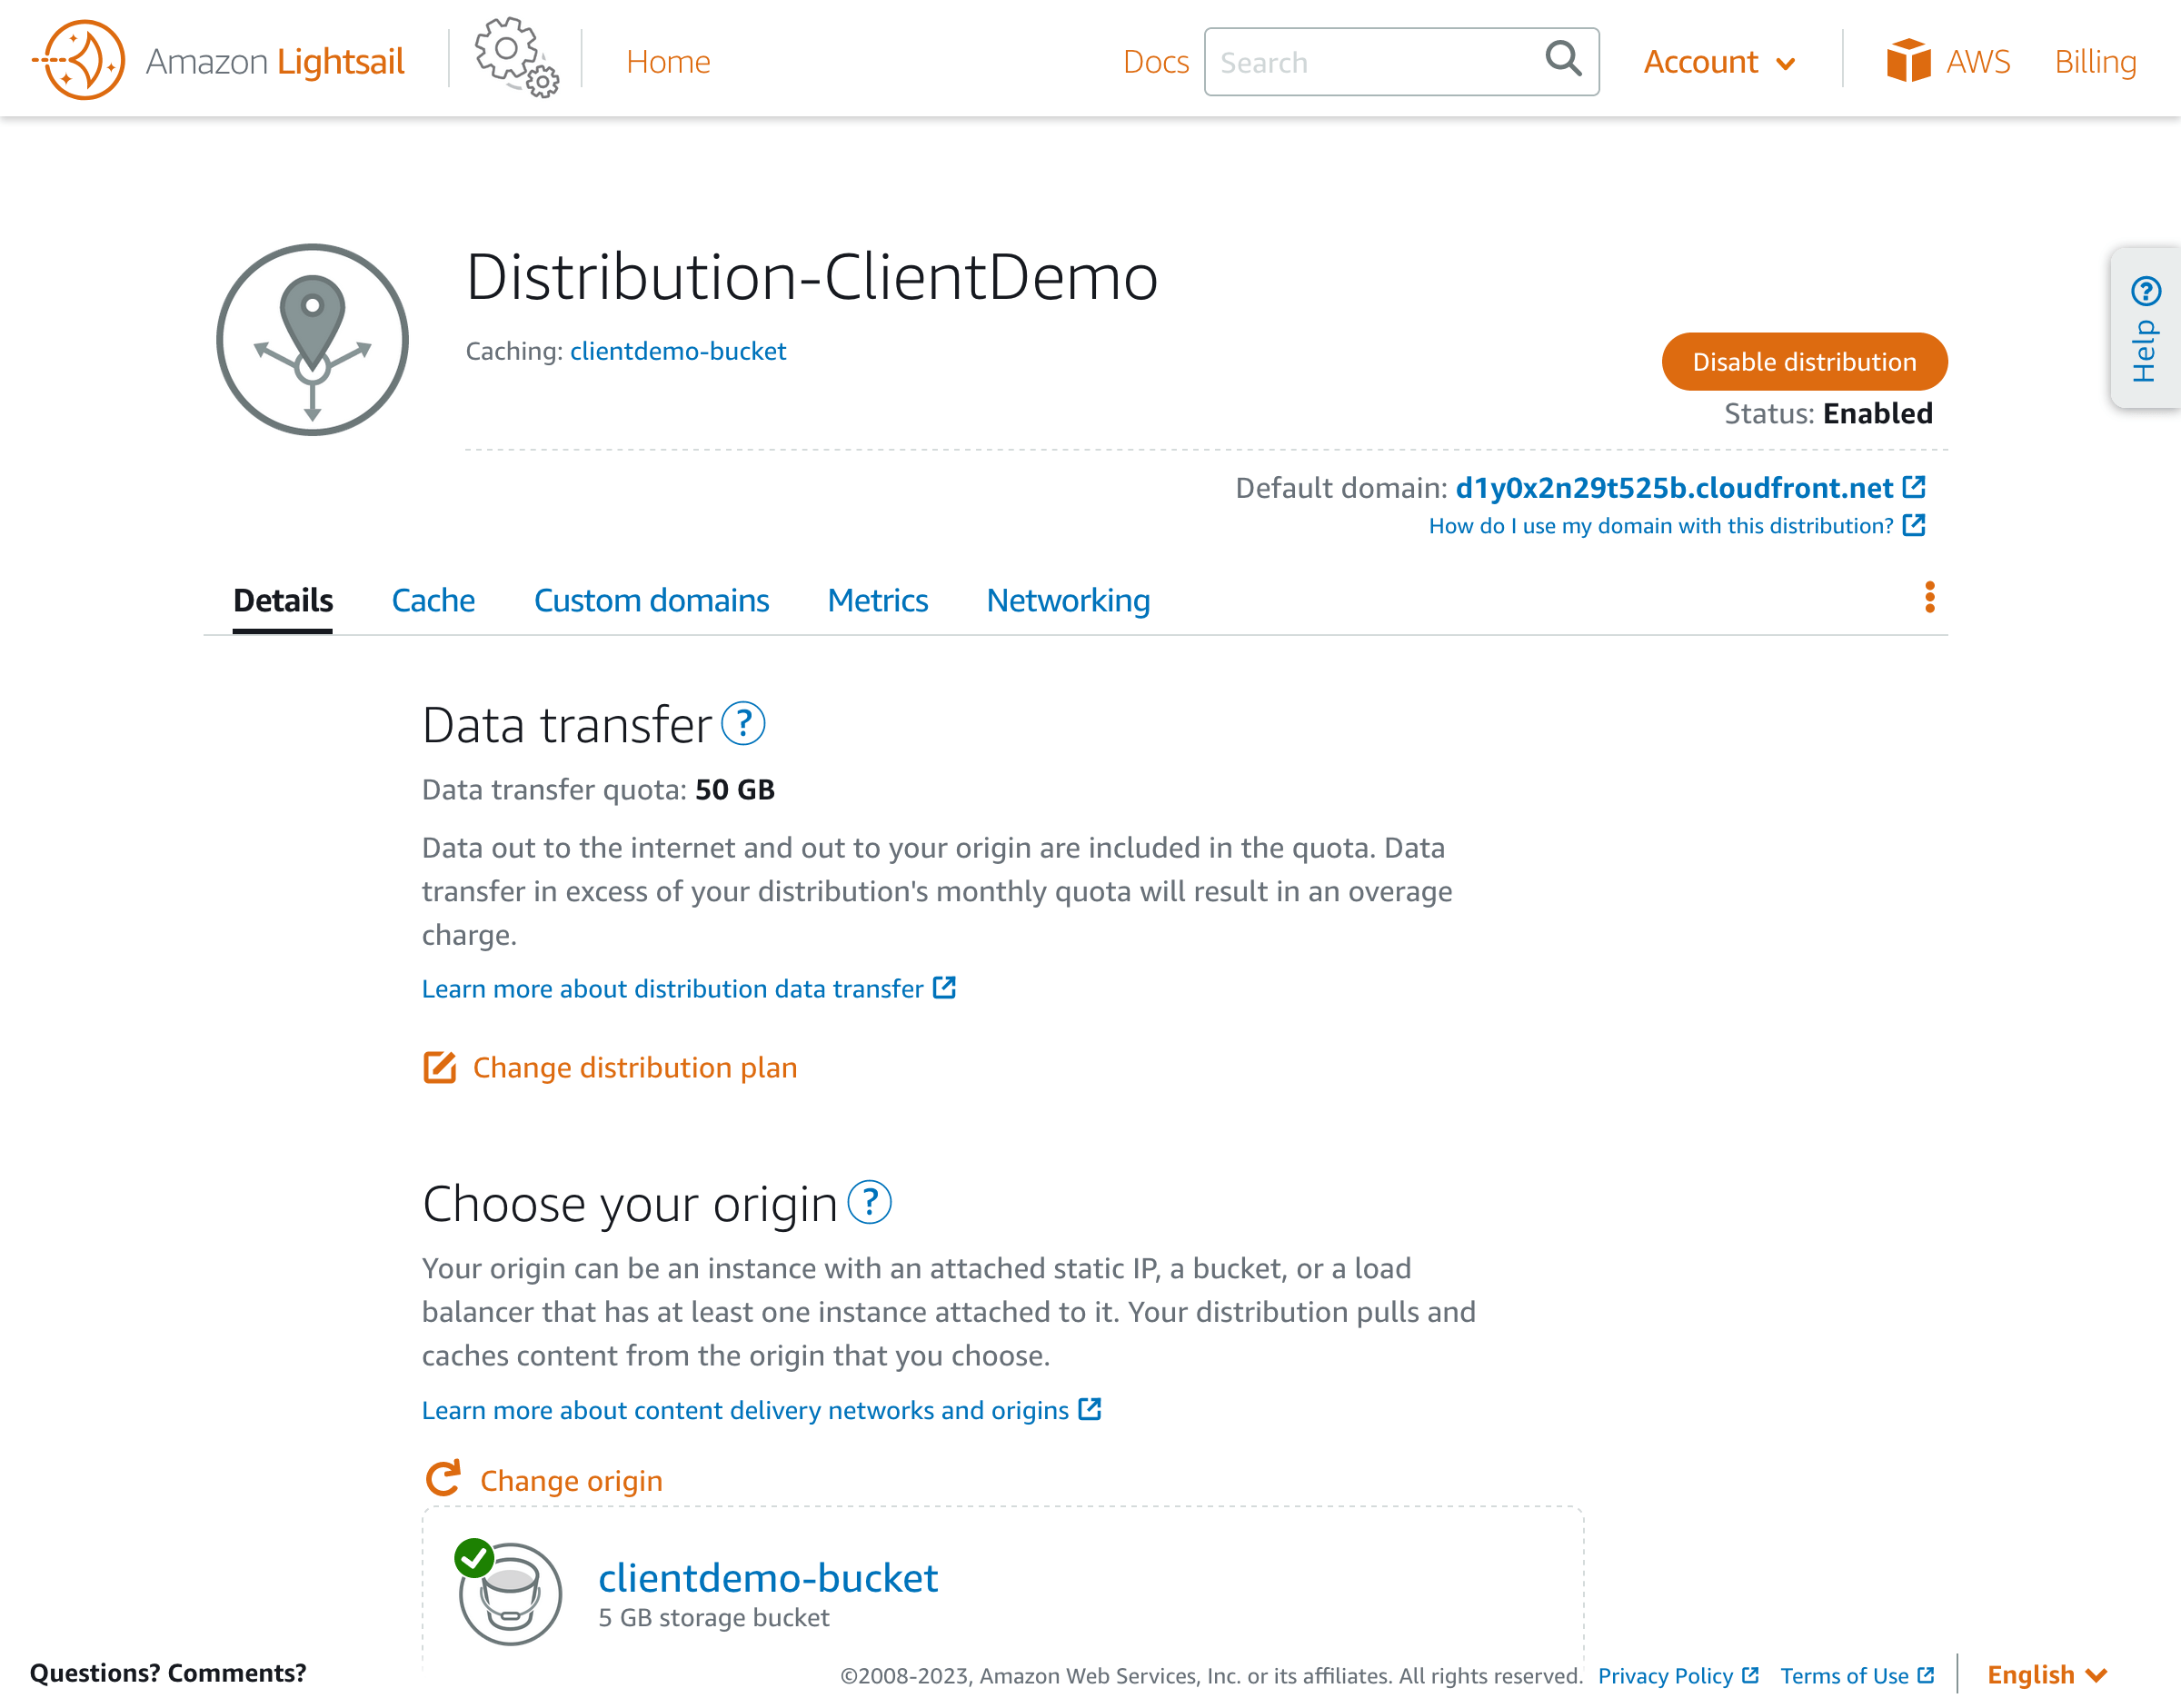
One final piece remains: offload image delivery to a CDN so visitors fetch assets from a nearby edge location, cutting latency. In the Lightsail console, open the Networking tab and click Create distribution.

On the distribution creation screen, pick the bucket you created earlier as the origin. The edge location closest to the user will retrieve the image from the bucket on the first request, cache it, and serve it from that point onward.

Keep the pricing flat: select the 50 GB plan at $2.50/month, which is free for the first year. Enter a unique distribution name and click Create distribution.

Once created, the top-right of the screen shows a URL in the form {subdomain}.cloudfront.net — you can assign a custom domain later under the Custom domains tab.
Now point WP Offload Media Lite at that distribution. Open the Delivery Settings tab and edit the delivery provider, which is currently set to Amazon S3.
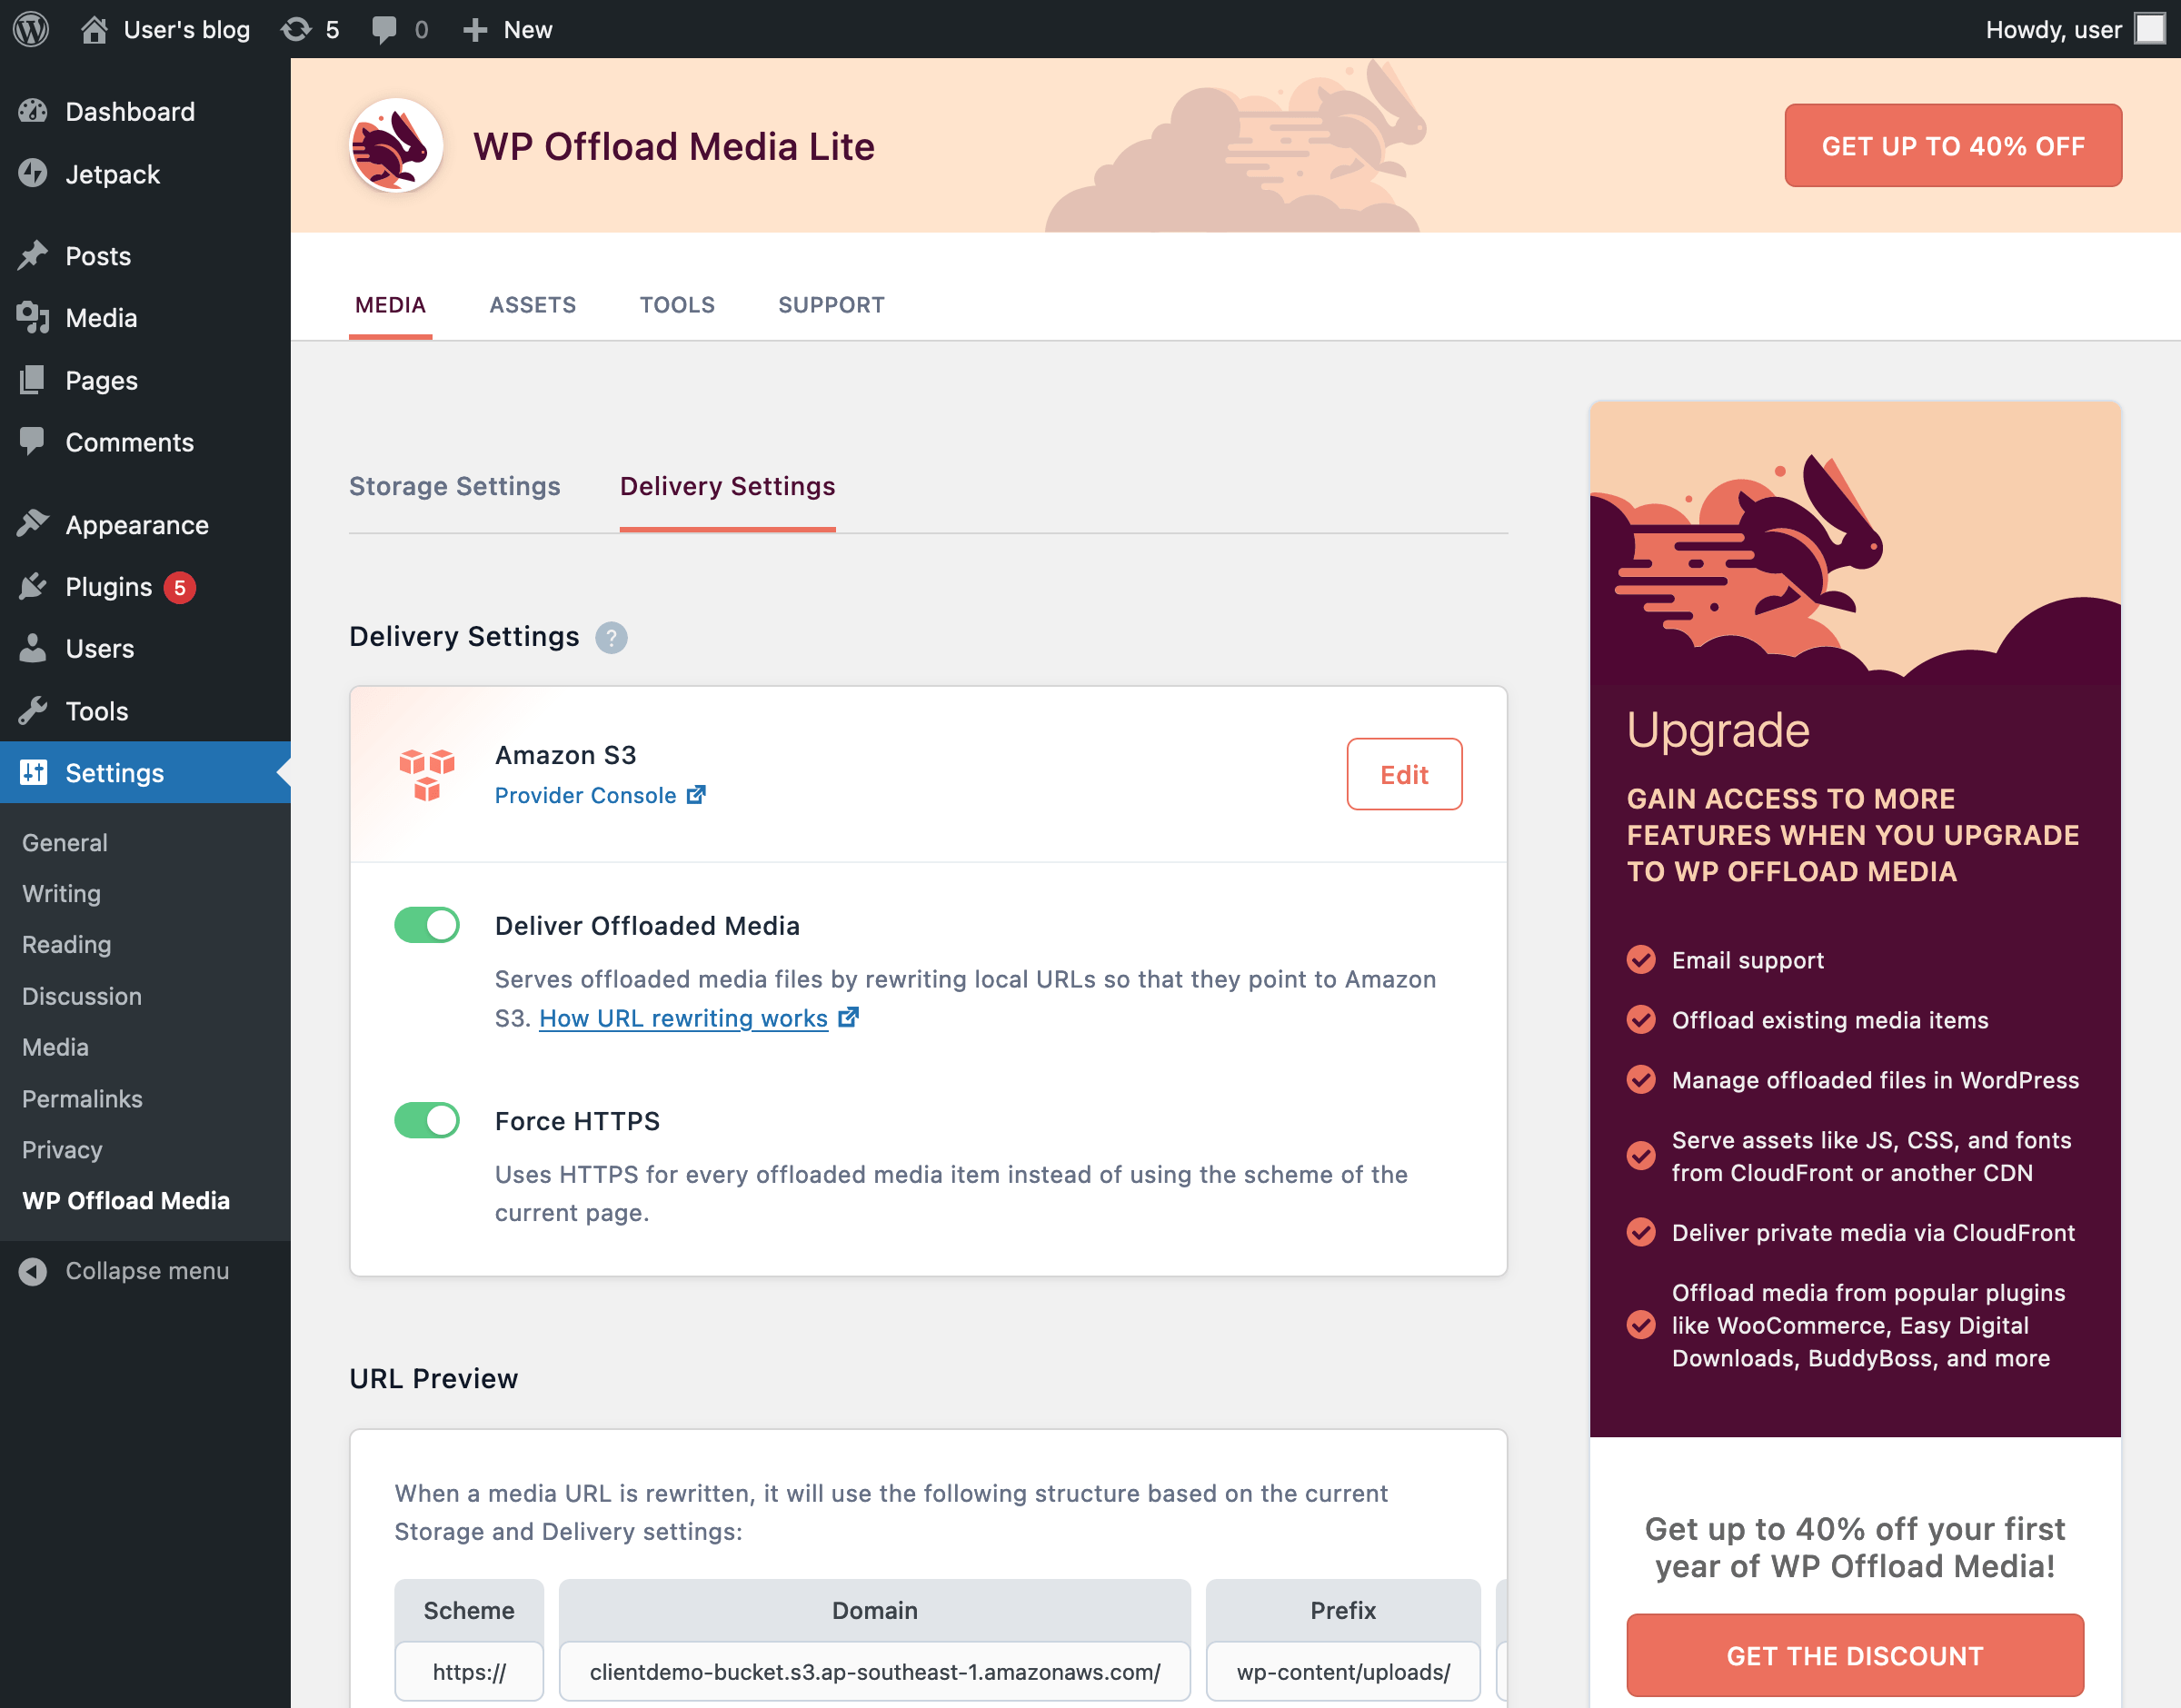
Switch the provider to Amazon CloudFront and save. Back on the Delivery Settings tab, a new field appears: Use Custom Domain Name (CNAME). Paste the CloudFront distribution domain there and save your changes.


To confirm everything works, go to Media > Add New, upload another image, and verify that the asset URL now begins with your distribution domain. With that, all images on your WordPress site are served through the AWS CDN.


Putting It All Together
Lightsail delivers the full power of AWS for web hosting with a far simpler setup than spinning up EC2 instances manually. The whole workflow described here — from launching WordPress to enabling a CDN — takes roughly 15 to 30 minutes.
The flat pricing model removes billing surprises, and the service is free for the first three months, so there is little reason not to test it on your next project.


