A predictable file structure for cross-functional design work
Shopping for the latest design in a Figma file can quickly turn into a scavenger hunt. Designers, product managers, and engineers often struggle with questions like: “Which of these designs are the latest ones? Has this layout been approved and is it ready to be implemented? Which prototype are you planning to test with your users?” While Figma makes collaboration effortless, it also introduces complexity in communicating state and process as files and artifacts accumulate over time.
On Shopify’s Retail Foundations team, we provide the Polaris for Retail design system, guidelines, templates, and documentation so other teams can do their best work. Through many conversations with cross-functional peers, we discovered that inconsistent approaches to organizing files made it increasingly difficult for people outside UX—and even within it—to locate specific information.
The Figma template we’re sharing creates a predictable structure that other disciplines can rely on when navigating between files. It also helps teams and individuals get set up more quickly at the onset of a project.

Applying the GSD framework in Figma
Get Sh*t Done (GSD) is a lightweight, common-sense framework for managing projects at Shopify. It prescribes a minimum process for maximum value across three phases: Think, Explore, Build.
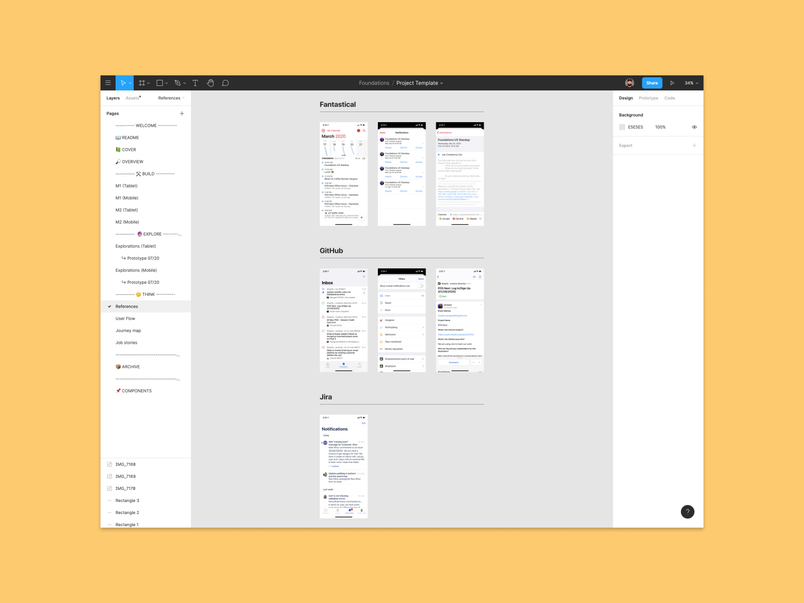
The page structure of the template reverses the order of the GSD phases so the most actionable information is visible first. The first few pages are where your file’s core content should live. Start by generalizing your cover and project overview. In the Think phase, you establish the foundation by gathering user flows, journey maps, job stories, inspiration, and any other research needed to succeed. This section is also a place to link out to project briefs and supporting documents.
Explore broadly, then converge on the Build section
The Explore section is meant to be the playground of the project—the place where you can go both broad and deep.
- Separate explorations for different form factors (e.g., tablet versus mobile) onto dedicated pages.
- Always title your explorations and flows to make context obvious.
- Add badges to signal what state an exploration is in, and remember to date every page.
- Use distinct pages for prototypes you plan on user-testing.
- Take advantage of sticky-note components to jot down feedback, thoughts, and future ideas.
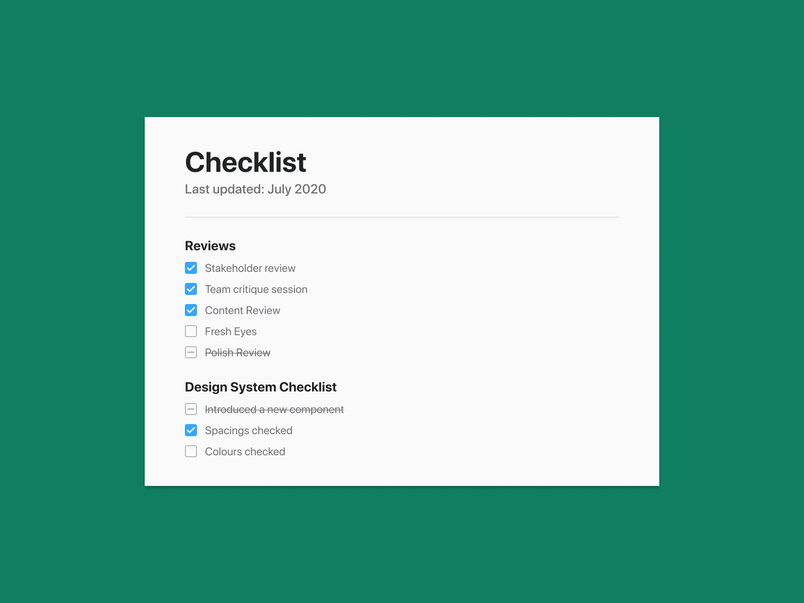
When you’re ready to move into the Build phase, relocate the pages or layouts that made the cut from your Explore section. You want this section to be lean—it’s where work is ready for implementation, not where new options get explored. Create separate pages for milestones, for different target devices, and clearly mark when updates were last made. Links to these board-specific pages are particularly useful inside issues, tickets, and tracking tools. Treat the fixed checklist on this page as the process audit you’ll complete before code or layout can ship.
Should any exploration fall off the path, move them to the archive. It allows you to revisit earlier directions without the chance of losing your place in the active design. This proves especially valuable across multi-month, complex projects.
Great design depends on effective communication. With a structure that documents both process and decision-making, design rationale becomes far easier to relay to co-workers and stakeholders. You that have confidence your best work is not only discoverable, but framed in a way that moves your design work forward with fewer blockers.


