

SPA Page Transitions With the Shared Element Transitions API
Same-document transitions are currently the only fully supported use case for the Shared Element Transitions API, which makes them a natural fit for Single Page Applications built with React, Vue, Svelte, or similar frameworks. Since SPAs don't reload on navigation, the browser can more easily track shared elements and avoid complications like loading additional stylesheets from a new page head. The Chrome team deliberately started with SPA support first for these reasons, and we may eventually see separate API implementations for SPA and MPA use cases.
To demonstrate, let's build a vinyl record showcase app with two page types: an item list on the homepage and item detail pages at unique URLs like /item/unique-id/. The navigation to a detail page will use an elaborate animation, while returning to the list will use a quicker, simpler crossfade. We'll also add a reveal animation for the vinyl artwork once the transition finishes.
Setting Up the Demo
Using the Eleventy static site generator keeps the example simple while allowing us to generate multiple pages from templates and markdown data. The key move is converting what looks like a Multi Page Application into a Single Page App by intercepting navigation with the Navigation API and updating the DOM manually, rather than letting the browser perform a full page load.
After Eleventy compiles the templates, the card markup looks like this:
<!-- Item grid element on the listing page (homepage) -->
<a href="https://www.smashingmagazine.com/item/sorcerer-crowning-of-the-fire-king/" class="card">
  <figure class="card__figure">
    <picture>
     <!-- Prefer AVIF images -->
      <source type="image/avif" />
     <!-- PNG fallback -->
      <img alt="LP sleeve cover" class="card__image" src="..." />
    </picture>
    <figcaption class="card__content">
      <h2 class="card__title">Crowning Of The Fire King</h2>
      <h3 class="card__subtitle">Sorcerer</h3>
    </figcaption>
  </figure>
</a>
To simulate SPA behavior, we can adapt utility functions originally written by Jake Archibald that hook into the Navigation API. These utilities intercept default browser navigation, fetch the new page content, update the DOM, and keep the URL in sync without a reload:
async function getPageContent(url) {
    // This is a really scrappy way to do this.
    //Don’t do this in production!
    const response = await fetch(url);
    const text = await response.text();
    // Particularly as it uses regexp
    return /<body[^>]*>([\w\W]*)<\/body>/.exec(text)[1];
}

// Intercept navigations.
// This is a naive usage of the navigation API, to keep things simple
async function onLinkNavigate(callback) {
    // Fallback to regular navigation if API is not supported.
    if (!document.createDocumentTransition) return;

    navigation.addEventListener("navigate", (event) => {
        const toUrl = new URL(event.destination.url);
        if (location.origin !== toUrl.origin) return;
        const handler = function () {
            return callback({
                toPath: toUrl.pathname
            });
        };
        // New syntax (Chrome Canary version 105+)
        if (event.intercept) {
            event.intercept({
                handler,
            });
        } else {
            // Deprecated (will be removed in later versions).
            event.transitionWhile(handler());
        }
    });
}

// Setup the listener on page load.
onLinkNavigate(async ({ toPath }) => {
    const content = await getPageContent(toPath);
    // Scroll back to the top.
    window.scrollTo({ left: 0, top: 0 });
    // Update page content.
    document.body.innerHTML = content;
});
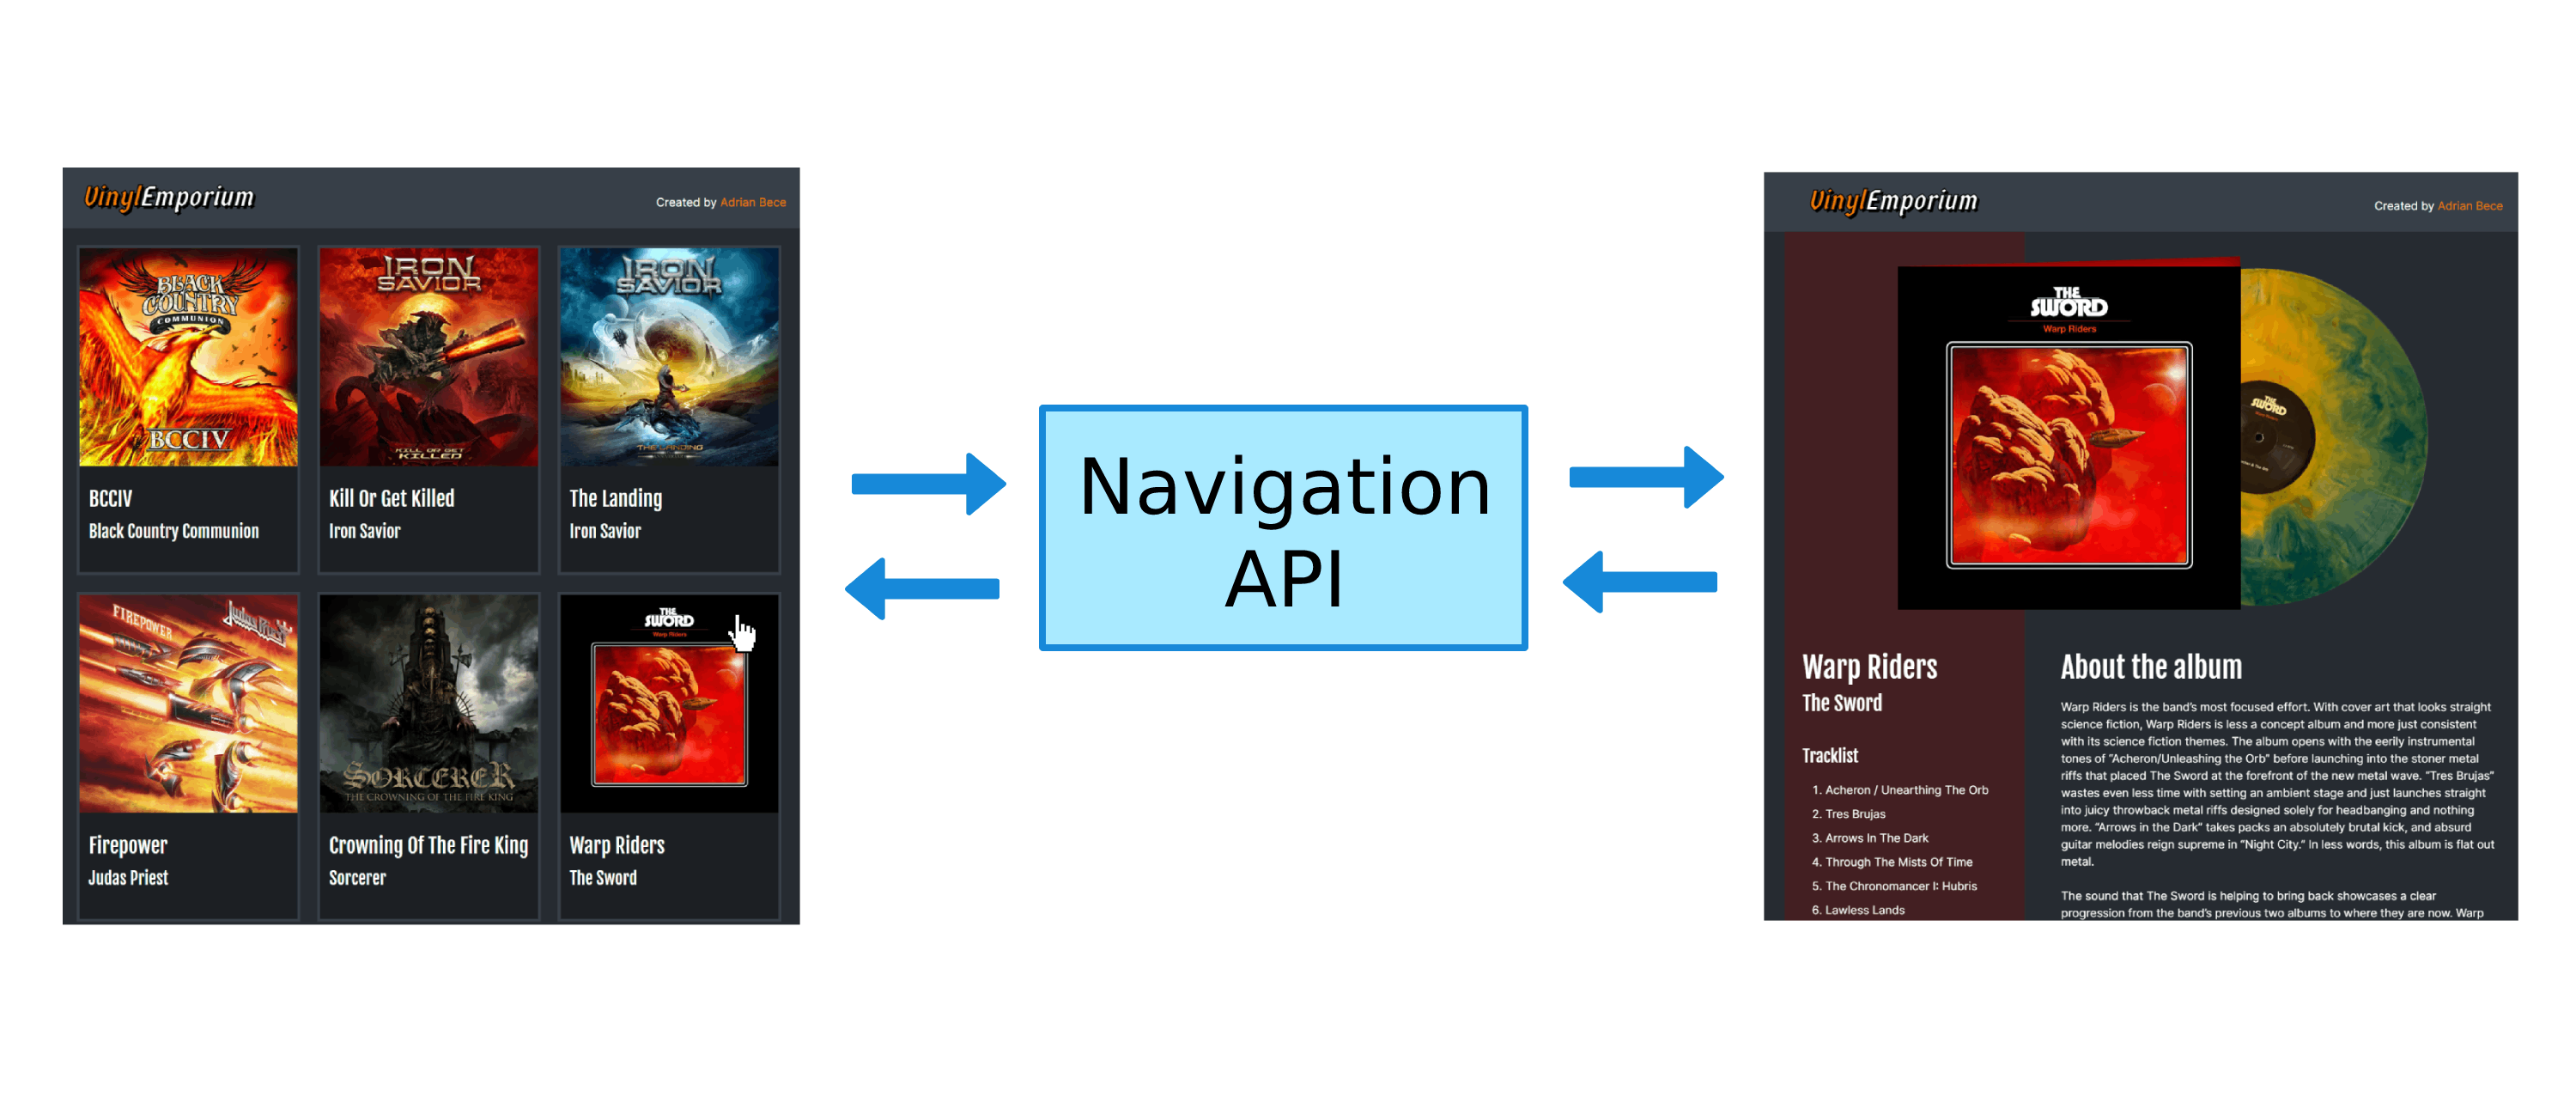
This starting point mirrors what you'd find in frameworks like React with react-router-dom or SvelteKit's built-in router.
Once we have navigation interception in place, we also need to hide the vinyl gatefold sleeve opening and record-rolling animations during the page transition. Toggling opacity immediately after the transition completes—without animating it—ensures these elements only appear once the transition has finished:
.product__media::before {
    content: "";
    opacity: 0;
    transform: rotateZ(0);
    transform-origin: bottom left;
    animation: open 0.25s 0.5s ease-out forwards;
    /* ... */
}
.product__image--deco {
    opacity: 0;
    position: absolute;
    transform: translateX(0) translateY(-50%) rotateZ(0deg);
    animation: rollOut 0.7s 0.6s ease-out forwards;
    /* ... */
}

@keyframes rollOut {
    from {
        opacity: 1;
        transform: translateX(0) translateY(-50%) rotateZ(-45deg);
    }
    to {
        opacity: 1;
        transform: translateX(55%) translateY(-50%) rotateZ(18deg);
    }
}

@keyframes open {
    from {
        opacity: 1;
        transform: rotateZ(0);
    }
    to {
        opacity: 1;
        transform: rotateZ(-1.7deg);
    }
}
Adding a Basic Crossfade
With navigation hooked up, running the Shared Element Transitions API requires calling the start function and passing a callback that updates the DOM with the new page content:
onLinkNavigate(async ({ toPath }) => {
    const content = await getPageContent(toPath);
    const transition = document.createDocumentTransition();

    transition.start(() => {
        window.scrollTo({ left: 0, top: 0 });
        document.body.innerHTML = content;
    });
});
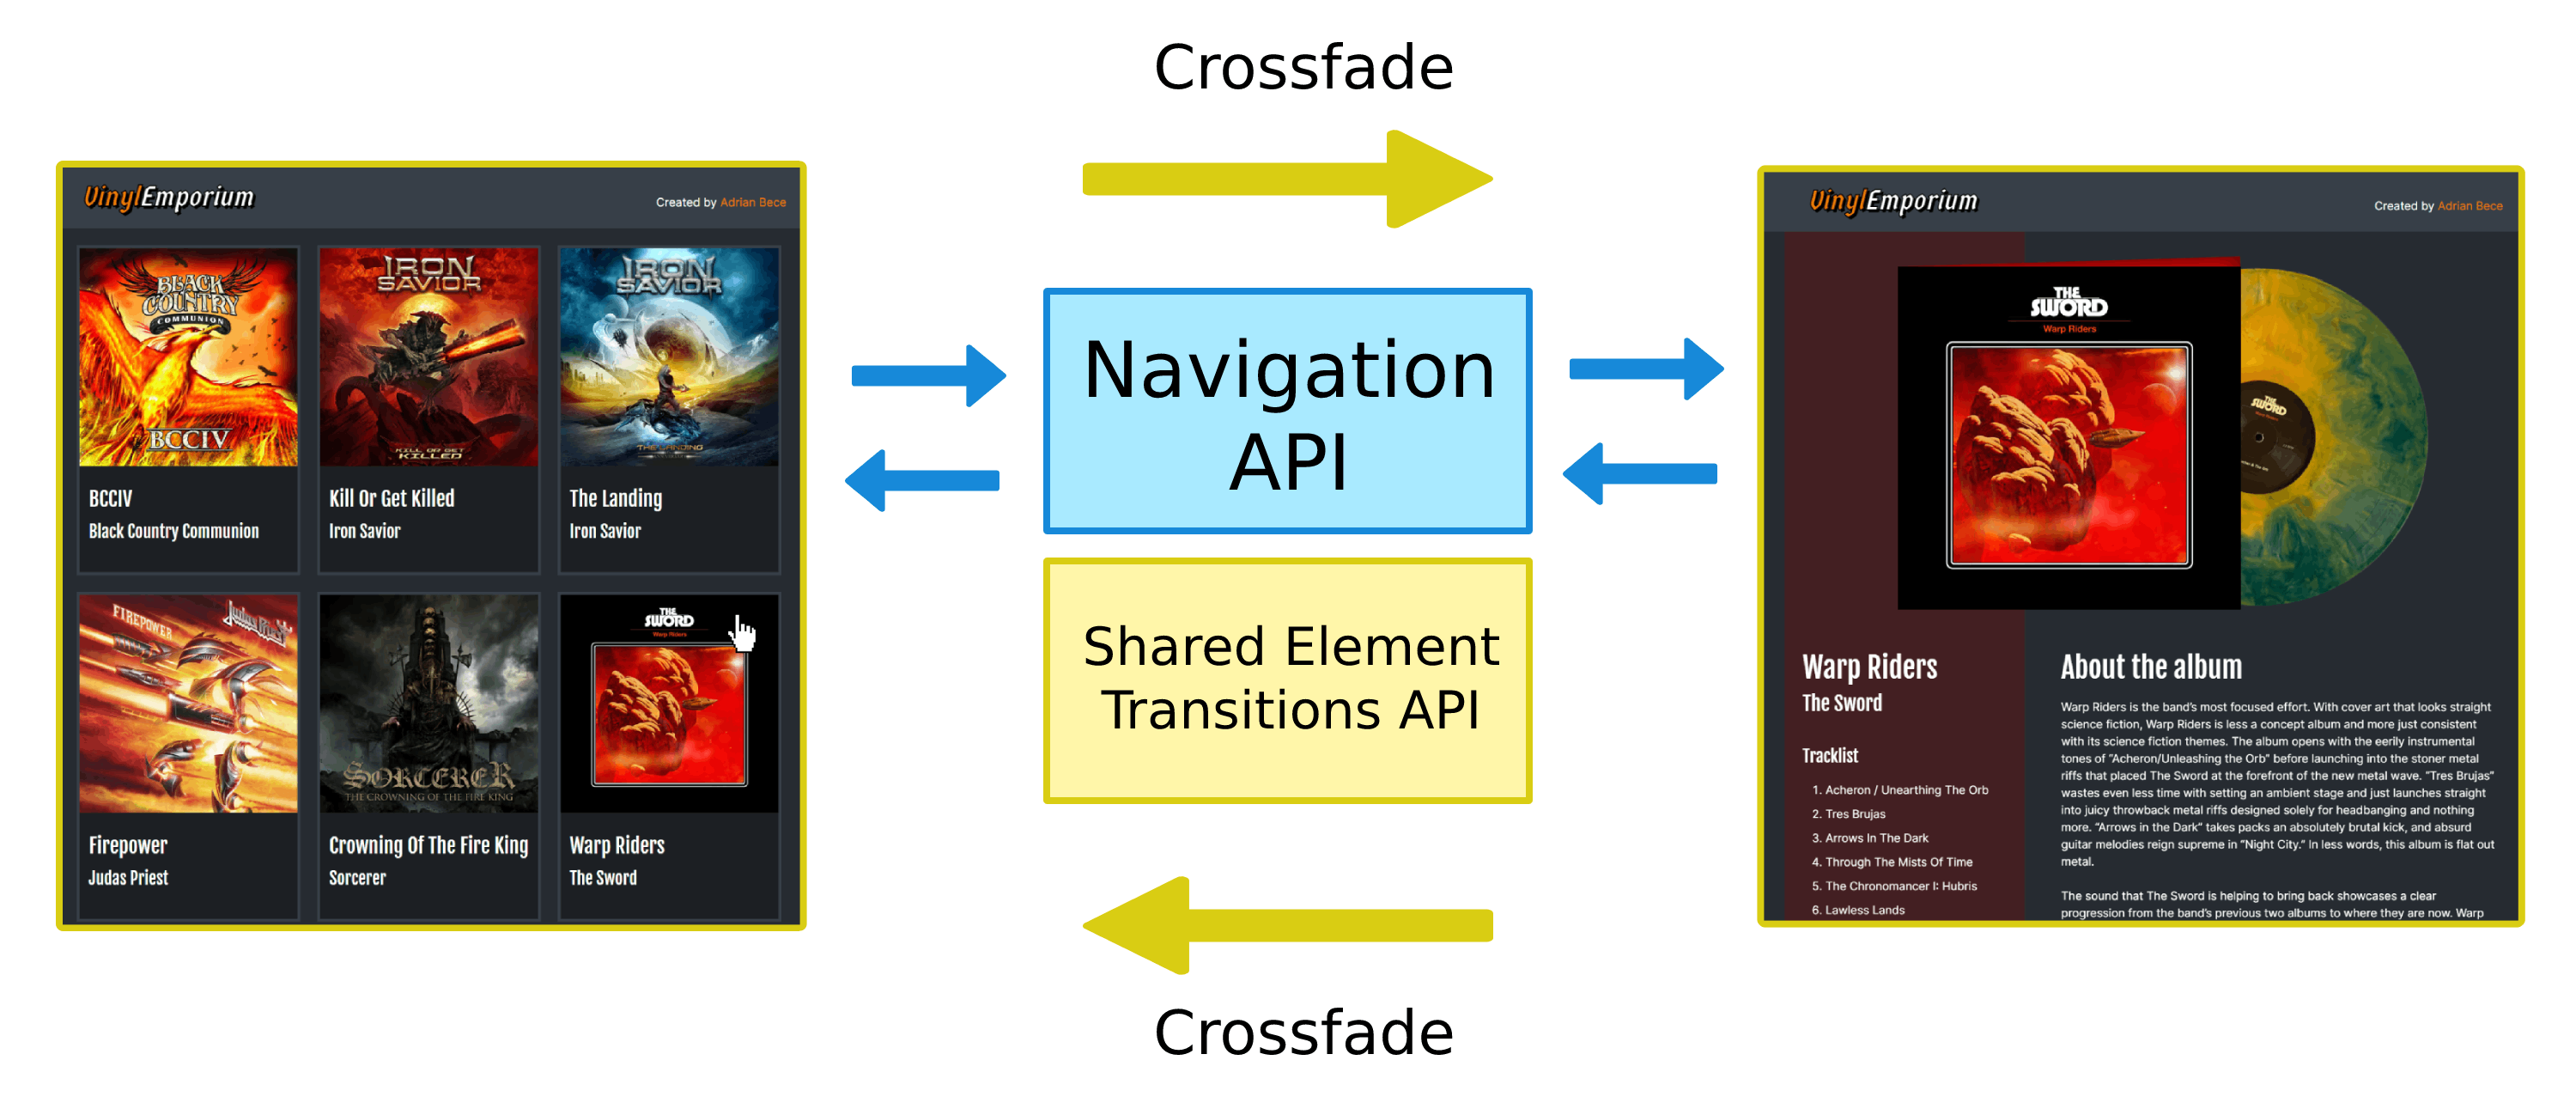
Passing the DOM update function as a callback gives us a crossfade between pages immediately, with no extra work.
Identifying Shared Elements
The more interesting part is applying a page-transition-tag to the image inside the clicked link. Remember, only one element per page can carry a specific tag during a transition. The Navigation API lets us inspect the target URL before navigation, so we can write a selector targeting the correct image in the grid:
function applyTag(url) {
    const image = document.querySelector(
        `a[href="${url.pathname}"] .card__image`
    );
    if (!image) {
        return;
    }
    image.style.pageTransitionTag = "product-image";
}
This function runs inside onLinkNavigate before the DOM update occurs:
async function onLinkNavigate(callback) {
    if (!document.createDocumentTransition) return;
    navigation.addEventListener("navigate", (event) => {
        const toUrl = new URL(event.destination.url);
        if (location.origin !== toUrl.origin) return;

        // Apply the tag before updating the DOM.
        applyTag(toUrl);

        const handler = function () {
            return callback({
                toPath: toUrl.pathname,
            });
        };
        if (event.intercept) {
            event.intercept({
                handler,
            });
        } else {
            event.transitionWhile(handler());
        }
    });
}
On the item detail page, the same tag must be applied to the product image so the browser can match the shared element between states. Since there's only one image with the product-image tag on that page, we can declare it directly in CSS:
<!-- Image element on item details page -->
<article class="product__media">
        <div class="product__image">
            <picture>
              <source type="image/avif">
              <img alt="LP cover artwork" class="" src="...">
            </picture>
        </div>
        <div class="product__image--deco">
            <picture>
               <source type="image/avif">
               <img src="...">
            </picture>
        </div>
    </article>
.product__image {
    page-transition-tag: product-image;
}
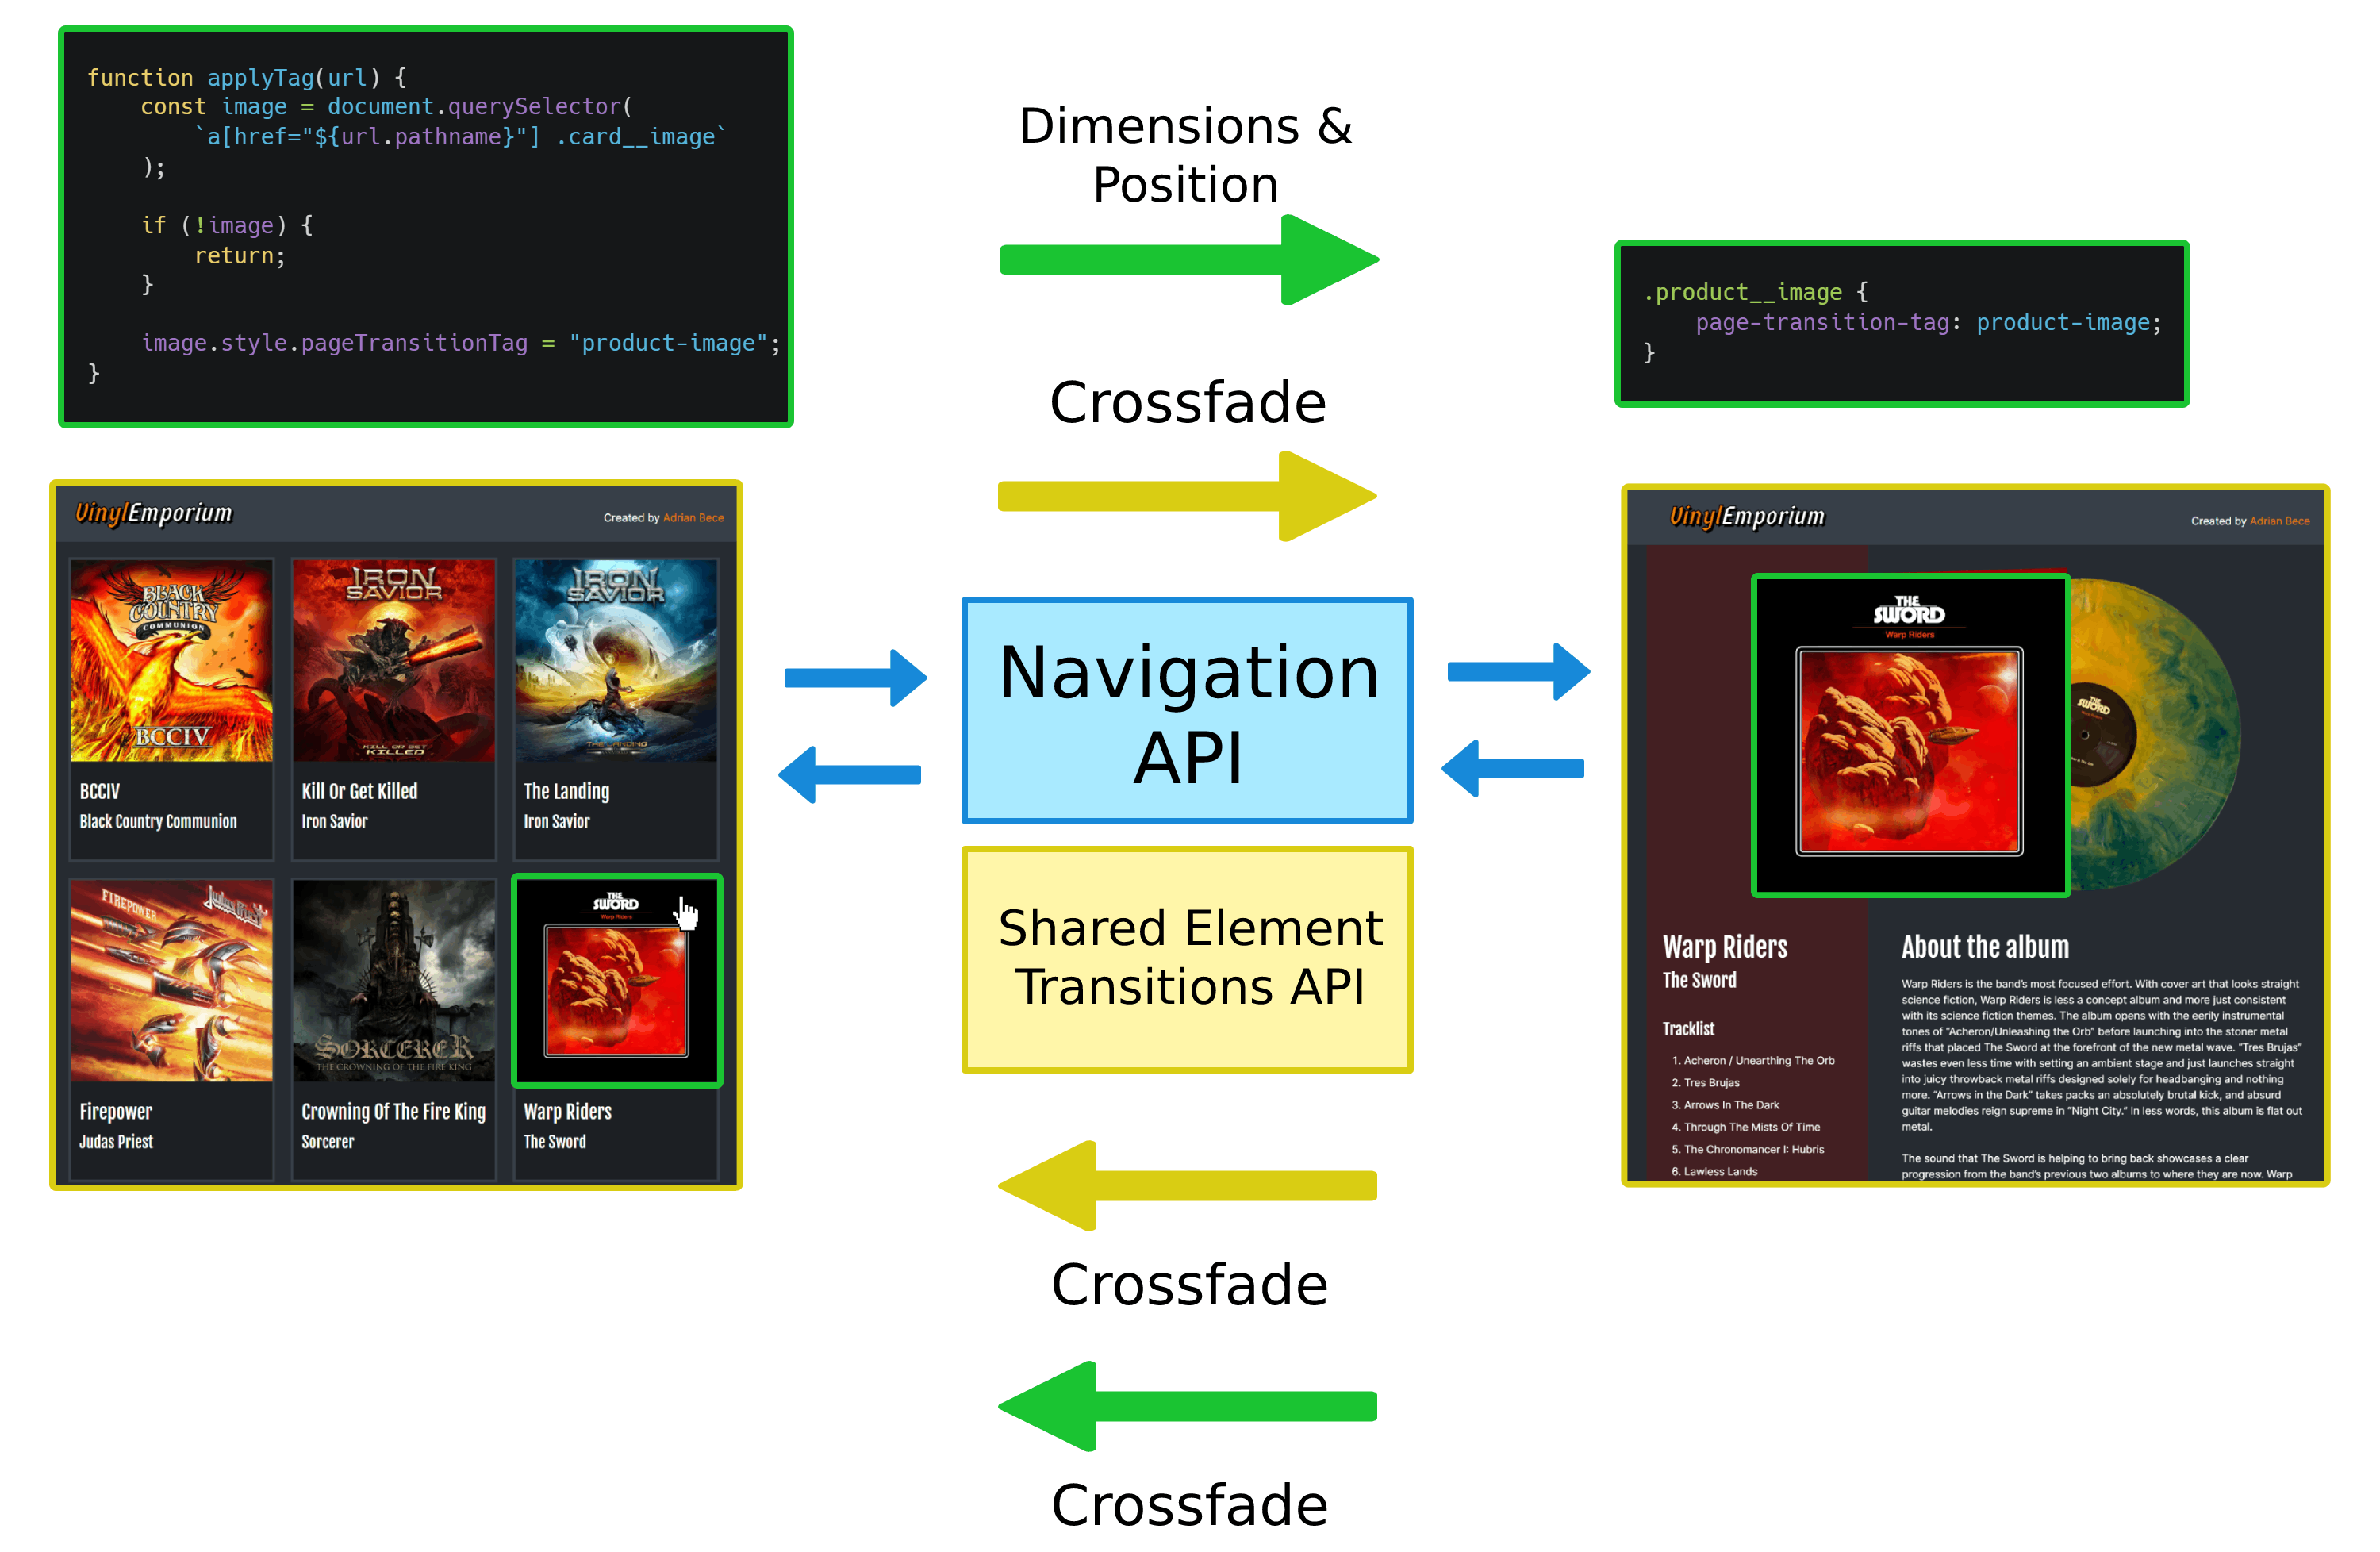
That's all it takes to create the transition. The browser handles matching the element's position and dimensions across the two states, producing a smooth shared-element animation. On backward navigation, the selector document.querySelector(`a[href="${url.pathname}"] .card__image`) won't match anything on the current detail page, so the browser falls back to a plain crossfade—which is exactly what we want for speed.
If we want the same shared-element effect when navigating back to the list, we'd need to apply the tag to the correct grid image after fetching the target page's contents.
Fine-Tuning the Animation
CSS animation properties let us adjust the transition feel. We'll make the crossfade snappier and subtler while giving the shared image animation a slower duration with a more pronounced easing curve:
/* Speed up crossfade animations */
::page-transition-outgoing-image(*),
::page-transition-incoming-image(*) {
    animation-timing-function: ease-in-out;
    animation-duration: 0.25s;
}

/* Fine-tune shared element position and dimension animation */
::page-transition-container(product-image) {
    animation-timing-function: cubic-bezier(0.22, 1, 0.36, 1);
    animation-duration: 0.5s;
}
We should also respect users who prefer reduced motion by disabling or simplifying these transitions when appropriate:
@media (prefers-reduced-motion) {
  ::page-transition-container(*),
  ::page-transition-outgoing-image(*),
  ::page-transition-incoming-image(*) {
    /* Or add appropriate animation alternatives */
    animation: none !important;
  }
}
The result is a faster crossfade combined with a more deliberate sizing and position animation on the shared image element.
This example only shows the code relevant to page transitions. For a complete look, the full source code is available in the project repository, and a live demo is hosted online.
Looking Ahead: Cross-Document Transitions
Full support for MPAs is still in development, but the WICG has published a rough draft explaining how it might function. Unlike same-document transitions where we call pageTransition.start(/* … */) to track DOM updates, cross-document transitions would require starting the transition request on the outgoing page before it unloads and then running the transition on the incoming page once it's ready to render:
// In the outgoing page
document.addEventListener("pagehide", (event) => {
  if (!event.isSameOriginDocumentSwap) return;
  if (looksRight(event.nextPageURL)) {
    // This signals that the outgoing elements should be captured.
    event.pleaseLetTheNextPageDoATransitionPlease();
  }
});
// In the incoming page
document.addEventListener("beforepageshow", (event) => {
  if (
    event.previousPageWantsToDoATransition &&
    looksRight(event.previousPageURL)
  ) {
    const transitionReadyPromise = event.yeahLetsDoAPageTransition();
  }
});
For security reasons, the cross-document implementation would need significantly tighter restrictions than what's available in same-document mode.
Community Demos and Framework Integrations
The Shared Element Transitions API is still young, and browser support remains inconsistent. Because of that, most production-ready implementations rely on progressive enhancement and careful framework integration. Several developers have published impressive examples that show how to wire the API into popular front-end stacks without waiting for router libraries to catch up.
React and Preact
Jake Archibald built a video playlist demo with Preact and TypeScript that includes a custom page transition hook. His custom router applies class names to the root html element, making it possible to adjust animation behavior based on navigation direction. This keeps the animation logic in CSS while still leveraging the full power of the API for same-document transitions.
The result is a clean separation between routing concerns and visual effects, a pattern that works particularly well in component-driven architectures.
Astro
Maxi Ferreira used Astro to recreate the Navigation API–based example from earlier in this series, this time building a full movie database application. He documented the entire journey in an article that walks through each step, from intercepting navigation to triggering the transition API.
Ferreira also teamed up with Ben Myers on a guitar shop demo where both the product image and the background container expand smoothly into the next page. The background grows to fill the screen and then morphs into the description container, showing how a single shared element can anchor a much larger visual sequence.
SvelteKit Implementation
SvelteKit developers have an advantage here because the framework ships a built-in navigating store. Geoff Rich leveraged that in a fruit nutrition data app and wrote up the full technique in a detailed blog post.
His approach uses a utility function that checks for browser support before enabling the API. If the browser doesn't support shared element transitions, navigation proceeds normally — a key principle for any progressive enhancement strategy.
State of the API and Future Work
What stands out across these demos is how little JavaScript is required. A few lines of code wrapped around a framework's navigation lifecycle, plus some CSS, is enough to produce app-like transitions between pages. No animation library is necessary.
The same-document use case for single-page apps is already usable today, and it's the path most of these demos take. True cross-document transitions for multi-page applications are still being finalized in the Shared Element Transitions explainer and the CSS Shared Element Transitions Module Level 1 spec. When those land in browsers, the API's impact will be significantly broader.


