Project Bootstrap and Configuration
Start by creating a new project directory and initializing a Node.js project with yarn init. This generates a package.json file that tracks dependencies and scripts. If you prefer npm, the equivalent commands work fine throughout this setup.
Create two files in the project root:
README.md— project documentation placeholder.editorconfig— enforces consistent style across editors/IDEs
Populate .editorconfig with rules for two-space indentation, UTF-8 encoding, trimming trailing whitespace, and inserting a final newline:
root = true
[*]
indent_style = space
indent_size = 2
charset = utf-8
trim_trailing_whitespace = false
insert_final_newline = true
Set up Git version control immediately, then add a .gitignore before your first commit:
node_modules/
yarn-error.log
.env
.nyc_output
coverage
build/
This prevents tracking of node_modules, environment files, logs, and other generated artifacts. Your project structure should now look like:
EXPRESS-API-TEMPLATE
├── .editorconfig
├── .gitignore
├── package.json
└── README.md
Scaffolding The Express Application
Express provides a generator tool to create an application skeleton. Install it globally and generate the project in the current directory using the -f flag:
# install the express generator globally
yarn global add express-generator

# Install Express
yarn add express

# Generate The Express Project In The Current Folder
express -f
Clean up the generated boilerplate with these steps:
- Delete
routes/users.js. - Remove the
public/andviews/directories. - Rename
bin/wwwtobin/www.js. - Remove the default Jade template engine:
yarn remove jade. - Create a
src/directory and moveapp.js,bin/, androutes/inside it. - Update the
startscript inpackage.jsonaccordingly.
The restructured layout should resemble:
EXPRESS-API-TEMPLATE
├── node_modules
├── src
|   ├── bin
│   │   ├── www.js
│   ├── routes
│   |   ├── index.js
│   └── app.js
├── .editorconfig
├── .gitignore
├── package.json
├── README.md
└── yarn.lock
Open src/app.js and replace its contents to mount your router at the /v1 prefix:
var logger = require('morgan');
var express = require('express');
var cookieParser = require('cookie-parser');
var indexRouter = require('./routes/index');
var app = express();

app.use(logger('dev'));
app.use(express.json());
app.use(express.urlencoded({ extended: true }));
app.use(cookieParser());
app.use('/v1', indexRouter);

module.exports = app;
Define the root route handler in src/routes/index.js to return a JSON response:
var express = require('express');
var router = express.Router();
router.get('/', function(req, res, next) {
  return res.status(200).json({ message: 'Welcome to Express API template' });
});
module.exports = router;
Start the server and visit http://localhost:3000/v1 — you should see the JSON message from the route handler.
Converting To ES6 Syntax
The generator's original output uses ES5 syntax, but modern JavaScript provides cleaner alternatives. Replace the route handler with the ES6 version using the import statement and an arrow function:
import express from 'express';

const indexRouter = express.Router();

indexRouter.get('/', (req, res) =>
  res.status(200).json({ message: 'Welcome to Express API template' })
);

export default indexRouter;
Update src/app.js with equivalent ES6 imports:
import logger from 'morgan';
import express from 'express';
import cookieParser from 'cookie-parser';
import indexRouter from './routes/index';
const app = express();
app.use(logger('dev'));
app.use(express.json());
app.use(express.urlencoded({ extended: true }));
app.use(cookieParser());
app.use('/v1', indexRouter);

export default app;
Rewrite src/bin/www.js incrementally. Start with the server setup:
#!/usr/bin/env node
/**
 * Module dependencies.
 */
import debug from 'debug';
import http from 'http';
import app from '../app';
/**
 * Normalize a port into a number, string, or false.
 */
const normalizePort = val => {
  const port = parseInt(val, 10);
  if (Number.isNaN(port)) {
    // named pipe
    return val;
  }
  if (port >= 0) {
    // port number
    return port;
  }
  return false;
};

/**
 * Get port from environment and store in Express.
 */
const port = normalizePort(process.env.PORT || '3000');
app.set('port', port);

/**
 * Create HTTP server.
 */
const server = http.createServer(app);

// next code block goes here
This block reads the port from environment variables (defaulting to 3000), normalizes it with normalizePort, and creates an HTTP server with app as the callback.
Append the error-handling and listening callbacks:
/**
 * Event listener for HTTP server "error" event.
 */
const onError = error => {
  if (error.syscall !== 'listen') {
    throw error;
  }
  const bind = typeof port === 'string' ? `Pipe ${port}` : `Port ${port}`;
  // handle specific listen errors with friendly messages
  switch (error.code) {
    case 'EACCES':
      alert(`${bind} requires elevated privileges`);
      process.exit(1);
      break;
    case 'EADDRINUSE':
      alert(`${bind} is already in use`);
      process.exit(1);
      break;
    default:
      throw error;
  }
};

/**
 * Event listener for HTTP server "listening" event.
 */
const onListening = () => {
  const addr = server.address();
  const bind = typeof addr === 'string' ? `pipe ${addr}` : `port ${addr.port}`;
  debug(`Listening on ${bind}`);
};
/**
 * Listen on provided port, on all network interfaces.
 */
server.listen(port);
server.on('error', onError);
server.on('listening', onListening);
The onError handler prints appropriate messages for server errors, while onListening logs the active port to the console.
When you restart the server now, you'll encounter a SyntaxError: Invalid or unexpected token. Node's current runtime doesn't natively support the ES6 import syntax used here. The next phase addresses this compatibility gap before proceeding further.
Setting Up Babel, Nodemon, ESLint, and Prettier
To compile modern JavaScript for both development and production, we need Babel alongside a few supporting tools. Install the required libraries as development dependencies:
# install babel scripts
yarn add @babel/cli @babel/core @babel/plugin-transform-runtime @babel/preset-env @babel/register @babel/runtime @babel/node --dev
After installation, check the devDependencies section of your package.json file; all these packages will be listed there. The Babel packages we're using serve these purposes:
@babel/cli | A required install for using babel. It allows the use of Babel from the terminal and is available as ./node_modules/.bin/babel. |
@babel/core | Core Babel functionality. This is a required installation. |
@babel/node | This works exactly like the Node.js CLI, with the added benefit of compiling with babel presets and plugins. This is required for use with nodemon. |
@babel/plugin-transform-runtime | This helps to avoid duplication in the compiled output. |
@babel/preset-env | A collection of plugins that are responsible for carrying out code transformations. |
@babel/register | This compiles files on the fly and is specified as a requirement during tests. |
@babel/runtime | This works in conjunction with @babel/plugin-transform-runtime. |
Create a .babelrc file at the project root with the following configuration:
{
  "presets": ["@babel/preset-env"],
  "plugins": ["@babel/transform-runtime"]
}
Next, install nodemon, which watches your source code and automatically restarts the server when changes are detected:
# install nodemon
yarn add nodemon --dev
Create a nodemon.json file at the root and add this configuration:
{
  "watch": [
    "package.json",
    "nodemon.json",
    ".eslintrc.json",
    ".babelrc",
    ".prettierrc",
    "src/"
  ],
  "verbose": true,
  "ignore": ["*.test.js", "*.spec.js"]
}
The watch key tells nodemon which directories to monitor for changes and restart the server accordingly. The ignore key designates files that should not trigger a restart.
Update the scripts section of package.json to look like this:
# build the content of the src folder
"prestart": "babel ./src --out-dir build"

# Start Server From The Build Folder
"start": "node ./build/bin/www"

# Start Server In Development Mode
"startdev": "nodemon --exec babel-node ./src/bin/www"prestartcompiles the contents of thesrc/folder into thebuild/folder. This runs automatically beforestartwhenever you executeyarn start.startserves the built files from thebuild/folder rather than thesrc/folder. This is the production script that deployment platforms like Heroku invoke.yarn startdevstarts the server during development. It usesbabel-node(via the--execflag) instead of plainnodeto run the code directly fromsrc/. For the productionstartscript, regularnodeis sufficient becausebuild/contains compiled code.
Run yarn startdev and visit https://localhost:3000/v1; your server should be operational again.
Finally, configure ESLint for syntax rule enforcement and prettier for code formatting. Install both packages from a separate terminal while keeping an eye on the server terminal—you'll see it restart, since package.json is among the monitored files.
# install elsint and prettier

yarn add eslint eslint-config-airbnb-base eslint-plugin-import prettier --dev
Now create an .eslintrc.json file at the project root with this code:
{
  "env": {
    "browser": true,
    "es6": true,
    "node": true,
    "mocha": true
  },
  "extends": ["airbnb-base"],
  "globals": {
    "Atomics": "readonly",
    "SharedArrayBuffer": "readonly"
  },
  "parserOptions": {
    "ecmaVersion": 2018,
    "sourceType": "module"
  },
  "rules": {
    "indent": ["warn", 2],
    "linebreak-style": ["error", "unix"],
    "quotes": ["error", "single"],
    "semi": ["error", "always"],
    "no-console": 1,
    "comma-dangle": [0],
    "arrow-parens": [0],
    "object-curly-spacing": ["warn", "always"],
    "array-bracket-spacing": ["warn", "always"],
    "import/prefer-default-export": [0]
  }
}
This file defines the rules ESLint checks against, including extending the Airbnb style guide. The "rules" section specifies whether violations trigger warnings or errors. For example, indentation with fewer than two spaces generates a warning. A value of [0] disables a rule entirely.
Create a .prettierrc file containing:
{
  "trailingComma": "es5",
  "tabWidth": 2,
  "semi": true,
  "singleQuote": true
}
This sets a tab width of 2 and enforces single quotes throughout the codebase. Refer to the prettier documentation for additional formatting options.
Update package.json with these linting-related scripts:
# add these one after the other

"lint": "./node_modules/.bin/eslint ./src"

"pretty": "prettier --write '**/*.{js,json}' '!node_modules/**'"

"postpretty": "yarn lint --fix"
When you run yarn lint, you'll see errors and warnings in the console. The pretty command formats your code; postpretty executes immediately afterward, running linting with the --fix flag to auto-correct common issues. In practice, you can rely on yarn pretty alone.
Executing yarn pretty should leave only two warnings about alert in the bin/www.js file. At this point, your project structure should resemble this:
EXPRESS-API-TEMPLATE
├── build
├── node_modules
├── src
|   ├── bin
│   │   ├── www.js
│   ├── routes
│   |   ├── index.js
│   └── app.js
├── .babelrc
├── .editorconfig
├── .eslintrc.json
├── .gitignore
├── .prettierrc
├── nodemon.json
├── package.json
├── README.md
└── yarn.lock
If a yarn-error.log file appears in the root directory, add it to your .gitignore. Commit these changes now. The corresponding branch in the example repository is 02-dev-dependencies.
Managing Environment Variables with a .env File
Applications frequently require secure storage for configuration values like API keys. Environment variables solve this by keeping such settings out of source code. A common pattern is to centralize these reads in a dedicated file, often named settings.js or config.js.
Create a .env file at the project root with the following:
TEST_ENV_VARIABLE="Environment variable is coming across"
To read these values, install dotenv, a library that imports the contents of .env into process.env:
# install dotenv
yarn add dotenv
Begin watching the .env file by adding it to the nodemon ignore-list configuration. Then create src/settings.js with this code:
import dotenv from 'dotenv';
dotenv.config();
export const testEnvironmentVariable = process.env.TEST_ENV_VARIABLE;
This imports dotenv and initializes it, then exports the testEnvironmentVariable value defined in your .env file. Now update src/routes/index.js to reference this setting:
import express from 'express';
import { testEnvironmentVariable } from '../settings';

const indexRouter = express.Router();

indexRouter.get('/', (req, res) => res.status(200).json({ message: testEnvironmentVariable }));

export default indexRouter;
The only difference is importing testEnvironmentVariable from the settings module and returning it as the response message for the base route. Visit https://localhost:3000/v1 and you should see the expected output:
{
  "message": "Environment variable is coming across."
}
This pattern allows you to add as many environment variables as needed, exporting each one from settings.js for use across the app. Run prettier and linting, then commit these changes. The corresponding branch is 03-env-variables.
Writing the First Test
Testing provides confidence that your code behaves as intended. Setting up automated tests is straightforward with Express.js. Our approach will send requests to API endpoints and verify the responses.
Install the necessary test dependencies:
# install dependencies

yarn add mocha chai nyc sinon-chai supertest coveralls --dev
Each library contributes a vital piece to the testing workflow:
mocha | test runner |
chai | used to make assertions |
nyc | collect test coverage report |
sinon-chai | extends chai’s assertions |
supertest | used to make HTTP calls to our API endpoints |
coveralls | for uploading test coverage to coveralls.io |
At the project root, create a test/ folder containing two files:
- test/setup.js
- test/index.test.js
Mocha discovers the test/ folder automatically. Populate test/setup.js with the following helper code—a centralized place for test-related imports:
import supertest from 'supertest';
import chai from 'chai';
import sinonChai from 'sinon-chai';
import app from '../src/app';

chai.use(sinonChai);
export const { expect } = chai;
export const server = supertest.agent(app);
export const BASE_URL = '/v1';
This file functions like a configuration for tests, avoiding repetitive imports across individual test files. Next, add your assertions to test/index.test.js:
import { expect, server, BASE_URL } from './setup';

describe('Index page test', () => {
  it('gets base url', done => {
    server
      .get(`${BASE_URL}/`)
      .expect(200)
      .end((err, res) => {
        expect(res.status).to.equal(200);
        expect(res.body.message).to.equal(
          'Environment variable is coming across.'
        );
        done();
      });
  });
});
Here, we request the base endpoint (/) and assert that the response body contains a message key whose value matches Environment variable is coming across.. If the describe/it pattern is unfamiliar, review Mocha's Getting Started guide.
Install the test command in package.json:
"test": "nyc --reporter=html --reporter=text --reporter=lcov mocha -r @babel/register"Running yarn test executes the suite via nyc, generating coverage in three formats: HTML output to coverage/, a text summary in the terminal, and an LCOV report in .nyc_output/. Execute the command and confirm the output:
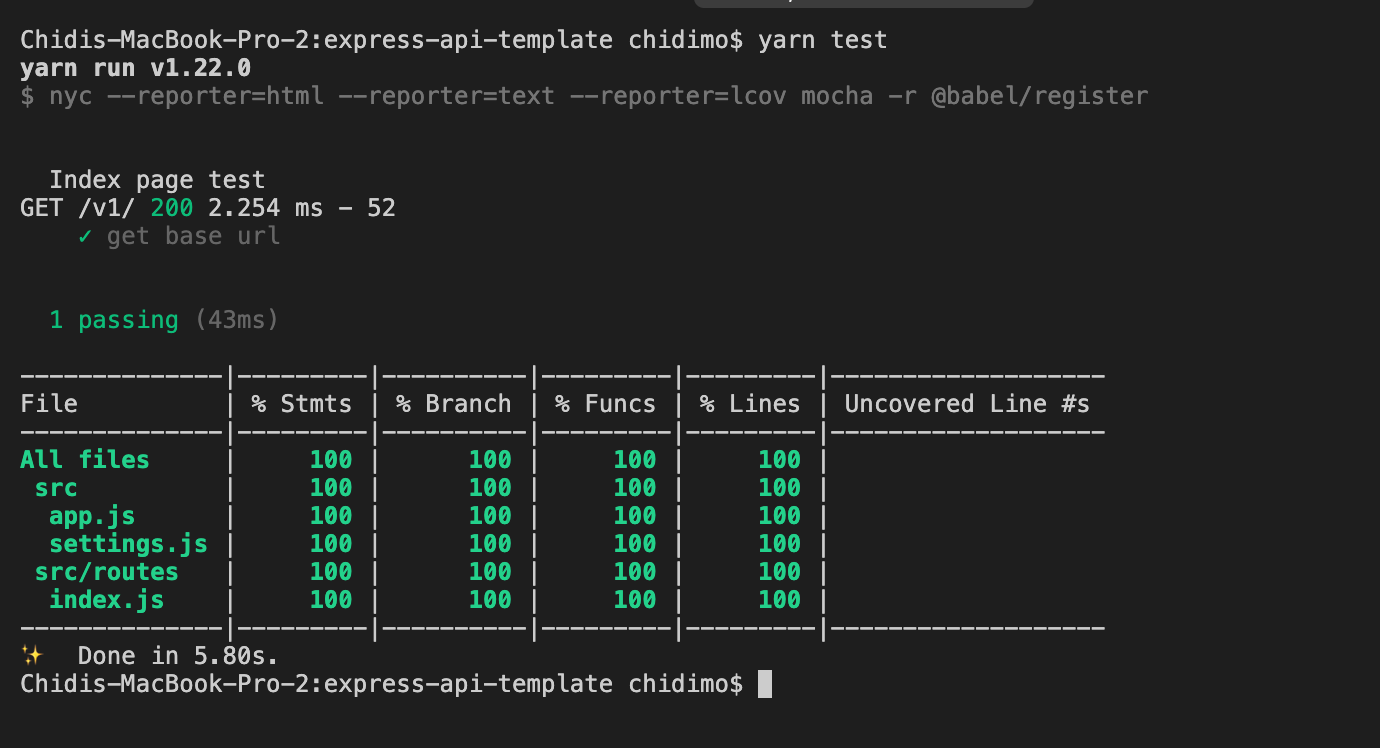
This generates two extra directories—.nyc_output/ and coverage/—both already covered by your .gitignore. Open coverage/index.html in a browser to inspect detailed file-by-file coverage metrics. Commit these changes, with the corresponding branch being 04-first-test.
Setting Up CI Services and Adding the First Controller
Travis CI
Travis CI automatically runs tests on every push and pull request to your GitHub repository. To set it up:
- Sign up at travis-ci.com with your GitHub account.
- Navigate to
settingsvia the dropdown next to your profile picture. - Under
Repositories, clickManage repositories on Github. - Choose
Only select repositories, then find and add theexpress-api-templaterepo. - Click
Approve and installto return to Travis CI. - On the repo page, click the
build unknownicon to copy the status image markdown and paste it into your README.md. - Go to
More options>Settings, and add theTEST_ENV_VARIABLEenvironment variable with its value wrapped in double quotes, e.g."Environment variable is coming across." - Create .travis.yml at the project root with this configuration:
language: node_js
env:
  global:
    - CC_TEST_REPORTER_ID=get-this-from-code-climate-repo-page
matrix:
  include:
  - node_js: '12'
cache:
  directories: [node_modules]
install:
  yarn
after_success: yarn coverage
before_script:
  - curl -L https://codeclimate.com/downloads/test-reporter/test-reporter-latest-linux-amd64 > ./cc-test-reporter
  - chmod +x ./cc-test-reporter
  - ./cc-test-reporter before-build
script:
  - yarn test
after_script:
  - ./cc-test-reporter after-build --exit-code $TRAVIS_TEST_RESUL
The configuration specifies Node.js v12 in the matrix section and caches node_modules/ to avoid regeneration on each build. Dependencies are installed with yarn, while before_script and after_script handle Code Climate coverage uploads (the CC_TEST_REPORTER_ID value gets set in the Code Climate section below). After a successful yarn test, the yarn coverage command runs to upload coverage data to Coveralls.
Coveralls
Coveralls publishes test coverage metrics so you can view them outside your local machine:
- Sign in at coveralls.io with your GitHub account.
- Open the navigation menu (hover on the left edge) and click
ADD REPOS. - Find
express-api-templateand toggle coverage on. If the repo is missing, clickSYNC REPOS. The repo must be public unless you have a PRO account. - Open the repo details page and locate the
repo_token. - Create .coveralls.yml at the root and enter the token:
repo_token: get-this-from-repo-settings-on-coveralls.ioAdd the coverage script to package.json:
"coverage": "nyc report --reporter=text-lcov | coveralls"
Run this command with your Internet connection on:
yarn coverage
The existing coverage report in .nyc_output gets uploaded. Refresh the repo page on Coveralls to see the report. Then use the BADGE YOUR REPO section to copy the markdown badge into your README.
Code Climate
Code Climate assesses code quality by scanning for patterns like repetition and deeply nested loops. It also collects test coverage data:
- Go to codeclimate.com and sign up with GitHub.
- Click
Add a repository, find the repo, and selectAdd Repo. - Wait for the build to finish, then navigate to the repo dashboard.
- Under
Test Coverage, copy theTEST REPORTER IDand use it as theCC_TEST_REPORTER_IDvalue in .travis.yml. - Under
EXTRASin the left navigation, clickBadgesand copy themaintainabilityandtest coveragemarkdown badges into your README.
Maintainability checks default to settings applied to every repo. You can override them with a .codeclimate.yml file if needed; this guide uses the default settings, viewable under the Maintainability tab in the repo settings.
AppVeyor
AppVeyor serves the same purpose as Travis CI but runs tests in a Windows environment instead of Linux:
- Log in at AppVeyor and click
NEW PROJECT. - Hover over
express-api-templatein the repo list and clickADD. - Under
Settings, go toEnvironmentand addTEST_ENV_VARIABLEwith its value. Save the changes. - Create appveyor.yml at the root with this code:
environment:
  matrix:
  - nodejs_version: "12"
install:
  - yarn
test_script:
  - yarn test
build: off
The config uses Node.js v12, installs dependencies with yarn, runs tests via test_script, and skips build folder creation on the last line. Then grab the markdown badge from the Settings tab and paste it into your README.
Commit your code and push. If environment variables are set correctly on Travis and AppVeyor, all tests should pass, displaying badges similar to:
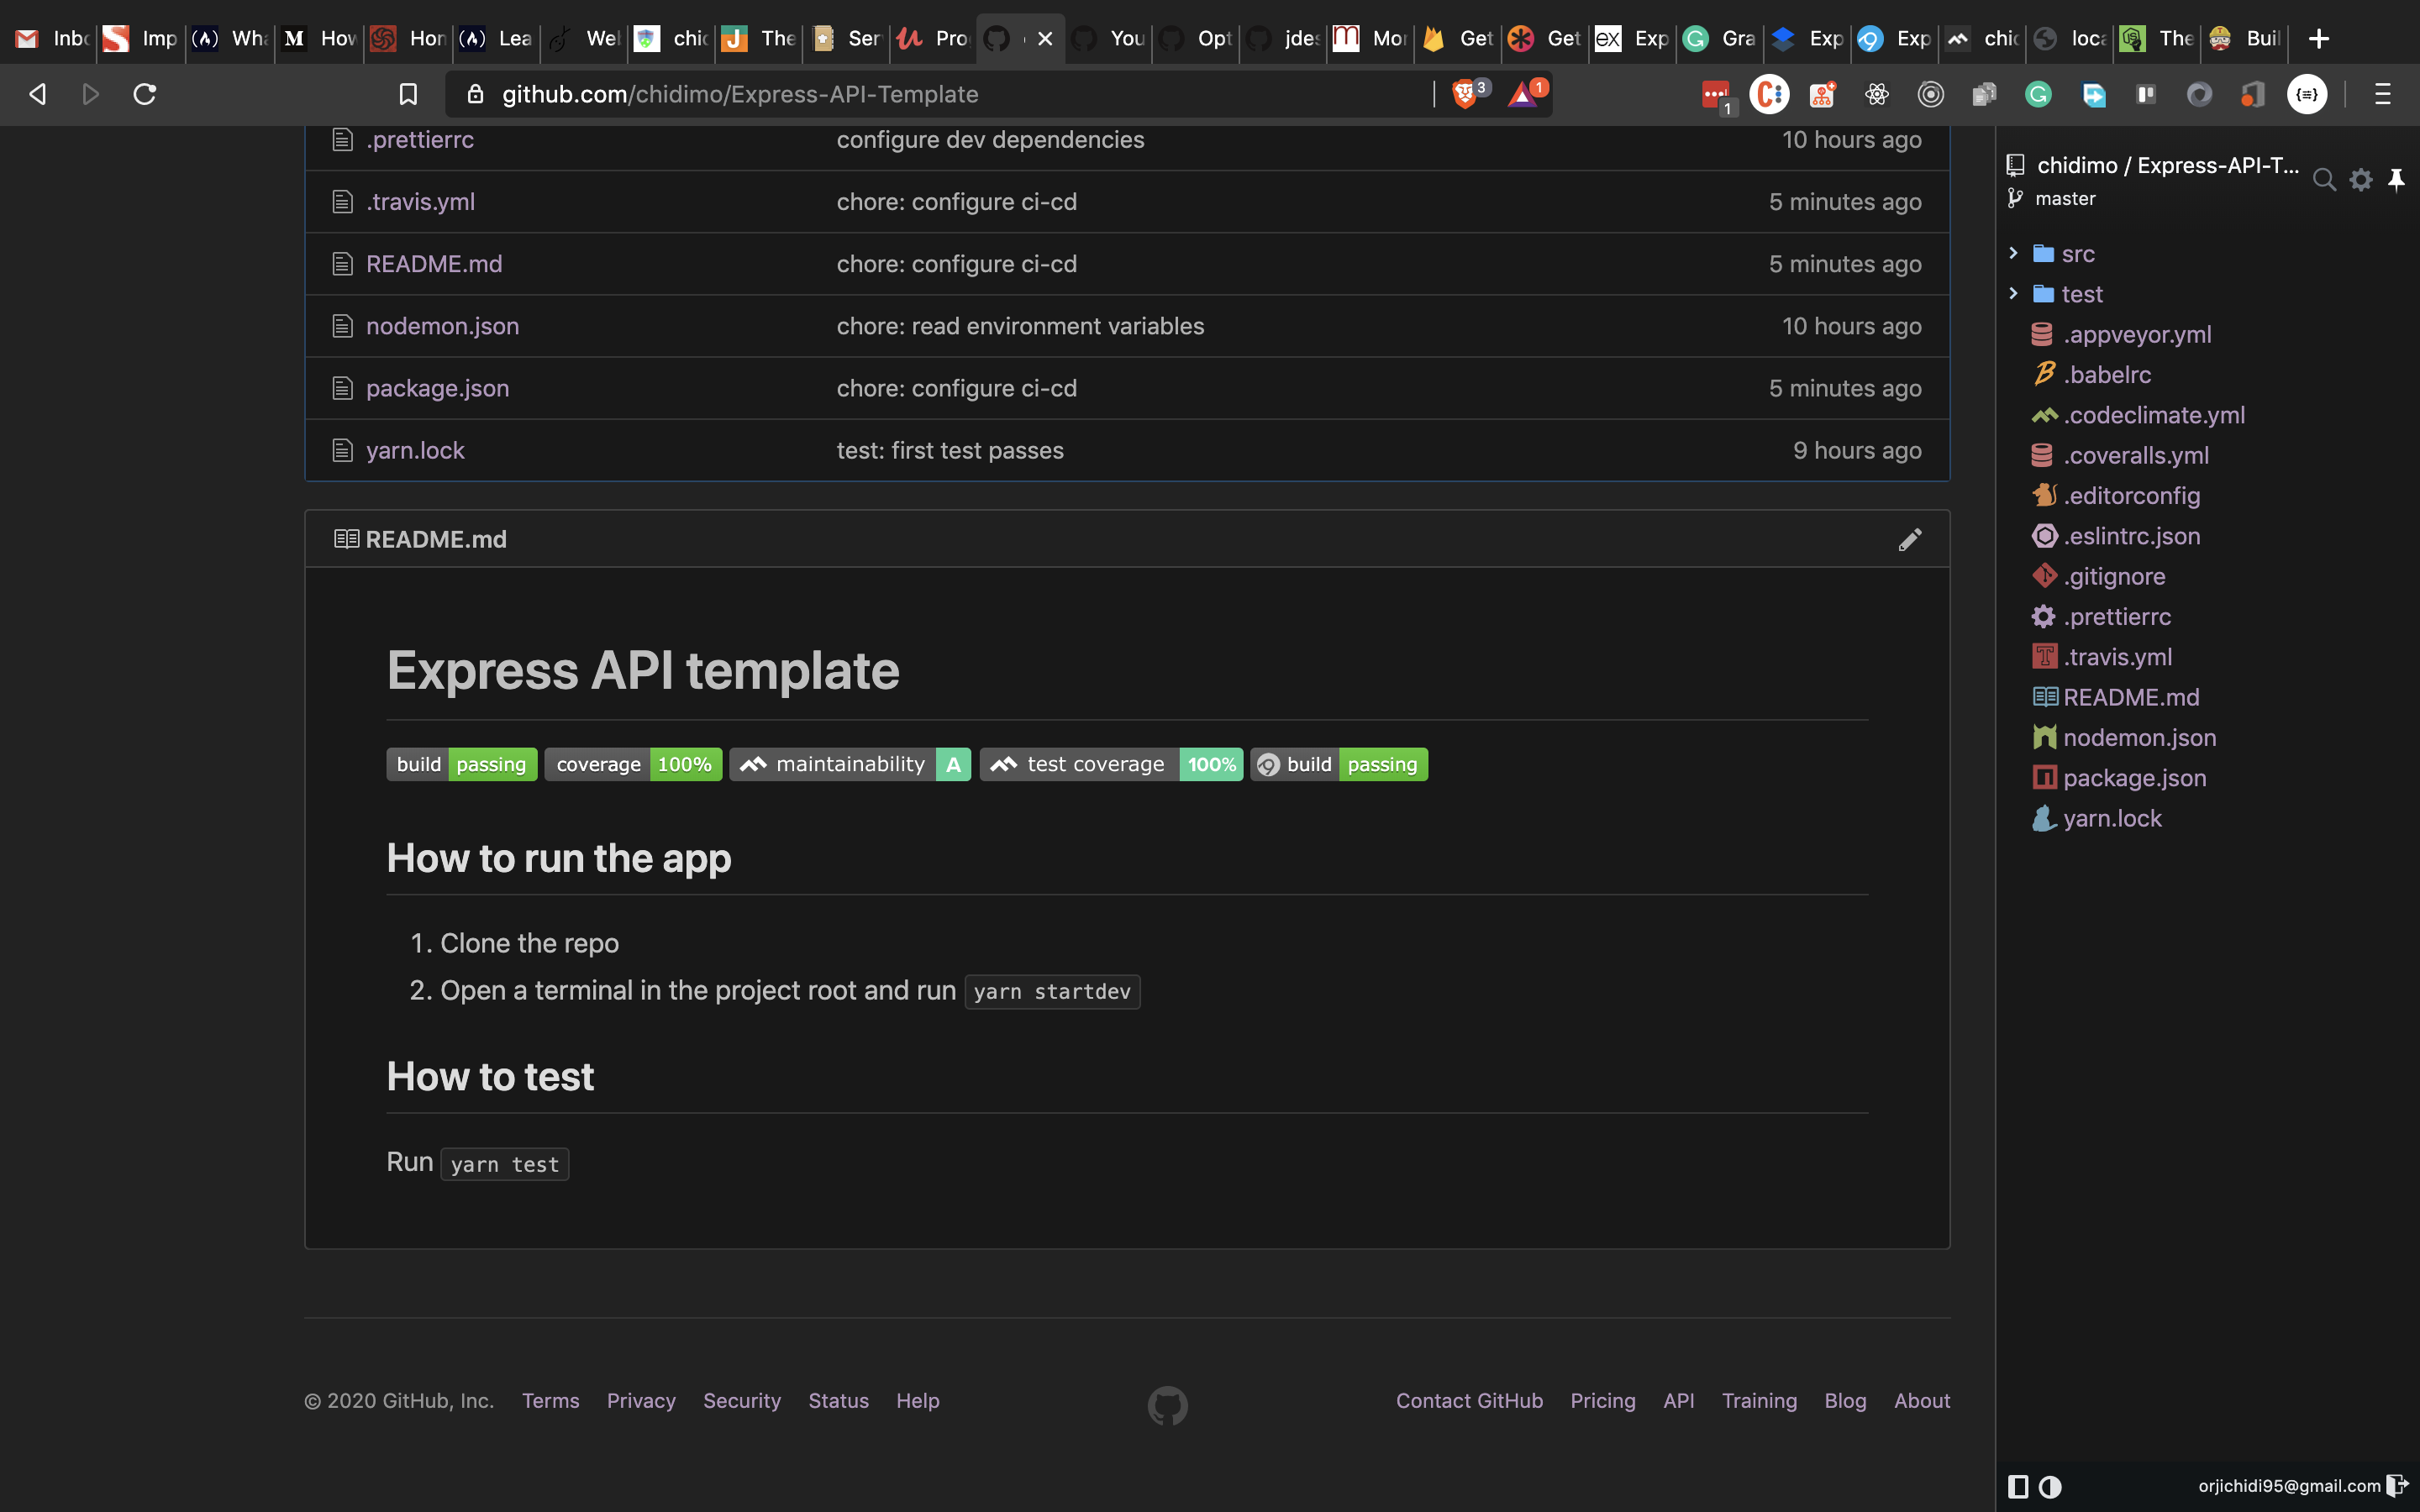
- The corresponding branch in my repo is 05-ci.
Adding a Controller
Handling the GET request to /v1 inside src/routes/index.js works for now, but keeping request handling and response generation separate becomes important as the app grows. Controllers are functions dedicated to handling requests for specific URLs.
Create a controllers/ folder inside src/ with two files: index.js and home.js. Name controllers based on what they manage (for instance, usersController.js for user-related functions). In home.js, add:
import { testEnvironmentVariable } from '../settings';

export const indexPage = (req, res) => res.status(200).json({ message: testEnvironmentVariable });
This just moves the existing handler for the / route into its own file. Set up index.js to re-export everything:
// export everything from home.js
export * from './home';
Exporting from home.js allows shorter imports like import { indexPage } from '../controllers'; in the routes file. Update src/routes/index.js:
import express from 'express';
import { indexPage } from '../controllers';
const indexRouter = express.Router();

indexRouter.get('/', indexPage);

export default indexRouter;
The only change here is passing a handler function directly to the route. You've now written your first controller. Add more routes and controllers as needed — an about page would be a good practice exercise, and remember to update your tests accordingly. Run yarn test to verify nothing is broken.
- The corresponding branch in my repo is 06-controllers.
Wiring the App to PostgreSQL
The hard-coded responses in our controllers won't cut it for a real backend. We need a database, and for this project we'll use PostgreSQL. You can either provision a free instance from a cloud provider like ElephantSQL, which offers a 20MB free tier sufficient for this tutorial, or run a local installation. Regardless of your choice, note the connection string (you'll find it on the ElephantSQL details page).
Node.js can't talk to PostgreSQL natively, so we'll use the excellent node-postgres library to execute SQL queries and handle the results. Let's install and configure it.
# install node-postgres
yarn add pg
First, update settings.js to include the new configuration.
export const connectionString = process.env.CONNECTION_STRING;Next, add the connection string to your .env file using the variable name CONNECTION_STRING.
CONNECTION_STRING="postgresql://dbuser:dbpassword@localhost:5432/dbname"Building the Model
Inside /src, create a models/ directory with two files: pool.js and model.js. The pool.js file establishes a connection pool—a collection of clients that node-postgres uses to run queries—by passing our connection string to the Pool constructor.
import { Pool } from 'pg';
import dotenv from 'dotenv';
import { connectionString } from '../settings';
dotenv.config();

export const pool = new Pool({ connectionString });
In model.js, we create a reusable class. Its constructor takes the table name, and it exposes methods like select, which accepts the columns to fetch and an optional clause (like a WHERE). Since queries return promises, we can use pool.query to run them on any available idle client from the pool.
import { pool } from './pool';

class Model {
  constructor(table) {
    this.pool = pool;
    this.table = table;
    this.pool.on('error', (err, client) => `Error, ${err}, on idle client${client}`);
  }

  async select(columns, clause) {
    let query = `SELECT ${columns} FROM ${this.table}`;
    if (clause) query += clause;
    return this.pool.query(query);
  }
}

export default Model;
Utility Scripts for Database Operations
Before building endpoints, let's create command-line utilities to manage our schema and seed data. In /src, create a utils/ folder with queries.js, queryFunctions.js, and runQuery.js.
The queries.js file defines three SQL strings: one to drop and recreate a messages table, one to insert seed rows, and one to drop the table entirely.
export const createMessageTable = `
DROP TABLE IF EXISTS messages;
CREATE TABLE IF NOT EXISTS messages (
  id SERIAL PRIMARY KEY,
  name VARCHAR DEFAULT '',
  message VARCHAR NOT NULL
  )
  `;

export const insertMessages = `
INSERT INTO messages(name, message)
VALUES ('chidimo', 'first message'),
      ('orji', 'second message')
`;

export const dropMessagesTable = 'DROP TABLE messages';
In queryFunctions.js, we wrap those queries in functions. Note the executeQueryArray function—it processes queries sequentially for setup purposes, which is fine for this context but not suitable for production.
import { pool } from '../models/pool';
import {
  insertMessages,
  dropMessagesTable,
  createMessageTable,
} from './queries';

export const executeQueryArray = async arr => new Promise(resolve => {
  const stop = arr.length;
  arr.forEach(async (q, index) => {
    await pool.query(q);
    if (index + 1 === stop) resolve();
  });
});

export const dropTables = () => executeQueryArray([ dropMessagesTable ]);
export const createTables = () => executeQueryArray([ createMessageTable ]);
export const insertIntoTables = () => executeQueryArray([ insertMessages ]);
Finally, runQuery.js triggers the setup functions. Add a script to package.json to run this file, then execute it via the command line.
"runQuery": "babel-node ./src/utils/runQuery"yarn runQuery
You should now see the messages table and its seeded data in your database (in ElephantSQL, use the BROWSER panel to view it).
Querying the Database via the API
Now we can replace the dummy data with a real database call. Create src/controllers/messages.js with an asynchronous controller. It instantiates the model for the messages table, uses the select method to fetch data, and sends the result as JSON.
import Model from '../models/model';

const messagesModel = new Model('messages');
export const messagesPage = async (req, res) => {
  try {
    const data = await messagesModel.select('name, message');
    res.status(200).json({ messages: data.rows });
  } catch (err) {
    res.status(200).json({ messages: err.stack });
  }
};
Register a GET route for /v1/messages in src/routes/index.js and update the import statement.
# update the import line
import { indexPage, messagesPage } from '../controllers';

# Add The Get Messages Endpoint
indexRouter.get('/messages', messagesPage)
Hit https://localhost:3000/v1/messages to see the stored messages. Let's also add proper tests. Create test/hooks.js—Mocha will run this before any test files. The before hook creates the table and inserts data, while the after hook drops it, ensuring a clean state for every test run.
import {
  dropTables,
  createTables,
  insertIntoTables,
} from '../src/utils/queryFunctions';

before(async () => {
  await createTables();
  await insertIntoTables();
});

after(async () => {
  await dropTables();
});
In the new test/messages.test.js, assert that the response is an array and each item has the expected name and message properties.
import { expect, server, BASE_URL } from './setup';
describe('Messages', () => {
  it('get messages page', done => {
    server
      .get(`${BASE_URL}/messages`)
      .expect(200)
      .end((err, res) => {
        expect(res.status).to.equal(200);
        expect(res.body.messages).to.be.instanceOf(Array);
        res.body.messages.forEach(m => {
          expect(m).to.have.property('name');
          expect(m).to.have.property('message');
        });
        done();
      });
  });
});
Finally, update the CI configurations. For Travis CI, add a PostgreSQL service and create the test database before running the suite.
services:
  - postgresql
addons:
  postgresql: "10"
  apt:
    packages:
    - postgresql-10
    - postgresql-client-10
before_install:
  - sudo cp /etc/postgresql/{9.6,10}/main/pg_hba.conf
  - sudo /etc/init.d/postgresql restart
# add this as the first line in the before_script section
- psql -c 'create database testdb;' -U postgresMake the CONNECTION_STRING environment variable available on Travis, using postgres://postgres@localhost:5432/ci_test. Do the same in the AppVeyor configuration.
before_test:
  - SET PGUSER=postgres
  - SET PGPASSWORD=Password12!
  - PATH=C:\Program Files\PostgreSQL\10\bin\;%PATH%
  - createdb testdb
services:
- postgresql101CONNECTION_STRING="postgresql://postgres:postgres@localhost:5432/testdb"CONNECTION_STRING=postgresql://postgres:Password12!@localhost:5432/testdbCommit and push—the tests should pass on both CI services. For reference, the complete code for this stage lives in the 07-connect-postgres branch.
Adding Support for POST Requests
Now let's implement a way to add new messages to the database. We'll follow a strict TDD flow: write a failing test first. In test/messages.test.js, add a test that sends a POST request and expects a response containing the new record's id, name, and message.
it('posts messages', done => {
  const data = { name: 'some name', message: 'new message' };
  server
    .post(`${BASE_URL}/messages`)
    .send(data)
    .expect(200)
    .end((err, res) => {
      expect(res.status).to.equal(200);
      expect(res.body.messages).to.be.instanceOf(Array);
      res.body.messages.forEach(m => {
        expect(m).to.have.property('id');
        expect(m).to.have.property('name', data.name);
        expect(m).to.have.property('message', data.message);
      });
      done();
    });
});
Run the suite—this test will fail. To fix it, back in src/models/model.js, add an insert method:
async insertWithReturn(columns, values) {
  const query = `
        INSERT INTO ${this.table}(${columns})
        VALUES (${values})
        RETURNING id, ${columns}
    `;
  return this.pool.query(query);
}
This method takes the relevant data, executes an INSERT query, and returns the inserted record including its new id. Add a corresponding controller in src/controllers/messages.js to handle the request.
export const addMessage = async (req, res) => {
  const { name, message } = req.body;
  const columns = 'name, message';
  const values = `'${name}', '${message}'`;
  try {
    const data = await messagesModel.insertWithReturn(columns, values);
    res.status(200).json({ messages: data.rows });
  } catch (err) {
    res.status(200).json({ messages: err.stack });
  }
};
Destructure the request body in this async function, create the SQL insert statement, and pass it to the model's method. Then wire up the POST/v1/messages endpoint in your routes file.
import { indexPage, messagesPage, addMessage } from '../controllers';

indexRouter.post('/messages', addMessage);
The tests should pass now. You can also test it manually with a tool like Postman. Send a POST request to the messages endpoint with a JSON body containing name and message fields. If your previous test run dropped the table, remember to run the query script again to recreate it before hitting the endpoint manually.
yarn query
Commit the changes and push. The test suite will pass on Travis and AppVeyor (some coverage will be lost, but that's acceptable at this stage). The implementation for this phase is available in the 08-post-to-db branch. Continue to the next part of this series to add update and delete operations.
Middleware in the Request-Response Cycle
Express middleware functions sit between the receipt of a request and the dispatch of a response. They receive the request object (req), the response object (res), and the next function, which passes control to the subsequent middleware in the chain. Middleware is commonly used for tasks like authentication and request body modification.
To demonstrate, we will build a simple middleware that prepends the string SAYS: to the incoming message body before it is saved.
First, update the relevant test in test/messages.test.js. The final assertion in the "posts message" test case should now expect the database-returned message to include the prefix:
it('posts messages', done => {
   ...
  expect(m).to.have.property('message', `SAYS: ${data.message}`); # update this line
    ...
});
Run the test suite to confirm this new assertion fails. Then create a middleware/ directory inside src/ with two files, middleware.js and index.js.
The core logic in middleware.js is:
export const modifyMessage = (req, res, next) => {
  req.body.message = `SAYS: ${req.body.message}`;
  next();
};
This function appends SAYS: to req.body.message and then invokes next(), which is mandatory for passing execution to the next function in the cycle. The companion index.js simply exports the available middleware:
# export everything from the middleware file

export * from './middleware';
Now wire the middleware into the route handler in src/routes/index.js. The modifyMessage function should be placed in the chain before addMessage, since calling next in the middleware will eventually invoke the route handler.
import { modifyMessage } from '../middleware';

indexRouter.post('/messages', modifyMessage, addMessage);
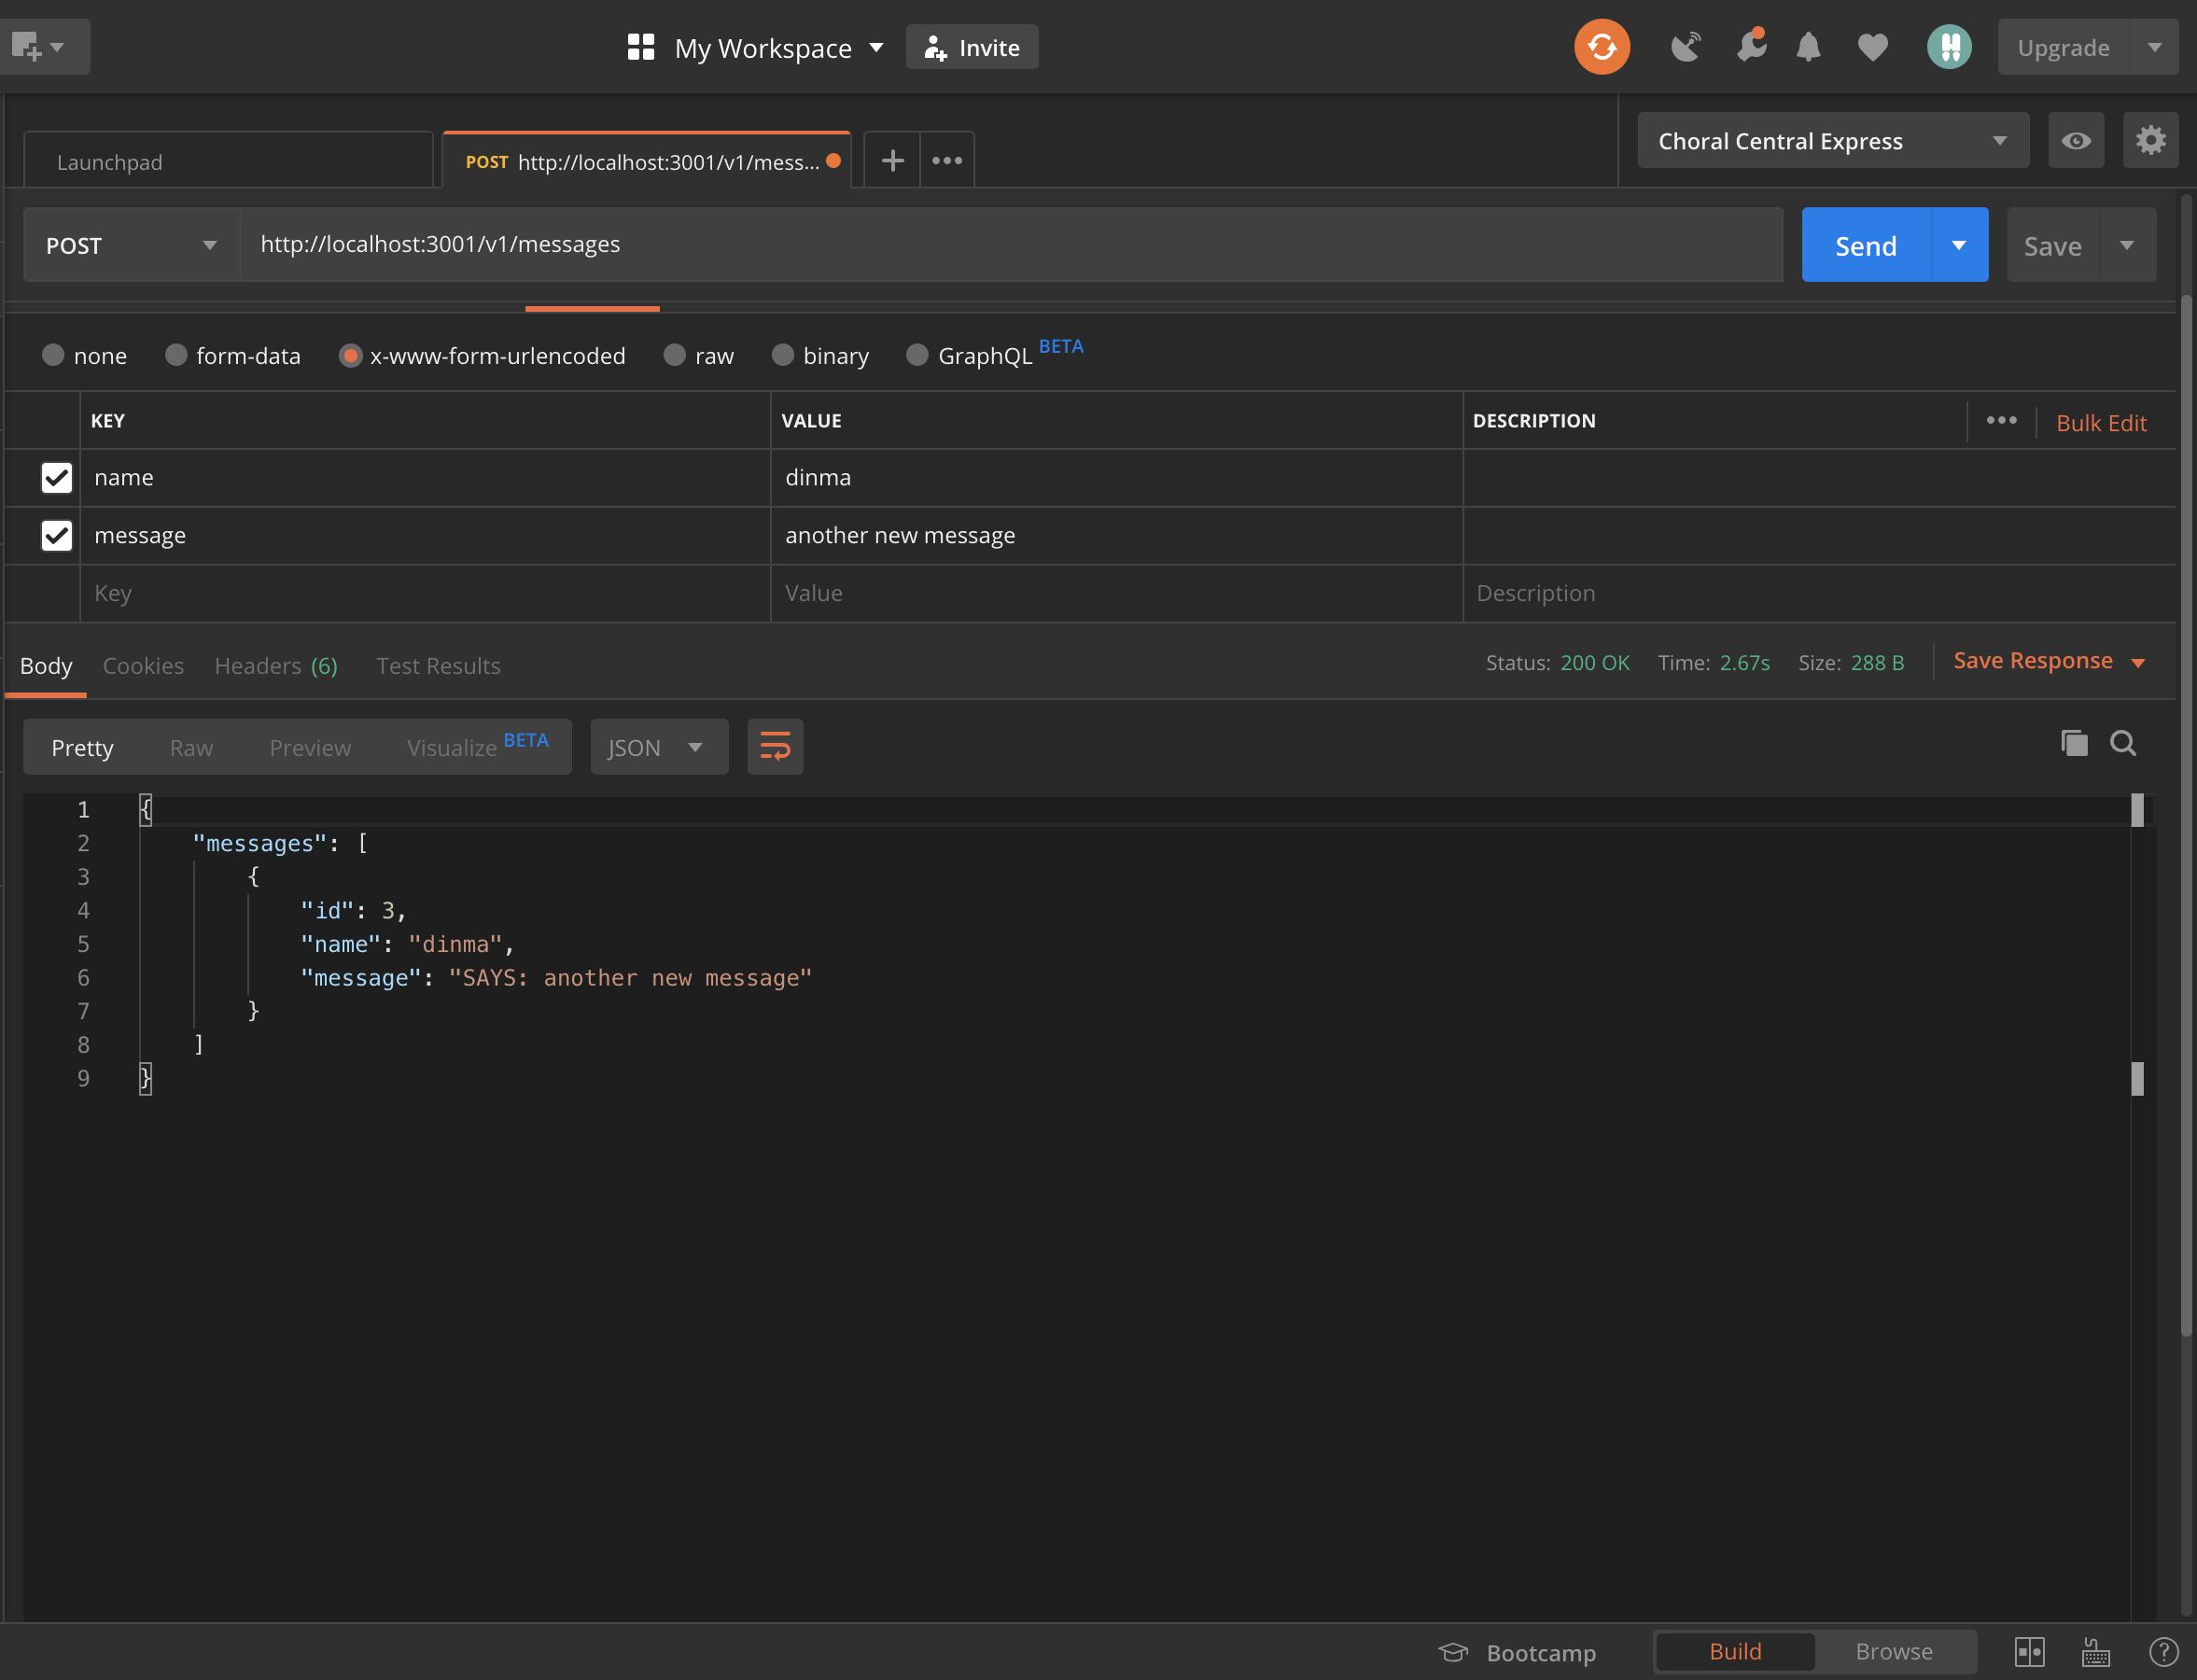
If you comment out the next() line in modifyMessage, the request will hang indefinitely. With the middleware active, sending a new message from Postman will return the message with the appended prefix:
Error Handling for Async Middleware
Express automatically catches errors in synchronous route handlers and middleware—no extra work is needed there. However, asynchronous functions require explicit error handling.
Consider a case where we want to fetch data from the Lorem Picsum API (https://picsum.photos/id/0/info) before creating a message. This is an asynchronous operation that might fail.
First, install Axios:
# install axios
yarn add axios
Add an asynchronous function to src/middleware/middleware.js that performs this request:
export const performAsyncAction = async (req, res, next) => {
  try {
    await axios.get('https://picsum.photos/id/0/info');
    next();
  } catch (err) {
    next(err);
  }
};
Inside this async function, we await the API call (ignoring the return value) and then call next(). If the request throws, we catch the error and pass it to next(err). Passing the error is critical; it causes Express to skip the remaining non-error middleware. Calling next() without an argument would let the request continue as if nothing went wrong, leaving the error uncaught.
Import this new function and place it in the chain for the POST messages route, before the message-modifying middleware:
import { modifyMessage, performAsyncAction } from '../middleware';

indexRouter.post('/messages', modifyMessage, performAsyncAction, addMessage);
A global error handler must be registered as the last middleware in src/app.js, just before the export default app line. Error handlers are identifiable by their four parameters, (err, req, res, next):
app.use((err, req, res, next) => {
  res.status(400).json({ error: err.stack });
});

export default app;
This handler responds with the error stack trace and a 400 status code, but the logic for handling the error is up to you—logging or sending it to a third-party service are valid alternatives.
Deploying to Heroku
- Log in or register at heroku.com.
- Install the Heroku CLI.
- From the project root, run the login command:
# login to heroku on command line
heroku login
After being authenticated in the browser, create a new Heroku app:
#app name is up to you
heroku create app-name
Heroku will provide the app URL and the Git remote URL:
# app production url and git url
https://app-name.herokuapp.com/ | https://git.heroku.com/app-name.git
If the remote was not added automatically, add it manually:
# add heroku remote url
git remote add heroku https://git.heroku.com/my-shiny-new-app.git
To monitor the deployment in real-time, open a second terminal and tail the logs:
# see process logs
heroku logs --tail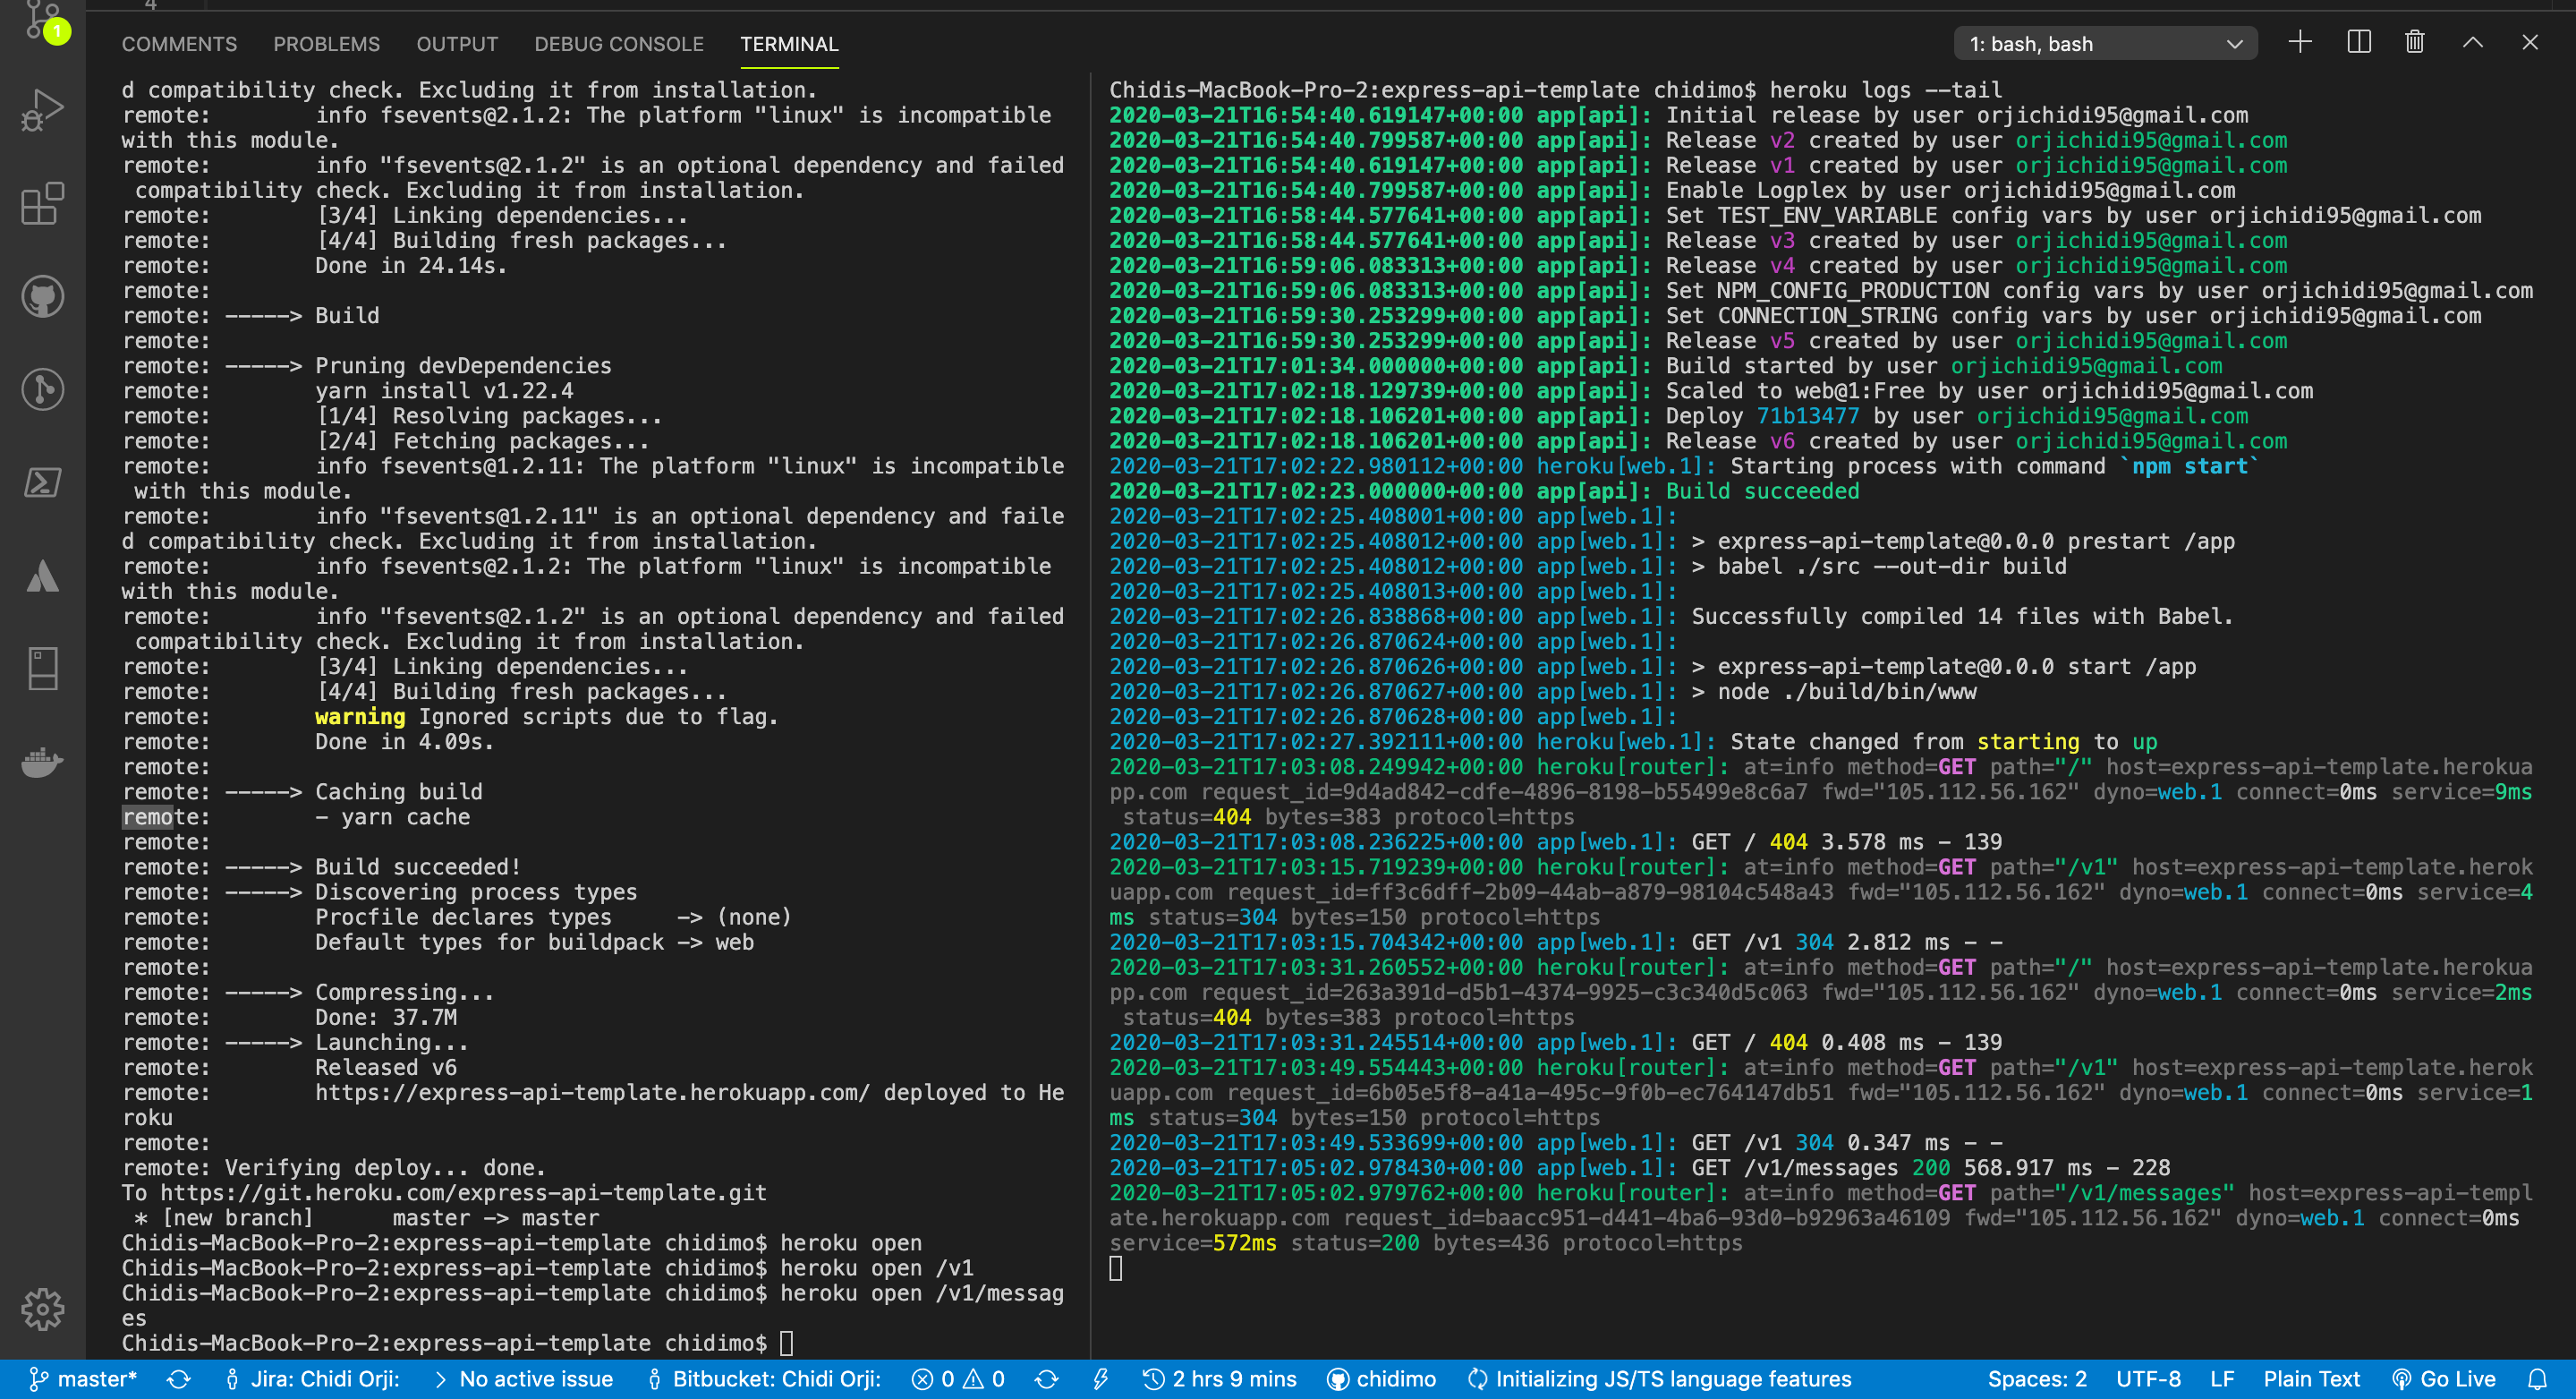
Set the environment variables required for the app to connect to the database and run correctly:
heroku config:set TEST_ENV_VARIABLE="Environment variable is coming across."
heroku config:set CONNECTION_STRING=your-db-connection-string-here.
heroku config:set NPM_CONFIG_PRODUCTION=false
The start scripts rely on Babel to compile the ES5 code in a prestart step. Since Babel is a development dependency, we set NPM_CONFIG_PRODUCTION=false to install those in the production environment as well.
Verify the configuration was applied correctly, either via the CLI or through the Heroku dashboard under "Settings" > "Reveal Config Vars":
# check configuration variables
heroku config
Finally, push the code and open the app:
# open /v1 route
heroku open /v1

# Open /v1/messages Route
heroku open /v1/messages
If you are using the same PostgreSQL instance for development and production, be aware that running tests will wipe the production database. To recreate the schema, run one of the migration or table-creation commands:
# run script locally
yarn runQuery

# Run Script With Heroku
heroku run yarn runQuery
Deploying is now complete.
Automating Deploys with Travis CI
Adding Continuous Deployment means Travis will push successful test runs straight to Heroku. Install the Travis CI client and log in from the project repository:
# login to travis
travis login --pro

# Use This If You’re Using Two Factor Authentication
travis login --pro --github-token enter-github-token-here
If your project is on travis-ci.org, omit the --pro flag. If your GitHub account uses two-factor authentication, generate a Personal Access Token from GitHub developer settings.
Open .travis.yml and add a deploy section:
deploy:
  provider: heroku
  app:
    master: app-name
The configuration specifies the Heroku app name (app-name) and the Git branch to deploy (master). Different branches can deploy to different apps. You will need your Heroku API key; encrypt it and add it to the deploy block with:
# encrypt heroku API key and add to .travis.yml
travis encrypt $(heroku auth:token) --add deploy.api_key --pro
This appends an encrypted api_key sub-section:
api_key:
  secure: very-long-encrypted-api-key-string
Commit the changes and push to GitHub. The build will trigger after the Travis test suite passes, completing the CI/CD pipeline: a failing test will block the deployment.