
When Code-Level Tests Aren't Enough
Automated testing is a staple of modern development workflows. Unit, integration, and end-to-end tests all serve a purpose: catching bugs before they reach users and protecting the quality of the codebase. But all of those strategies share a blind spot: they interact with the application through the DOM, asserting on elements and state changes rather than what a visitor actually sees on screen.
That distinction matters. A page can pass every functional check while rendering broken CSS, overlapping elements, or illegible text. These are "visual bugs": failures that a browser's rendering engine produces without triggering any JavaScript or DOM assertion errors. Traditional test suites rarely catch them because they're testing code behavior, not visual output.
Visual testing fills that gap by capturing a screenshot of the application and comparing it against a known baseline, providing a layer of coverage that maps to the user's actual experience.
Why Traditional Types of Tests Fall Short
Unit Tests Focus on the Atomic Level
Unit testing targets small, isolated pieces of logic, usually functions or individual modules. It's ideal for verifying that something like a cart total calculation handles promotional discounts correctly.
function myBusinessLogic(pricePerItem, quantity, discount) {
  const subtotal = pricePerItem * quantity;
  return subtotal - ( discount * subtotal );
}

expect(myBusinessLogic(2, 4, .1)).toEqual(7.2);
Unit tests are fast to write, cheap to run, and scale well, which is why teams frequently build up large suites around core business logic. However, their granular nature means they can't validate how separate pieces of the application interact.
Integration Tests Cover the Connections
Integration testing assesses how components and services work together. Rather than testing a button's onClick handler in isolation, an integration test might simulate that click and verify the resulting server request behaves as expected.
cy.get('.add-to-cart').click();
cy.url().should('contain', 'cart');
cy.get('.cart li').contains('My Item');
These tests capture failures that happen at the seams between units, but they still rely on reproducing interactions programmatically, which leaves real-world rendering issues out of scope.
End-To-End Tests Simulate Whole Journeys
End-to-end testing walks through a complete user flow, such as finding a product, adding something to a cart, and checking out. This is effectively one large integration test that exercises UI, APIs, and the connections between them.
cy.visit('/products');
cy.get('.product a[href="https://www.smashingmagazine.com/product/1234"]').click()
cy.url().should('contain', 'product/1234');
...
cy.get('.order-button').click();
cy.url().should('contain', 'receipt');
cy.get('.receipt li').contains('My Item');
These tests provide strong coverage, but they're slower to run and require more setup than lower-level tests. They also make no assertions about whether the interface actually looks correct at each step.
Use the Right Mix for Your Project
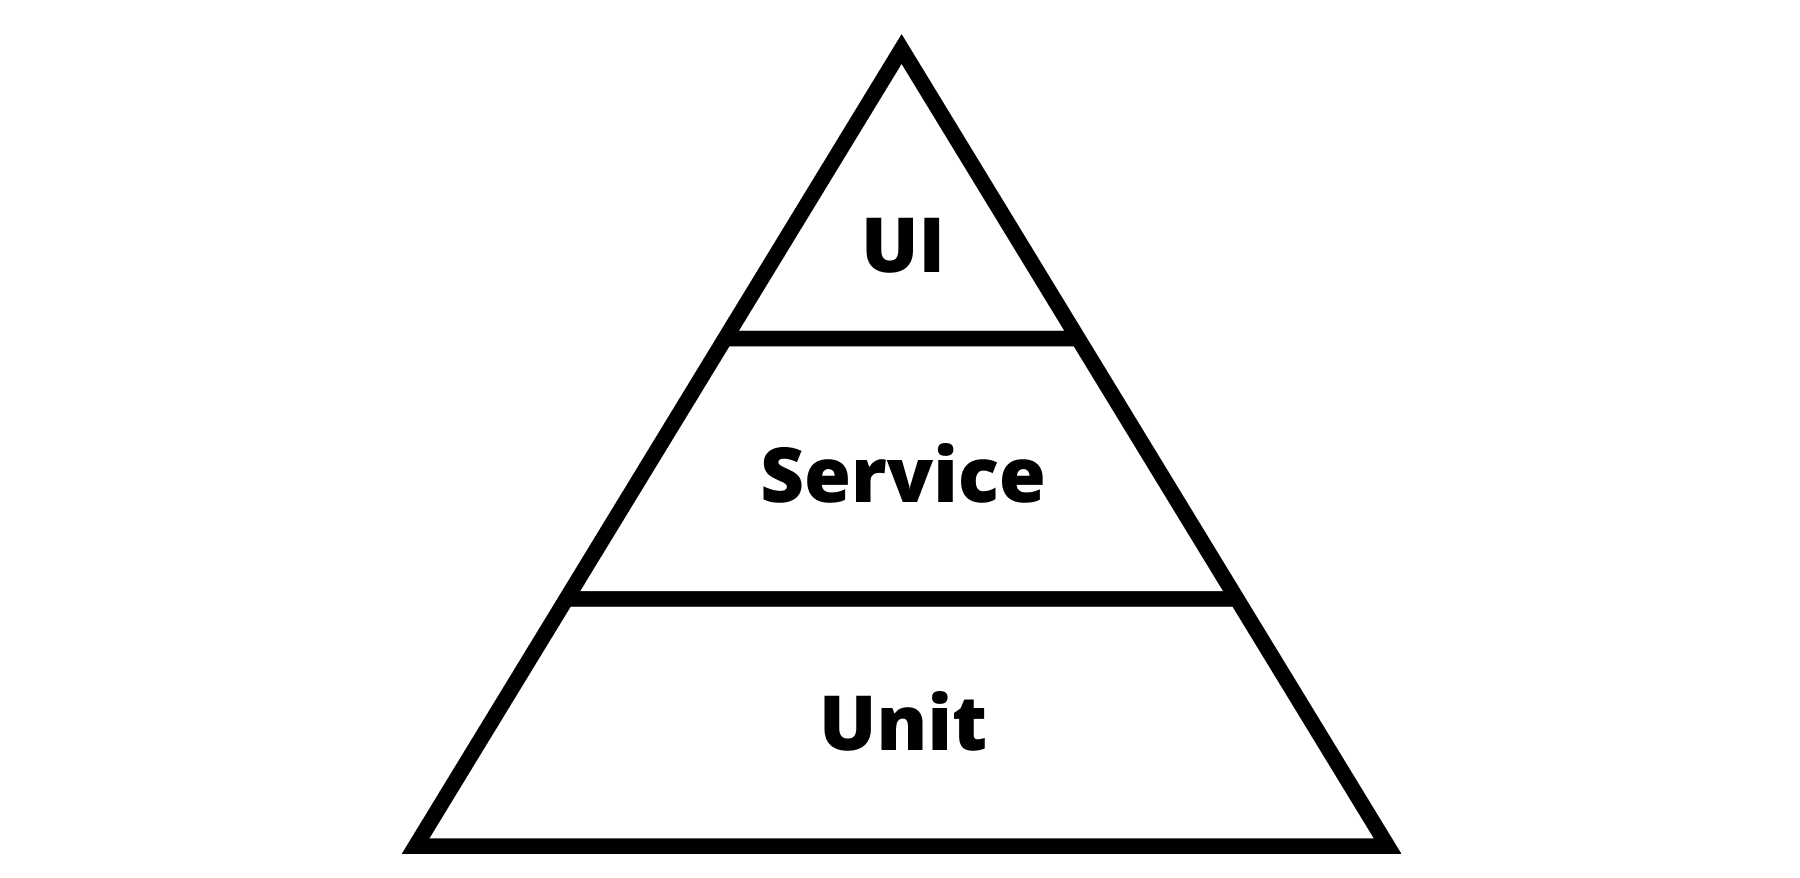
The "test pyramid" concept from Mike Cohn's Succeeding with Agile suggests that a healthy suite has many cheap, fast unit tests at its base, with progressively fewer, more expensive integration and end-to-end tests at the top.
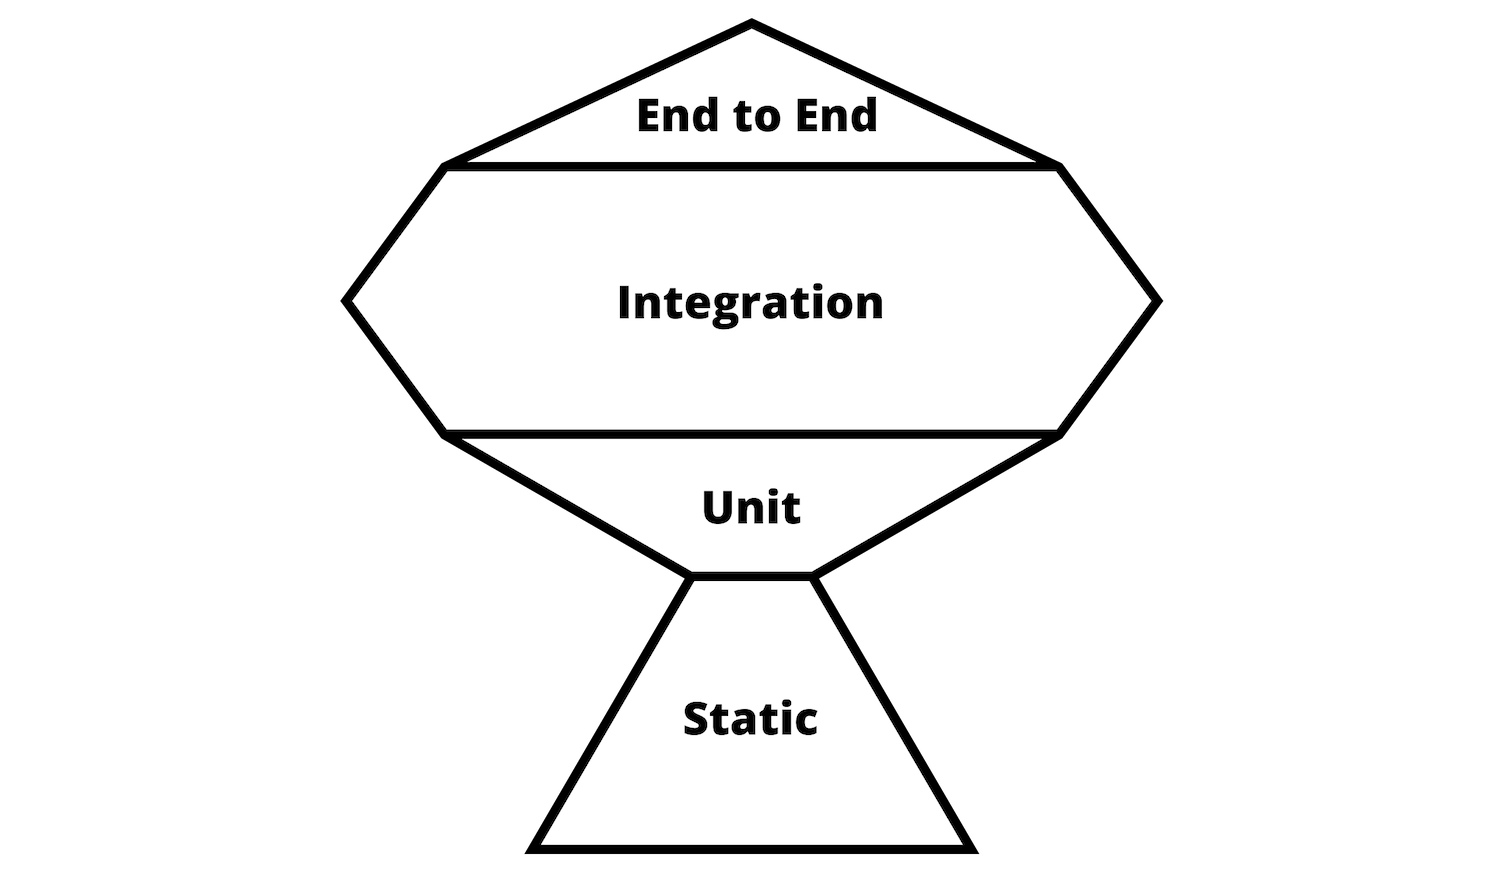
Kent C. Dodds has proposed the "test trophy" model, arguing that modern tooling has narrowed the cost gap. With frameworks like Cypress, Selenium, and Playwright, tests can drive real browsers with code just as simple as synthetic event handlers.
Instead of mocking a click, you can use a tool like Cypress:
cy.get('#my-button').click()
That test exercises the button in a real browser environment. Regardless of which philosophy you follow, the principle is a tradeoff between speed, cost, and confidence. The crucial omission in all of these strategies is visual output.
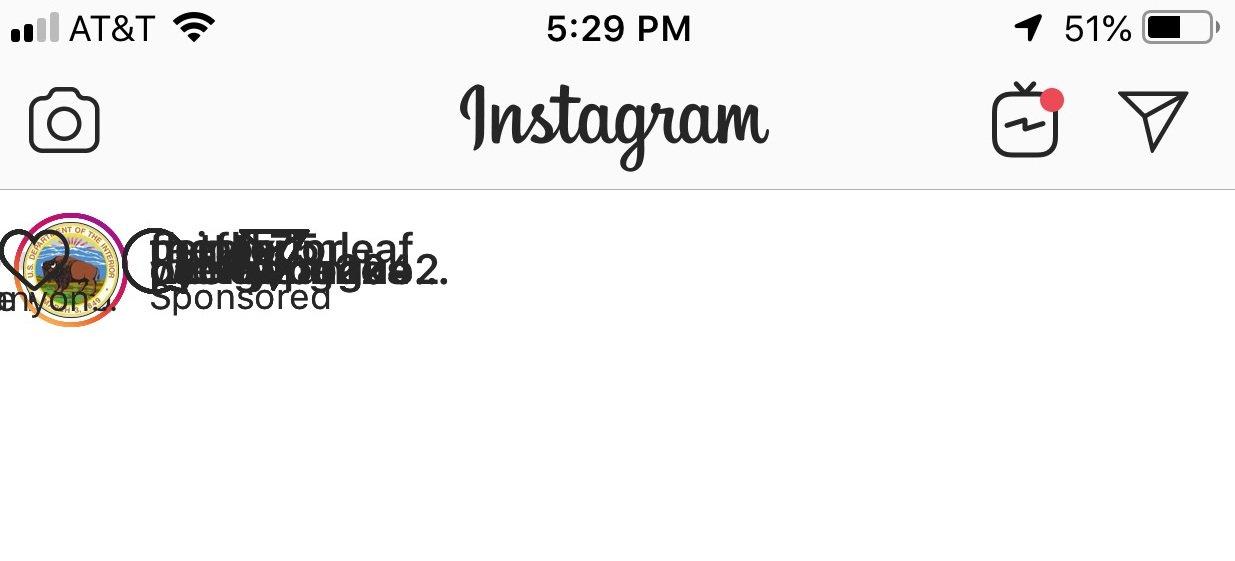
That example may seem extreme, but subtle CSS regressions that distort a layout occur often, and functional tests will report them as successes.
How Visual Testing Works
Visual testing introduces a new type of underlying comparison. It captures a rendered snapshot of the application, essentially a screenshot — and compares it against a baseline image from an earlier point in time.
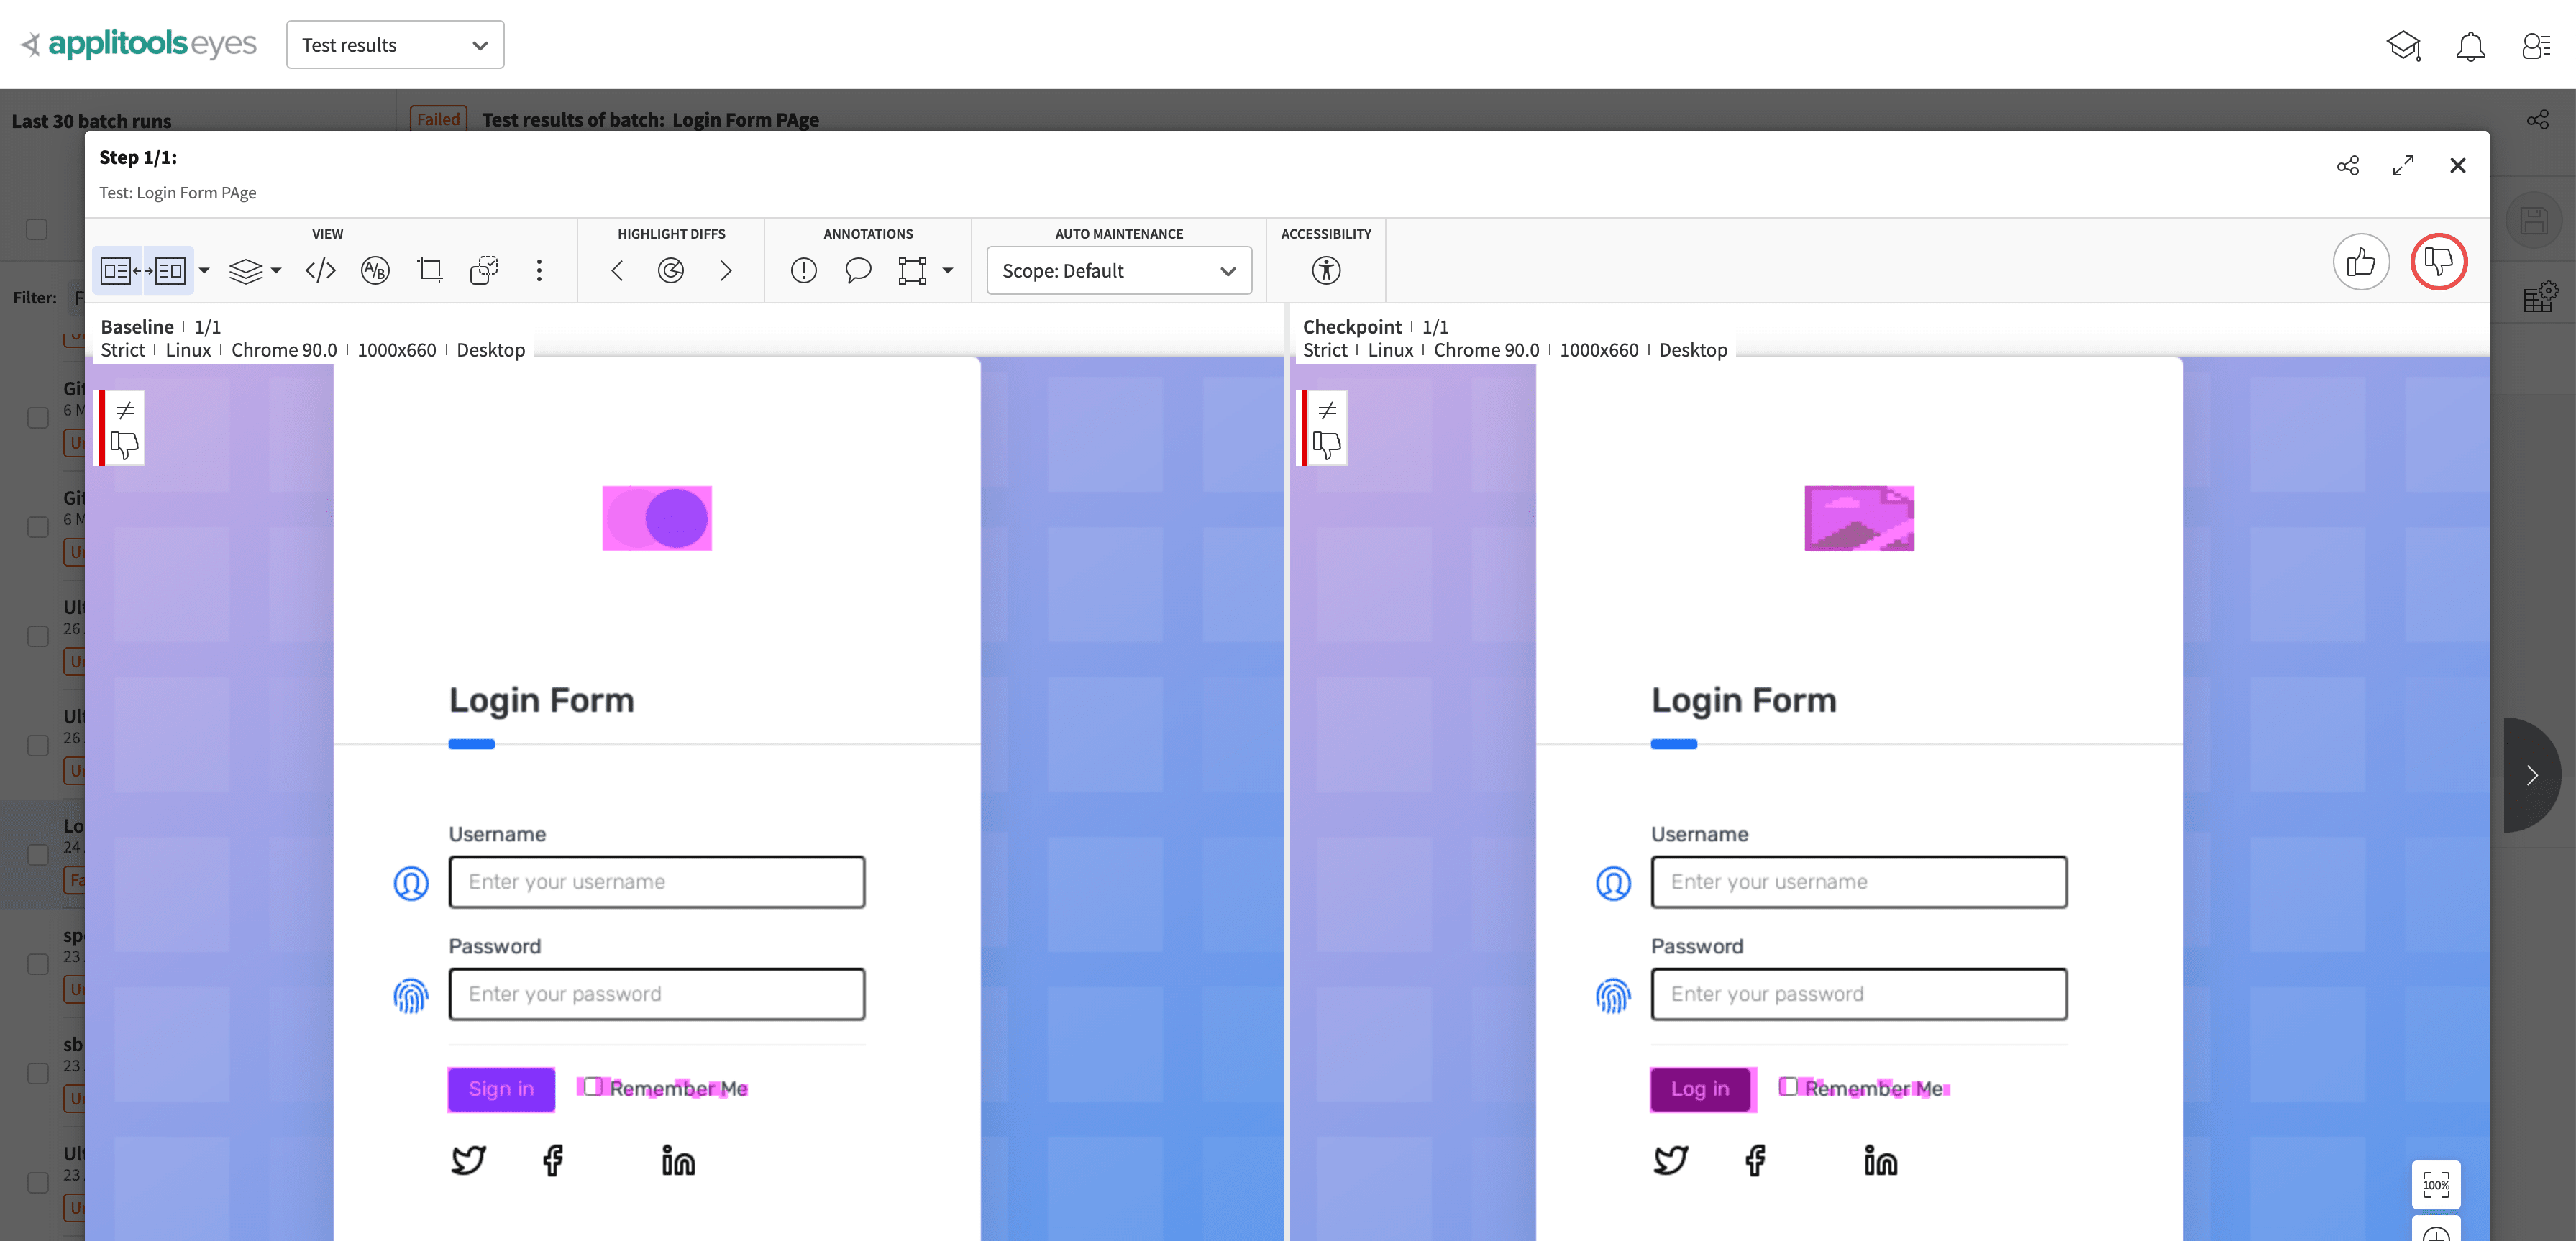
As the application evolves, developers review changed snapshots and approve them, updating the baseline to reflect the new intended appearance.
Pixel Comparison vs. AI-Assisted Analysis
The simplest visual testing implementations perform per-pixel image comparisons. Such an approach detects just about every difference that appears.
This precision tends to be flaky, though. Browsers render pages slightly differently across loads and updates. A one-pixel offset or a blinking text cursor can trigger a failure and block a deployment, even though nothing about the UI is genuinely broken.
Dynamic content presents another serious weakness of this method. Running pixel-by-pixel comparisons against a frequently updated site such as a news homepage will generate failures every time new articles are published, as the very presence of new text and imagery produces differences.
A more robust alternative leans on AI-assisted comparisons using tools capable of distinguishing real layout regressions from mere content updates or region-specific changes. These frameworks can ignore dynamic areas or classify differences as non-threatening, which cuts down on the likelihood of a test being failed for non-issues.
Expanding Coverage With Very Little Work
Where visual testing truly excels is in what it captures. Since it records an exact rendering of the page at a given moment, the assertion scope covers every visible element in the viewport, not just the selectors you explicitly target. You position visual tests around components that are most sensitive to layout changes in best practice.
That wide reach means visual tests can layer broad, low-overhead coverage across your entire application, supplementing and strengthening the protection provided by your unit, integration, and end-to-end test suites.
The Mechanics of Visual Testing
At its core, visual testing is straightforward: take two images, compare them, and identify what’s different. But the real work lies in deciding when and where to capture those images to get meaningful coverage.
Covering Real User Journeys
Effective visual tests focus on the full path a real person takes through an application — not just the landing page. You want to capture the state of the UI after every meaningful interaction, so you can verify that the interface not only works under the hood but is also actually usable.
For an e-commerce site, for example, useful visual checkpoints would be:
- The product listing page after it loads;
- The product detail page after you select an item;
- The on-page cart drawer after you add the item;
- The standalone cart page after you navigate there;
- The checkout forms for payment and shipping;
- The final order confirmation page.
This approach verifies that each step in the flow looks correct, not just that the code executed without errors.
Under the Hood
Automating those screenshots requires a browser automation framework. Tools like Selenium, Cypress, and Playwright can drive a browser natively — finding elements, clicking, typing — just like a human would. The visual testing tool then grabs a snapshot of the rendered UI at the moments you specify.
With Cypress and Applitools, for instance, the Cypress runner handles the navigation, the Applitools SDK extracts a DOM snapshot and sends it to the Applitools cloud, which then generates the reference images for comparison.
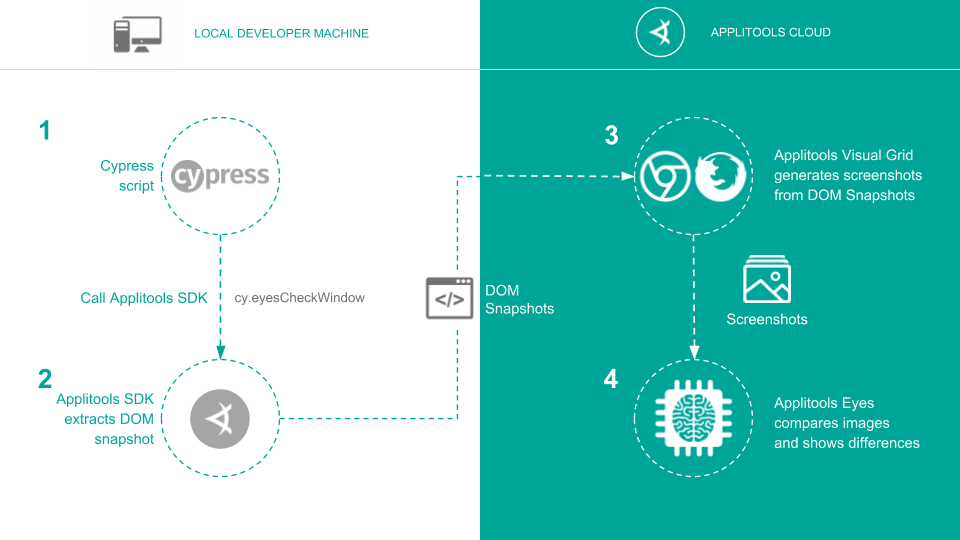
Once the comparison runs, you get back a set of results: either highlighted regions showing differences or a clean pass if nothing has changed.
Adding to Existing Test Suites
Integrating visual checks into your current setup is typically low-effort. Most visual testing platforms ship SDKs that drop straight into popular test runners like Cypress, Selenium, or Playwright.
cy.visit('/product/1234');
cy.eyesOpen({ appName: 'Online Store', testName: 'Product Page' });
cy.eyesCheckWindow();
cy.eyesClose();
That means you don’t need to write a separate suite from scratch. You can add visual checkpoints to the tests you already have, strengthening them without starting over.
Running Tests Automatically
Automation has become a standard part of the development pipeline. Traditional CI/CD servers like Jenkins or Travis CI can run your visual tests as part of the build. More recently, tools like GitHub Actions give you the same automation directly inside your existing repository, so you don’t have to stand up a whole new system.
name: Node.js CI

on: [push, pull_request]

jobs:
  build:
    runs-on: ubuntu-latest

    steps:
    - uses: actions/checkout@v2
    - uses: actions/setup-node@v2
      with:
        node-version: 12.x
    - run: npm ci
    - run: npm test
The environment requirements largely depend on the test runner. Cypress runs anywhere Node.js is available and a headless browser like Electron or Chrome can launch. Other frameworks might need a bit more setup, but you can usually tailor your CI environment to assemble the dependencies you need.
Why You’d Want Visual Testing
Visual testing helps everyone on the team — not just developers. Executives and product managers gain confidence that the test coverage maps to actual user behavior. Developers get immediate feedback on changes without the fear of breaking something invisible. And there are practical engineering advantages beyond peace of mind.
Less Assertion Code to Maintain
Once a visual test is wired up, the code you own falls into two categories: the navigation to reach a screen and the screenshot command itself. The interaction part is the same logic you already maintain for any test type. The screenshot replaces the assertions you’d otherwise have to write and update.
Instead of checking individual properties in the DOM, a single screenshot verifies that every element on the page is rendering as expected in the baseline.
Reduced Flakiness
Traditional DOM-based assertions often break when the markup changes, even if nothing visually changed. If you’re querying by an ID and someone removes that attribute during a refactor, your test suddenly fails for no functional reason. Or, if you rely on long generated selectors, wrapping elements in a new div can invalidate them outright.
Visual comparisons avoid that fragility. A change in the screenshot corresponds to a real, visible difference on the page — not a side effect of restructuring HTML.
Checking What Users Actually See
Semantic HTML doesn’t guarantee a usable UI. Small CSS adjustments — a z-index tweak here, an overflow change there — can completely alter what a person perceives.
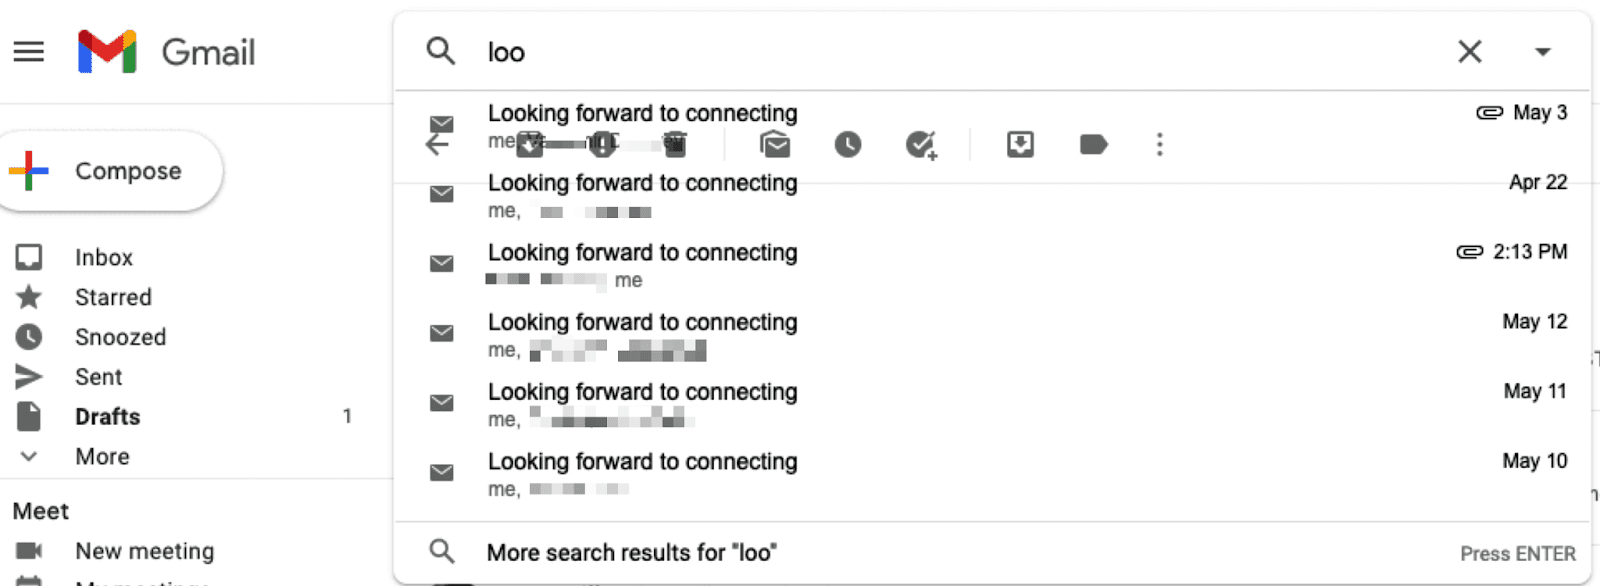
By capturing a screenshot of the UI as a user moves through a flow, you’re confirming that the frontend is usable by actual visitors, not just queryable by automation scripts.
Coverage for the Unplanned
Your test suite contains the cases you thought to write — often ones you wrote after hitting a bug. But what about the rest of the app? A screenshot inherently captures far more than the few asserted assertions in a targeted test.
That broader visual context means you’re picking up unintended regressions in areas you never explicitly thought to test.
What Visual Testing Misses
Visual testing is not a replacement for other kinds of tests. It’s a complement that fills in gaps. It can’t catch everything on its own.
Complex Business Logic
A screenshot might confirm the cart total displays, but if pricing depends on tiered discounts, edge cases or time-based promotions, the math is far better verified in unit tests that exercise the logic directly under many combinations of inputs.
API Behavior at Scale
A visual test acts somewhat like an integration test for the UI’s request/response logic. But it doesn’t query your API’s full range of endpoints, payloads, error handling, or performance. Those still need the support of a dedicated API test suite, health checks, and unit-level coverage.
Getting Started
Because visual testing serves many stakeholders, you can add it at various points in your process — not just during code integration.
Where It Fits
Design teams can use static mockups as the baseline for comparing a live implementation, turning it into a handoff tool. Developers can run it as a PR check, on a staging server before a release, or as a post-deployment probe on production to watch for anomalies.
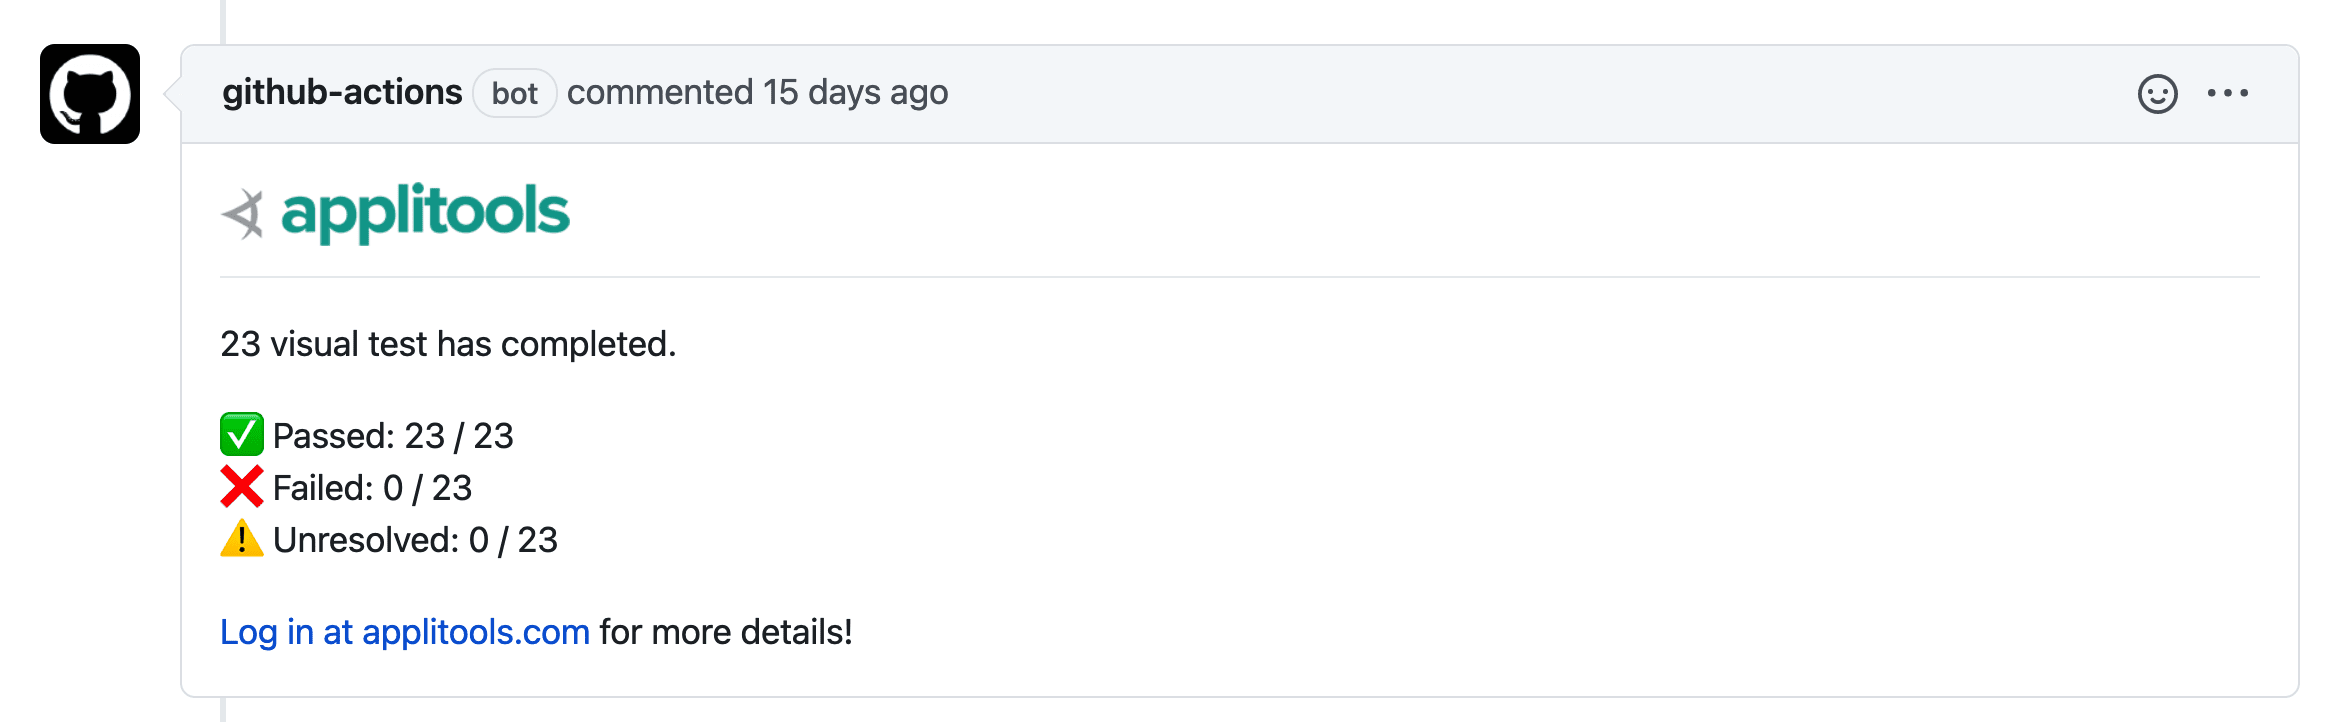
You can even schedule the tests on a cron job to function as a more reliable health check, since they return a genuine snapshot of app state rather than a synthetic event.
Many services plug into code review workflows, component explorers like Storybook, or CI systems — so the integration point flexibility is wide.
Platform Choices
The main differentiator between tools is how they perform the image comparison.
Percy and Chromatic rely on pixel-by-pixel analysis, flagging any change they detect. Applitools currently offers an AI-driven approach that can distinguish meaningful changes from visually irrelevant noise, avoiding false positives caused by anti-aliasing or minor rendering variations.
Whichever you choose, you’ll end up integrating the platform into your existing build and test pipeline.
Integration Path
The easiest approach is to layer visual testing on top of a runner you already use. If you have Cypress flows set up, adding a visual check involves installing a small SDK and inserting a couple of commands.
it('should log into the application', () => {
  cy.get('#username').type('colbyfayock');
  cy.get('#password').type('Password1234');
  cy.get('#log-in').click();
  cy.get('h1').contains('Dashboard');
});
If you already have a Storybook library, some SDKs allow you to install a package with npm and run a single command to capture all your components.
npm install @applitools/eyes-storybook --save-dev
npx eyes-storybook
The primary constraint, then, is simply checking whether the visual testing service provides an SDK for your existing framework before committing to a stack.
Beyond Regression: Other Roles for Visual Tests
Visual testing can serve purposes beyond simply adding another layer of coverage to your existing test suite. The same infrastructure can be repurposed for several practical, day-to-day engineering tasks.
- Uptime monitoring. A well-constructed visual test run on a schedule can serve as a more meaningful health check than fragile synthetic events that only ping an endpoint.
- Design and UX collaboration. Visual tests provide a shared, concrete artifact for the whole team — useful during handoff or when discussing usability issues.
- Accessibility checks. Visual testing can capture key issues that might restrict how accessible your application is.
- Historical snapshots. Periodic visual tests build an archive of screenshots, giving you a quick way to reference an older state of the project without digging through version control.
- Localization testing. AI-based visual testing can detect content changes, so you can verify that each language version looks and works as expected. This also reduces the overhead of comparing different versions of the same locale.

Adding a visual layer to your tests gives you more practical ways to keep quality high across the entire application.