

Why Your GitHub Account Needs 2FA
Passwords alone are not a reliable defense. They can be guessed, harvested through phishing attacks, or exposed when another site you use the same password on is breached. Adding two-factor authentication (2FA) closes much of that gap: even if an attacker obtains your password, they still need a second form of verification to get into your account. GitHub supports several 2FA methods, including authenticator apps, SMS, hardware security keys, and GitHub Mobile. The official 2FA documentation covers how each method works.
Enabling 2FA with an Authenticator App
To protect your account with 2FA on the web, you'll need an authenticator app. The Microsoft Authenticator app is a solid choice. Once it's installed, head to GitHub and follow these steps:
- Click your profile picture in the top-right corner to open the main menu.
- Select Settings from that menu.

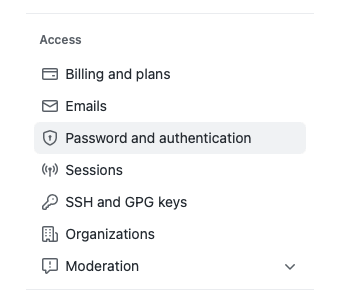
- In the left sidebar, click Password and authentication.
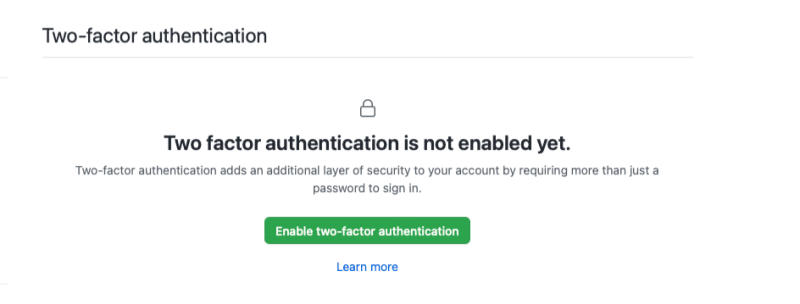
- Click the green Enable two-factor authentication button in the main panel. This loads the setup page.
 Use your authenticator app to scan the QR code on the screen. The exact steps for adding the account depend on the app you chose. After scanning, the app will show a code. Enter that code in the field on GitHub and click Continue.

The setup page will then display a set of recovery codes and prompt you to download them. Click the green Download button and store the file somewhere safe, such as a password manager. These codes are your fallback if you ever can't complete the 2FA prompt from a new device — without them, you risk losing access to your account entirely. After saving the codes, click I have saved my recovery codes to finish. Your account now has 2FA enabled.

Turning Your Profile into an About Me Page
With your account secured, you can make your public profile more informative with a profile README. This special file acts as an introduction on your profile page, letting you share your background, interests, and current projects.
To create one, start by making a repository that uses your exact GitHub username as its name.
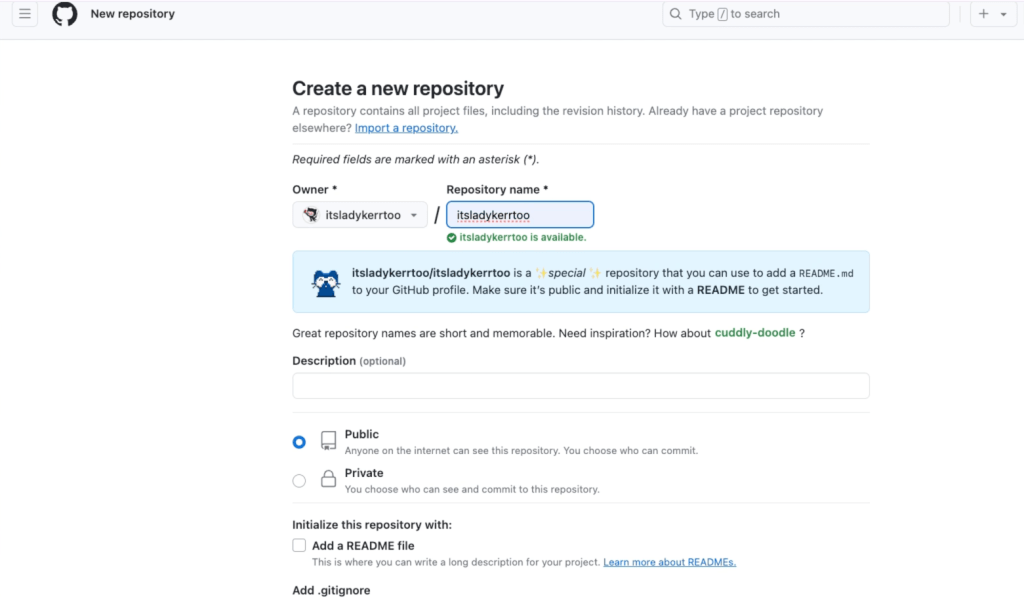
On the repository creation screen, pay attention to the note about special repositories. Verify that the Public option is selected and that the Add a README file checkbox is ticked, then click Create repository.
Once the repository exists, you'll see a box on the right side of the page noting that the README.md content will be displayed on your public profile.
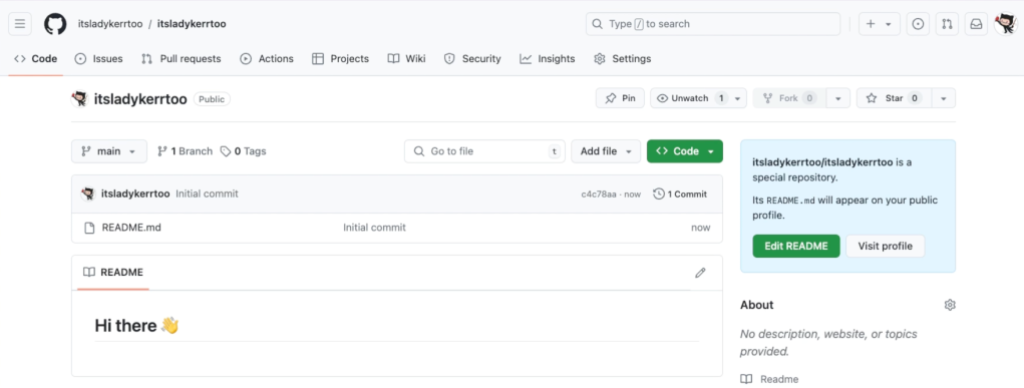
Click Edit README to open the editor. You can write your profile in Markdown, adding text, images, GIFs, and emoji as you like. If you need a starting point, this profile template includes copyable Markdown — grab it, paste it into your editor, and customize it. When you're done, click Commit changes, add a commit message (and optionally a description), then confirm with Commit changes again.
Return to your profile by clicking your username. Your personalized README is now live, giving visitors a clear picture of who you are and what you're building. For more ideas, check out the profiles of GitHub Stars like yabellini, levxyca, and omariosouto.