
The Case for Automated Testing
Before software reaches end-users, it needs to be verified against its specifications. But testing isn't a one-time step: applications change through refactors, third-party libraries release breaking updates, and browsers themselves evolve. Even when nothing obvious changes, things can fail unexpectedly. Regular testing throughout a project's lifetime is therefore essential.
Relying on manual testing alone is risky. A human tester may miss details between runs, especially when repeating the same checks. Automated testing solves this with machine-executed scripts. Test scripts are predictable and fast: whatever assertions you encode remain unchanged on every run, which makes it easier to find and fix bugs quickly.
Common Automated Testing Types
Several established categories of automated tests exist, and most projects will use a combination of them:
- Unit test: verifies an individual part of the application in isolation. For example, checking that a function returns the expected value for known inputs.
- Smoke test: verifies that the core system initializes correctly. In React, this may mean rendering the main app component to confirm it displays without crashing.
- Integration test: confirms that multiple modules work together correctly — for instance, that the server and database communicate properly.
- Functional test: verifies that the system satisfies its functional specification, accounting for user behavior.
- End-to-end (E2E) test: exercises the application the way it would be used in production, often via tools like Cypress.
- Acceptance test: typically performed by the business owner to confirm the system meets requirements.
- Performance test: measures how the system behaves under load — for frontend, usually how fast the app loads in the browser.
Why React Testing Library
Enzyme and React Testing Library (RTL) are the most common choices for testing React applications. RTL, part of the @testing-library family, follows a guiding principle that shapes how you approach tests:
“The more your tests resemble the way your software is used, the more confidence they can give you.”
In practice, this means testing functionality over implementation details. Your users don't care about your state management library, the complexity of your hooks, or whether a component is a class or a function. They care that the app behaves as intended.
RTL is also practical to adopt. Projects created with Create-React-App come with both RTL and Jest pre-configured, and the official React documentation recommends the library.
With that context, we can turn to the practical work: building a to-do list app using test-driven development (TDD).
Setting Up the Test Environment
Create a new React project and start the dev server:
# start new react project and start the server
npx create-react-app start-rtl && cd start-rtl && yarn start
Open a second terminal and run yarn test, then press a to run all tests in watch mode. Watch mode automatically re-runs tests when changes are detected in either the test file or the source file. You should see output similar to the following:
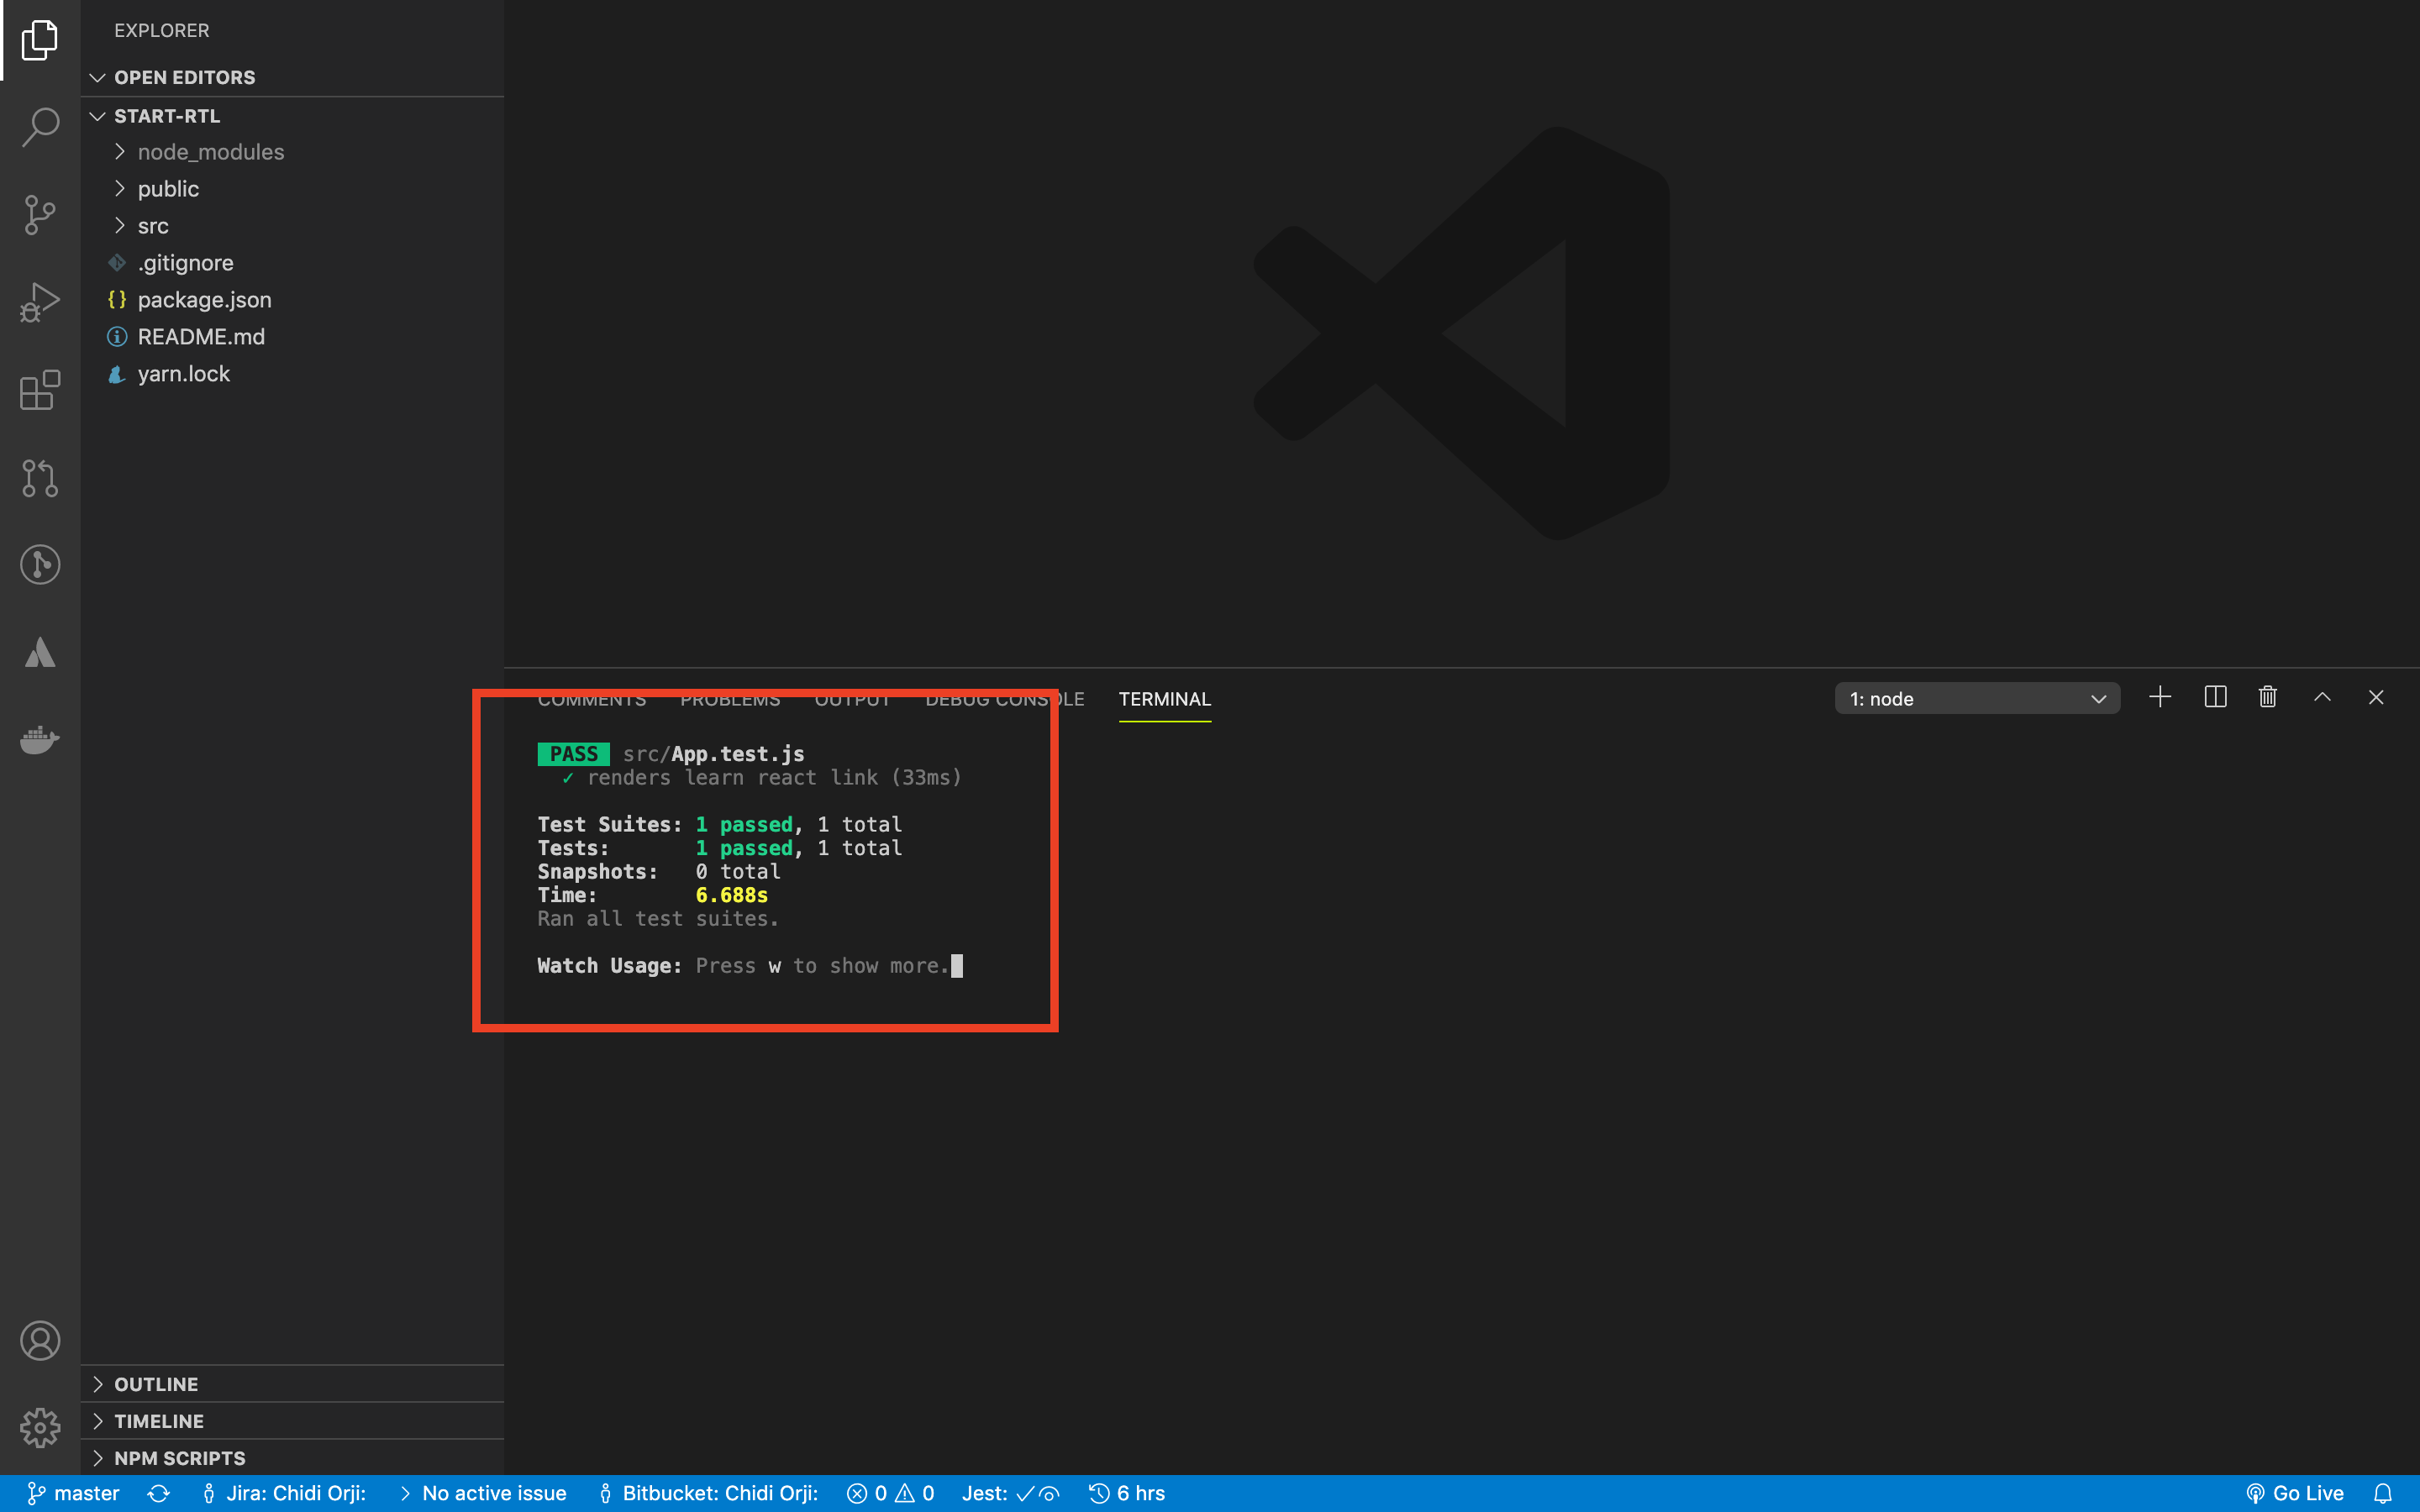
The green results indicate that the sample test included with Create React App (CRA) passed. CRA configures React Testing Library (RTL) and Jest for every new project out of the box.
When you run yarn test, react-scripts delegates to Jest, a JavaScript testing framework that provides assertions, mocking, and spying. Jest isn't listed directly in package.json, but you can find it in yarn.lock and node_modules/. It's worth exploring the Jest documentation, as this tutorial only covers a fraction of what it offers.
Open package.json and look at the dependencies section:
  "dependencies": {
    "@testing-library/jest-dom": "^4.2.4",
    "@testing-library/react": "^9.3.2",
    "@testing-library/user-event": "^7.1.2",
    ...
  },
Three packages are installed specifically for testing:
@testing-library/jest-dom– adds custom DOM element matchers for Jest.@testing-library/react– provides the core APIs for testing React components.@testing-library/user-event– simulates advanced browser interactions.
Now open App.test.js to see the default test:
import React from 'react';
import { render } from '@testing-library/react';
import App from './App';

test('renders learn react link', () => {
  const { getByText } = render();
  const linkElement = getByText(/learn react/i);
  expect(linkElement).toBeInTheDocument();
});
The render method renders the <App /> component and returns an object, from which we destructure the getByText query. Queries are the primary way to find elements in the DOM. The full list of queries is documented in the Testing Library API. RTL re-exports all DOM Testing Library queries, along with render, cleanup, and act.
The regular expression /learn react/i matches text case-insensitively. The test asserts that the text Learn React appears in the document.
This approach mirrors how users actually interact with the app in a browser.
Refactoring the First Test
Open App.js and replace its contents:
import React from "react";
import "./App.css";
function App() {
  return (
    <div className="App">
      <header className="App-header">
        <h2>Getting started with React testing library</h2>
      </header>
    </div>
  );
}
export default App;
If your test is still running, it should now fail. The reason is that the original test expects the text Learn React, but the new component renders different content. Let's update the test accordingly. Replace the test block in src/App.test.js:
# use describe, it pattern
describe("<App />", () => {
  it("Renders <App /> component correctly", () => {
    const { getByText } = render(<App />);
    expect(getByText(/Getting started with React testing library/i)).toBeInTheDocument();
  });
});
This refactor uses the describe and it pattern to structure related tests into logical blocks. The test should now pass. The key change was replacing the expected text learn react with Getting started with React testing library.
If you need styles, copy the following into App.css:
.App {
  min-height: 100vh;
  text-align: center;
}
.App-header {
  height: 10vh;
  display: flex;
  background-color: #282c34;
  flex-direction: column;
  align-items: center;
  justify-content: center;
  font-size: calc(10px + 2vmin);
  color: white;
}
.App-body {
  width: 60%;
  margin: 20px auto;
}
ul {
  padding: 0;
  display: flex;
  list-style-type: decimal;
  flex-direction: column;
}
li {
  font-size: large;
  text-align: left;
  padding: 0.5rem 0;
}
li a {
  text-transform: capitalize;
  text-decoration: none;
}
.todo-title {
  text-transform: capitalize;
}
.completed {
  color: green;
}
.not-completed {
  color: red;
}
The page title will reposition after applying the CSS.
Adding Routing, API Calls, and State
This app will need navigation and API requests, so install React Router and Axios:
# install react-router-dom and axios
yarn add react-router-dom axios
For state management, we'll use React's Context API with the useContext hook. Create src/AppContext.js:
import React from "react";
export const AppContext = React.createContext({});

export const AppProvider = ({ children }) => {
  const reducer = (state, action) => {
    switch (action.type) {
      case "LOAD_TODOLIST":
        return { ...state, todoList: action.todoList };
      case "LOAD_SINGLE_TODO":
        return { ...state, activeToDoItem: action.todo };
      default:
        return state;
    }
  };
  const [appData, appDispatch] = React.useReducer(reducer, {
    todoList: [],
    activeToDoItem: { id: 0 },
  });
  return (
    <AppContext.Provider value={{ appData, appDispatch }}>
      {children}
    </AppContext.Provider>
  );
};
This creates a context with React.createContext({}), initialized to an empty object. The AppProvider component wraps its children in AppContext.Provider, making { appData, appDispatch } available throughout the render tree.
The reducer handles two action types:
LOAD_TODOLIST– updates thetodoListarray.LOAD_SINGLE_TODO– updatesactiveToDoItem.
appData exposes the current state, while appDispatch returns a function for dispatching updates.
Next, open index.js, import AppProvider, and wrap <App /> with it:
import { AppProvider } from "./AppContext";

ReactDOM.render(
  <React.StrictMode>
    <AppProvider>
      <App />
    </AppProvider>
  </React.StrictMode>,
  document.getElementById("root")
);
Because RTL tests should simulate real user interactions, tests also need access to app state. RTL's render method is sufficient for components without state or navigation, but for more complex apps, it provides a wrapper option. This lets you define a custom render function. Create src/custom-render.js:
import React from "react";
import { render } from "@testing-library/react";
import { MemoryRouter } from "react-router-dom";

import { AppProvider } from "./AppContext";

const Wrapper = ({ children }) => {
  return (
    <AppProvider>
      <MemoryRouter>{children}</MemoryRouter>
    </AppProvider>
  );
};

const customRender = (ui, options) =>
  render(ui, { wrapper: Wrapper, ...options });

// re-export everything
export * from "@testing-library/react";

// override render method
export { customRender as render };
The <Wrapper /> component wraps children in both <AppProvider /> and <MemoryRouter />. As the React Router docs describe, MemoryRouter keeps URL history in memory rather than the address bar, making it ideal for tests and non-browser environments like React Native.
The custom render function passes Wrapper via the wrapper option, so every component rendered in tests receives navigation and state access. The file then re-exports everything from @testing-library/react, overriding render with the custom version. This pattern works equally well with Redux or any other state management library.
Now update App.test.js to use the custom render. Change the import from:
import { render } from '@testing-library/react';to:
import { render } from './custom-render';The test should still pass.
Using the screen Object
Writing const { getByText } repeatedly gets tedious. Instead, use the screen object from the DOM Testing Library. Import it from the custom render file and replace the describe block:
import { render, screen } from "./custom-render";

describe("<App />", () => {
  it("Renders <App /> component correctly", () => {
    render(<App />);
    expect(
      screen.getByText(/Getting started with React testing library/i)
    ).toBeInTheDocument();
  });
});
The test accesses getByText via the screen object. Confirm the test still passes, then compare your work to the reference branch if needed.
Building the To-Do List Page
The next component pulls data from https://jsonplaceholder.typicode.com/. Its specification is straightforward: while the API request is in flight, show a loading message of Fetching todos. Once the call resolves, display the titles of 15 to-do items, each as a link to a details page.
Start by creating src/TodoList.js with placeholder content so there's something to test against:
import React from "react";
import "./App.css";
export const TodoList = () => {
  return (
    <div>
    </div>
  );
};
Testing the component in isolation keeps any failures contained and avoids cascading breakage in existing tests. Create src/TodoList.test.js:
import React from "react";
import axios from "axios";
import { render, screen, waitForElementToBeRemoved } from "./custom-render";
import { TodoList } from "./TodoList";
import { todos } from "./makeTodos";

describe("<App />", () => {
  it("Renders <TodoList /> component", async () => {
    render(<TodoList />);
    await waitForElementToBeRemoved(() => screen.getByText(/Fetching todos/i));

    expect(axios.get).toHaveBeenCalledTimes(1);
    todos.slice(0, 15).forEach((td) => {
      expect(screen.getByText(td.title)).toBeInTheDocument();
    });
  });
});
This test renders <TodoList /> and uses waitForElementToBeRemoved to wait for the Fetching todos text to disappear, which signals the API response has arrived. It also verifies that the Axios get method was invoked once and that each returned title appears on screen. The it block is async to allow the use of await.
Each item in the API response has the following shape:
{
  id: 0,
  userId: 0,
  title: 'Some title',
  completed: true,
}
Our mock needs to return an array of such objects with unique id values:
import { todos } from "./makeTodos"Create src/makeTodos.js to generate fake data for tests:
const makeTodos = (n) => {
  // returns n number of todo items
  // default is 15
  const num = n || 15;
  const todos = [];
  for (let i = 0; i < num; i++) {
    todos.push({
      id: i,
      userId: i,
      title: `Todo item ${i}`,
      completed: [true, false][Math.floor(Math.random() * 2)],
    });
  }
  return todos;
};

export const todos = makeTodos(200);
The function produces a list of n to-do items, randomly setting the completed field to either true or false.
Unit tests should be fast and deterministic, which rules out real network calls. Instead, mock the Axios get method with Jest. Create src/__mocks__/axios.js:
import { todos } from "../makeTodos";

export default {
  get: jest.fn().mockImplementation((url) => {
    switch (url) {
      case "https://jsonplaceholder.typicode.com/todos":
        return Promise.resolve({ data: todos });
      default:
        throw new Error(`UNMATCHED URL: ${url}`);
    }
  }),
};
Jest automatically picks up this mocks folder during testing and uses it instead of the real Axios from node_modules/. Only the get method is mocked via mockImplementation; other methods like post, patch, and defaults remain undefined, so accessing them in a test would raise an error. The mock returns a promise that resolves with the desired data, and you can customize the response based on the URL passed to the Axios call.
With a passing test for the index page already in place, implement the logic. Replace the placeholder code in src/TodoList.js:
import React from "react";
import axios from "axios";
import { Link } from "react-router-dom";
import "./App.css";
import { AppContext } from "./AppContext";

export const TodoList = () => {
  const [loading, setLoading] = React.useState(true);
  const { appData, appDispatch } = React.useContext(AppContext);

  React.useEffect(() => {
    axios.get("https://jsonplaceholder.typicode.com/todos").then((resp) => {
      const { data } = resp;
      appDispatch({ type: "LOAD_TODOLIST", todoList: data });
      setLoading(false);
    });
  }, [appDispatch, setLoading]);

  return (
    <div>
      // next code block goes here
    </div>
  );
};
This pulls appData and appDispatch from AppContext, makes the API call inside a useEffect, and fires the LOAD_TODOLIST action once the response arrives. The loading state is then set to false to reveal the items.
Now add the rendering logic:
{loading ? (
  <p>Fetching todos</p>
) : (
  <ul>
    {appData.todoList.slice(0, 15).map((item) => {
      const { id, title } = item;
      return (
        <li key={id}>
          <Link to={`/item/${id}`} data-testid={id}>
            {title}
          </Link>
        </li>
      );
    })}
  </ul>
)}
The code slices appData.todoList to the first 15 items and maps over them, rendering each title inside a <Link /> for navigation. Each link gets a data-testid attribute with a unique value, which is useful for locating specific DOM elements in tests, especially when identical text may appear multiple times.
Wiring the Component into the App
Integrate <TodoList /> into the render tree so the UI actually works in the browser. Start with the imports in App.js:
import { BrowserRouter, Route } from "react-router-dom";
import { TodoList } from "./TodoList";
BrowserRouter provides navigation and Route matches URLs to components. Add this just after the <header /> element:
<div className="App-body">
  <BrowserRouter>
    <Route exact path="/" component={TodoList} />
  </BrowserRouter>
</div>
This maps the root path / to <TodoList />. At this point, the tests should still pass, but warnings may appear in the console about some act issue originating from <TodoList />:
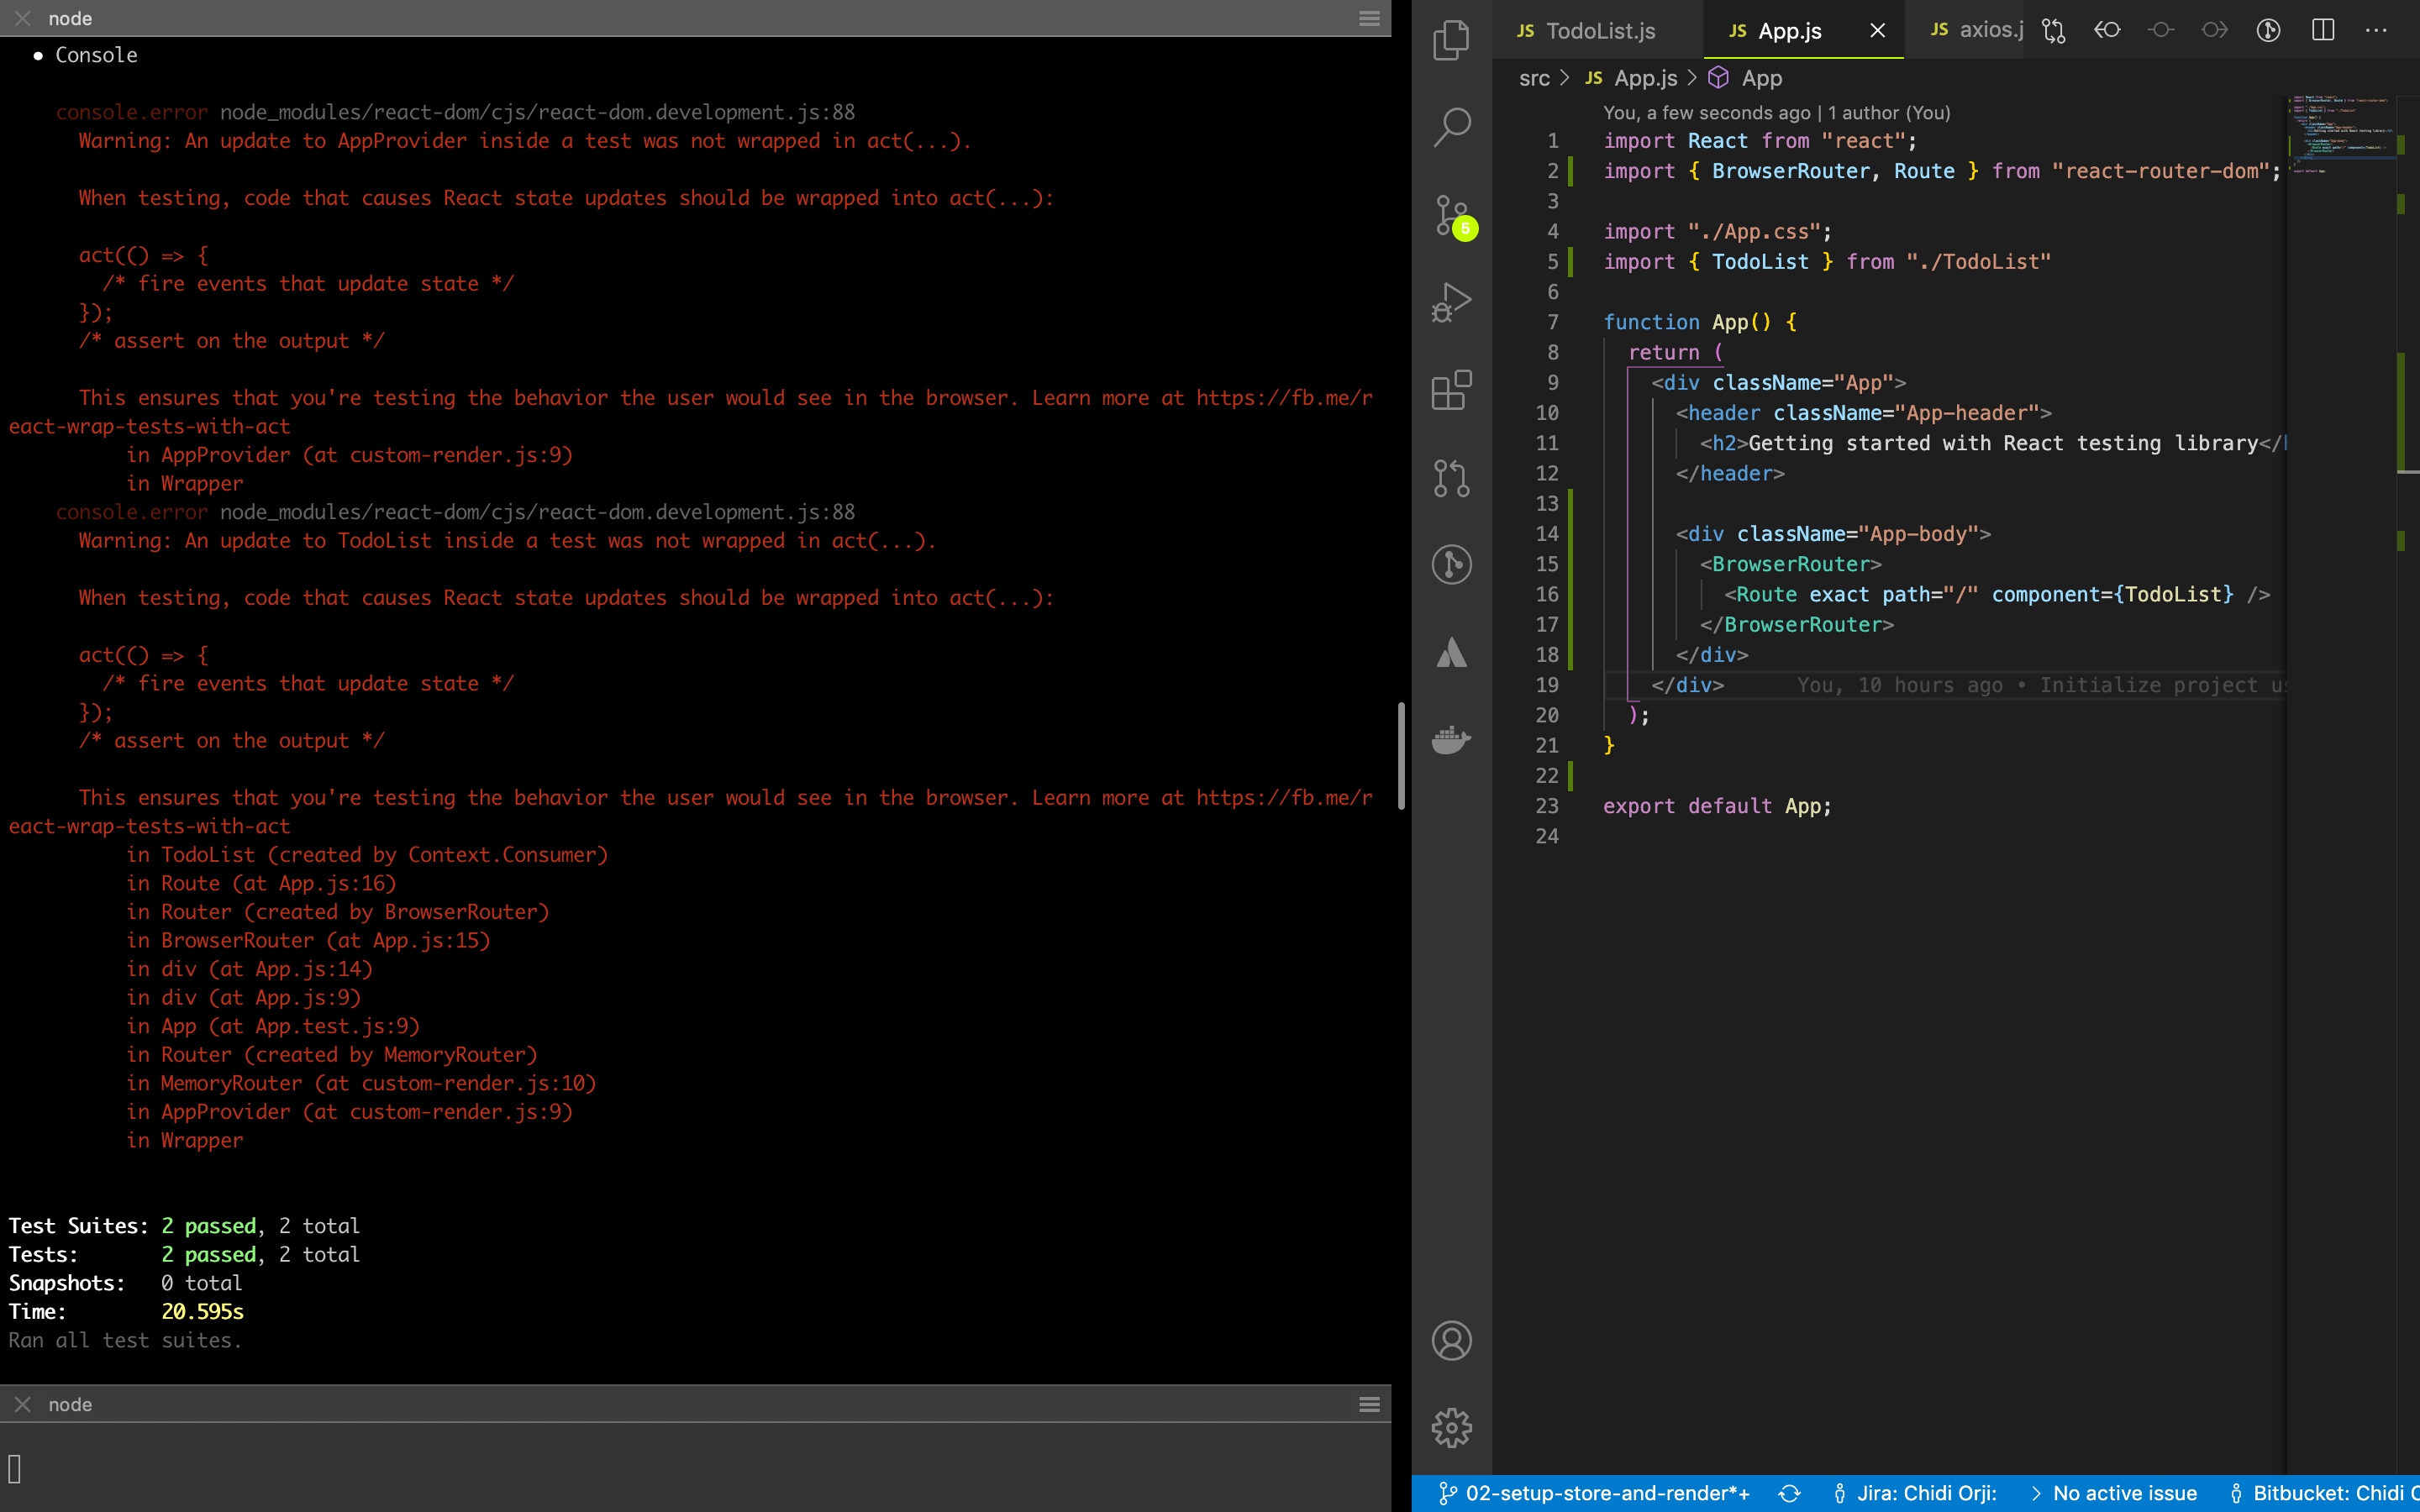
The warning indicates something is happening in the component that the test doesn't account for. Since <TodoList /> itself passes its own test, the problem belongs to the App test. The fix is to wait for the loading indicator to disappear before asserting. Update App.test.js accordingly:
import React from "react";
import { render, screen, waitForElementToBeRemoved } from "./custom-render";
import App from "./App";
describe("<App />", () => {
  it("Renders <App /> component correctly", async () => {
    render(<App />);
    expect(
      screen.getByText(/Getting started with React testing library/i)
    ).toBeInTheDocument();
    await waitForElementToBeRemoved(() => screen.getByText(/Fetching todos/i));
  });
});
Two changes are made: the callback in the it block becomes async, which is required for using await, and the test now waits for the Fetching todos text to be removed from the DOM. That silence the act warning. Kent Dodds has a useful write-up on this pattern for future reference.
Opening the app in the browser should now show the to-do titles. Clicking an item will not yet navigate anywhere, since the router doesn't know the details URL yet. The repository for this step is available on the 03-todolist branch.
Adding the To-Do Details Page
Next, we'll build the page that displays an individual to-do's full information.
Building a Single To-Do Page
The single to-do page has a straightforward spec. When a user navigates to a to-do page, the component shows a loading indicator (Fetching todo item id) during the API call to https://jsonplaceholder.typicode.com/todos/item_id. Once the call resolves, it displays the to-do title, the line Added by: userId, and either This item has been completed or This item is yet to be completed.
Create src/TodoItem.js with an initial bookmark component, then move to the test file. The one new piece here is the useParams() hook from react-router-dom, which reads the id from the URL. Testing this component in isolation means there is nothing to click, so we mock the hook—but only part of the module.
Create the mock file src/__mocks__/react-router-dom.js:
module.exports = {
  ...jest.requireActual("react-router-dom"),
  useParams: jest.fn(),
};
The mock file name must match the module name exactly. react-router-dom uses named exports, so module.exports is the right syntax here (unlike Axios, which has a default export). The mock spreads the actual module first, then replaces useParams with a Jest function. This is important: mocking the entire module would lose the MemoryHistory implementation that the render function depends on.
Now create src/TodoItem.test.js:
import React from "react";
import axios from "axios";
import { render, screen, waitForElementToBeRemoved } from "./custom-render";
import { useParams, MemoryRouter } from "react-router-dom";
import { TodoItem } from "./TodoItem";

describe("<TodoItem />", () => {
  it("can tell mocked from unmocked functions", () => {
    expect(jest.isMockFunction(useParams)).toBe(true);
    expect(jest.isMockFunction(MemoryRouter)).toBe(false);
  });
});
The first test case just confirms the partial mock is working. Jest's isMockFunction verifies that useParams is mocked while the spread-in functions are not, proving we mocked only what we need.
Add the test case for a completed to-do:
  it("Renders <TodoItem /> correctly for a completed item", async () => {
    useParams.mockReturnValue({ id: 1 });
    render(<TodoItem />);

    await waitForElementToBeRemoved(() =>
      screen.getByText(/Fetching todo item 1/i)
    );

    expect(axios.get).toHaveBeenCalledTimes(1);
    expect(screen.getByText(/todo item 1/)).toBeInTheDocument();
    expect(screen.getByText(/Added by: 1/)).toBeInTheDocument();
    expect(
      screen.getByText(/This item has been completed/)
    ).toBeInTheDocument();
  });
The first step mocks the return value of useParams to `{ id: 1 }`, which produces the API URL https://jsonplaceholder.typicode.com/todos/1. That URL must have a matching case in the Axios mock file, or the request throws. After waiting for the loading indicator to leave the screen, the test asserts the title, the user id, and the completion message.
Add the matching case to src/__mocks__/axios.js:
      case "https://jsonplaceholder.typicode.com/todos/1":
        return Promise.resolve({
          data: { id: 1, title: "todo item 1", userId: 1, completed: true },
        });
This returns a promise with a completed to-do. The test fails for now because the component logic isn't implemented yet. Add the counterpart test case for an uncompleted item:
  it("Renders <TodoItem /> correctly for an uncompleted item", async () => {
    useParams.mockReturnValue({ id: 2 });
    render(<TodoItem />);
    await waitForElementToBeRemoved(() =>
      screen.getByText(/Fetching todo item 2/i)
    );
    expect(axios.get).toHaveBeenCalledTimes(2);
    expect(screen.getByText(/todo item 2/)).toBeInTheDocument();
    expect(screen.getByText(/Added by: 2/)).toBeInTheDocument();
    expect(
      screen.getByText(/This item is yet to be completed/)
    ).toBeInTheDocument();
  });
The second case differs only in the to-do id (2), the userId, and the completion status. Extend the switch block in the Axios mock accordingly:
case "https://jsonplaceholder.typicode.com/todos/2":
  return Promise.resolve({
    data: { id: 2, title: "todo item 2", userId: 2, completed: false },
  });
Both tests fail at this point. Implementing the component makes them pass. Update src/TodoItem.js:
import React from "react";
import axios from "axios";
import { useParams } from "react-router-dom";
import "./App.css";
import { AppContext } from "./AppContext";

export const TodoItem = () => {
  const { id } = useParams();
  const [loading, setLoading] = React.useState(true);
  const {
    appData: { activeToDoItem },
    appDispatch,
  } = React.useContext(AppContext);

  const { title, completed, userId } = activeToDoItem;
  React.useEffect(() => {
    axios
      .get(`https://jsonplaceholder.typicode.com/todos/${id}`)
      .then((resp) => {
        const { data } = resp;
        appDispatch({ type: "LOAD_SINGLE_TODO", todo: data });
        setLoading(false);
      });
  }, [id, appDispatch]);
  return (
    <div className="single-todo-item">
      // next code block goes here.
    </div>
  );
};
Like TodoList, this component reads from AppContext, pulling out activeTodoItem along with its title, userId, and status. A useEffect block fires the API call and dispatches the LOAD_SINGLE_TODO action when it resolves. The final piece inside the return div reveals the details:
{loading ? (
  <p>Fetching todo item {id}</p>
) : (
  <div>
    <h2 className="todo-title">{title}</h2>
    <h4>Added by: {userId}</h4>
    {completed ? (
      <p className="completed">This item has been completed</p>
    ) : (
      <p className="not-completed">This item is yet to be completed</p>
    )}
  </div>
)}
All tests pass now. Finally, wire the page into the app. Add the import to src/App.js:
import { TodoItem } from './TodoItem'Then place the `TodoItem` route above the `TodoList` route:
# preserve this order
<Route path="/item/:id" component={TodoItem} />
<Route exact path="/" component={TodoList} />
Clicking a to-do in the browser now navigates to its page.
Testing the Real User Flow
The last test case exercises the full app: a user visits, clicks a to-do link, and lands on the detail page. Open App.test.js and add the new test, which is long enough to add in two steps:
import userEvent from "@testing-library/user-event";
import { todos } from "./makeTodos";

jest.mock("react-router-dom", () => ({
  ...jest.requireActual("react-router-dom"),
}));

describe("<App />"
  ...
  // previous test case
  ...

  it("Renders todos, and I can click to view a todo item", async () => {
    render(<App />);
    await waitForElementToBeRemoved(() => screen.getByText(/Fetching todos/i));
    todos.slice(0, 15).forEach((td) => {
      expect(screen.getByText(td.title)).toBeInTheDocument();
    });
    // click on a todo item and test the result
    const { id, title, completed, userId } = todos[0];
    axios.get.mockImplementationOnce(() =>
      Promise.resolve({
        data: { id, title, userId, completed },
      })
    );
    userEvent.click(screen.getByTestId(String(id)));
    await waitForElementToBeRemoved(() =>
      screen.getByText(`Fetching todo item ${String(id)}`)
    );

    // next code block goes here
  });
});
This introduces userEvent, a companion library for React Testing Library that simulates browser interactions more realistically than the built-in fireEvent. Before running this test, we restore the original useParams hook. Jest's requireActual returns the un-mocked react-router-dom module, which is essential here—this test should mock as little as possible. The call must happen before the describe block; placing it inside would cause Jest to ignore it, per the documentation: requireActual bypasses all checks on whether a module should receive a mock implementation.
After rendering App and waiting for the list's loading indicator to disappear, the test checks for the first 15 to-do items. It then grabs the first item and overrides the global Axios mock with mockImplementationOnce to avoid URL collisions with the mock's switch statement. This override is valid for a single call to axios.get. The test grabs the link via its data-testid attribute and fires a user click event, then waits for the single-page loading indicator to clear.
Complete the test with the final expectations:
expect(screen.getByText(title)).toBeInTheDocument();
expect(screen.getByText(`Added by: ${userId}`)).toBeInTheDocument();
switch (completed) {
  case true:
    expect(
      screen.getByText(/This item has been completed/)
    ).toBeInTheDocument();
    break;
  case false:
    expect(
      screen.getByText(/This item is yet to be completed/)
    ).toBeInTheDocument();
    break;
  default:
    throw new Error("No match");
    }
The screen should show the to-do title and the user who added it. Since the status is uncertain, the expectations branch on both possibilities, throwing an error if neither matches.
At this point you should have six passing tests and a working app.


