

Static on Purpose: Why Pre-Rendered Beats Dynamically Assembled
Back in the mid-1990s, serving a website was a simple affair: a web server delivered HTML and CSS files straight from disk. There were no application servers, no databases, and no content management systems involved in the request path. The modern web, of course, looks very different. Consider what happens when someone requests a page from a typical WordPress site. The host's servers execute PHP, which queries a MySQL database for content and metadata, selects the correct image assets, and merges everything into a theme template before finally sending the response to the browser. This complex orchestration runs for every single request, even though the content served is identical for the vast majority of visitors.
Static site generators (SSGs) restore that old, efficient model. Instead of building pages dynamically at request time, they compile content (often written in Markdown) into plain HTML using templates, but they do this before anyone visits the site. The output is a set of pre-generated, static files. The web server's job returns to what it does best: serving files quickly. This approach eliminates the database, reduces the reliance on third-party plugins, and shrinks the attack surface for potential security exploits, since there is less server-side infrastructure to compromise.
Modern static generators are also feature-rich. Eleventy, for instance, supports concepts like templates, filters, and shortcodes, which are conceptually similar to the template and library-item systems that Dreamweaver popularized years ago for maintaining cross-site consistency. These tools make a strong case for moving away from traditional CMS tech stacks.
Weighing the Trade-Offs
The move to an SSG is not without a learning curve. Content editing and site management generally shift to the command line and Markdown editors, which might be a steep transition for non-technical editorial teams. Certain use cases—such as heavy e-commerce, user-generated comments, or dynamic ratings—require the integration of third-party services or a headless CMS approach.
You also don't have to commit all at once. You can start with a small section of your site to gauge the workflow before scaling up. A popular hybrid strategy is to keep WordPress running as a headless content management system (CMS) that relies on an SSG to handle the frontend and serve the final, static pages.
Selecting a Generator and Launching the Project
Choosing between popular tools like Eleventy, Gatsby, Hugo, and Jekyll can be challenging. Often, the best way forward is to simply pick the one that fits your current comfort level. For many, Eleventy feels approachable, particularly for someone with intermediate HTML and JavaScript skills who is already comfortable with Git and the command line. Practical experience shows it can hold its own: it has been used to successfully convert multiple WordPress sites into static sites stored on GitHub and served securely via Netlify.
- Deploy the
eleventy-netlify-boilerplatestarter project by clicking Deploy to Netlify. This connects Netlify to GitHub, creates a new repository, and names the project. - Configure the project settings. Netlify automatically assigns a dynamic domain name and activates its Identity and Forms features as needed by the template. It's a simple process to secure the site with a custom domain and free HTTPS (SSL).
- Clone the newly created GitHub repository to your local machine using the provided Git clone command in your terminal (e.g., within Visual Studio Code). You'll need to update the
_data/metadata.jsonfile with the correct project information. - Install the local dependencies and start the development server with three commands:
npm install @11ty/eleventy,npm install, andnpx eleventy --serve --quiet. This final command builds the site and opens up a live preview atlocalhost:8080, watching for file changes.
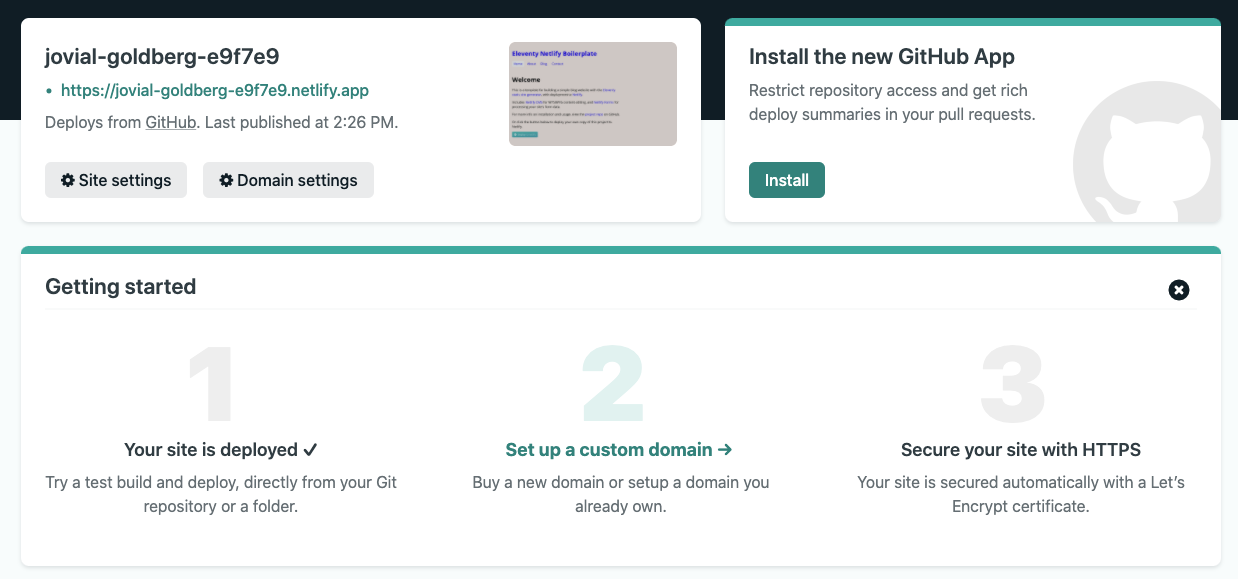
During the initial setup, you can customize the site's URL under Site Settings. After updating the site name in Netlify, a visit to the new URL should display the boilerplate content, confirming that the pipeline is running end-to-end from GitHub to the live site.
Migrating Content and Images from WordPress
Before rebuilding the site's layout, we need to extract the textual content and media from the existing WordPress installation. WordPress provides an excellent built-in exporter for this exact purpose. The **Export Content** option delivers a ZIP file containing an XML extract of all your text content: posts, pages, and metadata. A separate **Export Media Library** option provides another ZIP containing your images.
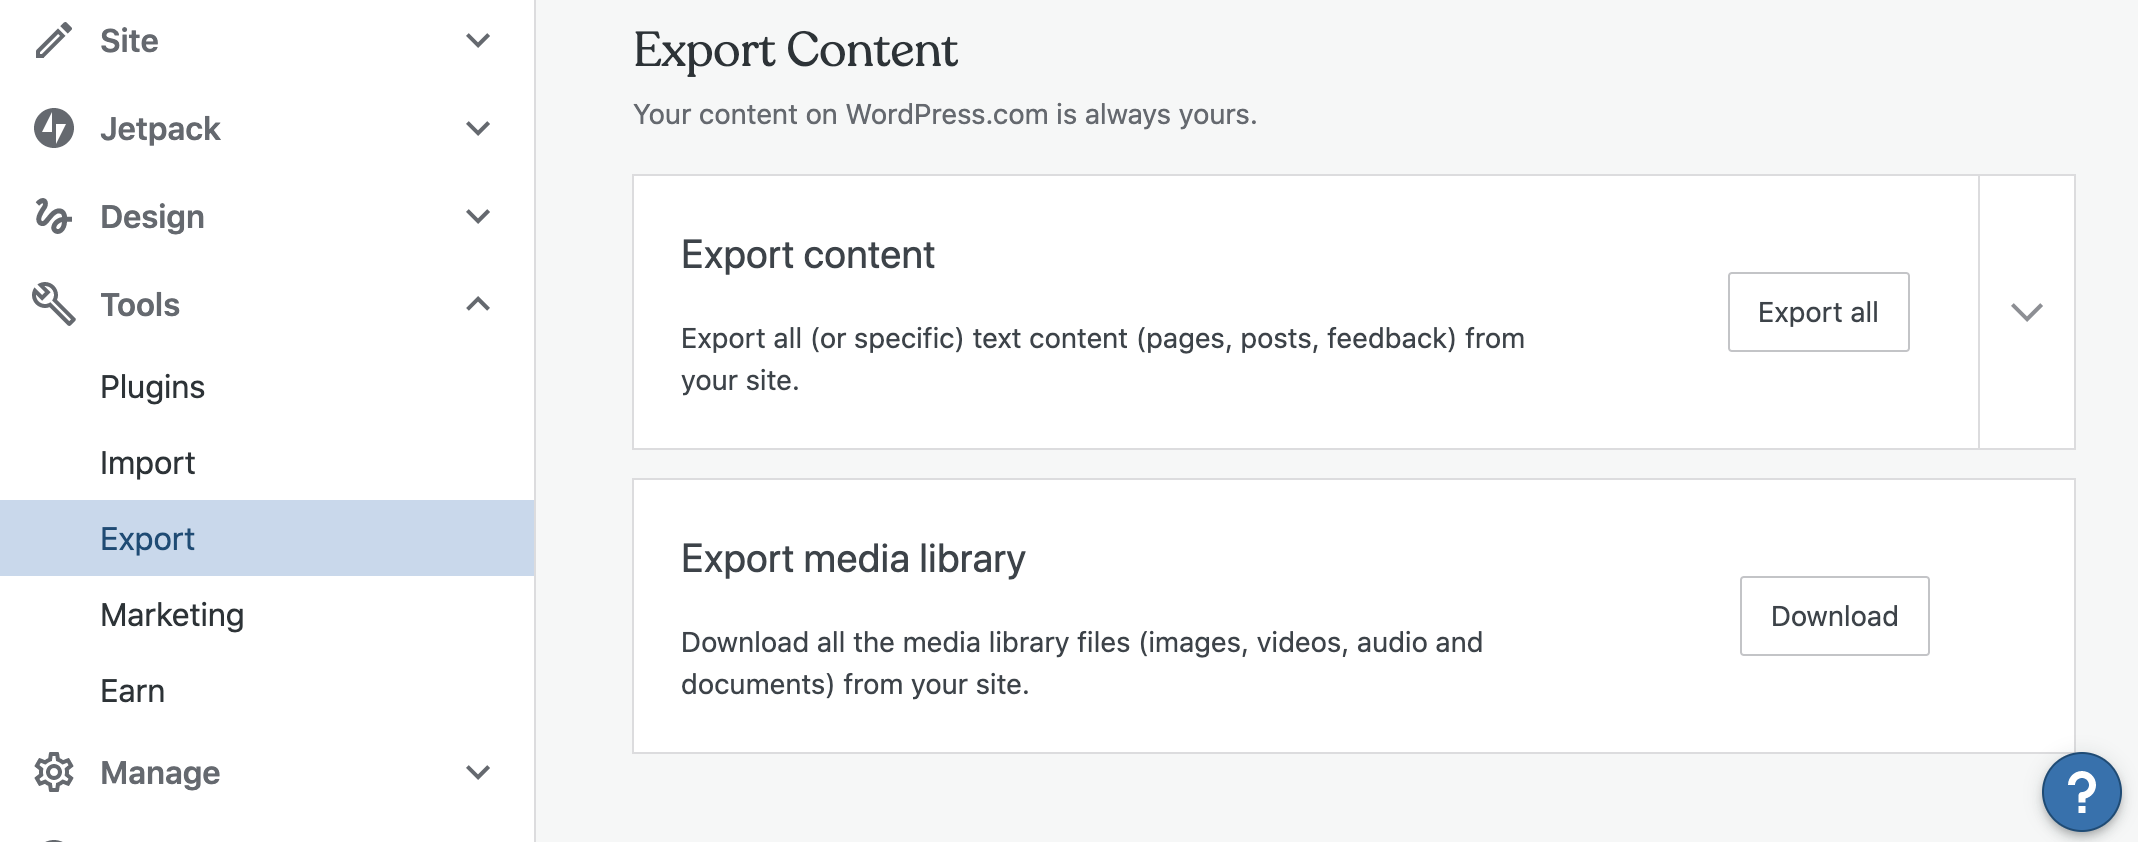
After downloading the XML file, it's time to transform it into the Markdown format that Eleventy expects. Directly reading the XML is not practical. Instead, you can use a conversion package such as wordpress-export-to-markdown to handle the heavy lifting. To use it:
- Clone the converter's repository to your local machine.
- Place the exported XML file from WordPress in that folder.
(The directory listing should include the parser file and the XML data.) - Adjust the parser for pages. By default, the tool extracts posts. Since this migration concerns a static page site, you need to edit
parser.jsand change"post"to"page"on line 39. - Run
node index.jsand follow the prompts. (Make sure to have already executednpm installin that directory.)
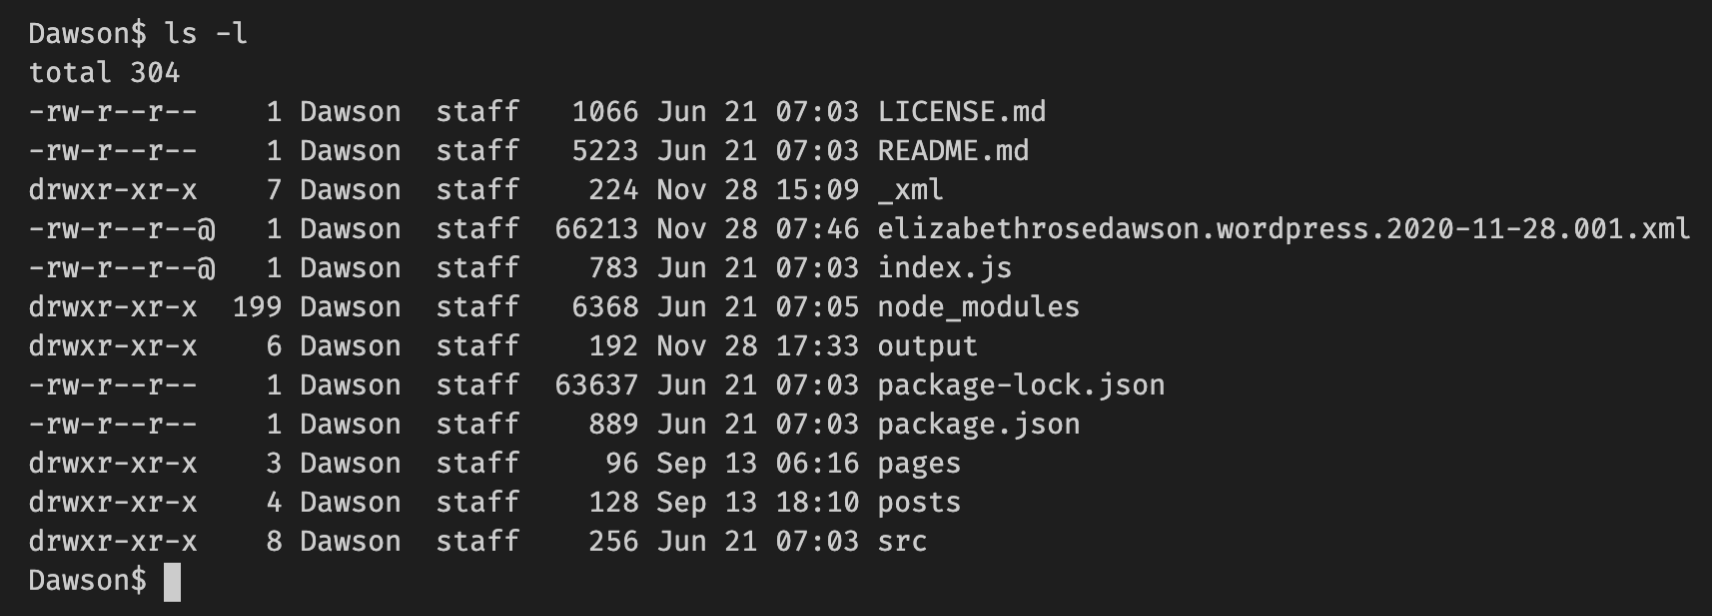
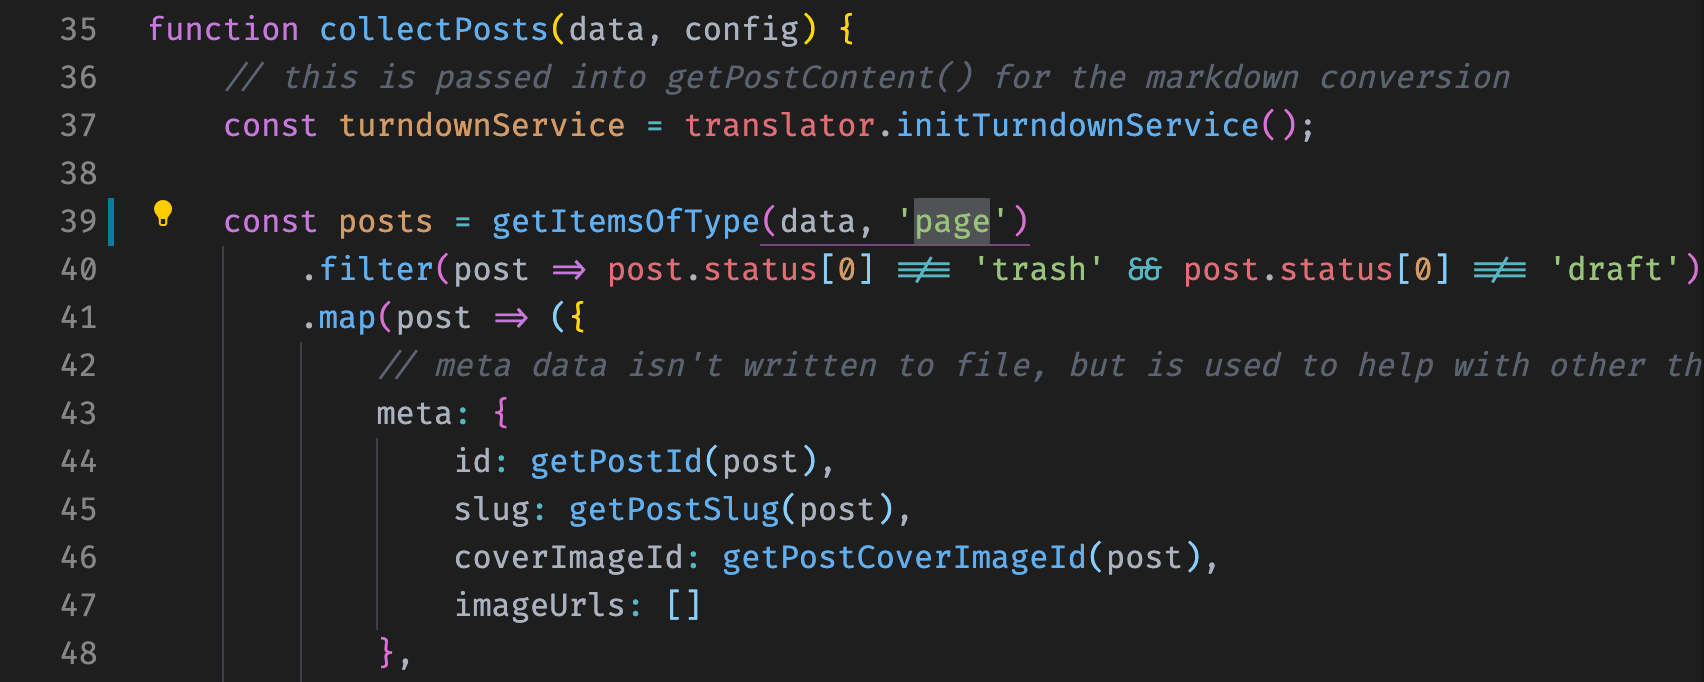
wordpress-export-to-markdown to export pages, not posts. (Large preview)The script will output individual .md files for each of your pages (for example, welcome.md, about.md, and contact.md). Each file contains the content converted to Markdown, wrapped with a front matter block. This front matter—the YAML data delimited by two triple-dash lines at the top of the file—carries crucial page metadata.
eleventyNavigation:
  key: Home
  order: 0
Included in the front matter are keys that set the layout, title, and even navigation order. You can use this syntax to automatically add pages to the site’s navigation. After generating these files, copy the core content from the output pages into the boilerplate's corresponding template files (like the home page layout). Since this site does not utilize a blog, any leftover example posts in the "posts" directory should be deleted. Refreshing the local preview in your browser should now display your migrated pages with the boilerplate styling.
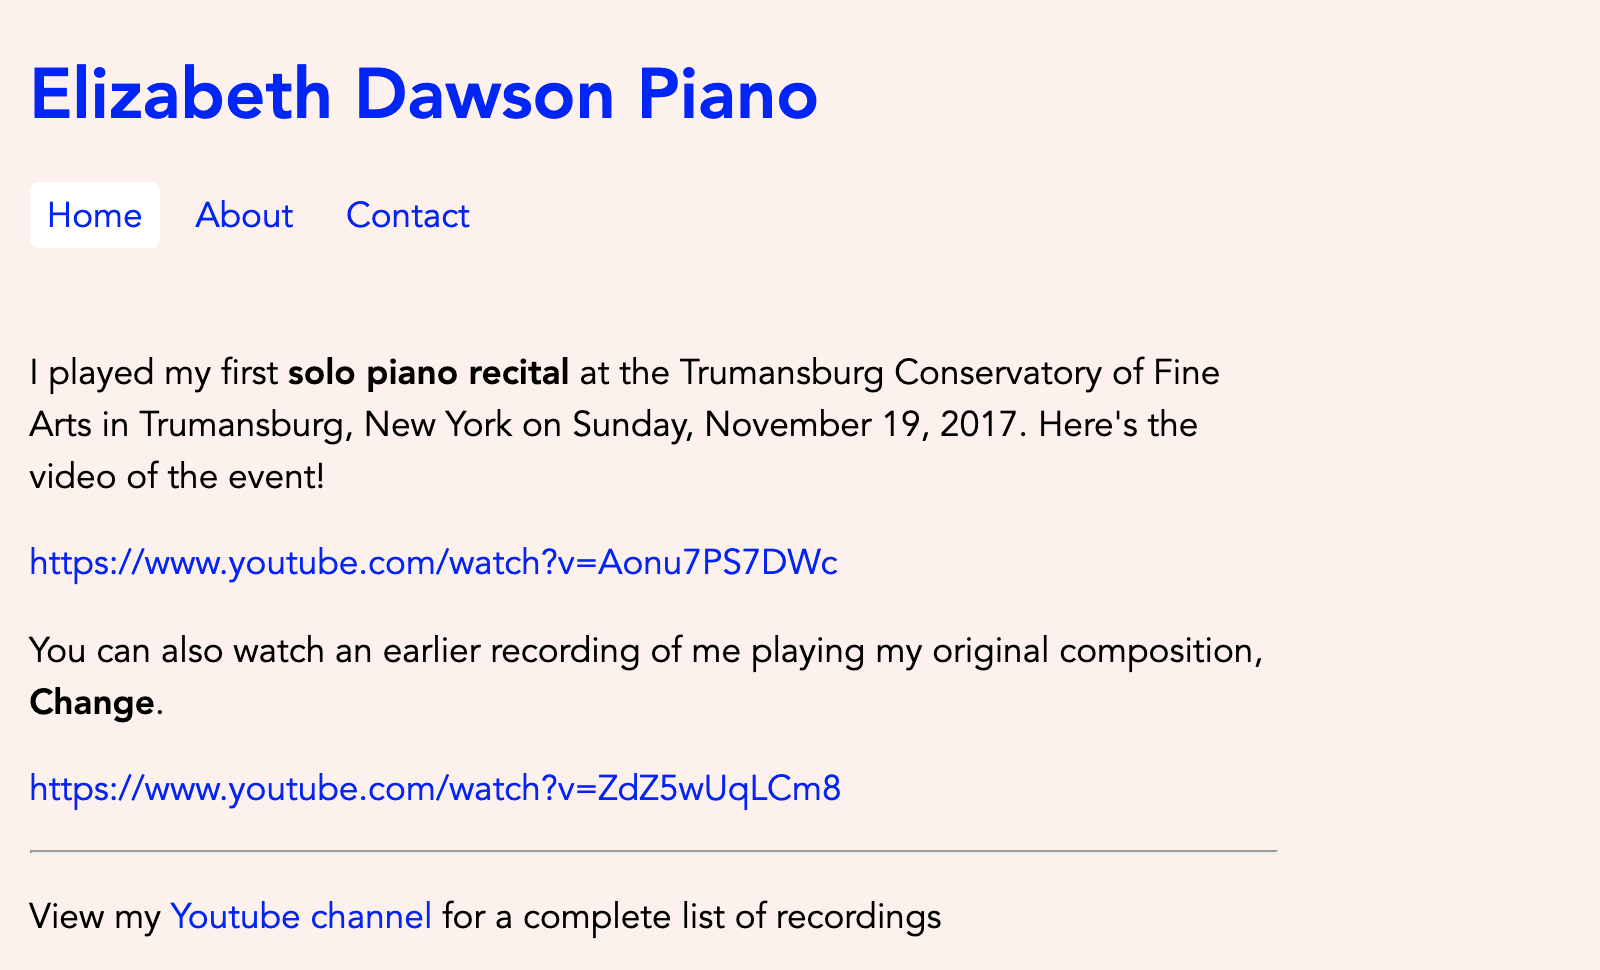
This milestone is the perfect time to commit the changes and push them to GitHub. Netlify automatically detects the push, runs the Eleventy build process, and updates the live site with the new pages—bypassing the local file system entirely.
Making the Website Visual: Adding Images & Media
Next, we can add the visual elements pulled from the original site, starting with the media library. Eleventy is instructed via the .eleventy.js configuration file to deposit static assets like images in path set within static/img.
Instead of hard-coding an image path in the layout template, we can leverage the existing content structure to improve reusability. By adding a key like hero_image to the front matter of your Markdown files, you can dynamically control the hero image shown on each specific page.
hero: `/static/img/performance.jpg`
To display this image correctly, the page's primary layout file (in this case, _includes/layouts/base.njk) needs to be edited. Insert the hero image element just below the main navigation—the desired placement in this design scheme.
{% if (hero) %}
<img class="page-hero" src="{{ hero }}" alt="Hero image for {{ title }}" />
{% endif %}
This way, when rendering the site, the base layout will automatically find the hero image path defined in the current page's front matter and display it in the template position. You can extend this pattern for other inline imagery, adding CSS classes to properly align and space pictures within the content flow, as with a profile photo on an "About" page.
Embedding Videos with Plugins
Rather than copying and pasting extensive iframe HTML or complex embed URLs for rich media like YouTube videos, Eleventy’s plugin ecosystem offers a streamlined, humane alternative. A great example is the eleventy-plugin-youtube-embed npm package. After installing the package, the only remaining step is to include it in your .eleventy.js configuration file. With this plugin active, you can simply paste the full YouTube URLs directly into your Markdown content. The plugin will then automatically transform those text-based links into full, functional embedded players during the build process—no extra HTML customization needed. This drastically simplifies the content creation workflow.
Modeling Events With Collections And Filters
While the site we’ve built so far doesn’t need a blog, it does need a mechanism for publicizing upcoming performances. Functionally, these event listings behave like blog posts: each one has a title, a description, and a date. We can model them that way in Eleventy.
A collection-based events page requires a few steps:
- Create an
events.mdpage file in the pages directory. - Add event content as Markdown files in the posts directory (I used files for a holiday concert, a spring concert, and a fall recital).
- Define a collection in
.eleventy.jsthat gathers every Markdown file in the posts directory, filtering out any item that lacks a designated location in its front matter.
eleventyConfig.addCollection("events", (collection) =>
    collection.getFilteredByGlob("posts/*.md").filter( post => {
        return ( item.data.location ? post : false );
    })
);
Then, events.md can iterate over that collection and render each event as a table row.
<table>
    <thead>
        <tr>
            <th>Date</th>
            <th>Title</th>
            <th>Location</th>
        </tr>
    </thead>
    <tbody>
        {%- for post in collections.events -%}
        <tr>
            <td>{{ post.date }}</td>
            <td><a href="{{ post.url }}">{{ post.data.title }}</a></td>
            <td>{{ post.data.location }}</td>
        </tr>
        {%- endfor -%}
    </tbody>
</table>
The resulting date output is barely readable, though. The boilerplate configuration already includes a readableDate filter, which we can apply directly inside Markdown and template content.
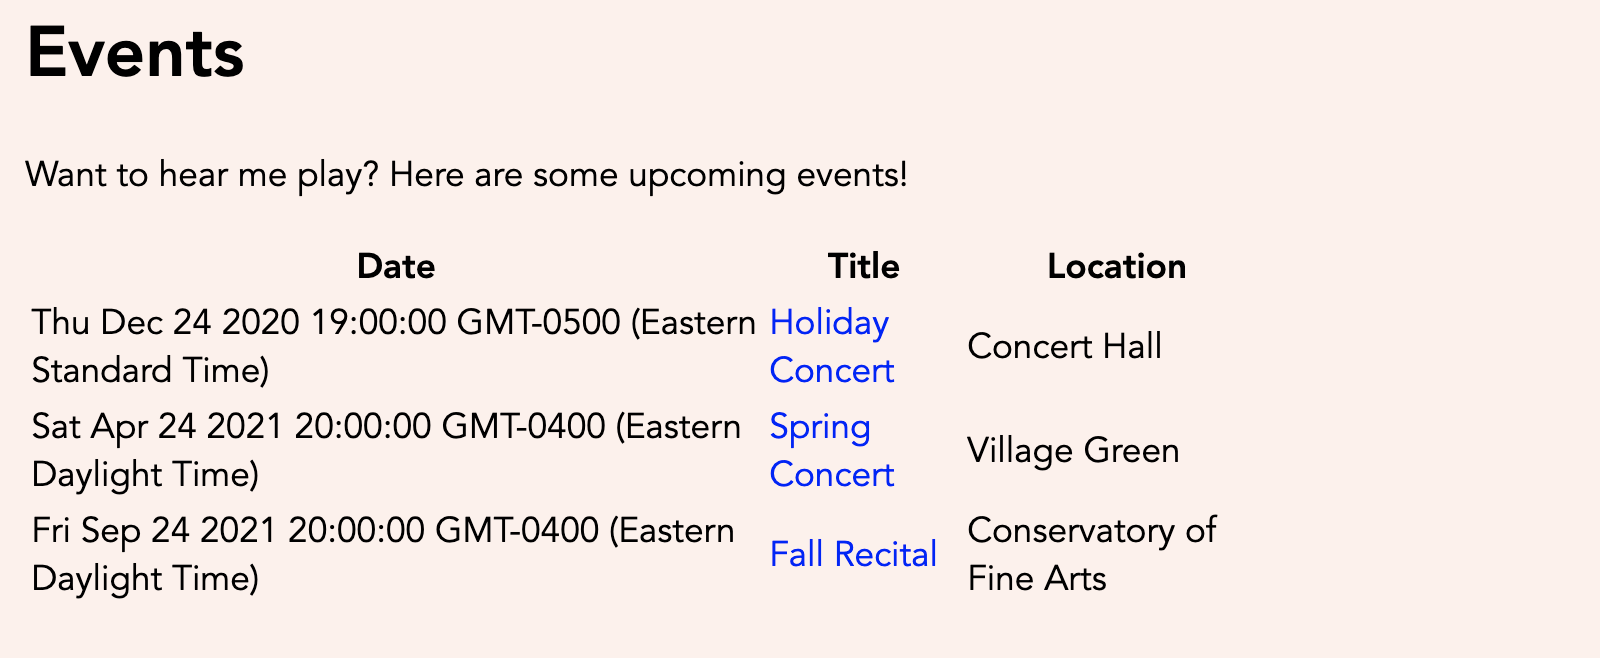
{{ post.date | readableDate }}With that filter in place, the dates display cleanly. For more detail on built-in filters and building custom ones, the Eleventy documentation covers the available options thoroughly. The implementation used here is available in this commit.
Refining The Visual Design
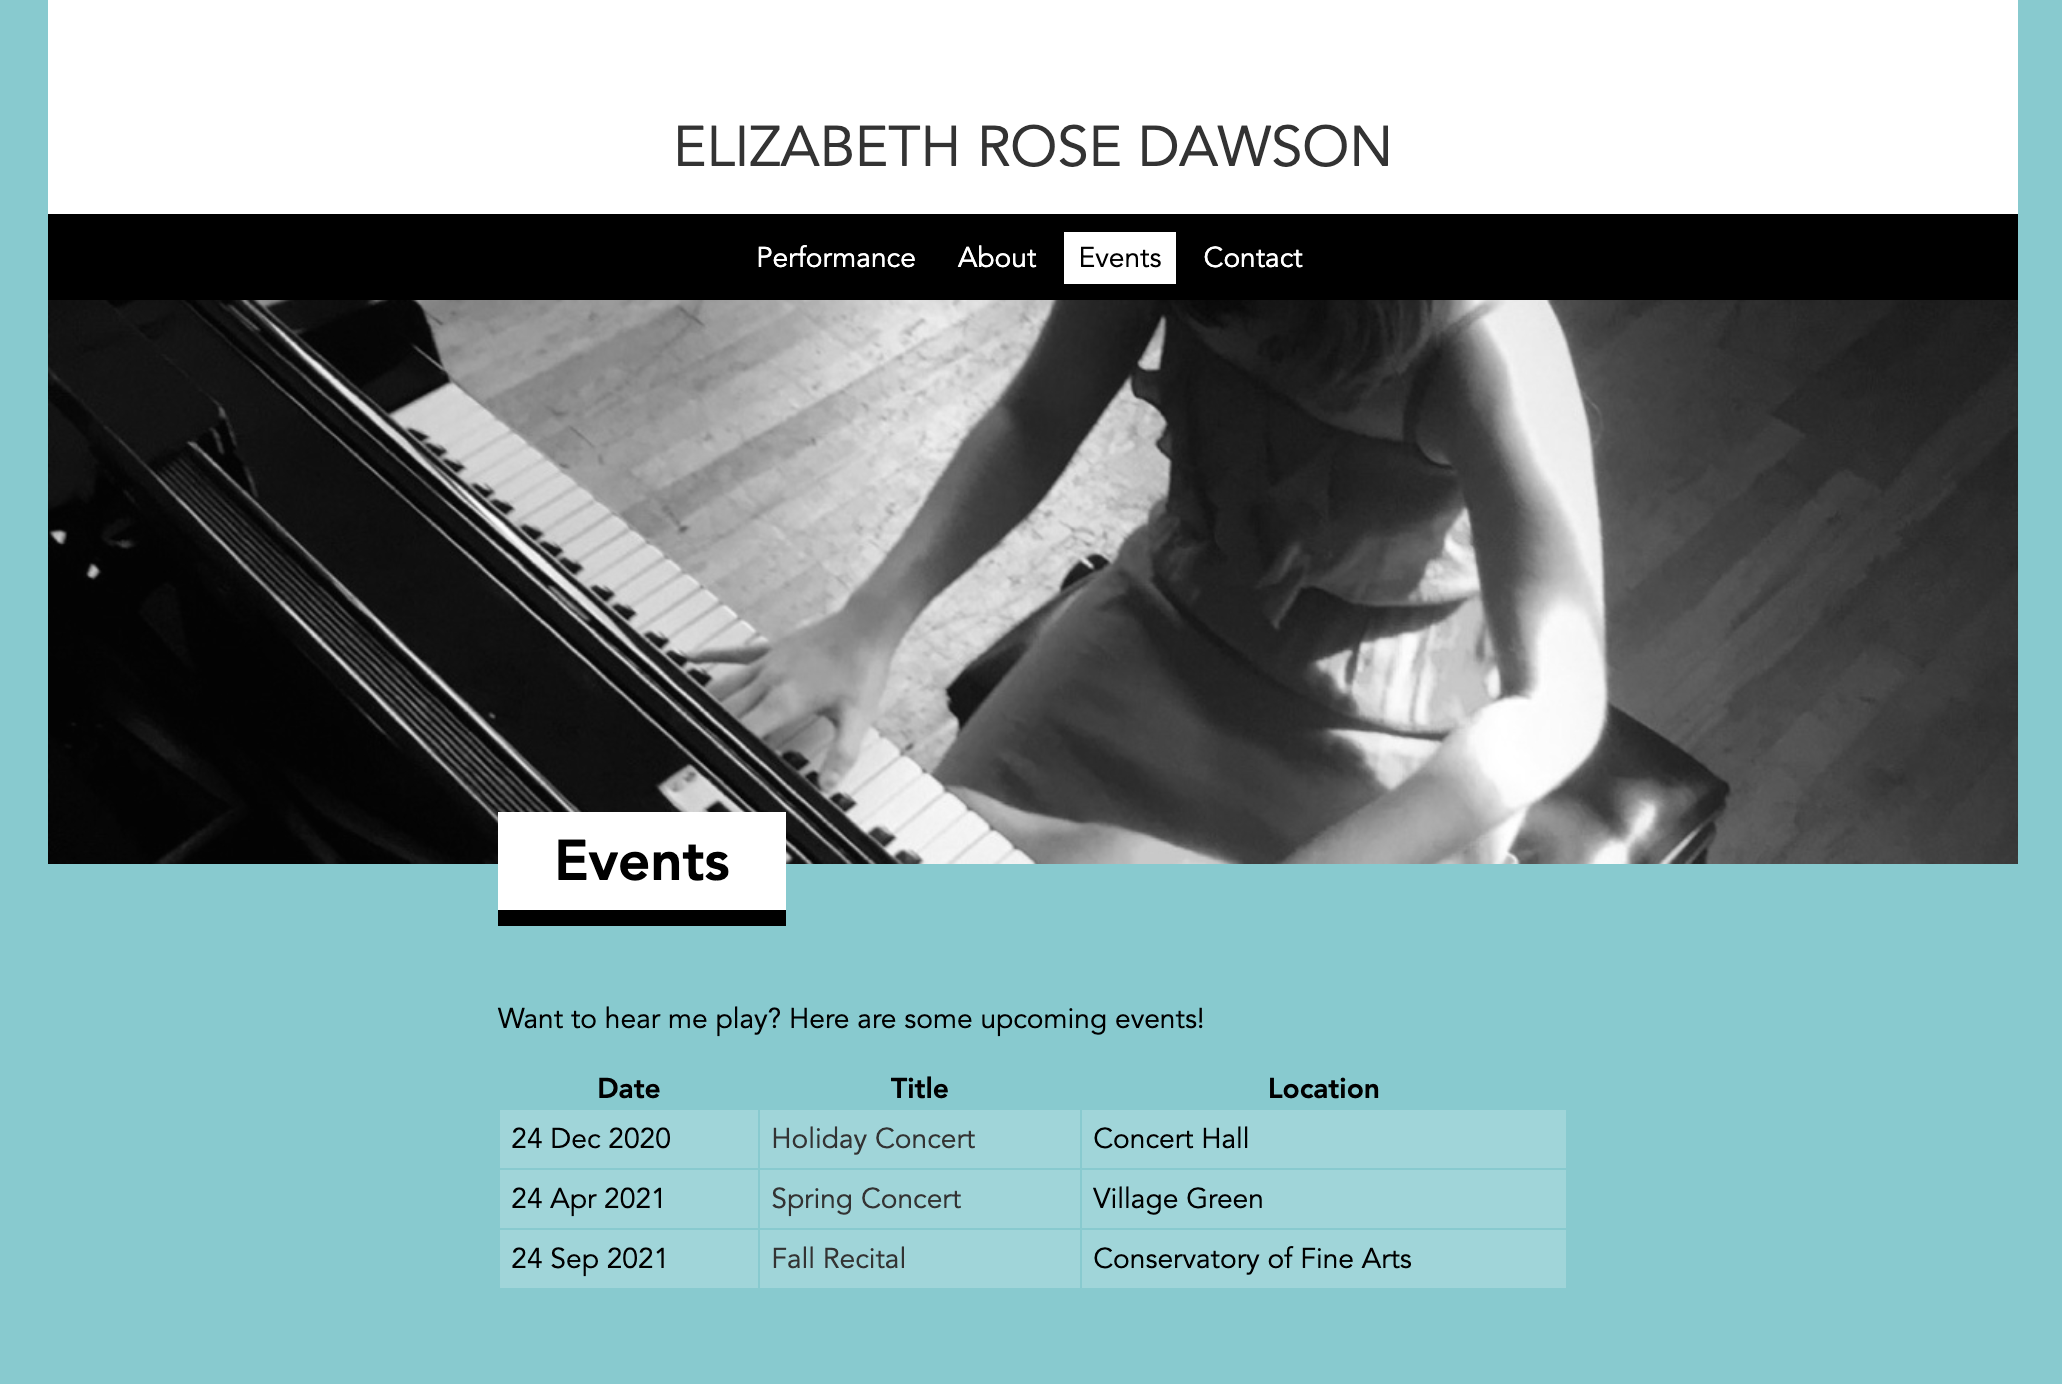
The site now has real substance: pages, hero images, an event schedule, and a working contact form. Because Eleventy imposes no theme, the design direction is entirely up to you — there are no constraints on how performant, responsive, or attractive the site should be. I applied my own styling and markup refinements in the final commit to prepare the site for public launch.
Going Live With Git And Netlify
Publishing is already taken care of. The workflow we’ve been using syncs each GitHub update directly to Netlify, which rebuilds the Markdown into fresh HTML automatically. Shipping a change means simply pushing to git. When the site is ready for a custom domain, Netlify allows you to attach your existing domain at no cost, and its free HTTPS certificate can be provisioned through Site Settings > Domain Management.
Going Further: Large Media, Forms, And CMS
Our sample site is light on images, but larger projects often need more headroom. Netlify’s Large Media service addresses this by storing full-resolution originals outside git: you push a pointer to Large Media, keeping the repository lean while requesting optimized crops and sizes at render time. I found setup easy and the responsive output excellent on my own higher-traffic sites.
The contact form from the starter boilerplate works out of the box. Submissions appear under the Forms section of your Netlify site dashboard, where you can enable email notifications. To send users to a custom thank-you page after submission, create that page at a path such as /contact/success and add action="/contact/success" to the form tag in the form.njk template.
The boilerplate also wires up Netlify’s content manager. Configuring it fully for non-technical editors goes beyond what I’ll cover here, but in principle you can define editing templates, have changes saved through Netlify’s interface, and have them sync to GitHub to trigger a redeploy. For those at ease with editing Markdown and committing, that extra layer likely isn’t necessary.
The finished product — links to the live site and the source repository — demonstrates the complete conversion.
Additional Resources
- “How Smashing Magazine Manages Content: Migration From WordPress To JAMstack,” Sarah Drasner
- “Modern Web Development On The JAMstack,” Mathias Biilmann & Phil Hawksworth
- “Eleventy Is A Simpler Static Site Generator,” Eleventy Docs
- “Starter Projects,” Eleventy Docs
- “Large Media Docs,” Netlify
- “Configuration Options,” Netlify CMS
- “12 Things I Learned After Converting WordPress Sites to Eleventy,” Scott Dawson


