

Static Sites vs. Server Rendering: How the Two Approaches Differ
Modern front-end development typically boils down to one of three application types: single-page applications (SPAs), pre-rendered/static-generated sites, or server-side-rendered (SSR) applications. SPAs have well-documented drawbacks — most notably for SEO — which pushes many developers toward either static generation or SSR.
Understanding Static-Site Generators
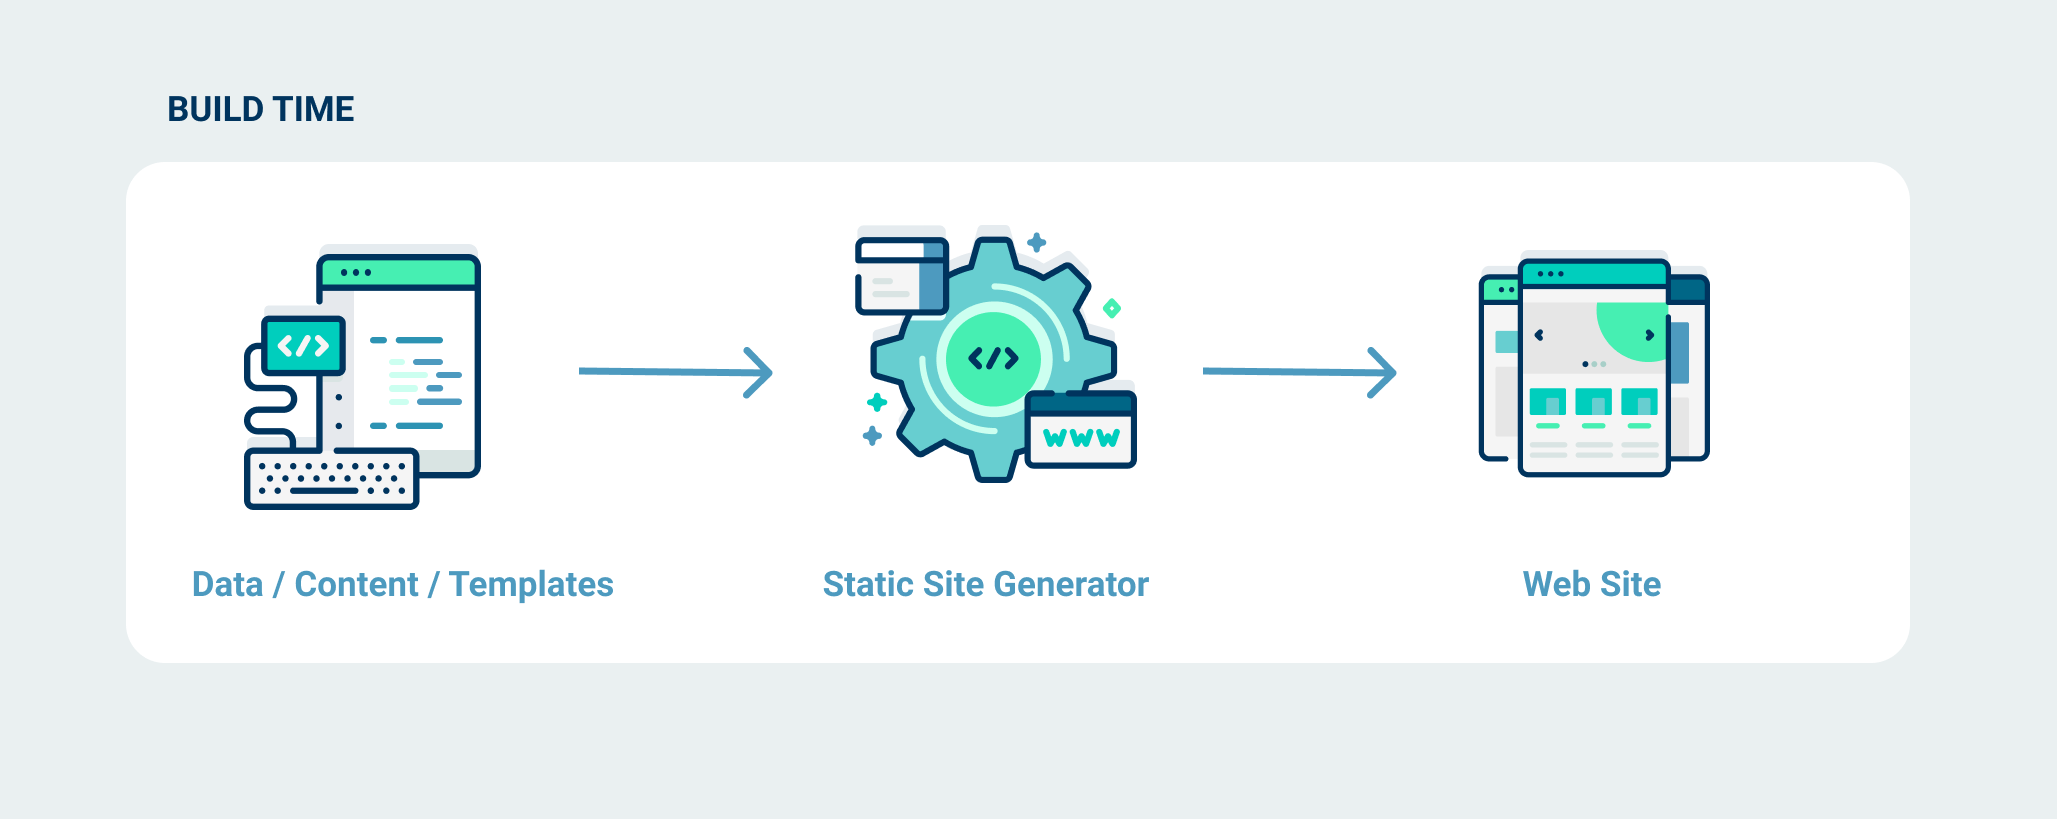
A static-site generator (SSG) takes templates or components paired with a content source and produces a complete set of HTML pages. The output is a fully static website generated at build time. The catch: page content won't change unless you add new content, components, or rebuild entirely. This model suits sites with infrequently changing content — blogs and personal portfolios being prime examples — but falls short for highly dynamic, user-generated content.
Why Choose Static Generation?
- Speed: Build-time generation that eliminates runtime API calls for content results in fast performance.
- Deployment: Since you're left with only static files, hosting something like Netlify is trivial.
- Security: With no database on the server, malicious code injection via a database is essentially a non-issue.
- Version control: Content managed through a version-controlled system like Git allows for straightforward change tracking and rollbacks.
The Drawbacks
- If content updates rapidly, this model becomes too slow to maintain.
- Every content change requires a full rebuild.
- Build time scales with application size.
Working with Gatsby
Gatsby, a React-based static-site generator, is a popular choice for developers on that framework. Installing it and creating a project is purely command-line driven:
npm install -g gatsby-cli
gatsby new demo-gatsby
Running the development server next (shown below) makes the application available at localhost:8000.
cd demo-gatsby
gatsby develop
In the generated project structure, all files in the src/pages folder automatically translate to routes. If you add a file like newPage.js, Gatsby handles the rest:
import React from "react"
import { Link } from "gatsby"
import Layout from "../components/layout"
import SEO from "../components/seo"
const NewPage = () => (
  <Layout>
    <SEO title="My new page" />
    <h1>Hello Gatsby</h1>
    <p>This is my first Gatsby page</p>
    <button>
      <Link to='/'>Home</Link>
    </button>
  </Layout>
)
export default NewPage
This new file imports React (which will be referenced in the final transpiled JavaScript), a Link component from Gatsby to replace standard anchor tags, and a default Layout component to wrap all pages. A SEO component accepts a title prop for page meta data. The exported NewPage function returns the JSX content for the route.
With the page created, add a link to it in your existing index.js home page by importing the Link component:
import React from "react"
import { Link } from "gatsby"
import Layout from "../components/layout"
import Image from "../components/image"
import SEO from "../components/seo"
const IndexPage = () => (
  <Layout>
    <SEO title="Home" />
    <h1>Hi people</h1>
    <p>Welcome to your new Gatsby site.</p>
    <p>Now go build something great.</p>
    <div style={{ maxWidth: `300px`, marginBottom: `1.45rem` }}>
      <Image />
    </div>
    <Link to="/page-2/">Go to page 2</Link>
    {/* new link */}
    <button>
      <Link to="/newPage/">Go to new page</Link>
    </button>
  </Layout>
)
export default IndexPage
In addition to React and the Link component, the index.js file pulls in an Image component that Gatsby includes by default for image lazy loading and optimization. The main page then exports IndexPage, which returns JSX with the link along with any existing content. A link titled “Go to new page” now appears on the home page and, when clicked, routes to the newly generated page.
Static Generation with VuePress for Documentation
VuePress is another static generator, but tailored to a specific need: great project documentation with minimal configuration work. Built on Vue.js, vue-router, and webpack, it favors the simplicity of Markdown. Your first Vue.js-powered site begins by adding Markdown to the project — our example tests a local README.md file:
// Globally…
yarn global add vuepress # OR npm install -g vuepress

// Or in an existing project…
yarn add -D vuepress # OR npm install -D vuepress
# Create the project folder
mkdir demo-vuepress && cd demo-vuepress

# Create a Markdown file
echo '# Hello VuePress' > README.md

# Start writing
vuepress dev
Once started, the generator serves the app at localhost:8080. Inside the README.md file you can even use Vue syntax alongside your standard Markdown:
# Hello VuePress
_VuePress Rocks_
> **Yes!**
_It supports JavaScript interpolation code_
> **{{new Date()}}**
<p v-for="i of ['v','u', 'e', 'p', 'r', 'e', 's', 's']">{{i}}</p>
Creating a new page for your site involves adding another Markdown file — with the route determined by the file name — to the root folder:
# Hello World
Lorem ipsum dolor sit amet, consectetur adipisicing elit, sed do eiusmod
tempor incididunt ut labore et dolore magna aliqua. Ut enim ad minim veniam,
quis nostrud exercitation ullamco laboris nisi ut aliquip ex ea commodo
consequat.
This new page-2 route is now visible in the browser, giving you a working multi-page documentation site from two Markdown files.
Rendering on the Server
Server-side rendering (SSR) flips the rendering process: instead of the browser assembling a page from JavaScript, the server compiles a fully rendered HTML page and sends it to the client. Once the page loads, the client's JavaScript bundle hydrates the markup and takes over, allowing the SPA framework to function normally.
With SSR, the content a user sees is fetched from the server and delivered to the browser pre-rendered. This contrasts with client-side rendering, where the browser initially receives an empty shell and must make a round trip to the server to obtain and display the actual page content, causing a noticeable delay. Applications built this way are referred to as server-side-rendered applications.
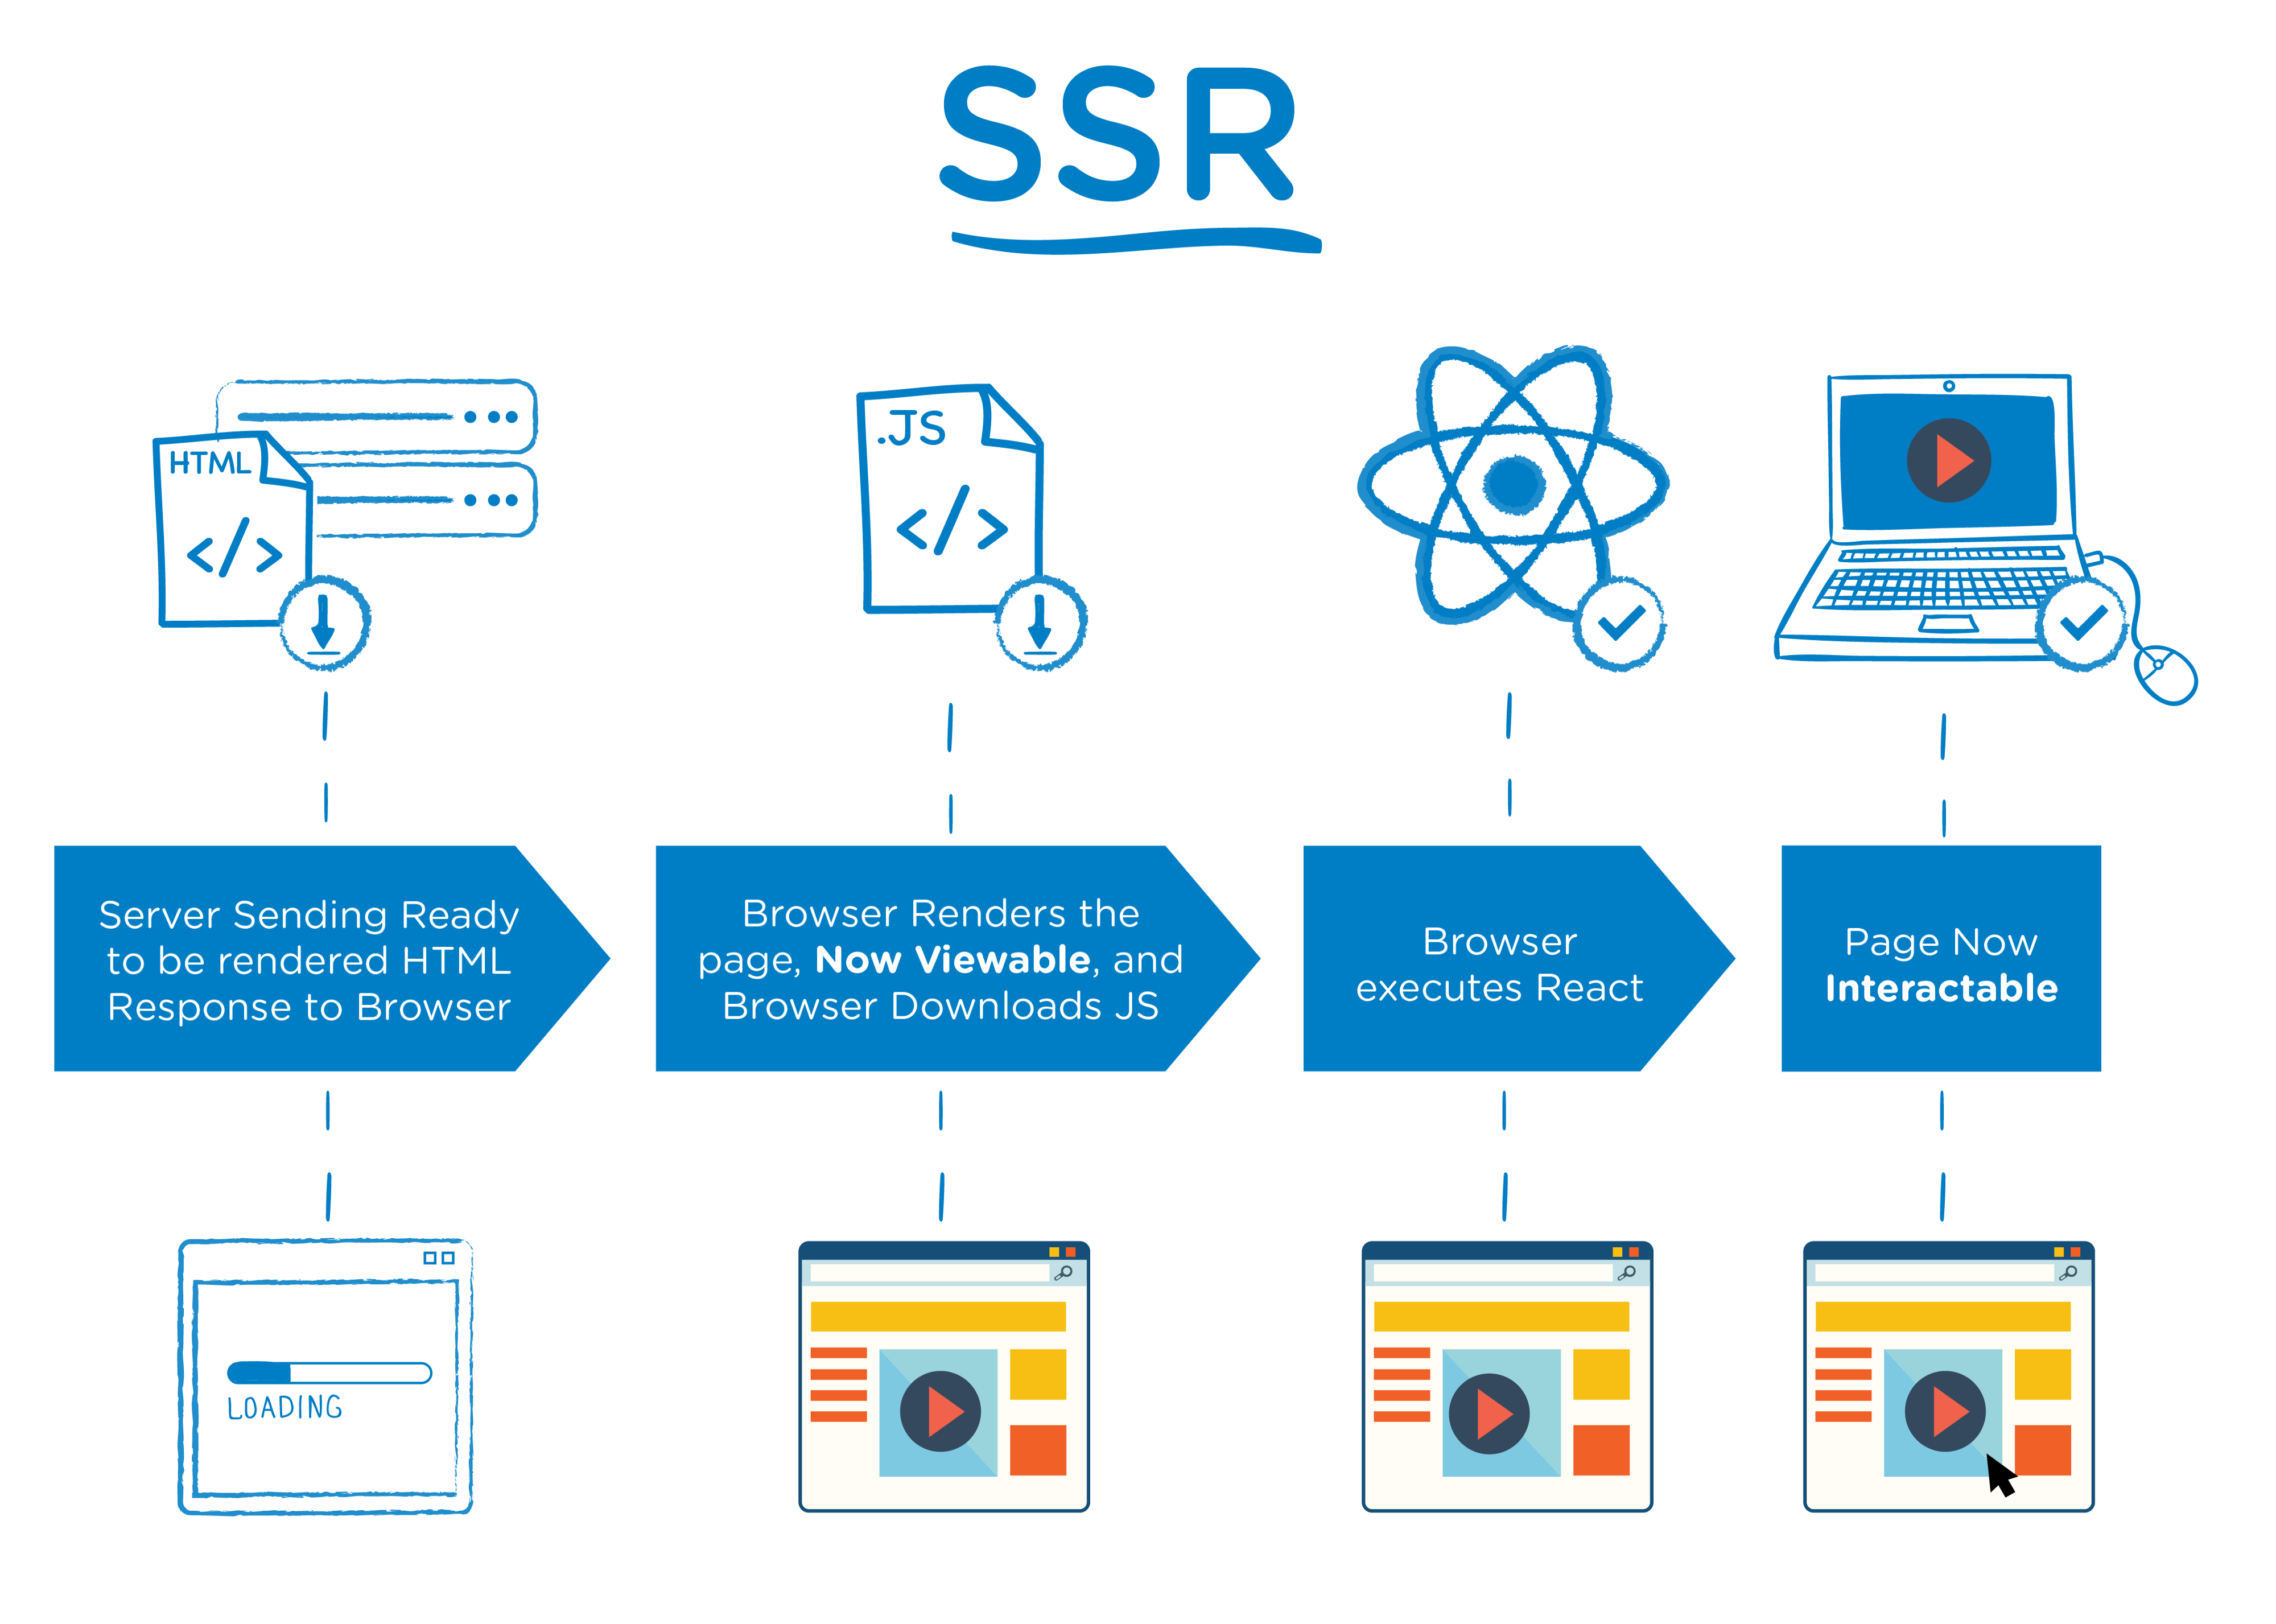
SSR is well-suited for complex applications that depend on real-time data or databases, or that tailor their content to individual logged-in users. It is a fitting choice for large e-commerce platforms or social networks where content changes frequently and users expect immediate updates. It also allows these dynamic experiences to remain indexable by search engines.
Strengths of SSR
- Users always see the latest content, as it is fetched on each request.
- Since the server renders the HTML, a user's device has little impact on the initial load time, resulting in more consistent performance.
Trade-offs of SSR
- Each request triggers its own API calls to the server, increasing server load.
- Because of its server dependency, the application cannot be deployed to a simple static CDN.
Popular React and Vue frameworks, such as Next.js and Nuxt.js, provide built-in support for SSR.
Using Next.js
Built on React, Next.js is a frameowrk that can generate static sites, SSR applications, and more. Familiarity with React is a prerequisite for working with it.
Initialize a new project by running the following command in your CLI:
npm init next-app
# or
yarn create next-app
During setup, you will be prompted to assign a name (e.g., demo-next) and pick a template—choosing the default starter gives you a working app. Once the installation finishes, run the development server with:
cd demo-next
yarn dev
# or npm run dev
Navigate to localhost:3000 in your browser to verify the app is running.
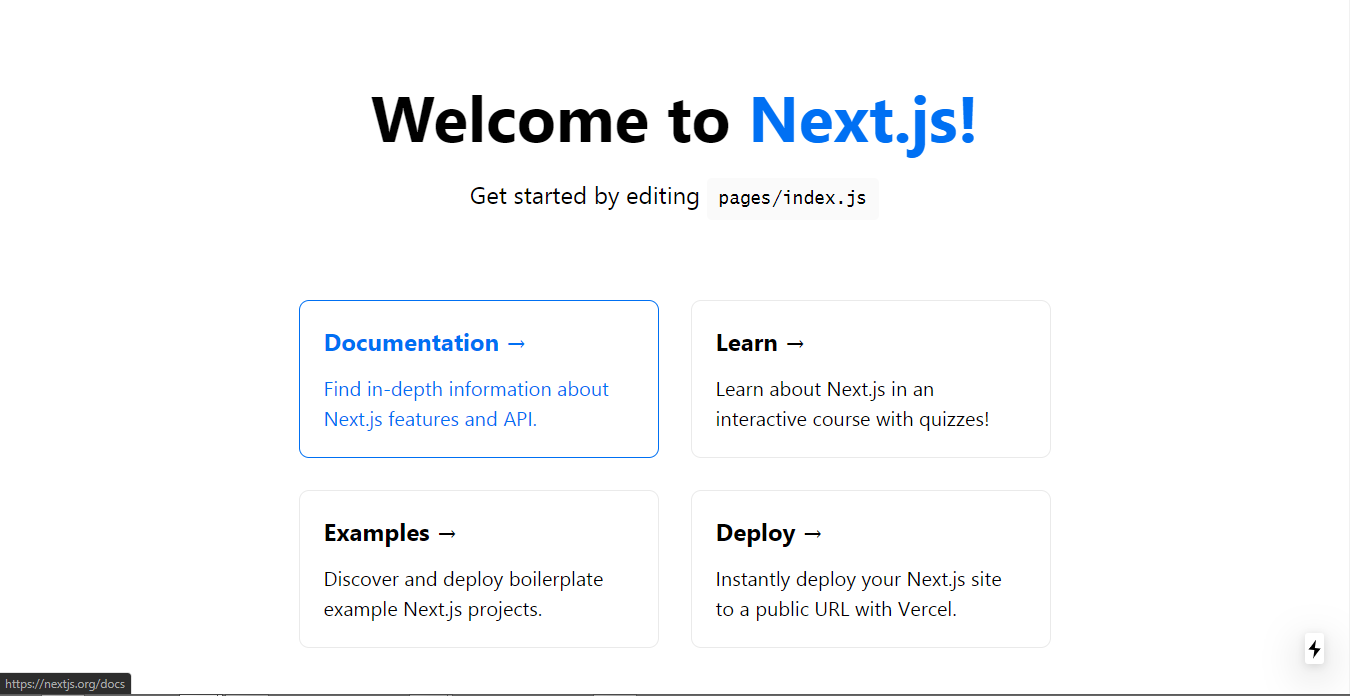
The structure is file-based: each file within the pages directory creates its own route. The homepage is controlled by pages/index.js. To see this in action, edit the file and replace its JSX content with your own page markup, like the example below. This snippet uses Next.js's Head component to manage the page title and favicon, and also defines scoped and global styles.
import Head from 'next/head'
export default function Home() {
  return (
    <div className="container">
      <Head>
        <title>Hello Next.js</title>
        <link rel="icon" href="https://www.smashingmagazine.com/favicon.ico" />
      </Head>
      <main>
        <h1 className="title">
          Welcome to <a href="https://nextjs.org">Next.js!</a>
        </h1>
        <p className='description'>Next.js Rocks!</p>
      </main>
      <style jsx>{`
        main {
          padding: 5rem 0;
          flex: 1;
          display: flex;
          flex-direction: column;
          justify-content: center;
          align-items: center;
        }
        .title a {
          color: #0070f3;
          text-decoration: none;
        }
        .title a:hover,
        .title a:focus,
        .title a:active {
          text-decoration: underline;
        }
        .title {
          margin: 0;
          line-height: 1.15;
          font-size: 4rem;
        }
        .title,
        .description {
          text-align: center;
        }
        .description {
          line-height: 1.5;
          font-size: 1.5rem;
        }
      `}</style>
      <style jsx global>{`
        html,
        body {
          padding: 0;
          margin: 0;
          font-family: -apple-system, BlinkMacSystemFont, Segoe UI, Roboto,
            Oxygen, Ubuntu, Cantarell, Fira Sans, Droid Sans, Helvetica Neue,
            sans-serif;
        }
        * {
          box-sizing: border-box;
        }
      \`}</style>
    </div>
  )
}
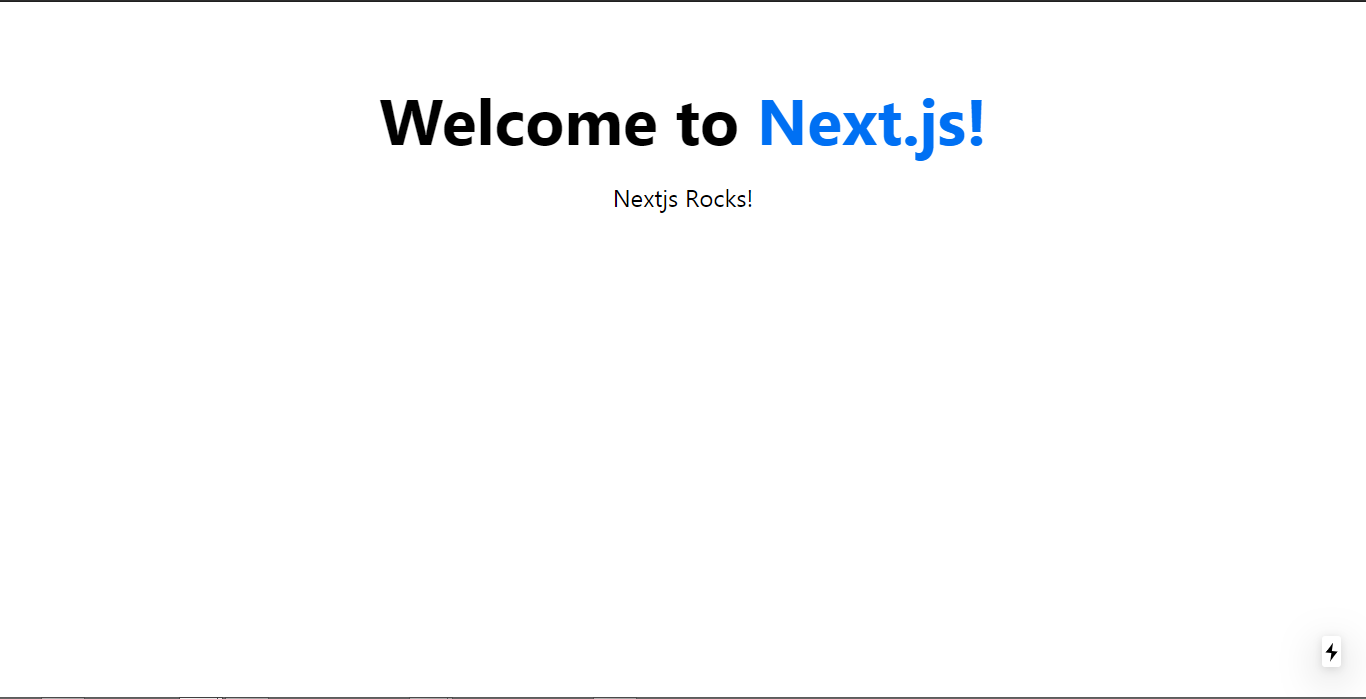
Your refresh of the browser should now show your modified content.
To add a second page, simply create a new file in the /pages directory. For example, add a hello.js file with its own component to see this pattern in action.
--| pages
----| index.js ==> '/'
----| about.js ==> '/about'
----| projects
------| next.js ==> '/projects/next'
import Head from 'next/head'
export default function Hello() {
  return (
    <div>
       <Head>
        <title>Hello World</title>
        <link rel="icon" href="https://www.smashingmagazine.com/favicon.ico" />
      </Head>
      <main className='container'>
        <h1 className='title'>
         Hello <a href="https://en.wikipedia.org/wiki/Hello_World_(film)">world</a>
        </h1>
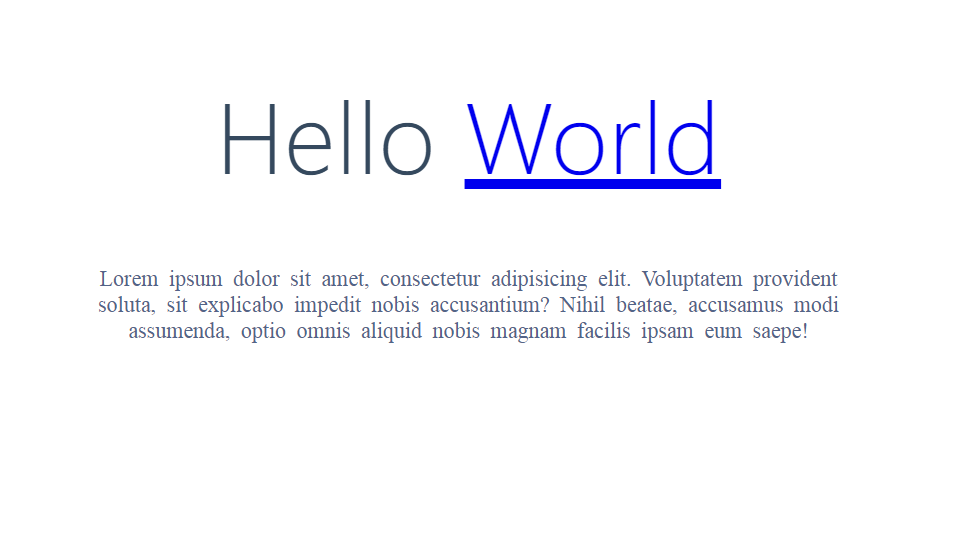
        <p className='subtitle'>Lorem ipsum dolor sit amet, consectetur adipisicing elit. Voluptatem provident soluta, sit explicabo impedit nobis accusantium? Nihil beatae, accusamus modi assumenda, optio omnis aliquid nobis magnam facilis ipsam eum saepe!</p>
      </main>
      <style jsx> {`

      .container {
        margin: 0 auto;
        min-height: 100vh;
        max-width: 800px;
        text-align: center;
      }
      .title {
        font-family: "Quicksand", "Source Sans Pro", -apple-system, BlinkMacSystemFont,
          "Segoe UI", Roboto, "Helvetica Neue", Arial, sans-serif;
        display: block;
        font-weight: 300;
        font-size: 100px;
        color: #35495e;
        letter-spacing: 1px;
      }
      .subtitle {
        font-weight: 300;
        font-size: 22px;
        color: #526488;
        word-spacing: 5px;
        padding-bottom: 15px;
      }
      \`} </style>
    </div>
  )
}
Access localhost:3000/hello to see the new page rendered. Returning to the homepage, you'll need to add a navigation link to guide users to it. Next.js provides a dedicated Link component for this purpose; import it from the framework and wrap your anchor text with it. This is the standard method for enabling client-side navigation in Next.js.
# index.js
import Link from 'next/link'

#Add this to your JSX
<Link href='/hello'>
<Link href='/hello'>
  <a>Next</a>
</Link>
Vue-Powered SSR with Nuxt.js
Nuxt.js is a progressive framework for Vue.js applications, combining the official core libraries (vue, vue-router, and vuex) with tools like webpack and Babel. As it is Vue-centric, developers need Vue knowledge to use it.
To bootstrap a Nuxt project, run the creating command and follow the CLI prompts, confirming the default names (e.g., demo-nuxt) and options.
yarn create nuxt-app <project-name>
# or npx
npx create-nuxt-app <project-name>
Nuxt also leverages the file-system router. The file pages/index.vue maps to the root URL. Modify its Vue template to match your intended landing page.
<template>
  <div class="container">
    <div>
      <logo />
      <h1 class="title">
        Hello Nuxt.js
      </h1>
      <h2 class="subtitle">
        Nuxt.js Rocks!
      </h2>
      <div class="links">
        <a
          href="https://nuxtjs.org/"
          target="_blank"
          class="button--green"
        >
          Documentation
        </a>
        <a
          href="https://github.com/nuxt/nuxt.js"
          target="_blank"
          class="button--grey"
        >
          GitHub
        </a>
      </div>
    </div>
  </div>
</template>
<script>
import Logo from '~/components/Logo.vue'
export default {
  components: {
    Logo
  }
}
</script>
<style>
.container {
  margin: 0 auto;
  min-height: 100vh;
  display: flex;
  justify-content: center;
  align-items: center;
  text-align: center;
}
.title {
  font-family: 'Quicksand', 'Source Sans Pro', -apple-system, BlinkMacSystemFont,
    'Segoe UI', Roboto, 'Helvetica Neue', Arial, sans-serif;
  display: block;
  font-weight: 300;
  font-size: 100px;
  color: #35495e;
  letter-spacing: 1px;
}
.subtitle {
  font-weight: 300;
  font-size: 42px;
  color: #526488;
  word-spacing: 5px;
  padding-bottom: 15px;
}
.links {
  padding-top: 15px;
}
</style>
Start the local server to preview your work.
cd demo-nuxt
# start your applicatio
yarn dev # or npm run dev
You should see the app running at localhost:3000.

Much as in Next.js, you can extend the application by dropping a new file (e.g., hello.vue) into the pages folder, thereby generating the route /hello.
<template>
  <div>
    <h1>Hello world!</h1>
    <p>Lorem ipsum dolor sit amet, consectetur adipisicing elit. Id ipsa vitae tempora perferendis, voluptate a accusantium itaque vel ex, provident autem quod rem saepe ullam hic explicabo voluptas, libero distinctio?</p>
  </div>
</template>
<script>
export default {};
</script>
<style>
</style>

Static vs. Dynamic: Key Distinctions
The core difference hinges on when a page is prepared. Static site generators pre-build HTML files at deploy time, resulting in fast, cacheable assets that can be served from a CDN; however, they struggle with frequently changing content or personalization. SSR, on the other hand, generates fresh markup for each incoming request, which ensures data is current but sacrifices CDN deployment and adds complexity to server infrastructure.
| Static-Site Generation | Server-Side Rendering |
|---|---|
| Can easily be deployed to a static CDN | Cannot be deployed to a static CDN |
| Content and pages are generated at build time | Content and pages are generated per request |
| Content can get stale quickly | Content is always up to date |
| Fewer API calls, because it only makes them at build time | Makes API calls each time a new page is visited |
Wrapping Up
The line between the two strategies appears thin, as both ultimately deliver HTML to the browser, but the decision depends on your content's nature. Much like SSG frameworks, examining the codebases of Next.js and Nuxt.js is a great way to internalize how the patterns differ.
Resources
For more hands-on guidance, the official documentation and community examples for these tools are invaluable. Additional material that explains static site generators and server-side rendering in depth can be found online.


