
Selector types: how you target elements
A selector is the first part of a ruleset. It can be as basic as an HTML tag name; from there, selector types let you narrow down which elements actually receive a given set of styles.
/* CSS Ruleset */
selector {
  /* Style rule */
  property: value;
}
Selecting an element by its tag is only one selector type among several, and each raises the question of how much of the page you intend to hit.
Type (element) selectors
Writing a bare tag name styles every element of that type. Applied to article, a single selector targets all <article> elements. Whether that breadth is wanted depends on the design — when one article must stand out, the selector has to be more precise.
/* Select all <article> elements... */
article {
  /* ... and apply this background-color on them */
  background-color: hsl(25 100% 50%);
}
ID selectors
An ID lets you single out one instance of an element. Add the attribute to the markup:
<article id="featured">
  <!-- Article 1 -->
</article>

<article>
  <!-- Article 2 -->
</article>

<article>
  <!-- Article 3 -->
</article>
and reference it in CSS with a hashtag (#) ahead of the name:
/* Selects all <article> elements */
article {
  background: #fff;
}

/* Selects any element with id="featured" */
#featured {
  background: hsl(35 100% 90%);
  border-color: hsl(35 100% 50%);
}
IDs come with a warning, though. They are a heavy-handed way to select: their specificity is high enough that overriding them almost always needs another ID, and stacking rules like that pushes the cascade toward !important, which is harder still to unpick. Reordering the earlier CSS shows the effect — placing the element selector after the ID ruleset does not reinstate the white background on all articles, because cascade order does not decide the winner here:
/* Selects any element with id="featured" */
#featured {
  background: hsl(35 100% 90%);
  border-color: hsl(35 100% 50%);
}

/* Selects all <article> elements */
article {
  background: #fff;
}
There is a second constraint: a page may use a given ID only once, so extending those styles to further elements is not possible.
For interaction, although not for styling, IDs remain a reasonable choice: they separate what CSS selects for presentation from what JavaScript selects for behaviour. IDs also establish an anchor that can be linked to directly:
<article id="featured">...</article>which a link can point to:
<a href="featured">Jump to article below ⬇️</a>

<!-- muuuuuuch further down the page. -->

<article id="featured">...</article>
Class selectors
Classes are likely the selector you will meet most often. They are slightly more specific than element selectors but stay modest enough to keep overriding manageable, which is why they are so widespread.
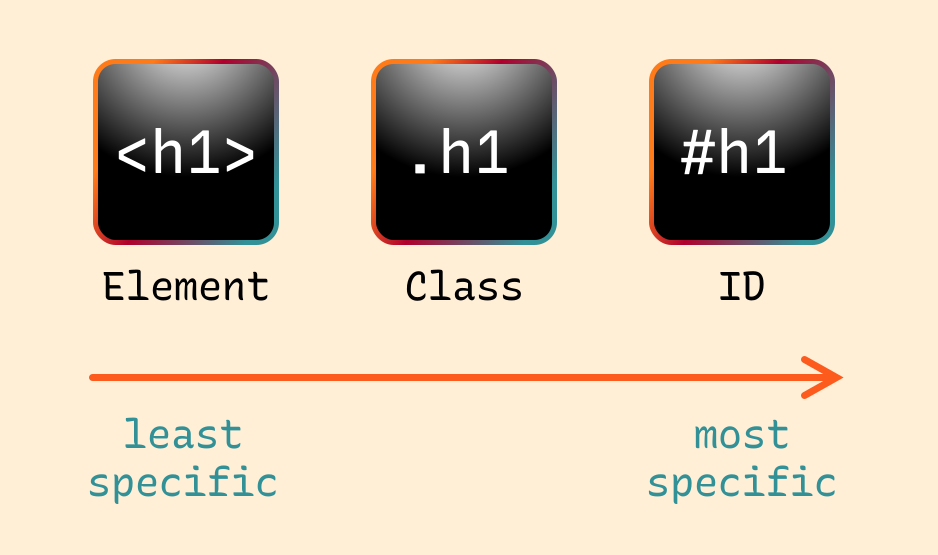
In the CSS, a class is written with a leading period (.) rather than a hashtag:
/* Selects all <article> elements */
article {
  background: #fff;
}

/* Selects any element with class="featured" */
.featured {
  background: hsl(35 100% 90%);
  border-color: hsl(35 100% 50%);
}
Substituting .featured for #featured in the article example produces the same result with better specificity. Selector types can also be combined on the same element:
<article id="someID" class="featured">...</article>So a single <article> can be reached through its element type (article), its ID (#someID) or its class (.featured).
Selecting by attribute and across the document
Attribute selectors
IDs and classes are attribute selectors in the technical sense: both match on information carried in the HTML markup. Many other attributes exist, any of which can be matched. Writing them means using square brackets ([]) instead of a period or hashtag:
a[href="https://css-tricks.com"] {
  color: orangered;
}
The equals sign implies that matching can go beyond an exact value. One option is controlling case sensitivity. Adding s restricts matching to an attribute that contains no uppercase letters:
/* Case sensitive */
a[href*='css-tricks' s] {}
<!-- 👎 No match -->
<a href="https://CSS-Tricks.com">...</a>
<!-- 👍 Match! -->
<a href="https://css-tricks.com">...</a>Where case doesn't matter, say so and either form of the attribute value will match:
/* Case insensitive */
a[href*='css-tricks' i] {}
<!-- 👍 I match! -->
<a href="https://CSS-Tricks.com">...</a>
<!-- 👍 I match too! -->
<a href="https://css-tricks.com">...</a>Data attributes are covered in depth in the Data Attributes guide, including [data-attribute] and how to style with it.
Universal selector
The asterisk (*) selects all elements on a page — every element at once. It does not capture IDs, classes or pseudo-elements: it is, in effect, the element selector that selects everything.
/* Select ALL THE THINGS! 💥 */
* {
  /* Styles */
}
Paired with another selector, it reaches everything inside that element, which stays true if more elements are added later:
/* Select everything in an <article> */
article * {
  /* Styles */
}
Most frequently it appears in the box-sizing reset applied to all elements and pseudo-elements:
*,
*::before,
*::after {
  box-sizing: border-box;
}
The universal selector is sometimes implied: a pseudo selector placed at the start of a new selector selects exactly what the same selector would with an explicit *.
*:has(article) { }
:has(article)  { }
Pseudo-selectors
Pseudo-elements are not in the HTML markup; they are extra hooks on an element for applying styles without adding markup. Every element carries ::before and ::after pseudo-elements, whether or not you write them:
<div class="container">
  <!-- ::before psuedo-element here -->
  <div>Item</div>
  <div>Item</div>
  <div>Item</div>
  <!-- ::after psuedo-element here -->
</div>
The double colon (::) is how they are selected:
.container::before {
  /* Styles */
}
A single colon — :before and :after — is also accepted, though the double colon remains more common because it separates pseudo-elements from pseudo-classes.
When using pseudo-selectors there is a catch: the content property is required, since pseudo-elements are not real elements and need something to display, even if that content is empty:
.container::before {
  content: "";
}
Supplying words in content, of course, renders those words on the page.
Combining and chaining selectors
Selectors can be combined inside a single ruleset, which keeps shared styles in one place and lets us target elements by condition. Three routes are worth separating: listing selectors so they share declarations, nesting rulesets to express relationships, and compounding selectors to raise specificity.
Selector lists
Separating selectors with a comma applies the same block of styles to each of them. Heading rules are the common case, since headings typically share everything except font-size:
h1,
h2,
h3,
h4,
h5,
h6 {
  color: hsl(25 80% 15%);
  font-family: "Poppins", system-ui;
}
A line break between selectors improves legibility, though long lists quickly become hard to read — it is difficult to tell what is actually being selected.
section h1, section h2, section h3, section h4, section h5, section h6,
article h1, article h2, article h3, article h4, article h5, article h6,
aside h1, aside h2, aside h3, aside h4, aside h5, aside h6,
nav h1, nav h2, nav h3, nav h4, nav h5, nav h6 {
  color: #BADA55;
}
The :is() pseudo selector offers a more compact way to express the same intent. Descendant selectors scoped individually to section, article,
:is(section, article, aside, nav) {
  color: #BADA55;
}
Applied to the elements themselves, that sets color on the containers rather than the headings; :is() can wrap the heading selectors as well to select them in one fell swoop:
/* Matches any of the following headings scoped to any of the following elements.  */
:is(section, article, aside, nav) :is(h1, h2, h3, h4, h5, h6) {
  color: #BADA55;
}
:where() does the same job, with one distinction: the specificity of :is() equals that of the most specific item in its list, while :where() carries zero specificity. Where a complex selector should be easy to override, :where() is the choice.
Nesting rulesets
CSS nesting is now widely supported and expresses the relationship between selectors the way indentation expresses structure in HTML.
article h2 { /* Styles */ }The flat descendant selector above becomes, with nesting, a child ruleset embedded in its parent:
article  {
  /* Article styles */

  h2 { /* Heading 2 styles */ }
}
Because the heading sits inside another .article-content element, the nest can go one level deeper, which is equivalent to the flat descendant selector:
article .article-content h2 { /* Heading 2 styles */ }A chained selector can be nested inside another selector without trouble, but the outer element selector cannot simply be re-declared as a nested one. Doing so would also work against the point of a nest that visibly maps the relationships between selectors. Instead, the ampersand (&) stands in for the selector being nested into — the nesting selector:
article  {

  &.article-content {
    /* Equates to: article.article-content */
  }
}
Compound selectors
Chaining, or compounding, selectors raises their specificity, giving them priority when the Cascade evaluates two or more matching styles. Since overriding ID selectors is extremely difficult, element and class selectors serve as the illustration. Chaining the article element selector with the .featured class selector produces a higher score:
article { /* Specificity: 0, 0, 1 */ }
.featured { /* Specificity: 0, 1, 0 */ }

article.featured { /* Specificity: 0, 1, 1 */ }
The resulting compound selector is more specific than either individual selector. Placed before them in the stylesheet, it still wins when the Cascade compares specificity scores.
Chained selectors also accept “fake” classes as a specificity-management strategy, as in this real-world example:
.wp-block-theme-button .button:not(.specificity):not(.extra-specificity) { }The .specificity and .extra-specificity class selectors exist only to raise the score of the .wp-block-theme .button descendant selector; neither is part of the intended match.
.wp-block-theme-button .button {
  /* Specificity: 0, 2, 0 */
}

.wp-block-theme-button .button:not(.specificity) {
  /* Specificity: 0, 3, 0 */
}

.wp-block-theme-button  .button:not(.specificity):not(.extra-specificity {
  /* Specificity: 0, 4, 0 */
}
This is a less heavy-handed tactic than falling back to !important, which is as difficult to override as an ID selector.
Combinators
If selectors define what is selected, combinators define how: they join other selectors to target elements. Two situations drive their use — increasing specificity, and selecting an element based on a condition.
Descendant and child combinators
A descendant combinator selects elements inside other elements:
/* Selects all elements in .parent with .child class */
.parent .child {}
That matches every .child nested anywhere within .parent. Any element with a different class name inside the same parent is left out, since it does not match .child even though it descends from .parent.
A child combinator is an offshoot of the descendant combinator, more specific because it selects only direct children of an element instead of any descendant. Add a .grandchild inside one of the .child elements:
<div class="parent">
  <div class="child"></div>
  <div class="child">
    <div class="grandchild"></div>
  </div>
  <div class="child"></div>
  <div class="child"></div>
</div>
The .parent now holds four .child elements, one of which contains a .grandchild. To select the .child without also picking up the grandchild, any of the following work:
/* Select only the "direct" children of .parent */
.parent > .child {}
.parent > div {}
.parent > * {}
Each version combines different selector types, and the type used in the chain sets the specificity: an ID selector is more specific than a class selector, which is more specific than an element selector.
Sibling combinators
Two elements sharing a parent are siblings. Given an element with class .sister and one with class .brother under the same parent, the tilde (~) in the following selects the sister whenever a brother precedes it:
/* Select .sister only if follows .brother */
.brother ~ .sister { }
Immediate adjacency is not required: any .sister that follows a .brother under the same parent matches. In a larger structure, only the first three .sister elements match — the third because it follows another sister that already follows a brother. A fourth .sister sits inside a .cousin element, which keeps it from matching at all. In the rendering, the repeated selector choice leaves that last sister with its original color while the others change.
The adjacent combinator is stricter still: it selects any element immediately following another. The sister inside .cousin stops being out of reach when selected on its own:
/* Select .sister only if directly follows .brother */
.brother + .sister { }
With that rule applied, only the first two sisters change color, the ones coming directly after a brother. The third follows another sister rather than a brother, and the fourth remains inside the .cousin, so neither matches.
Where to go next
Most of the guidance in this guide comes from CSS-Tricks articles published elsewhere and linked inline. Alongside those, the resources below were the most useful in assembling it.
Learning and lookup
- Selectors (CSS-Tricks Almanac)
- Learn CSS: Selectors (Mozilla Developer Network)
- Guide to Advanced Selectors (ModernCSS.dev)
- Selectors (web.dev)
Practice and plain-English translation
- Selectors Explained: Translate Selectors into English (Kitty Giraudel)
- CSS Diner (Interactive game)
References
Two specifications sit behind the selector syntax itself.
- CSS Selectors Level 4 (W3C)
- 3.2.6 Global Attributes (HTML Living Standard)