
Why Headless CMS Is the New Baseline for Content-Driven Apps
Traditional content management systems bundle the editing interface, templates, and custom code into one environment. That convenience has a cost: the tightly coupled frontend and backend make changes slow, and the content is effectively trapped inside one website. A headless CMS flips that model, splitting content storage from presentation so the same content can be delivered anywhere through an API.
With a headless CMS, you manage content in one place and fetch it over REST or GraphQL into whatever frontend you choose — a React app, a native mobile client, a static site. Because the frontend is decoupled, you can rebuild or redesign it without touching the backend infrastructure. For teams shipping to multiple channels, that separation solves the core problem of keeping web, iOS, Android, and other experiences in sync from a single content source.
The trade-off is that a headless CMS alone cannot render a website. There are no themes, templates, or site-building features; you must build the presentation layer yourself and plug the content in through the API.
Choosing Between Traditional and Headless
Neither approach is universally better; the right choice depends on your team and requirements.
What Traditional CMS Still Does Well
- Drag-and-drop editing and built-in design tools suit non-programmers.
- Everything (content management, design, hosting) lives in one place, making initial setup straightforward.
Where Traditional CMS Falls Short
- The coupled frontend and backend mean more time and money spent on maintenance and customization.
- Plugin and theme ecosystems (WordPress especially) can introduce security vulnerabilities, bugs, and performance slowdowns.
The Headless Advantages
- Frontend freedom: pick the best tool for the job (React, Vue, static site generator, etc.) with no backend lock-in.
- Cross-platform reach: the same API serves web apps, mobile apps, and emerging platforms such as AR/VR.
Headless Drawbacks
- You own more infrastructure: setting up the presentation layer and managing backend systems is your responsibility.
- Total costs can be higher because building a user-friendly frontend with analytics and personalization requires more engineering effort than a traditional CMS out of the box.
Where Headless Shines
- Static site generators (Gridsome, Gatsby, Hugo): These can’t query a database, so content lives in a headless CMS and is fetched at build time and deployed as static files.
- Mobile apps: A single backend feeds both web and iOS/Android apps, keeping content consistent across devices.
- Web applications: E-commerce stores and similar apps consume content and product data via an API while content teams edit from a central CMS.
A Look at the Headless CMS Landscape
Several headless CMS platforms compete in this space, with different strengths:
- Contentful — an API-driven CMS with full control over the content model.
- GraphCMS — built from the ground up as a GraphQL-first content infrastructure; enables creators to define the structure, permissions, and relations of the API.
- ButterCMS — runs with any tech stack, includes SEO support, and integrates with any language or framework.
- Directus (free, open source) — wraps custom SQL databases with a dynamic API and an admin app.
- Sanity — manages text, images, and other media through APIs and offers the customizable open-source Sanity Studio editing environment.
- Agility — a content-first, JAMStack-focused CMS with built-in page management, extendable with ecommerce, ticketing, and search features.
- Netlify CMS (free, open source) — a git-based CMS with customizable content models and third-party authentication.
All the offerings above have free and paid tiers except Directus and Netlify CMS, which are free. This walkthrough uses GraphCMS because its GraphQL API approach removes the need for multiple SDKs and provides straightforward multi-channel content delivery.
Why GraphQL Fits a Headless Architecture
GraphQL is an API query language and runtime open-sourced by Facebook in 2015, and adopted since by Pinterest, GitHub, Twitter, and Coursera. Unlike REST, which typically forces several requests to different endpoints, GraphQL abstracts all requests to one endpoint and returns exactly what is requested. That declarative data fetching prevents both over- and under-fetching, cuts redundant network calls, and keeps the number of requests low as traffic scales.
A concrete example: on a newsfeed with posts, authors, and comments, a REST-based CMS would need three separate endpoint calls; GraphQL retrieves it all in a single query. Given thousands or millions of users, this difference has a measurable impact on speed and bandwidth.
GraphCMS’s free tier allows 1 million API operations per month and 500 GB of asset traffic. The platform includes a GraphiQL admin interface for full access to your data; you can migrate existing content by running create-many mutations against a new backend.
Scaffolding the Data Layer With GraphCMS
To demonstrate the headless CMS workflow, we’ll build a simple shopping cart with React and GraphCMS. The free tier of GraphCMS is sufficient for this project.
After creating an account, you’ll land on the dashboard. Create a new project from scratch and fill in the project details.
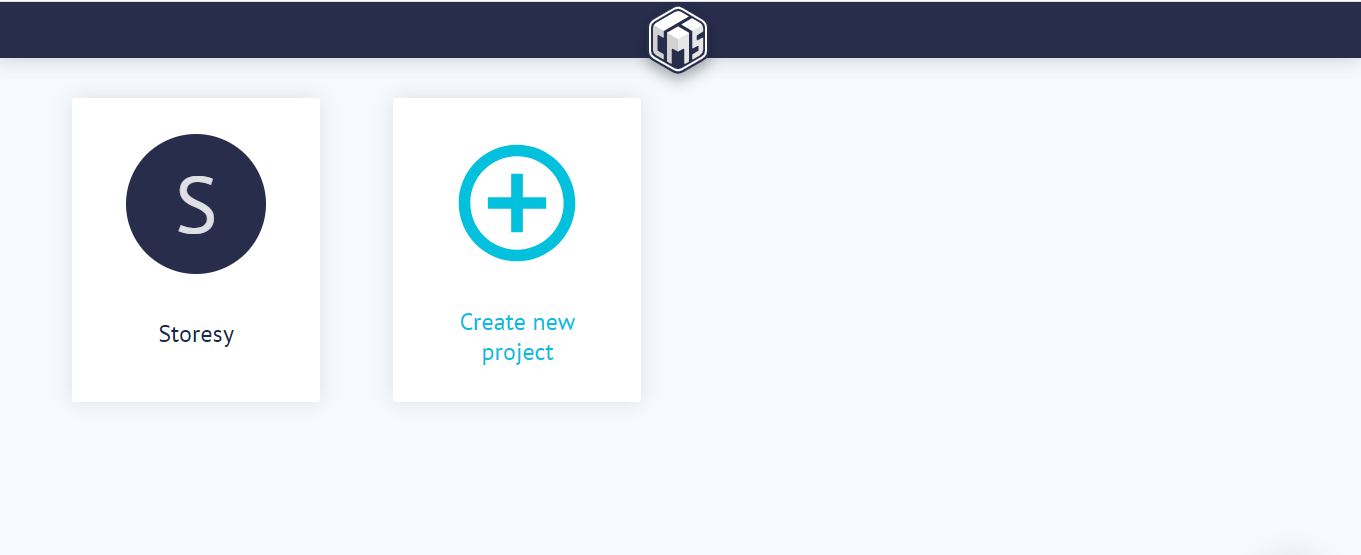
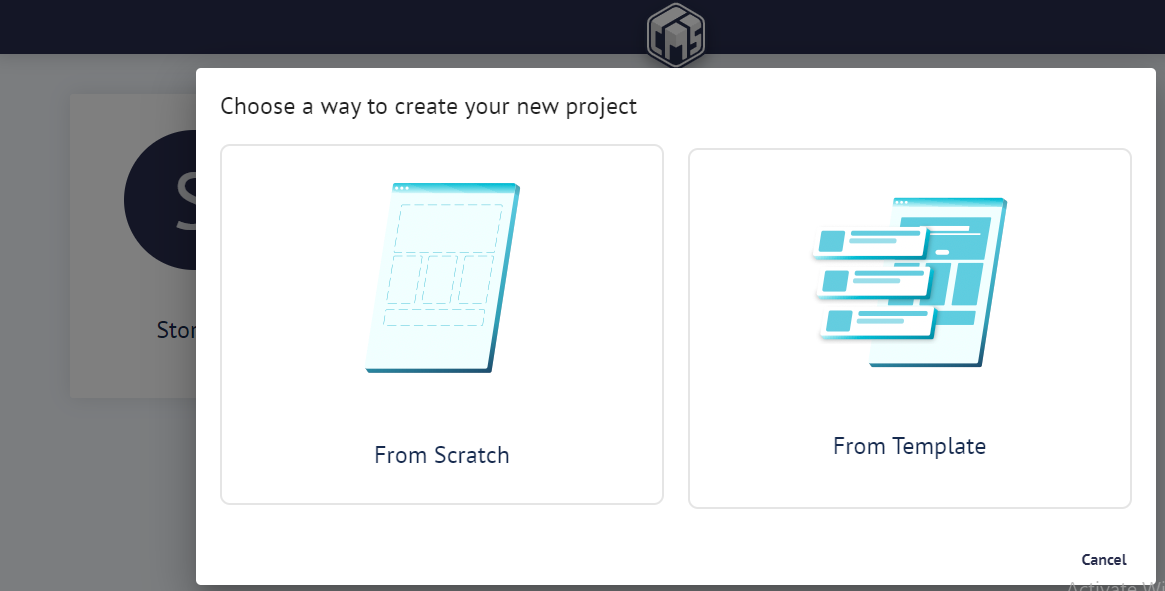
Within the project dashboard, use the schema editor to define your content model. GraphCMS offers a drag-and-drop UI for building schemas.
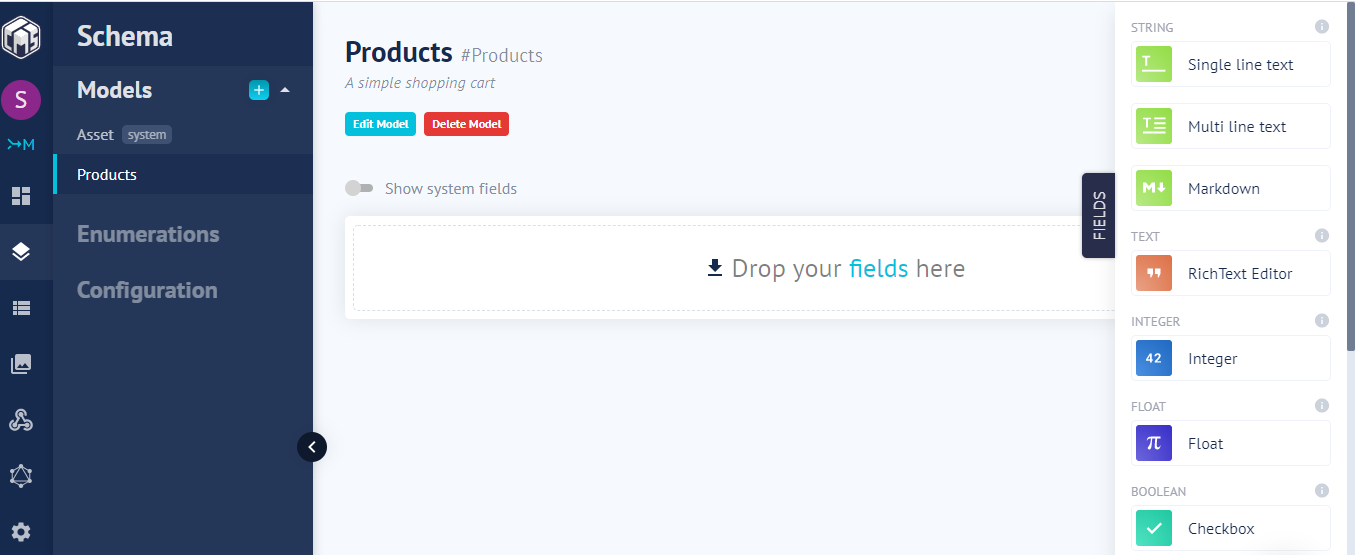
Our Product model will need these system fields:
name: a required string (single-line text) representing the product name.price: a required integer holding the product price.description: a required multi-line text field for the product description.image: a required asset picker (file) field for the product image.
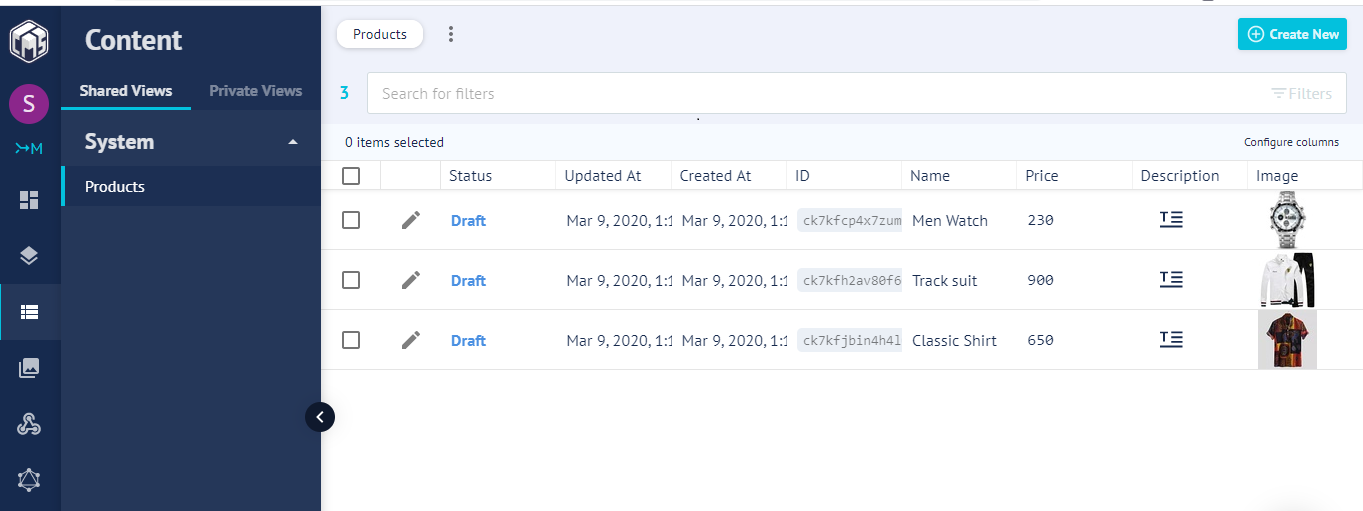
Use the “Advance” tab on each field to mark it as required. After creating the schema, populate it with content by navigating to the Content section and creating new entries.
Exposing the API
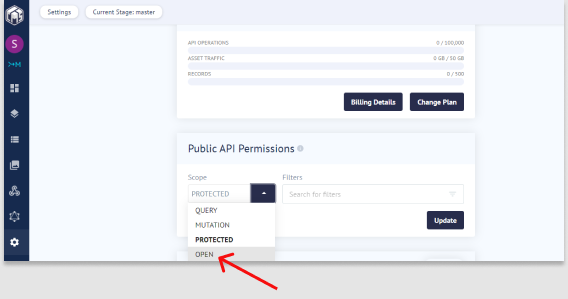
Copy the API endpoint URL from the Dashboard section. This is the single point of communication between React and GraphCMS. Then, go to Settings and under Public API Permission, select OPEN and update the settings so your endpoint is accessible.
Bootstrapping the React Frontend
Use Create React App to set up the project. From your terminal, run:
npx create-react-app smashing-stores && cd smashing-storesOnce installed, start the dev server with npm start.
We’ll structure the UI with Bootstrap for quick styling. Add the Bootstrap CDN link to the head of index.html in the public folder. Then, create a /components folder with these files:
- Navbar.js
- Allproducts.js
- Product.js
- Footer.js
- Cart.js
Navbar and Footer
The Navbar is a functional component that uses Bootstrap’s navbar navbar-light bg-light classes. It contains a link to the homepage and a styled button that will later trigger the cart modal.
import React from 'react';

const Navbar = () => {
  return (
    <nav className="navbar navbar-light bg-light">
      <a href="/" className="navbar-brand">Smashing Stores</a>
        <button className="btn btn-outline-success my-2 my-sm-0" type="submit">Cart</button>
    </nav>
  );
};
export default Navbar;
The Footer displays a contact email and a copyright notice for “Smashing Stores”. Basic styles for the footer go in App.css.
import React from 'react';
import '../App.css';
const Footer = () => {
  return (
      <footer className="page-footer font-small bg-blue pt-4">
        <div className="container text-center text-md-left">
          <div className="row">
            <div className="col-md-6 mt-md-0 mt-3">
              <h5 className="text-uppercase font-weight-bold">Contact Us</h5>
              <p>You can contact us on [email protected]</p>
            </div>
            <div className="col-md-6 mb-md-0 mb-3">
              <h5 className="text-uppercase font-weight-bold">Smashing Stores</h5>
              <p>Built with 💕 by <a href="https://twitter.com/beveloper">beveloper</a></p>
            </div>
          </div>
        </div>
        <div className="footer-copyright text-center py-3">© 2020 Copyright
          <span> Smashing Stores</span>
        </div>
      </footer>
  );
};
export default Footer;
Connecting With GraphQL
To talk to GraphCMS, install the Apollo client packages:
npm install apollo-boost graphql graphql-tag react-apolloIn index.js, wrap App with ApolloProvider, passing an ApolloClient instance configured with the GraphCMS endpoint as the URI.
import React from 'react';
import ReactDOM from 'react-dom';
import './index.css';
import App from './App';
import { ApolloProvider } from "react-apollo";
import ApolloClient from "apollo-boost";
import * as serviceWorker from './serviceWorker';

const client = new ApolloClient({
  uri: "<YOUR_GRAPHCMS_ENDPOINT>"
});

ReactDOM.render(
  <ApolloProvider client={client}>
    <App />
  </ApolloProvider>,
  document.getElementById('root')
);

serviceWorker.unregister();
Fetching and Displaying Products
Now that the Apollo provider is mounted, we can query the schema. Create an /all-product folder inside /components with an index.js file.
import gql from "graphql-tag";
const PRODUCTS_QUERY = gql`
  query {
    productses {
      id
      name
      price
      description
      createdAt
      image {
        id
        url
      }
    }
  }
`;
export default PRODUCTS_QUERY;
The query targets the pluralized model name productses. Store the GraphQL string in a variable with gql, which parses the query. GraphCMS exposes a GraphiQL playground for testing queries before wiring them into the component.
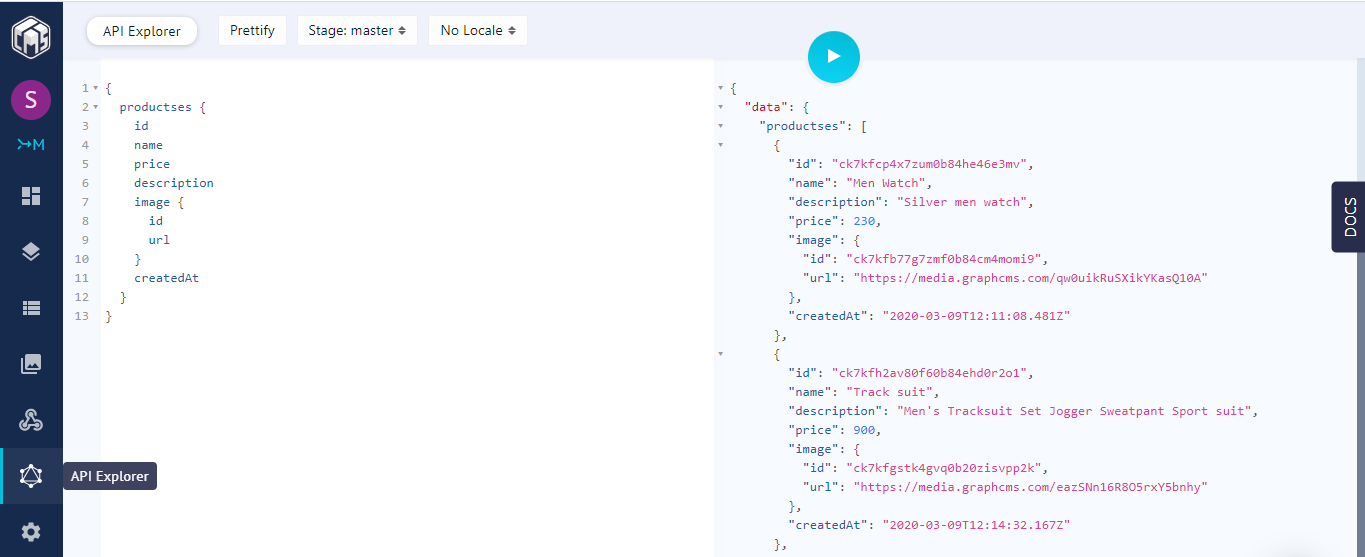
In Allproducts.js, use the <Query/> component with the query as a prop. Apollo injects loading, error, and data props into the render function.
import React, { Component } from 'react';
import { Query } from 'react-apollo';
import PRODUCTS_QUERY from './all-products/index';
import Product from './Product';
import Cart from './Cart';
import Navbar from './Navbar';
class Allproducts extends Component {
  constructor(props) {
    super(props);
    this.state = {
      cartitems: []
    };
  }
    addItem = (item) => {
      this.setState({
          cartitems : this.state.cartitems.concat([item])
      });
    }
  render() {
    return (
      <Query query={PRODUCTS_QUERY}>
       {({ loading, error, data }) => {

          if (loading) return <div>Fetching products.....</div>
          if (error)   return <div>Error fetching products</div>

          const items = data.productses;
          return (
            <div>
              <Navbar/>
              <div className="container mt-4">
                <div className="row">
                   {items.map(item => <Product key={item.id} product={item} addItem={this.addItem} />)}
                </div>
              </div>
            </div>
          )
        }}
      </Query>
    );
  }

};
export default AllProducts;
When loading is finished and data arrives, loop over the productses array, passing each item to the Product component.
Product Card Component
Product.js receives its details via props. An addItem function is called from the click event to add the current product to the cart.
import React from 'react';
const Product = (props) => {
  return (
      <div className="col-sm-4">
          <div className="card" style={{width: "18rem"}}>
            <img src={props.product.image.url} className="card-img-top" alt="shirt"/>
            <div className="card-body">
              <h5 className="card-title">{props.product.name}</h5>
              <p className="card-title">$ {props.product.price}</p>
              <p className="card-title">{props.product.description}</p>
              <button className="btn btn-primary" onClick={() => props.addItem(props.product)}>Buy now</button>
            </div>
          </div>
      </div>
  );
}
export default Product;
Assembling the App
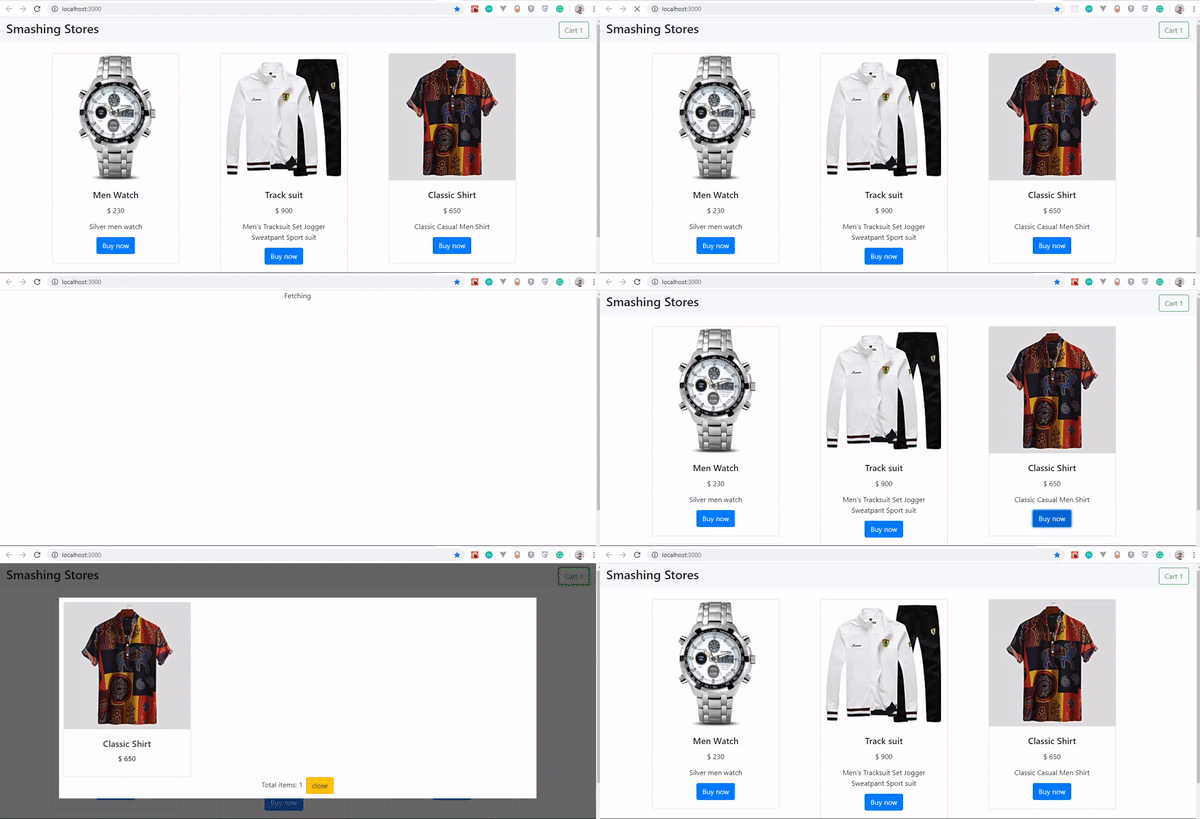
Open App.js and import the Navbar, Footer, and Products (the Allproducts component) so they render on the page. Running npm start will show the product listing locally.
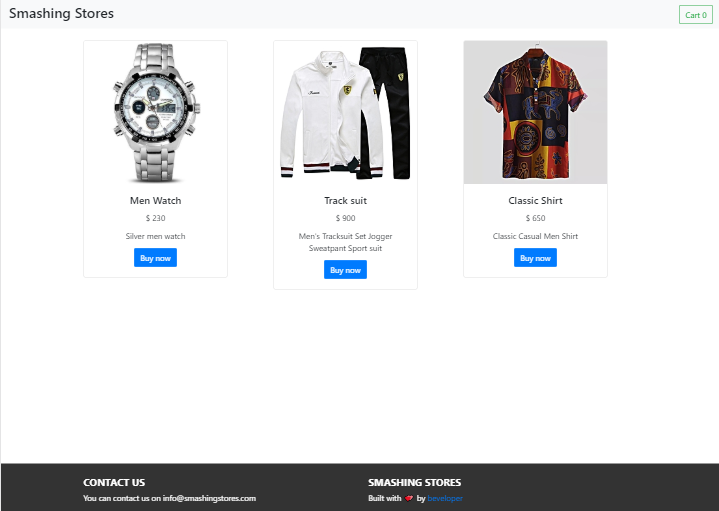
Cart Logic and State
The cart requires a bit of state management. Update Allproducts.js to control modal visibility with showModal and hideModal methods, and to track the itemssent state for cart items.
showModalsets ashowstate totrue.hideModalsets it back tofalse.- Pass the cart items and modal state down to the
Navbar.
Revise Navbar.js to accept cart and show props. The cart button gets an onClick handler to open the modal, and uses the .length method to show the item count.
import React from 'react';

const Navbar = (props) => {
  return (
    <nav className="navbar navbar-light bg-light">
      <h3>Smashing Stores</h3>
        <button className="btn btn-outline-success my-2 my-sm-0" onClick={() => props.show()}>Cart {(props.cart.length)}</button>
    </nav>
  );
};
export default Navbar;
Build out the Cart.js component. Inside, a ternary operator toggles the modal’s visibility. Mapping over the items prop displays each cart item, and the total count is derived with JavaScript’s .length method. A handleClose prop closes the modal.
import React from 'react';

const Cart = ({ handleClose, show, items }) => {
  return (
    <div className={show ? "modal display-block" : "modal display-none"}>
      <section className="main-modal">
        {items.map(item =>
           <div className="card" style={{width: "18rem"}}>
              <img src={item.image.url} className="card-img-top" alt="shirt"/>
              <div className="card-body">
                <h5 className="card-title">{item.name}</h5>
                <h6 className="card-title">$ {item.price}</h6>
              </div>
            </div>
        )}
         Total items: {items.length}
        <button className="btn btn-warning ml-2" onClick={handleClose}>close</button>
      </section>
    </div>
  );
};
export default Cart;
Add the supporting modal and cart styles to app.css. Once complete, you can open the cart, add items from the product grid, and view them in the modal.