

Quasar: One Codebase, Every Platform
Quasar Framework is an open-source, Vue.js-based cross-platform framework. Its core promise: write your application once and deploy it as a website, a mobile app, or a desktop Electron app. Under the hood, Quasar leverages Cordova and Electron to target mobile and desktop platforms while providing a comprehensive UI kit that follows Material Design guidelines.
This guide walks through building a notes application with Quasar and Firebase. You'll see how Quasar handles the heavy lifting of configuration and boilerplate, allowing you to concentrate on features. The final output is a fully functional app that reads from and writes to a Firebase database.
To follow along, you'll need a working knowledge of HTML, CSS, JavaScript, and some basic familiarity with Vue.js. Your machine should have Node.js version 10 or above and npm version 5 or above installed, along with comfort using the command line.
Why Choose Quasar?
Quasar's main advantage lies in its comprehensive nature. It replaces the need to cobble together multiple UI libraries, providing a full-featured toolset for building responsive front-end applications. Its build system supports a wide array of targets, including:
- Single-page applications (SPAs)
- Progressive web applications (PWAs)
- Server-side rendering (SSR)
- Mobile apps for iOS and Android via Cordova or Capacitor
- Desktop apps for multiple platforms via Electron
- Browser extensions
Setting Up Your Development Environment
Quasar offers several installation paths. You can embed it into an existing project via a CDN, use the Vue.js CLI plugin, or work with the dedicated Quasar CLI. This tutorial uses the dedicated Quasar CLI, starting with a global installation:
quasar -v #check if quasar has been installed previously

yarn global add @quasar/cli
# or
npm install -g @quasar/cli
With the CLI installed, you can create a new project:
quasar create <folder_name>The setup process will prompt you with configuration questions. For this notes app, the following choices are appropriate:
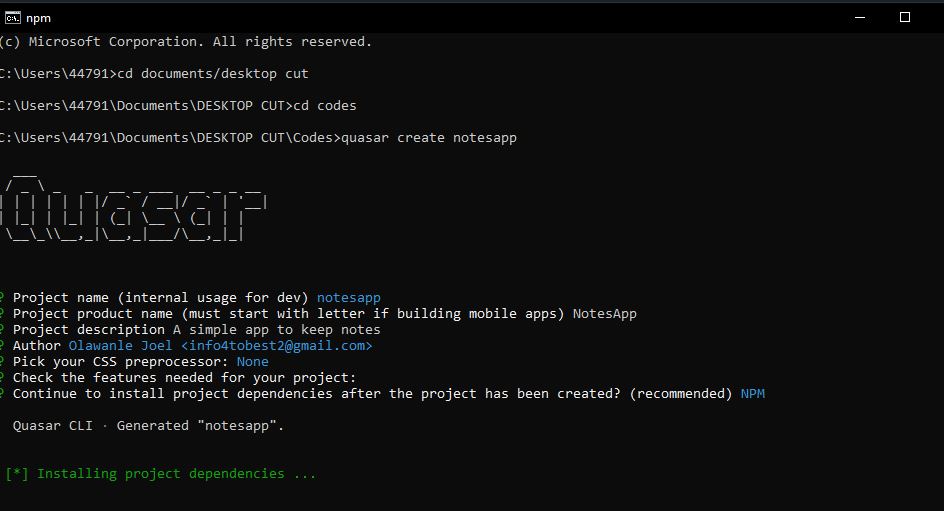
Once the project structure is in place, navigate into the project directory and start the development server:
cd <folder_name>
quasar dev
Your application should now be running at http://localhost:8080.
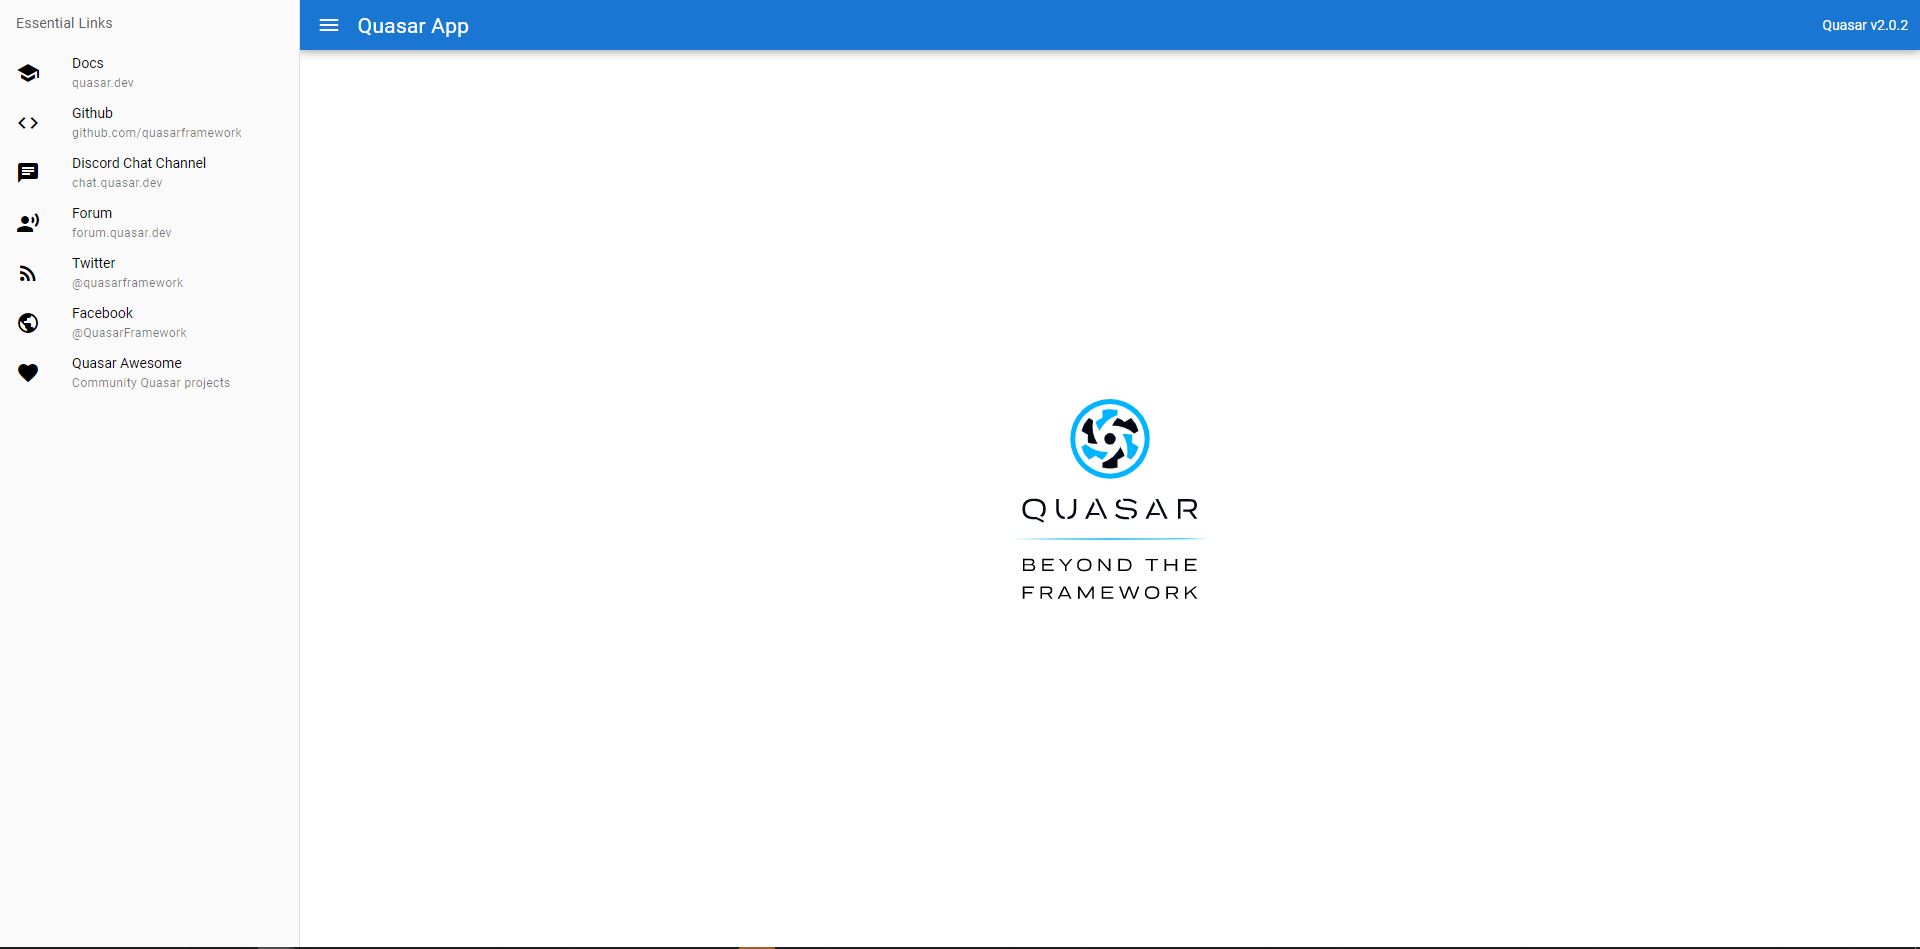
Understanding Quasar's Project Structure
The default Quasar application is structured to be a solid starting point for any project. The primary directories you'll interact with are as follows:
.
├── public/                  # pure static assets (directly copied)
├── src/
│   ├── assets/              # dynamic assets (processed by Webpack)
│   ├── components/          # .vue components used in pages and layouts
│   ├── css/                 # CSS/Stylus/Sass/… files for your app
│   ├── layouts/             # layout .vue files
│   ├── pages/               # page .vue files
│   ├── boot/                # boot files (app initialization code)
│   ├── router/              # Vue Router
│   ├── store/               # Vuex Store
│   ├── App.vue              # root Vue component of your app
│   └── index.template.html  # template for index.html
├── .editorconfig            # editor config
├── .gitignore               # GIT ignore paths
├── .postcssrc.js            # PostCSS config
├── babel.config.js          # Babel config
├── package.json             # npm scripts and dependencies
├── quasar.conf.js           # Quasar app config file
└── README.md                # readme for your app
quasar.conf.js
This file is the central configuration hub for the application. Quasar handles complex configurations for the tools you use, so you can manage settings for components, icon packs, CSS animations, and more from one place.src/assets
Store uncompiled assets like Sass files, images, or fonts here.src/components
As in standard Vue.js, this directory holds your reusable components, which can be imported into pages, layouts, and other components.src/css
A Quasar-specific directory for your global CSS, written in Sass. It containsapp.sassfor general styles andquasar.variables.sassfor reusable styling variables.src/layouts
This folder helps define consistent layouts (such as sidebars or footers) for your app without repeating code. You can have separate layouts for mobile and desktop.src/pages
Your application's views and routes live here. Pages are managed by Vue Router and need to be referenced in the router configuration file.src/router
Containsindex.js, which initializes the Vue Router, androutes.js, where you map your routes to your pages and layouts.
Creating the App Layout
When building in Quasar, your first task is to define the layout. Quasar simplifies this with an interactive Layout Builder tool, accessible from the "Layout and Grid" section of its documentation.
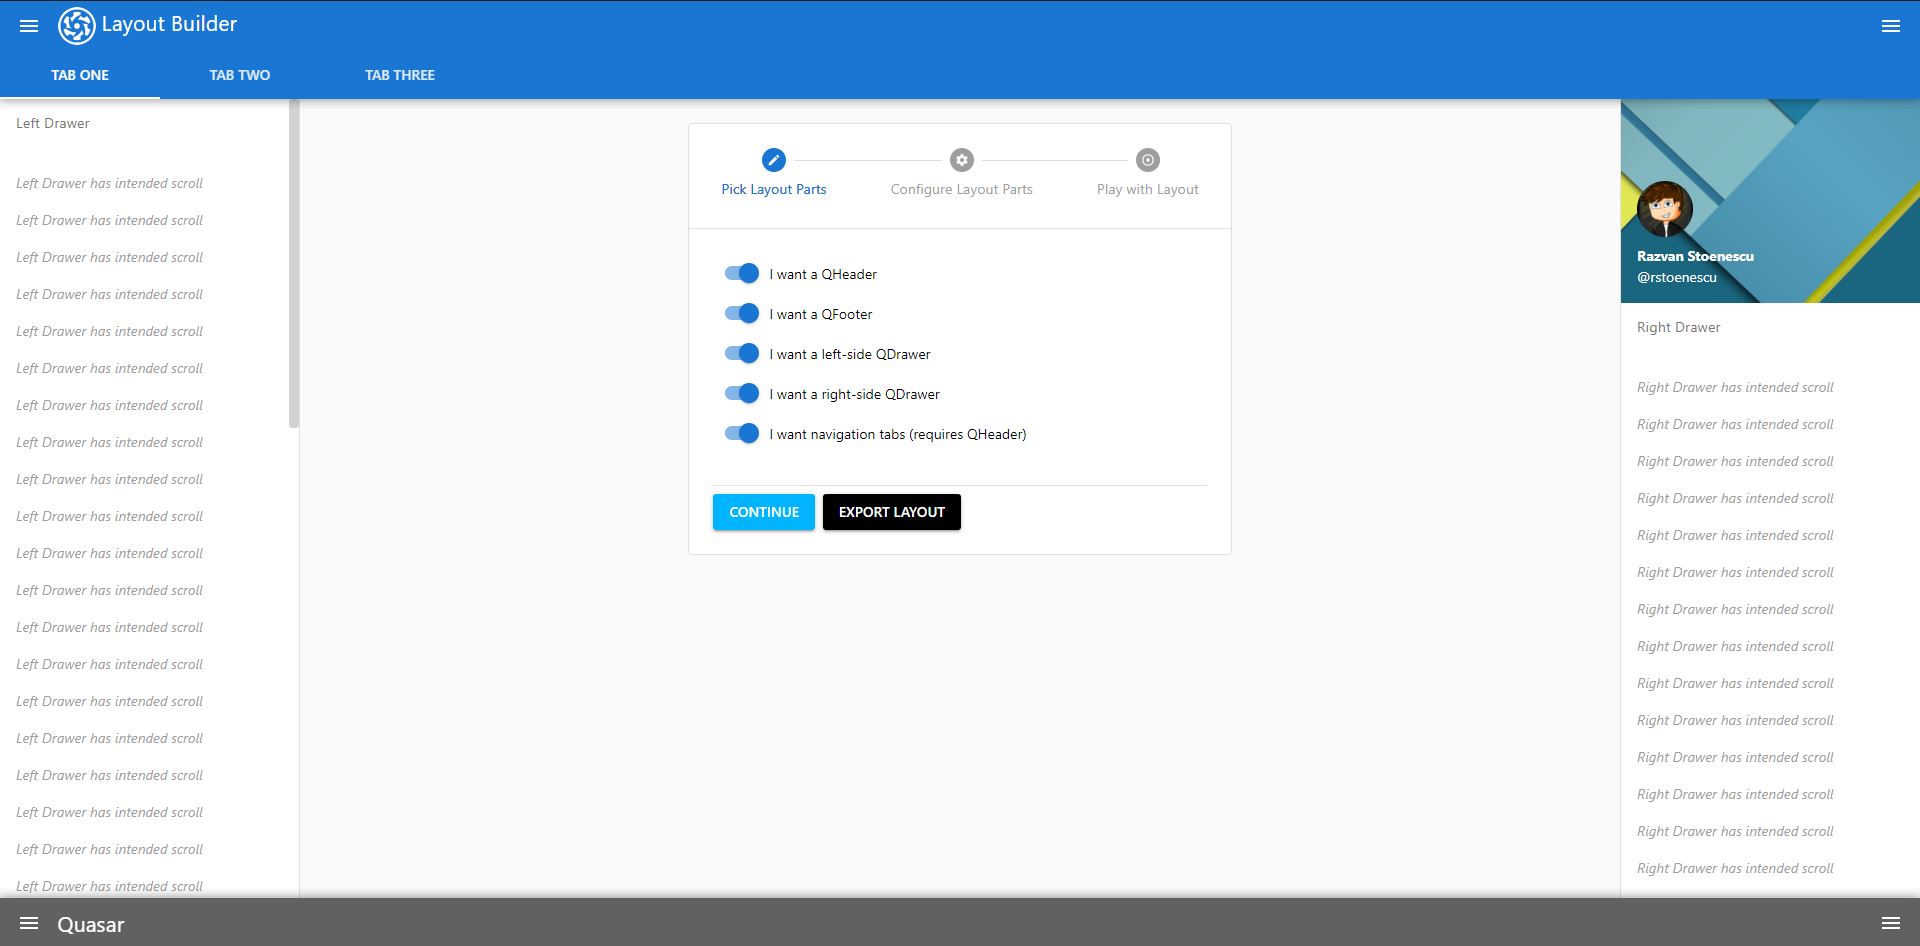
This tool lets you pick and configure the layout parts—such as header, drawer, and footer—and then generate the corresponding code for your Vue file.
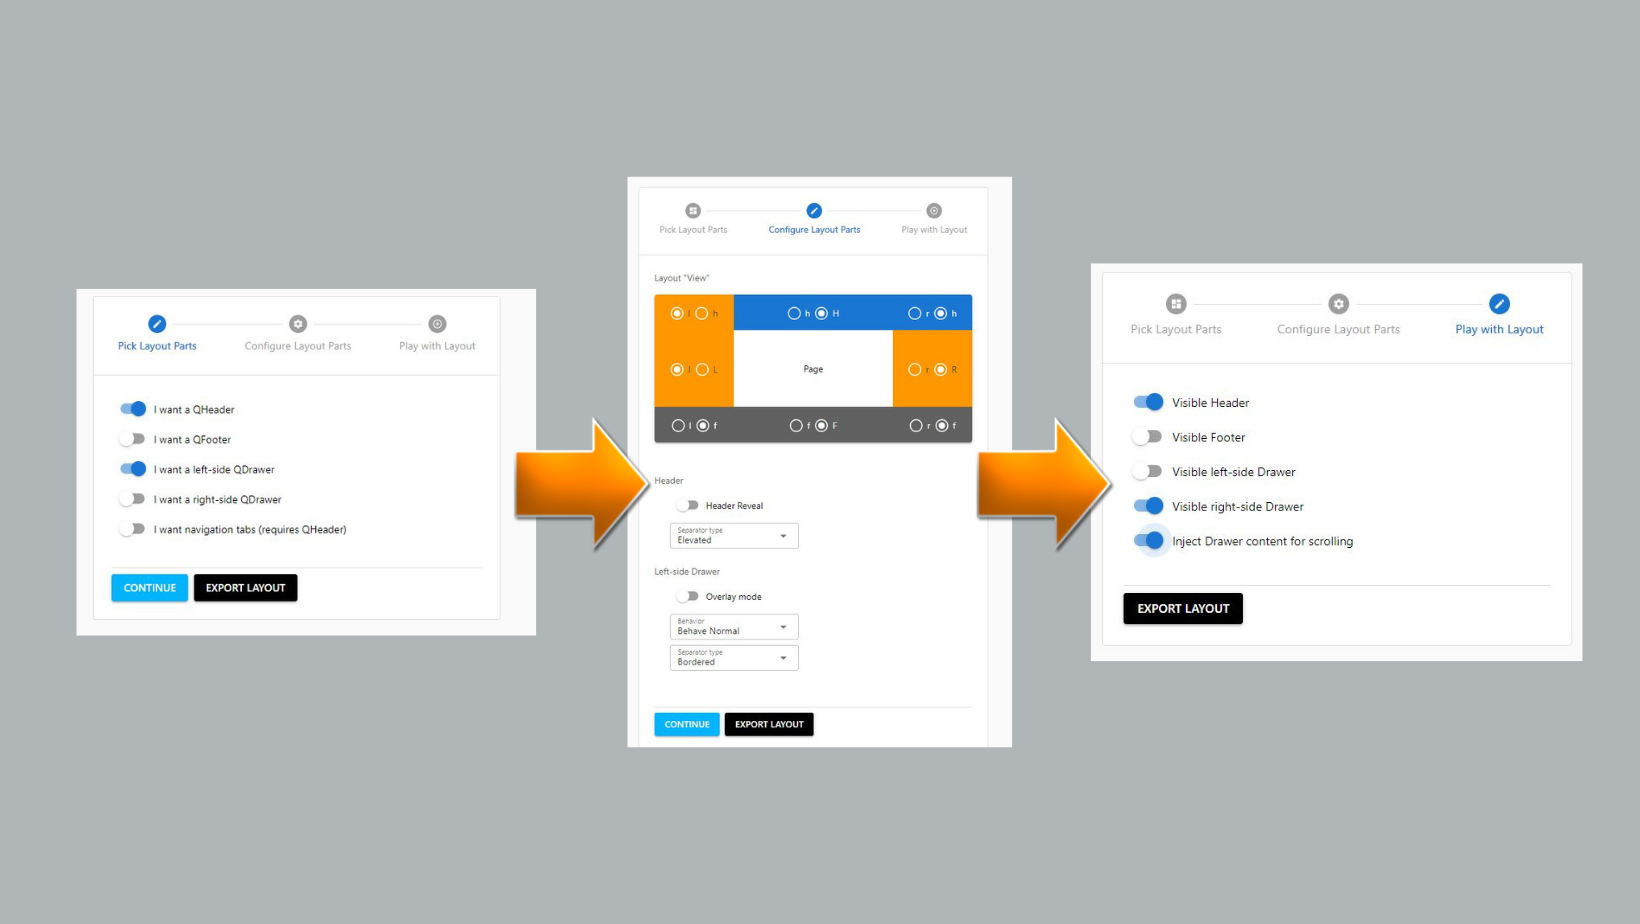
For this project, the layout includes a header (navbar), a drawer (sidebar), and a page container holding the router view. The generated layout code is used to replace the contents of src/layouts/MainLayout.vue.
<template>
  <q-layout view="lHh lpR fFf">
    <q-header elevated class="bg-primary text-white">
      <q-toolbar>
        <q-btn dense flat round icon="menu" @click="left = !left" />
        <q-toolbar-title>
          <q-avatar>
            <img src="https://cdn.quasar.dev/logo-v2/svg/logo-mono-white.svg" />
          </q-avatar>
          Title
        </q-toolbar-title>
      </q-toolbar>
    </q-header>
    <q-drawer show-if-above v-model="left" side="left" bordered>
      <!-- drawer content -->
    </q-drawer>
    <q-page-container>
      <router-view />
    </q-page-container>
  </q-layout>
</template>

<script>
export default {
  data() {
    return {
      left: false
    };
  }
};
</script>
After generating the base layout, you can customize it. You can change the title in the header and have a list of items in your sidebar, leveraging Quasar's comprehensive UI components. The layout then provides a consistent shell for your application's pages.
<template>
  <q-layout view="lHh lpR fFf">
    <q-header elevated class="bg-primary text-white">
      <q-toolbar>
        <q-btn dense flat round icon="menu" @click="left = !left" />
        <q-toolbar-title class="text-h6">
          My Notes
        </q-toolbar-title>
      </q-toolbar>
    </q-header>
    <q-drawer show-if-above v-model="left" side="left" bordered>
      <q-list class="q-pt-xl">
        <q-item clickable v-ripple to="/">
          <q-item-section avatar>
            <q-icon name="home" size="md" />
          </q-item-section>
          <q-item-section class="text-weight-bold">Home</q-item-section>
        </q-item>
        <q-item clickable v-ripple to="/about">
          <q-item-section avatar>
            <q-icon name="info" size="md" />
          </q-item-section>
          <q-item-section class="text-weight-bold">About</q-item-section>
        </q-item>
      </q-list>
    </q-drawer>
    <q-page-container>
      <router-view />
    </q-page-container>
    <q-footer class="bg-grey-2 text-black ">
      <q-toolbar>
        <q-toolbar-title class="text-subtitle2">
          Designed and Built For this article.
        </q-toolbar-title>
      </q-toolbar>
    </q-footer>
  </q-layout>
</template>
<script>
export default {
  data() {
    return {
      left: false
    };
  }
};
</script>
Building the Notes Interface
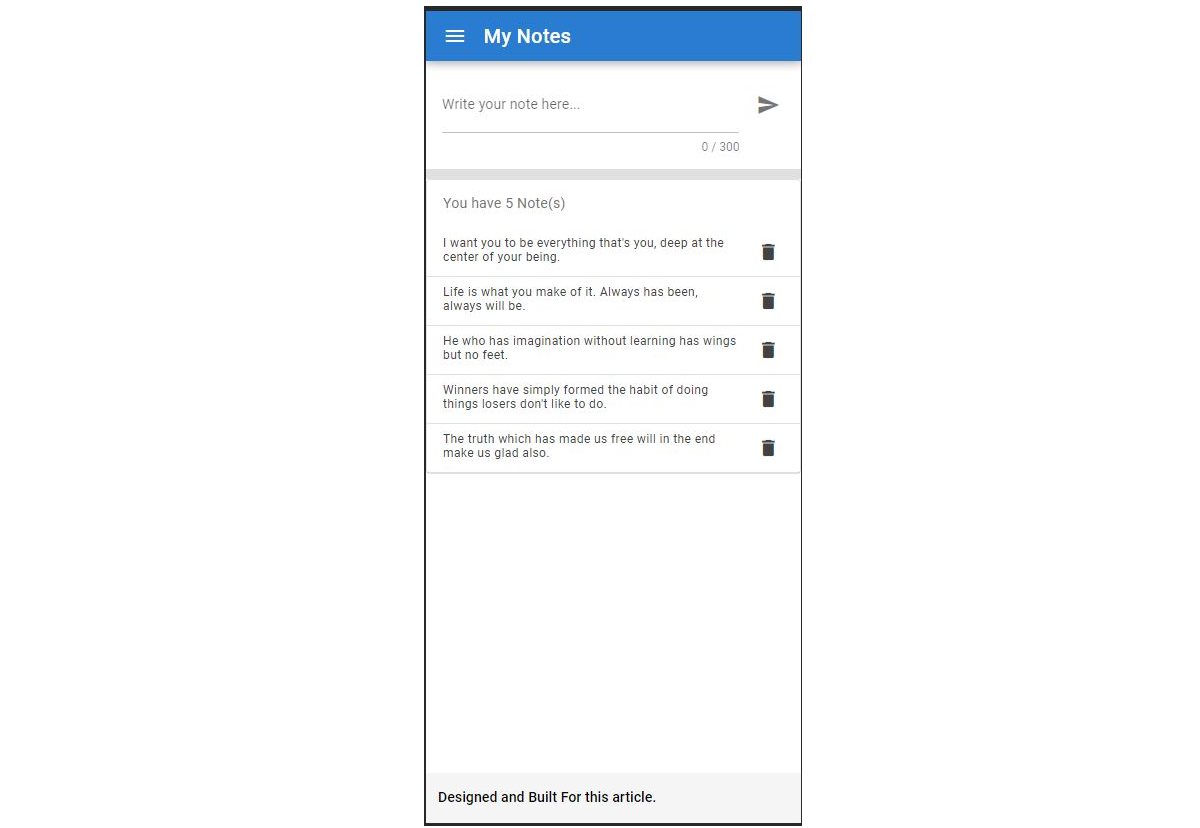
Our app is a single page found at index.vue. The core interface consists of a Quasar input field for creating new notes, a submit button, and a list to display existing notes. Each list item has a delete icon.
<template>
  <q-page class="">
    <div class="q-pa-md">
      <q-input
        bottom-slots
        v-model="newNoteContent"
        placeholder="Write your note here..."
        counter
        autogrow
        maxlength="300"
      >
        <template v-slot:after>
          <q-btn round dense flat icon="send" />
        </template>
      </q-input>
    </div>
    <q-separator size="10px" />
    <q-list bordered class="rounded-borders" style="max-width: 600px">
      <q-item-label header>You have 3 Note(s)</q-item-label>
      <div>
        <q-item>
          <q-item-section top>
            <q-item-label caption class="text-grey-9">
              He who has imagination without learning has wings but no feet.
            </q-item-label>
          </q-item-section>
          <q-item-section top side>
            <div class="text-grey-9 q-gutter-xs">
              <q-btn size="13px" flat dense round icon="delete" />
            </div>
          </q-item-section>
        </q-item>
        <q-separator size="1px" />
      </div>
      <div>
        <q-item>
          <q-item-section top>
            <q-item-label caption class="text-grey-9">
              He who has imagination without learning has wings but no feet.
            </q-item-label>
          </q-item-section>
          <q-item-section top side>
            <div class="text-grey-9 q-gutter-xs">
              <q-btn size="13px" flat dense round icon="delete" />
            </div>
          </q-item-section>
        </q-item>
        <q-separator size="1px" />
      </div>
      <div>
        <q-item>
          <q-item-section top>
            <q-item-label caption class="text-grey-9">
              He who has imagination without learning has wings but no feet.
            </q-item-label>
          </q-item-section>
          <q-item-section top side>
            <div class="text-grey-9 q-gutter-xs">
              <q-btn size="13px" flat dense round icon="delete" />
            </div>
          </q-item-section>
        </q-item>
        <q-separator size="1px" />
      </div>
    </q-list>
  </q-page>
</template>
<script>
import db from "src/boot/firebase";
export default {
  name: "PageIndex",
  data() {
    return {
      basic: false,
      fixed: false,
      newNoteContent: ""
    };
  }
};
</script>
Handling Notes with Local Data
Before integrating Firebase, we'll first manage the notes directly in the component. The data is held in a simple array within the Vue component's data() function.
notes: [
  {
    id: 1,
    noteContent: "Lorem ipsum dolor sit amet consectetur adipisicing elit. Ea vereprehenderit aspernatur mollitia saepe cupiditate pariatur natus accusantium esse repudiandae nisi velit provident corporis commodi eius fugiat reiciendis non aliquam."
  },
  {
    id: 2,
    noteContent: "Lorem ipsum dolor sit amet consectetur adipisicing elit. Ea vereprehenderit aspernatur mollitia saepe cupiditate pariatur natus accusantium esse repudiandae nisi velit provident corporis commodi eius fugiat reiciendis non aliquam."
  },
  {
    id: 3,
    noteContent: "Lorem ipsum dolor sit amet consectetur adipisicing elit. Ea vereprehenderit aspernatur mollitia saepe cupiditate pariatur natus accusantium esse repudiandae nisi velit provident corporis commodi eius fugiat reiciendis non aliquam."
  }
]
Fetching and Displaying Notes: With a local array in place, you can map each note to a list item using Vue's v-for directive, placing it onto the page. A click event handler is also attached to each item's delete button.
<div v-for="noteContent in notes" :key="noteContent.id">
  <q-item>
    <q-item-section top>
      <q-item-label caption class="text-grey-9">
        {{ noteContent.note }}
      </q-item-label>
    </q-item-section>
    <q-item-section top side>
      <div class="text-grey-9 q-gutter-xs">
        <q-btn
          size="13px"
          flat
          dense
          round
          icon="delete"
          @click="deleteNote(noteContent)"
        />
      </div>
    </q-item-section>
  </q-item>
  <q-separator size="1px" />
</div>
Adding New Notes: A click event listener is added to the submit button to trigger a method. This method gathers the input value, creates a new note object with an ID and text content, and adds it to the beginning of the notes array using the JavaScript unShift() method.
methods: {
  addNote() {
    let newNote = {
      id: this.notes.length + 1,
     note: this.newNoteContent
    };
    this.notes.unshift(newNote);
    this.newNoteContent = "";
  }
}
Deleting Notes: Similarly, the delete icon has an event listener that calls a method, passing the ID of the note to be removed.
deleteNote(noteContent) {
  let noteId = noteContent.id;

  //doing this to get the real id of the notes
  let index = this.notes.findIndex(noteContent => noteContent.id === noteId);
  this.notes.splice(index, 1);
}
This method uses the ID to find the exact note object. It then safely removes only that item from the array using the JavaScript splice method. With these core functions verified, the application is now ready to be connected to a persistent backend.
Wiring Quasar to Firebase
With the core note-taking UI in place, the next step is persisting data. Firebase provides real-time synchronization across devices, which fits naturally with Quasar's reactive components. For a production-scale app you'd want to review Firebase's pricing tiers, but for this demo the free tier is more than sufficient.
Creating the Firestore Database
Start by signing in at firebase.google.com and navigating to the console. Create a new project (we'll call it notesApp) and disable Google Analytics for this small-scale application. After the project is provisioned, open Firestore from the sidebar and create a new database.
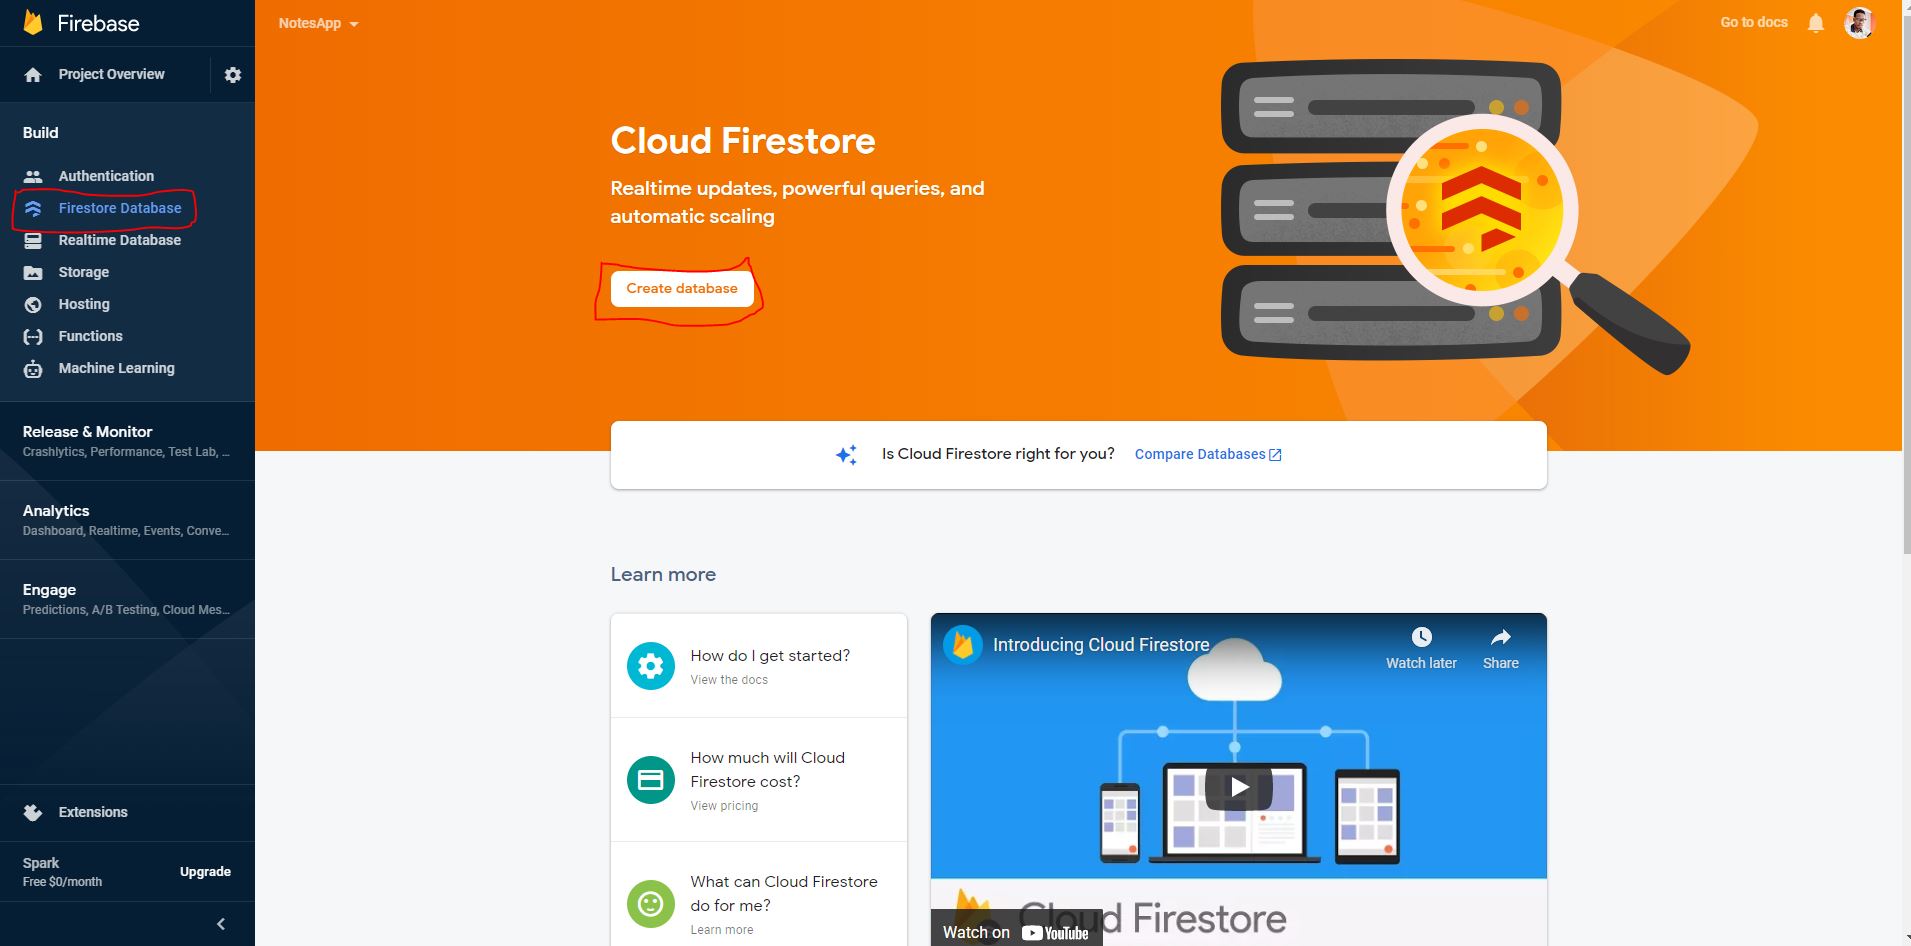
Choose Start in test mode to get working quickly. Be aware that test mode permits anyone with your database reference to read and write all data for 30 days. Keep the default location and enable the database.
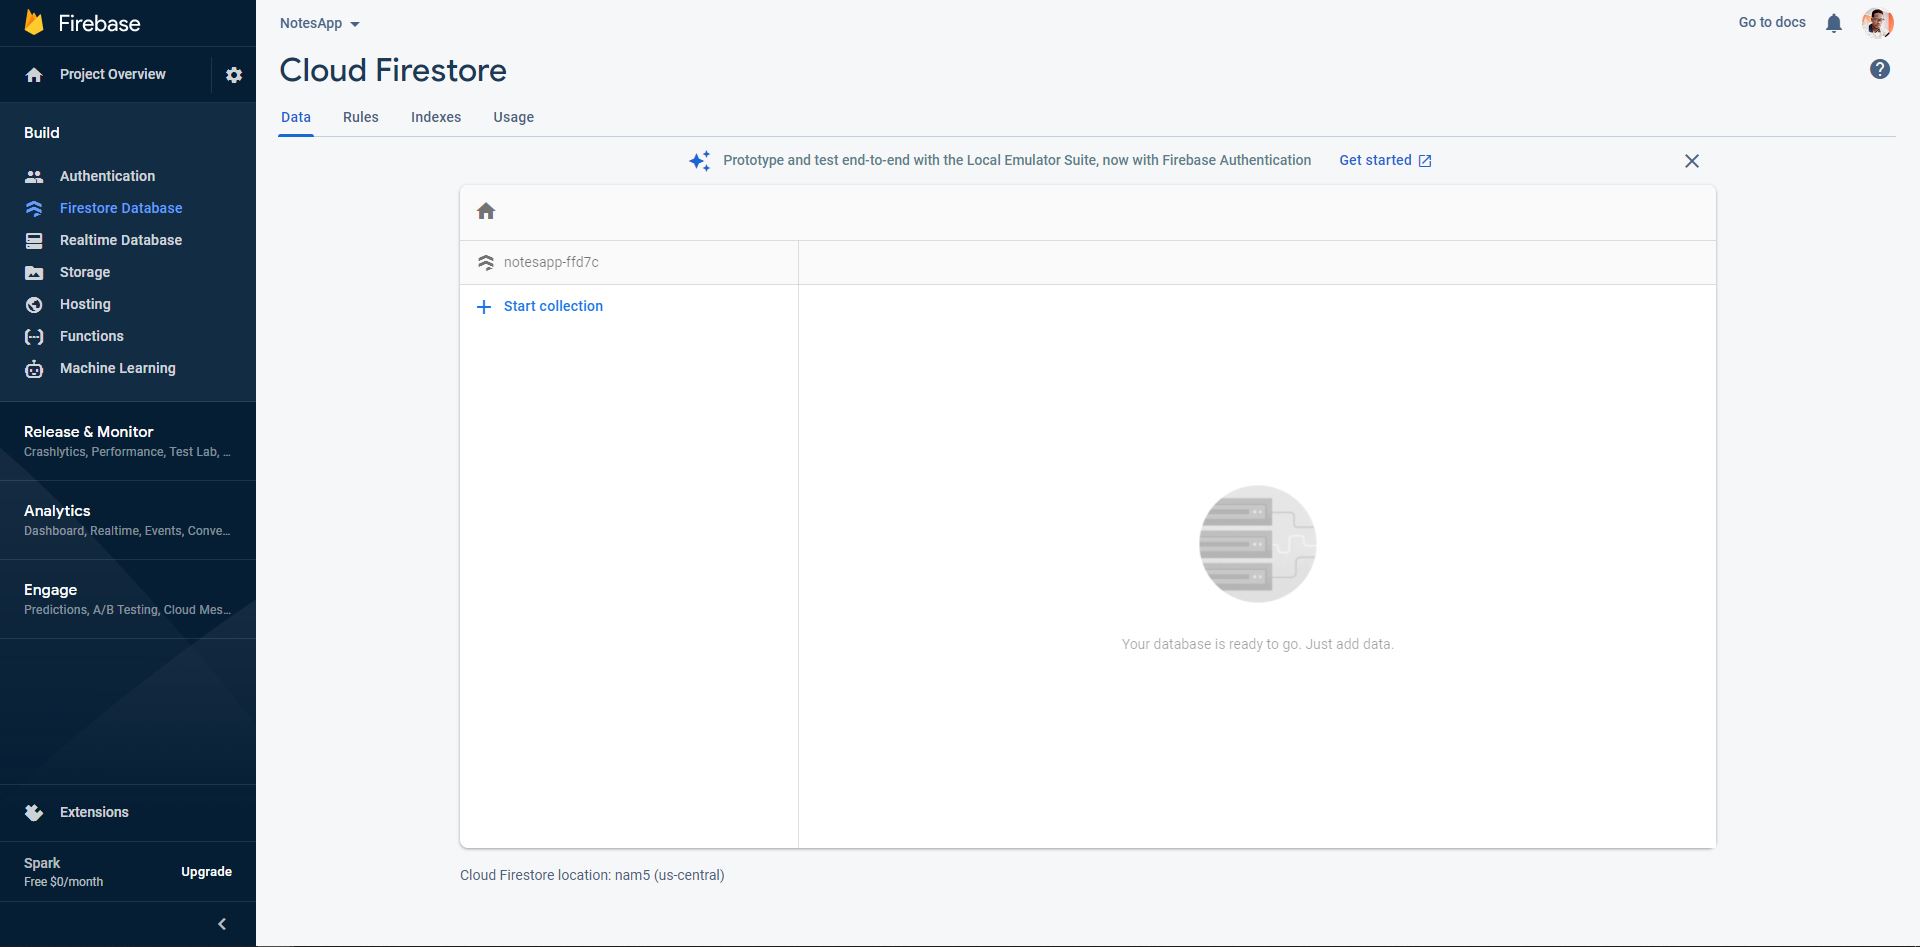
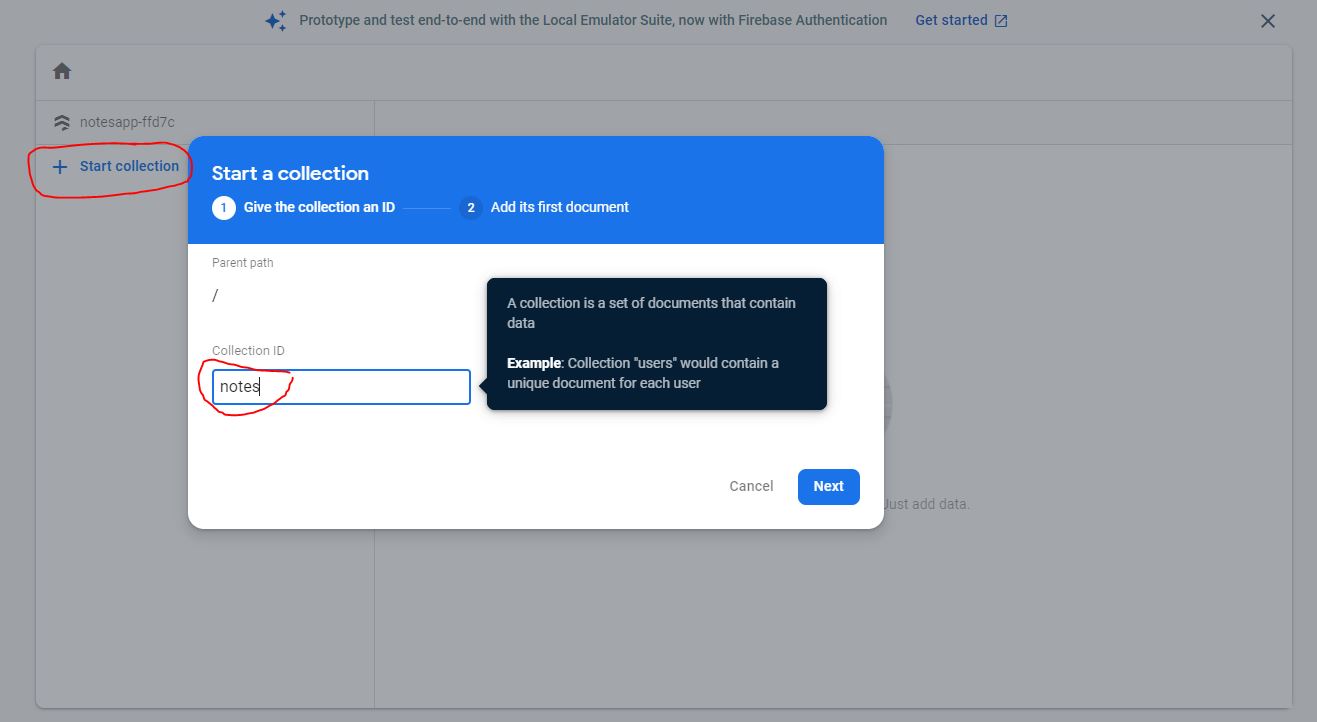
Firestore organizes data into collections of documents, where each document is a JavaScript object. Create a collection called notes and add a few documents. Use Auto-ID for document IDs to guarantee uniqueness.

Next, register the app as a web app from the Project overview screen. You'll see an SDK snippet containing your unique configuration object, but we won't use the snippet directly. In Quasar, the cleaner approach is to install the Firebase SDK and initialize it through a boot file so the database connection is ready before the root component mounts.
Initializing Firebase with a Boot File
Install Firebase via npm:
npm install --save firebaseGenerate a boot file with the Quasar CLI:
quasar new boot firebaseQuasar boot files run before the Vue root instance is created, which makes them ideal for setting up global services like a database connection. Add the new boot file to the boot array in quasar.config.js.
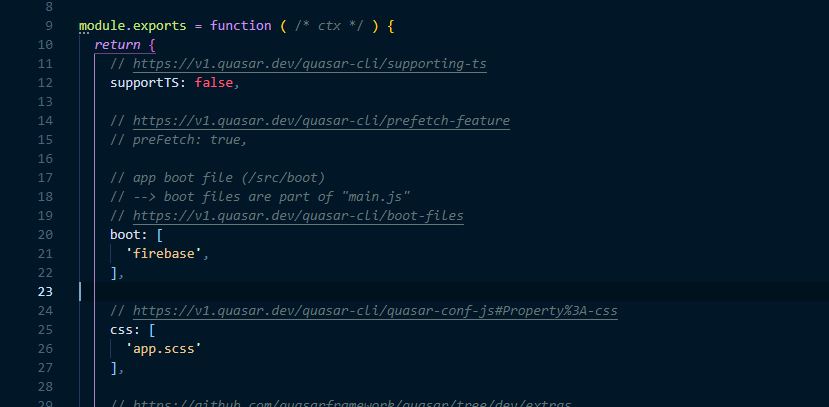
Replace the generated boot file contents with the Firebase initialization code below. This imports the Firebase core and Firestore modules, initializes the app with your config, and exports a Firestore instance called db for use throughout the application.
import firebase from "firebase/app";
import "firebase/firestore";

const firebaseConfig = {
  // ...
};

// Initialize Firebase
firebase.initializeApp(firebaseConfig);
Copy your unique configuration object from the Firebase console and paste it where indicated. The final boot file should resemble this:
import firebase from "firebase/app";
import "firebase/firestore";
const firebaseConfig = {
  apiKey: "***",
  authDomain: "notesapp-ffd7c.firebaseapp.com",
  projectId: "notesapp-ffd7c",
  storageBucket: "notesapp-ffd7c.appspot.com",
  messagingSenderId: "18944010047",
  appId: "1:18944010047:web:ddfb46fc6bc8bba375158a"
};
// Initialize Firebase
firebase.initializeApp(firebaseConfig);
The last line initializes the Firestore database:
let db = firebase.firestore();
export default db;
This db export gives every component in the app immediate access to the database.
Fetching Notes in Real Time
To display database content, import db into the index page and make a query inside a mounted hook so the data loads as soon as the app starts.
import db from 'src/boot/firebase';The .onSnapshot method registers a listener that fires on any change to the notes collection — additions, edits, or deletions. Each snapshot returns objects with a type property indicating the kind of change. Logging the snapshot output shows every note in the collection.
mounted() {
  db.collection("notes").onSnapshot(snapshot => {
    snapshot.docChanges().forEach(change => {

      let noteChange = change.doc.data();

      if (change.type === "added") {
        console.log("New note: ", noteChange);
        this.notes.unshift(noteChange);
      }
      if (change.type === "modified") {
        console.log("Modified note: ", noteChange);
      }
      if (change.type === "removed") {
        console.log("Removed note: ", noteChange);
      }
    });
  });
}
Remove the static objects from the local notes array and push incoming snapshot documents into it instead. Because the snapshot handler updates whenever the collection changes, the array stays in sync without manual refresh calls.
if (change.type === "added") {
  this.notes.unshift(noteChange);
}
Adding Documents
The existing addNote() method only adds to the local array; a page reload drops the note. Replace the method body with a write to the Firestore collection. The database generates a unique ID for each document, so there's no need to construct one client-side. The unshift() call is also obsolete — the snapshot listener updates the view automatically when the new document arrives.
addNote() {
  let newNote = {
    // id: this.notes.length + 1,
    note: this.newNoteContent
  };
  // this.notes.unshift(newNote);

  db.collection("notes")
    .add(newNote)
    .then(docRef => {
      console.log("Document written with ID: ", docRef.id);
    })
    .catch(error => {
      console.error("Error adding document: ", error);
    });

  this.newNoteContent = "";
},
Deleting Documents
Deletion follows a similar pattern. To delete the right document, the note object needs its generated Firestore ID. Include it in the object handled by the snapshot listener:
noteChange.id = change.doc.id;Then update the deleteNote() method to remove the document from the collection by that ID.
deleteNote(noteContent) {
  let noteId = noteContent.id;
  db.collection("notes")
    .doc(noteId)
    .delete()
    .then(() => {
      console.log("Document successfully deleted!");
    })
    .catch(error => {
      console.error("Error removing document: ", error);
    });
}
The document disappears from Firestore, but the interface will still show it until the snapshot handler processes the removal event. Use the change's payload to remove the note from the notes array in the UI whenever a document with a matching ID is removed.
if (change.type === "removed") {
  console.log("Removed note: ", noteChange);
  let index = this.notes.findIndex(
    noteContent => noteContent.id === noteChange.id
  );
  this.notes.splice(index, 1);
}
Deploying Beyond the Browser
With persistent data and real-time syncing in place, the Quasar app is functionally complete. One of the framework's key advantages is that the same codebase deploys as a website, a mobile app via Cordova, or a desktop application via Electron. For iOS builds, install Cordova globally on your machine, preferably macOS:
$ npm install - g cordovaFor Windows targets, Quasar's documentation covers the equivalent Electron setup. The notes application built here is a foundation — the same patterns extend to editing documents, adding timestamps for sorting, richer styling, and image attachments.


