
Why CSS Alone Isn't Enough
The gap between what designers want and what CSS can natively do has always been filled with JavaScript workarounds. While polyfills let developers use new CSS features early, they come at a cost. They run after the initial render cycle completes, meaning any style changes they make trigger a full re-render. When they depend on scroll events or requestAnimationFrame, performance suffers even more.
Beyond that, CSS has hard limits. It can animate colors natively, but not gradients. There are a limited number of properties that support animation at all, and features like masonry layout or styled select elements remain out of reach. Pushing the CSS specification to cover every industry demand is simply not practical.
Houdini offers a different path: instead of waiting for CSS to catch up, it gives developers a native way to extend the language. It's an umbrella term for a set of browser APIs that allow JavaScript to hook directly into the rendering engine. Rather than working around CSS limitations, developers can teach the browser how to handle new styles and effects itself.
How Houdini Is Organized
Houdini is split into two layers. The high-level APIs correspond to specific stages of the browser's rendering pipeline:
- Paint API: Extends the paint step where visual properties like background and border are set.
- Layout API: Extends the layout step where element dimensions and positioning are determined.
- Animation API: Extends the composite step where layers are drawn and animated.
The low-level APIs form the foundation for these high-level features. This group includes the Typed Object Model, Custom Properties & Values API, Font Metrics API, and Worklets. Each of these pieces is at a different stage of browser support, but some are usable today with progressive enhancement.
Typed Object Model API
One of Houdini's core improvements is the Typed Object Model (Typed OM) API. Previously, JavaScript could only interact with CSS through string values, which required manual parsing and unit handling. The Typed OM exposes CSS values as typed JavaScript objects using the CSSUnitValue interface, which pairs a numeric value with a unit property.
{
  value: 20,
  unit: "px"
}
This API introduces two new ways to access styles:
computedStyleMap(): Parses computed, non-inline styles. This method must be invoked on the element before other methods are used.attributeStyleMap: Handles inline styles directly as a property of the element.
// Get computed styles from stylesheet (initial value)
selectedElement.computedStyleMap().get("font-size"); // { value: 20, unit: "px"}

// Set inline styles
selectedElement.attributeStyleMap.set("font-size", CSS.em(2)); // Sets inline style
selectedElement.attributeStyleMap.set("color", "blue"); // Sets inline style

// Computed style remains the same (initial value)
selectedElement.computedStyleMap().get("font-size"); // { value: 20, unit: "px"}

// Get new inline style
selectedElement.attributeStyleMap.get("font-size"); // { value: 2, unit: "em"}
Because CSS types are respected when setting values, the code avoids many class of bugs related to unit mismatches and type coercion. The API also includes methods beyond get and set, such as clear, delete, has and append, which broaden how inline styles can be managed programmatically.
Feature Detection & Status
Support can be checked before use:
var selectedElement = document.getElementById("example");

if(selectedElement.attributeStyleMap) {
  /* ... */
}

if(selectedElement.computedStyleMap) {
  /* ... */
}
The specification remains a Working Draft. Browser support requires enabling an "Experimental Web Platform features" flag in Chromium-based browsers.
| Google Chrome | Microsoft Edge | Opera Browser | Firefox | Safari |
|---|---|---|---|---|
| Supported | Supported | Supported | Not supported | Partial support (*) |
Custom Properties And Values API
CSS variables have always been simple string substitutions. The Custom Properties And Values API changes this by giving them a type, an initial value, and inheritance rules. This is done through the registerProperty method, which tells the browser how to handle the property during transitions and how to fall back if an error occurs.
CSS.registerProperty({
  name: "--colorPrimary",
  syntax: "<color>",
  inherits: false,
  initialValue: "blue",
});
When you register a property, you pass it an object with the following fields:
name: The custom property name.syntax: The expected data type, using pre-defined values like<color>,<integer>,<length>, or<percentage>.inherits: Whether the property inherits from its parent element.initialValue: The fallback value that applies until overridden.
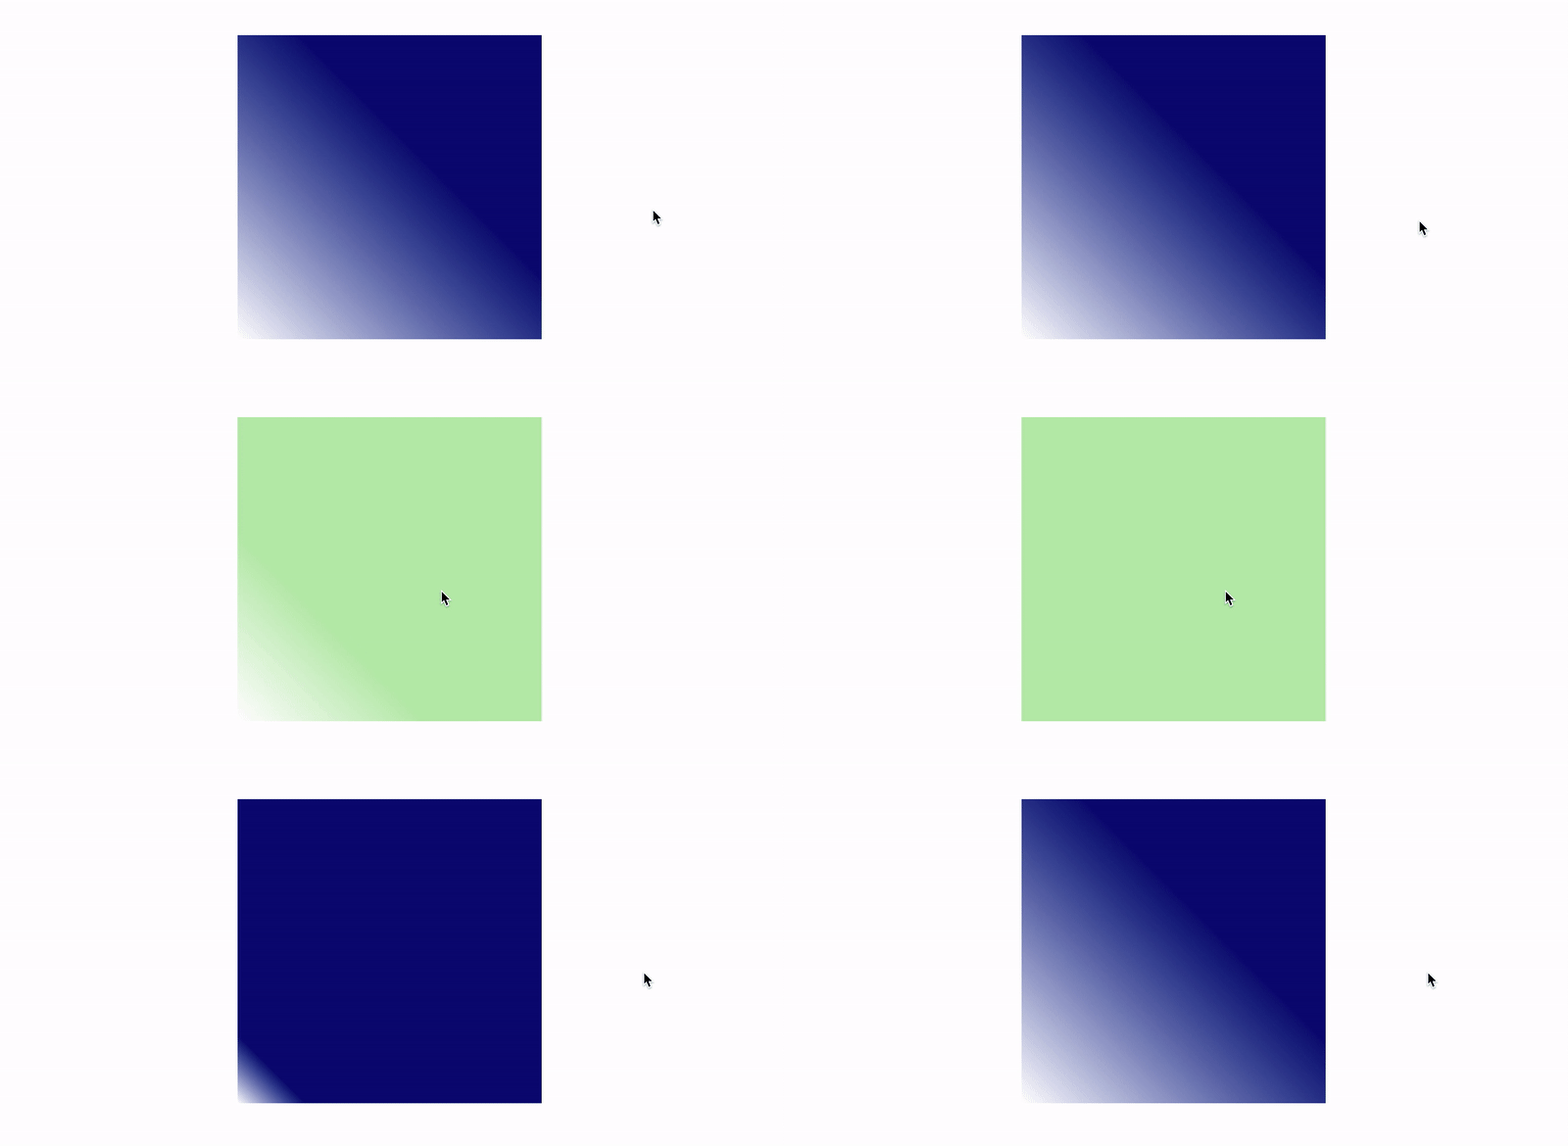
The most notable effect is enabling animations on features CSS can't normally transition. Gradients are a common example. CSS has no idea how to interpolate between two gradient backgrounds. However, if the gradient uses a registered custom property typed as <color>, the browser can transition that property, and a gradient transition happens on hover because the browser knows how to animate colors.
.gradientBox {
  background: linear-gradient(45deg, rgba(255,255,255,1) 0%, var(--colorPrimary) 60%);
  transition: --colorPrimary 0.5s ease;
  /* ... */
}

.gradientBox:hover {
  --colorPrimary: red
  /* ... */
}
This only works if registerProperty has been run. Using a plain custom property in a :root rule won't do — the browser needs the explicit type declaration to know it should treat the value as a color.
Future versions may allow this registration to be written directly in CSS, and jump to avoid the JavaScript call entirely.
@property --colorPrimary {
  syntax: "<color>";
  inherits: false;
  initial-value: blue;
}
A typical demo shows gradient color and position transitioning on hover, using registered properties for both.
Feature Detection
if (CSS.registerProperty) {
  /* ... */
}
The spec is a Working Draft, with support in Chromium behind the same experimental flag.
| Google Chrome | Microsoft Edge | Opera Browser | Firefox | Safari |
|---|---|---|---|---|
| Supported | Supported | Supported | Not supported | Not supported |
Font Metrics API
Text rendering remains an area where CSS measurement is limited. The Font Metrics API aims to expose dimensions of rendered text so developers can build better text features themselves. For example, true multi-line truncation is difficult today because there's no way to know when a line actually breaks or how much vertical space a block of text consumes.
This API is still at the conceptual level — defined as a collection of ideas with no formal draft and no browser support.
| Google Chrome | Microsoft Edge | Opera Browser | Firefox | Safari |
|---|---|---|---|---|
| Not supported | Not supported | Not supported | Not supported | Not supported |
Worklets: The Runtime Pieces
The Paint, Layout and Animation APIs all run on scripts called Worklets. These are lightweight scripts that execute during the render process. They run independently of the main JavaScript thread, from a reduced global scope that strips out access to the DOM.
Worklets are designed with parallelism in mind and can spin up two or more instances as the rendering engine needs. They only run over HTTPS in production, or on localhost in development.
Each renders-stage extension point is tied to a specific worklet type: Paint API, Layout API, and Animation API. These are the key to letting developers run custom style logic without the main thread round-trips and re-renders that old-style polyfills caused.
Paint API: Drawing Directly in CSS
The Paint API lets developers draw directly into an element's background, border, or content using JavaScript functions and the 2D Rendering Context, a subset of the HTML5 Canvas API. Because it uses a Paint Worklet, the drawn image can dynamically respond to CSS changes, such as updates to CSS custom properties. Anyone familiar with the Canvas API will find the Paint API approachable.
Defining a Paint Worklet requires three steps:
- Write and register the Worklet using the
registerPaintfunction. - Load the Worklet in the HTML or JavaScript file using
CSS.paintWorklet.addModule. - Reference it in CSS with the
paint()function, passing the Worklet name and any optional arguments.
The registerPaint function defines the Worklet's configuration and main logic:
inputProperties: An array of CSS custom properties the Worklet tracks; these are its dependencies.inputArguments: An array of arguments that can be passed from thepaint()function in CSS.contextOptions: Determines color opacity behavior; set tofalseto force full opacity.paint: The core drawing function, receiving:ctx: 2D drawing context, nearly identical to the Canvas API's.size: An object with element width and height; canvas size equals the actual element size.properties: The input variables listed ininputProperties.args: Array of input arguments from the CSSpaint()function.
registerPaint("paintWorketExample", class {
  static get inputProperties() { return ["--myVariable"]; }
  static get inputArguments() { return ["<color>"]; }
  static get contextOptions() { return {alpha: true}; }

  paint(ctx, size, properties, args) {
    /* ... */
  }
});
After registration, the Worklet is invoked from the HTML file by providing its file path.
CSS.paintWorklet.addModule("path/to/worklet/file.js");
Worklets can also be loaded from an external URL, like a CDN, making them modular and reusable.
CSS.paintWorklet.addModule("https://url/to/worklet/file.js");
Once loaded, the Worklet is used in CSS via the paint() function. The first argument is the Worklet's registered name; any following arguments are passed as custom arguments, matching the Worklet's inputArguments definition. The browser then decides when to invoke the Worklet, responding to user actions and CSS custom property changes.
.exampleElement {
  /* paintWorkletExample - name of the worklet
     blue - argument passed to a Worklet */
  background-image: paint(paintWorketExample, blue);
}
Paint API Example
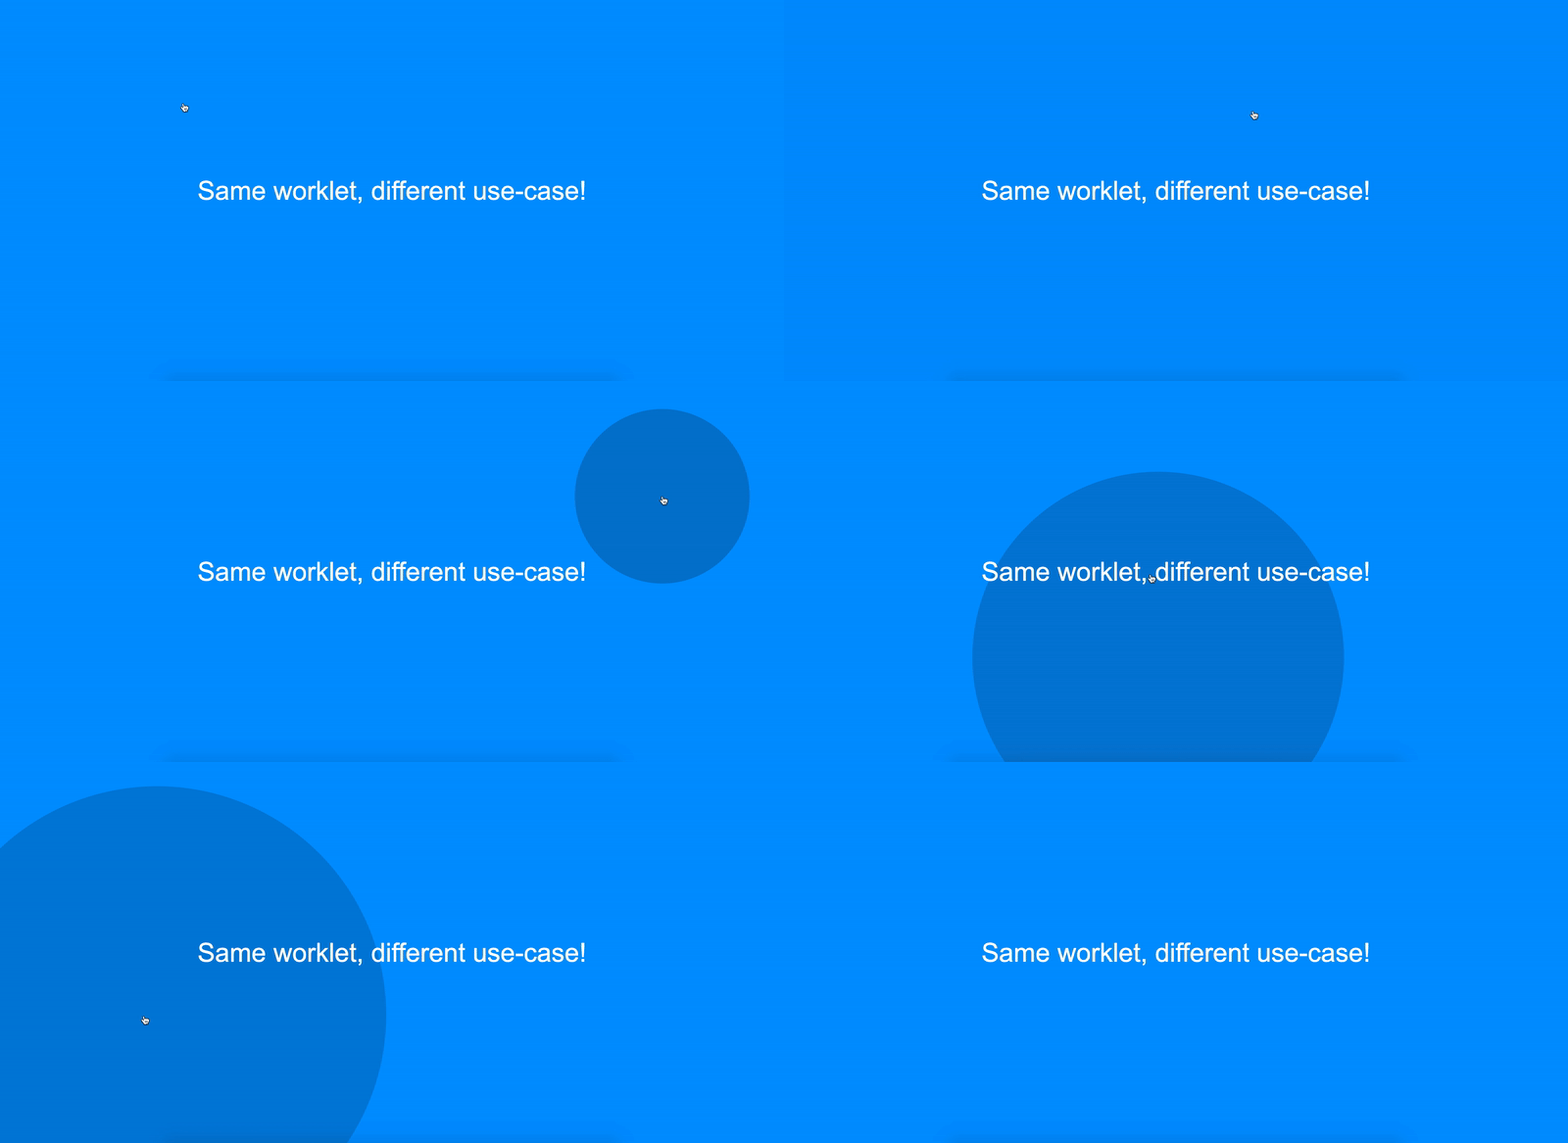
This example demonstrates the Paint API's reusability, using the ripple Worklet from the Google Chrome Labs repository running on an element with different styles. Full source is in the example repository.
Feature Detection
if ("paintWorklet" in CSS) {
  /* ... */
}

@supports(background:paint(paintWorketExample)){
  /* ... */
}
Specification Status
- Candidate recommendation: a stable draft ready for implementation.
Browser Support
| Google Chrome | Microsoft Edge | Opera Browser | Firefox | Safari |
|---|---|---|---|---|
| Supported | Supported | Supported | Not supported | Not supported |
Data source: Is Houdini Ready Yet?
Animation API: Off-Thread, Event-Driven Motion
The Animation API extends standard web animations with the ability to respond to events like scroll, hover, and click. By running animations on a dedicated thread via an Animation Worklet, it keeps motion performant and non-blocking.
Like all Worklets, the Animation Worklet must be registered first.
registerAnimator("animationWorkletExample", class {
  constructor(options) {
    /* ... */
  }
  animate(currentTime, effect) {
    /* ... */
  }
});
This class has two key functions:
constructor: Called on instance creation; used for setup.animate: Contains the animation logic, receiving:currentTime: The current time value from the chosen timeline.effect: An array of effects associated with this animation.
After registration, the Worklet is included in the main JavaScript file, where the animation (element, keyframes, and options) is defined and instantiated with a selected timeline.
/* Include Animation Worklet */
await CSS.animationWorklet.addModule("path/to/worklet/file.js");;

/* Select element that's going to be animated */
const elementExample = document.getElementById("elementExample");

/* Define animation (effect) */
const effectExample = new KeyframeEffect(
  elementExample,  /* Selected element that's going to be animated */
  [ /* ... */ ],   /* Animation keyframes */
  { /* ... */ },   /* Animation options - duration, delay, iterations, etc. */
);

/* Create new WorkletAnimation instance and run it */
new WorkletAnimation(
  "animationWorkletExample"  /* Worklet name */
  effectExample,             /* Animation (effect) timeline */
  document.timeline,         /* Input timeline */
  {},                        /* Options passed to constructor */
).play();                    /* Play animation */
Mapping Timelines to Local Time
Web animation revolves around timelines and mapping the current time to an effect's local time. Consider a repeating linear animation with three keyframes, a 1000ms delay, and a 4000ms duration.
| Effect timeline (4s duration) | Keyframe |
|---|---|
| 0ms | First keyframe - animation starts |
| 2000ms | Middle keyframe - animation in progress |
| 4000ms | Last keyframe - animation ends or resets to first keyframe |
Setting effect.localTime to 3000ms locks the animation at the middle keyframe. The same result occurs at 7000ms and 11000ms, because the animation repeats on a 4000ms cycle.
animate(currentTime, effect) {
  effect.localTime = 3000; // 1000ms delay + 2000ms middle keyframe
}
With a constant effect.localTime, no animation occurs — the element is frozen at a keyframe. Real animation requires effect.localTime to be a function of currentTime or another changing variable. Here's the 1:1 linear mapping:
animate(currentTime, effect) {
  effect.localTime = currentTime; // y = x linear function
}
Timeline (document.timeline) | Mapped effect local time | Keyframe |
|---|---|---|
startTime + 0ms (elapsed time) | startTime + 0ms | First |
startTime + 1000ms (elapsed time) | startTime + 1000ms (delay) + 0ms | First |
startTime + 3000ms (elapsed time) | startTime + 1000ms (delay) + 2000ms | Middle |
startTime + 5000ms (elapsed time) | startTime + 1000ms (delay) + 4000ms | Last / First |
startTime + 7000ms (elapsed time) | startTime + 1000ms (delay) + 6000ms | Middle |
startTime + 9000ms (elapsed time) | startTime + 1000ms (delay) + 8000ms | Last / First |
Timeline mapping is not limited to a linear 1:1 relationship. Developers can shape it inside the animate function with JavaScript. Animation also doesn't need to repeat identically each iteration.
Timelines need not be tied to document load time. A ScrollTimeline object can use scroll position as the timeline, e.g., starting an animation at 200 pixels scrolled and ending at 800 pixels.
const scrollTimelineExample = new ScrollTimeline({
  scrollSource: scrollElement,  /* DOM element whose scrolling action is being tracked */
  orientation: "vertical",      /* Scroll direction */
  startScrollOffset: "200px",   /* Beginning of the scroll timeline */
  endScrollOffset: "800px",    /* Ending of the scroll timeline */
  timeRange: 1200,              /* Time duration to be mapped to scroll values*/
  fill: "forwards"              /* Animation fill mode */
});

...
Such animations adapt to user scroll speed automatically, staying smooth and responsive. Since Animation Worklets run off the main thread and link directly to the browser's rendering engine, scroll-driven animation is highly performant.
Animation API Example
This example illustrates non-linear timeline mapping, using a Gaussian function to drive translation and rotation with a shared timeline. Full source code is in the example repository.

Feature Detection
if (CSS.animationWorklet) {
  /* ... */
}
Specification Status
- First Public Working Draft: open for community review; may change.
Browser Support
| Google Chrome | Microsoft Edge | Opera Browser | Firefox | Safari |
|---|---|---|---|---|
| Partial support (*) | Partial support (*) | Partial support (*) | Not supported | Not supported |
* Supported with "Experimental Web Platform features" flag enabled.
Data source: Is Houdini Ready Yet?
Layout API: Custom Display Modes
The Layout API lets developers extend the browser's layout engine by defining new layout modes for the display CSS property. It introduces new concepts, is highly complex, and offers deep customization of layout algorithms. As with other Worklets, registration comes first.
registerLayout('exampleLayout', class {
  static get inputProperties() { return ['--exampleVariable']; }

  static get childrenInputProperties() { return ['--exampleChildVariable']; }

  static get layoutOptions() {
    return {
      childDisplay: 'normal',
      sizing: 'block-like'
    };
  }

  intrinsicSizes(children, edges, styleMap) {
    /* ... */
  }

  layout(children, edges, constraints, styleMap, breakToken) {
    /* ... */
  }
});
The Worklet registration includes these methods:
inputProperties: CSS custom properties tracked, belonging to the parent layout element. These are the Worklet's dependencies.childrenInputProperties: Similar, but tracks properties on the parent element's children.layoutOptions: Sets layout behavior:childDisplay:blockornormal, controlling whether child boxes display as blocks or inline.sizing:block-likeormanual, telling the browser whether to pre-calculate size automatically.
intrinsicSizes: Defines intrinsic sizing within the layout context, receiving children, edges, and style data.layout: The main layout function, receiving children, edges, constraints, style data, and abreakTokenfor pagination or printing.
The browser's rendering engine decides when to call the Worklet — it just needs to be added to the HTML or main JavaScript file.
CSS.layoutWorklet.addModule('path/to/worklet/file.js');
Finally, reference it in CSS:
.exampleElement {
  display: layout(exampleLayout);
}
How Layout Works
In the example above, exampleLayout is defined on an element, which becomes the Parent Layout. The Parent Layout is wrapped in Layout Edges (padding, borders, scrollbars) and contains child elements, the Current Layouts whose positioning the Layout API can override. This is conceptually similar to how display: flex repositions its children, but with complete customization.
Each Current Layout contains a Child Layout, the algorithm applied to a LayoutChild — a CSS-generated box holding style info only, created automatically at the style step. The LayoutChild generates Fragments that execute actual layout rendering.
Layout API Example
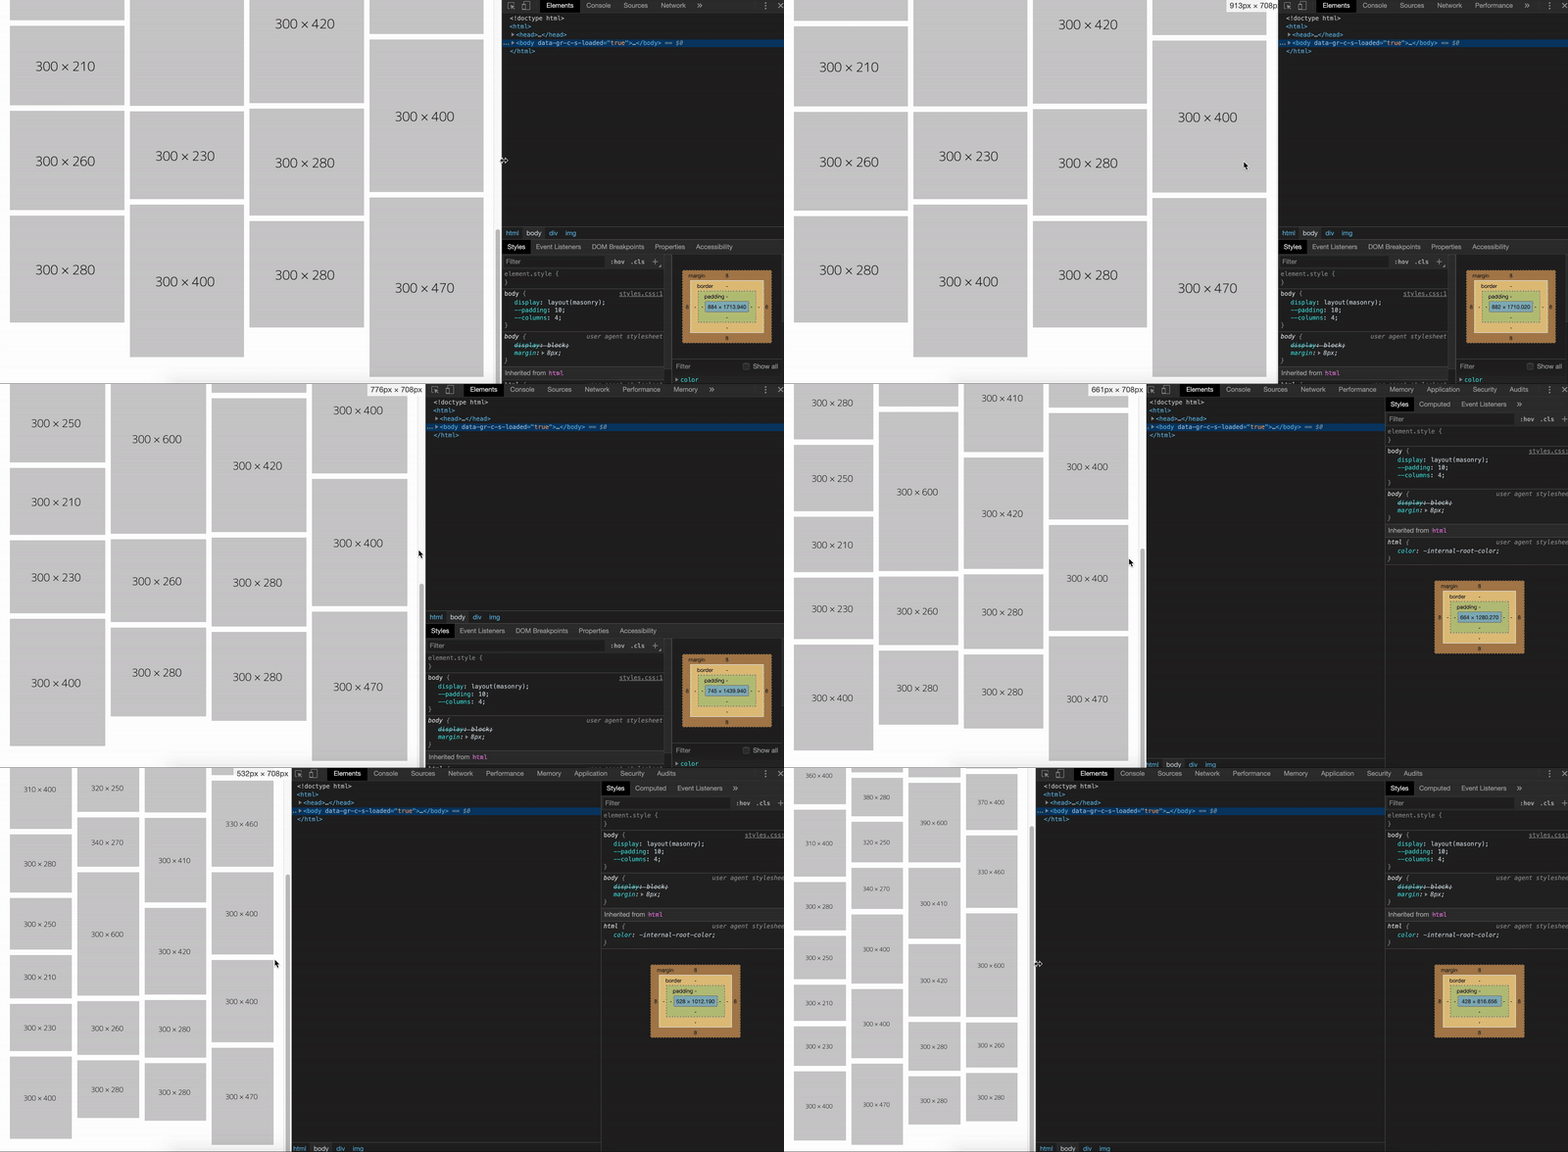
This example reuses the masonry Worklet from the Google Chrome Labs repository, applying it to image content. Full source code is in the example repository.
Feature Detection
if (CSS.layoutWorklet) {
  /* ... */
}
Specification Status
- First Public Working Draft: open for community review; may change.
Browser Support
| Google Chrome | Microsoft Edge | Opera Browser | Firefox | Safari |
|---|---|---|---|---|
| Partial support (*) | Partial support (*) | Partial support (*) | Not supported | Not supported |
* Supported with "Experimental Web Platform features" flag enabled.
Data source: Is Houdini Ready Yet?
Working With Houdini Today
CSS Houdini does not yet have complete browser support, but that does not mean it cannot be used in production right now. The key is to treat it as a progressive enhancement, layering Houdini features on top of a solid, fully functional baseline. A few practical guidelines help keep that approach safe:
- Detect features before using them. Every Houdini API and Worklet has a straightforward way to check whether it is available in the current browser. Use that detection to keep Houdini enhancements from throwing errors in unsupported environments.
- Restrict Houdini to presentation and visuals. Users in browsers that lack support should still get the core content and functionality of the site. Neither navigation nor reading experience should ever depend on a Houdini feature.
- Provide a standard CSS fallback. For instance, ordinary CSS Custom Properties can serve as a fallback for styles defined through the Custom Properties & Values API.
The right order of operations is to build a performant and reliable site first, then use Houdini for decorative work as an enhancement.
Where Houdini Leads
The broader promise of the Houdini APIs is that they move the JavaScript developers use for styling and decoration closer to the browser's rendering pipeline. That placement yields better performance and stability than the typical approach of poking the DOM or the CSSOM from a script. Because Houdini lets developers hook directly into rendering, it also opens the door to CSS polyfills that can be shared easily, adopted widely, and in some cases eventually folded into the CSS specification itself.
For designers and developers, the practical payoff is being less boxed in by CSS limitations on layouts, styling, and animations. As support and adoption grow, expect to see new kinds of web experiences that are difficult or impossible to build with plain CSS today.
Houdini can be adopted in current projects, but only under the discipline of progressive enhancement. That discipline keeps unsupported browsers rendering correctly while still letting users on modern browsers benefit from the new capabilities. In the meantime, the community is already experimenting with the APIs in useful and creative ways:
- CSS Houdini Experiments
- Interactive Introduction to CSS Houdini
- Houdini Samples by Google Chrome Labs
References
- W3C Houdini Specification Drafts
- State of Houdini (Chrome Dev Summit 2018)
- Houdini's Animation Worklet - Google Developers
- Interactive Introduction to CSS Houdini
Further Reading
- Infinite-Scrolling Logos In Flat HTML And Pure CSS
- New CSS Viewport Units Do Not Solve The Classic Scrollbar Problem
- CTA Modal: How To Build A Web Component
- Performance Game Changer: Browser Back/Forward Cache



