
BFF: How Gatsby Functions Can Power an API
Serverless Functions let front-end developers write backend-style logic without managing server infrastructure, and Gatsby Functions places that logic in the same code base as the front end. But this model has two blind spots:
- Some front-end tools (Storybook, for instance) have no built-in support for serverless functions.
- Sometimes the same backend logic needs to serve more than one front end.
Both scenarios pushed me toward treating Gatsby Functions as a small, reusable API — a back end for front ends (BFF). As a concrete example, I run the open-source MDX Embed project. Its docs site is built with Storybook, which offers no serverless capability. I wanted to add "pay what you want" contributions using Stripe, which needs a secure server-side component. By extracting that logic into an API powered by Gatsby Functions, I enabled payments for both the MDX Embed docs site and my blog, sharing one implementation across two different front ends. The full breakdown of that approach is covered in Monetize Open-Source Software With Gatsby Functions And Stripe.
Here I'll walk through building a minimal API with Gatsby Functions and deploying that API to Gatsby Cloud.
Setup and Dependencies
Gatsby Cloud supports Gatsby Functions natively, and you'll deploy to it in this tutorial — so create a free account first. You'll also need a GitHub, GitLab, or Bitbucket account since Gatsby Cloud builds your project from a connected Git repository. I'll use GitHub for this tutorial; if you want to skip ahead, the finished demo API is on GitHub.
Start a new directory locally and initialize a default package.json:
npm init -yThen install the required Gatsby dependencies:
npm install gatsby react react-domSince this API will have no real pages, add the following minimal content to both src/pages/index.js and src/pages/404.js to avoid Gatsby's default "missing page" warning in the browser:
//src/pages/index.js & src/pages/404.js

export default () => null;
Your First Function
Gatsby Functions live under src/api and are named after their file — a file named my-first-function.js is exposed at /api/my-first-function. Create that file now:
//src/api/my-first-function.js

export default function handler(req, res) {
  res.setHeader('Access-Control-Allow-Origin', '*');

  res.status(200).json({ message: 'A ok!' });
}
The line 'Access-Control-Allow-Origin', '*' keeps browsers from blocking requests to this function from other origins under CORS rules; more on that in a moment.
Set the dev and build scripts in package.json:
//package.json

...
  "scripts": {
    "develop": "gatsby develop",
    "build": "gatsby build"
  },
...
Start the Gatsby development server:
npm run developVisit http://localhost:8000/api/my-first-function — since the function responds to GET, you should see the JSON response in the browser:
{
  "message": "A ok!"
}
That response confirms your function is working locally.
Bringing It to Gatsby Cloud
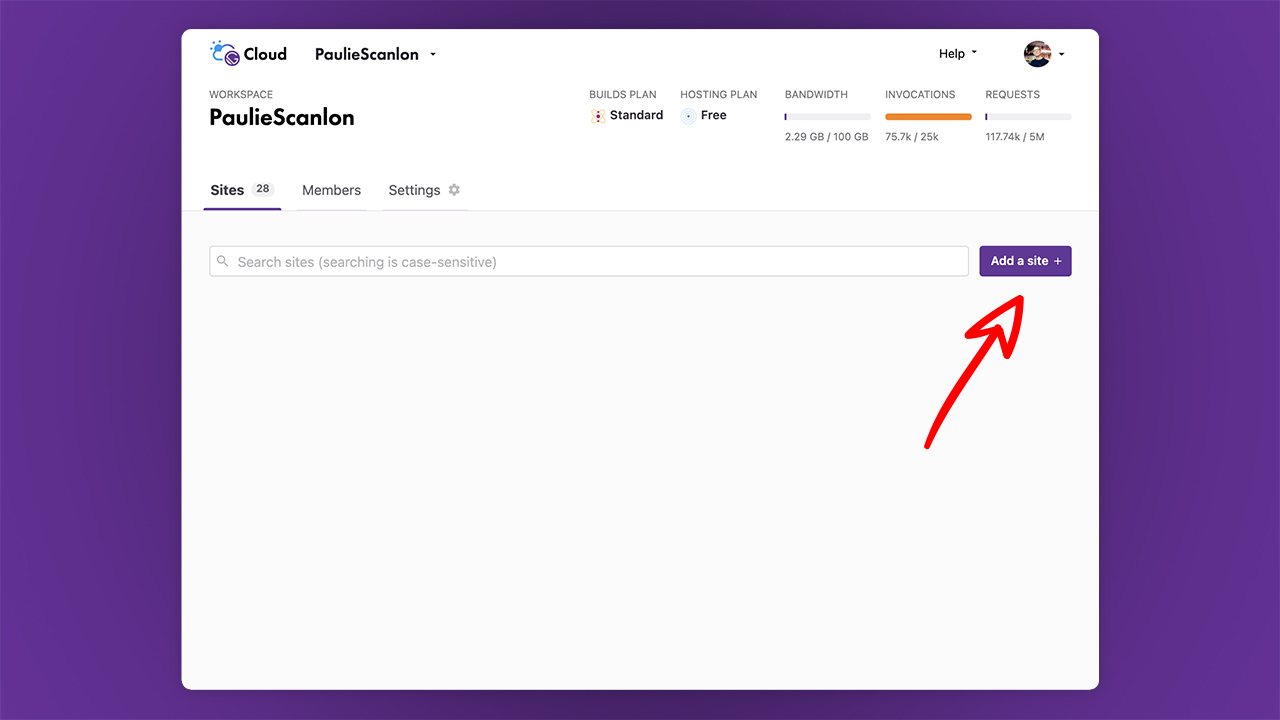
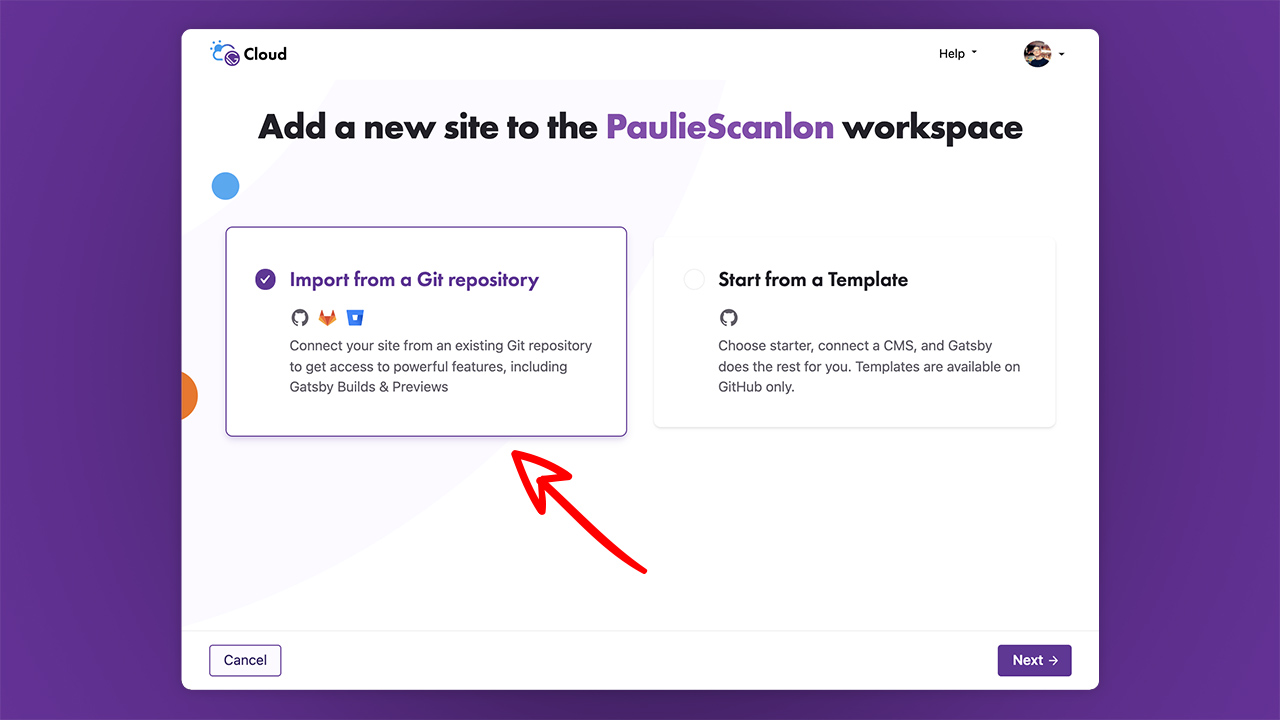
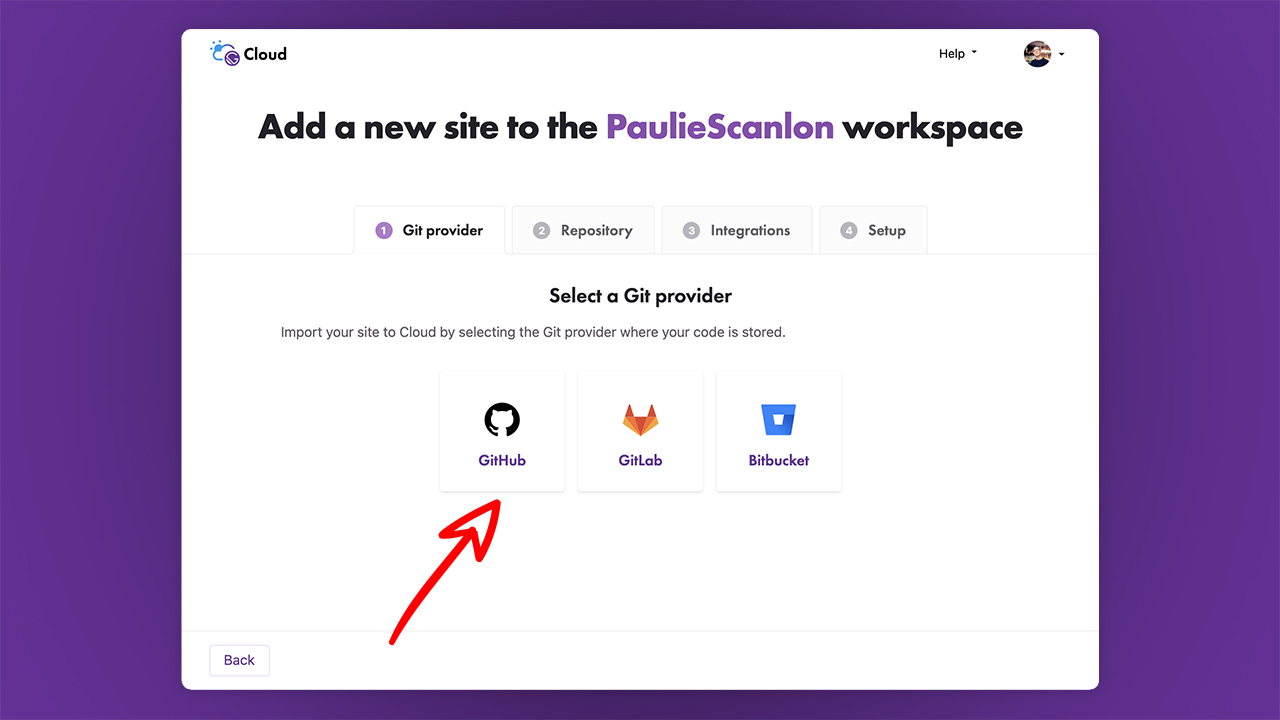
Push the repository to your Git provider first. Then log into Gatsby Cloud, click Add site +, and choose Import from Git Repository:
Select your preferred Git provider, then search for your repository and give the site a name:
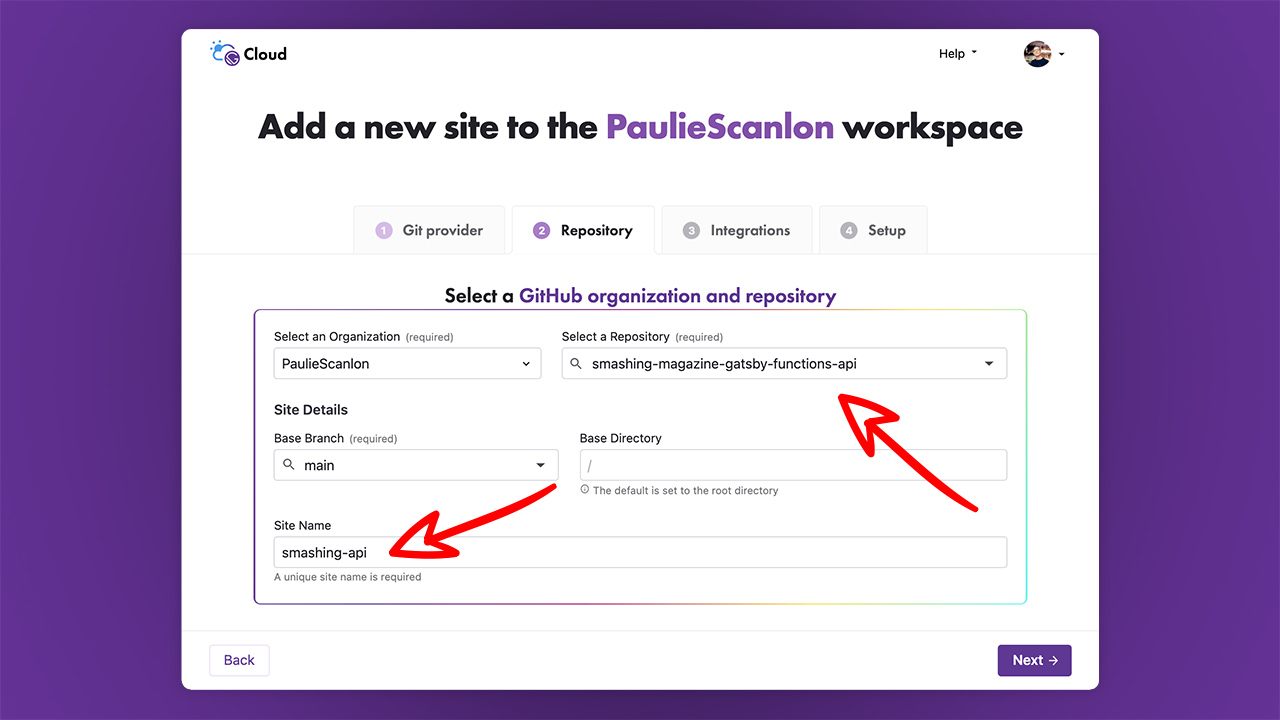
Skip the Integrations and Setup steps — neither is required for this API. Once the build finishes, Gatsby Cloud shows a URL ending in gatsbyjs.io:
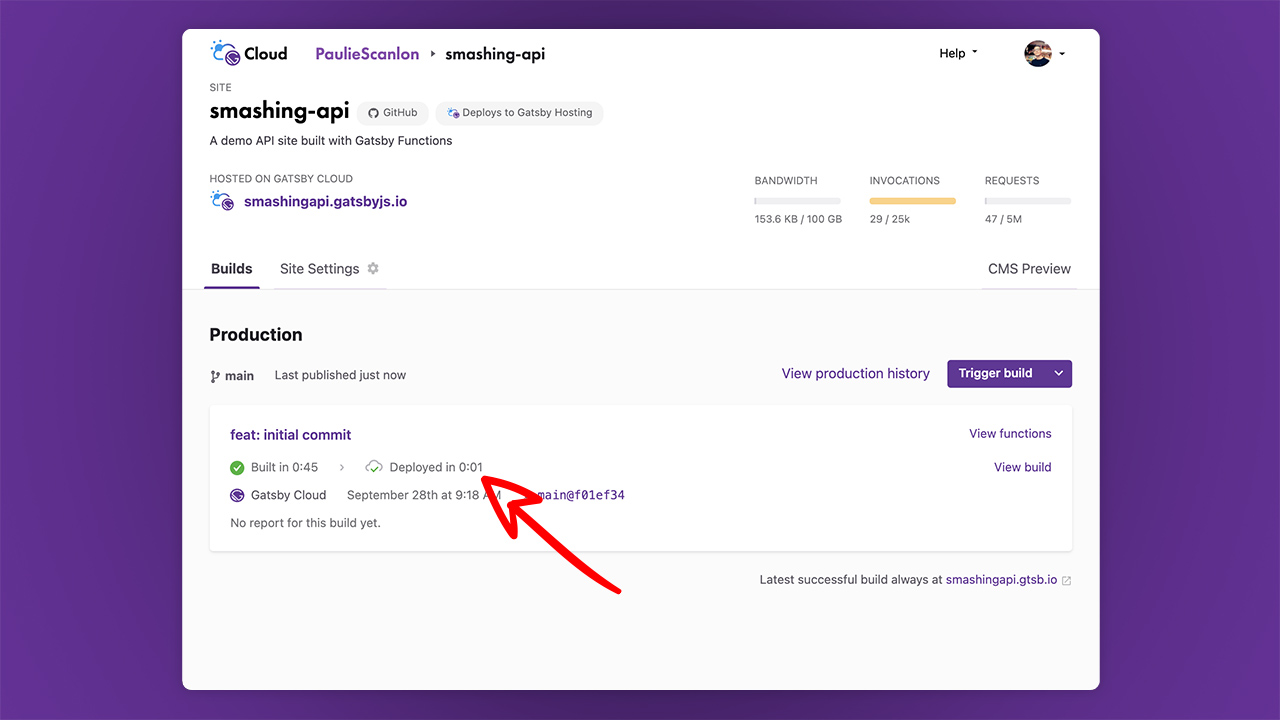
That root URL is your API's base — any function is reachable by appending /api/name-of-function. In my demo, the deployed form of my-first-function.js is the complete example above.
Testing From an Unrelated Origin
Visiting your deployed URL in a browser proves the endpoint responds, but an API is only useful when clients on other origins can call it. That's where the CORS header matters. With res.setHeader('Access-Control-Allow-Origin', '*'), any domain may call your function; without it, browsers enforce same-origin policy and block those requests. Many public APIs set this header deliberately. Only limit the value when you need fine-grained control over who can call a function.
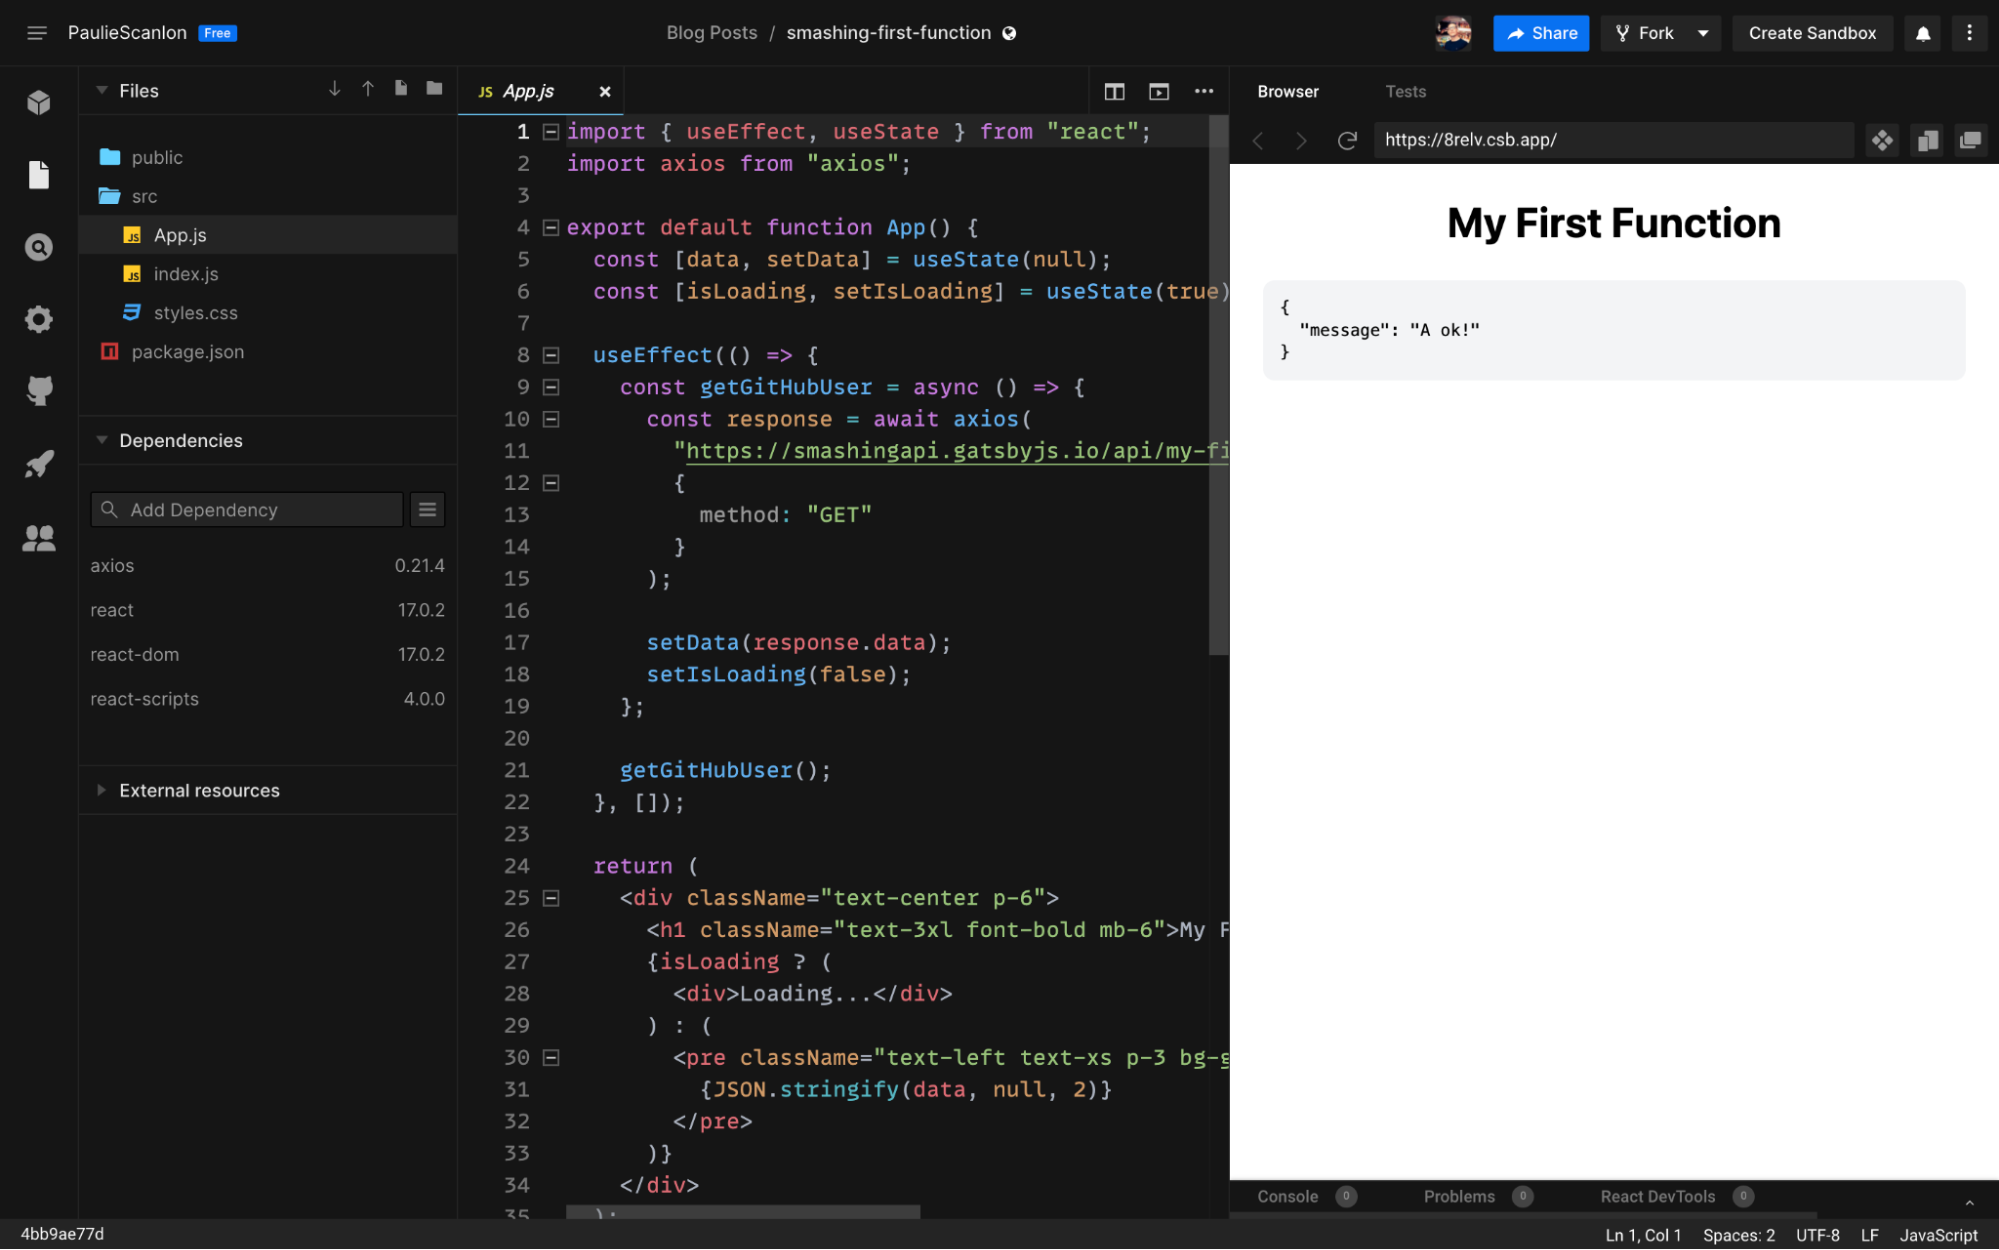
The sandbox below calls my-first-function from my demo API — fork it, swap in your own URL, and you'll get the JSON response back via Axios:
Adding a Data Fetch: GitHub Profile API
A hardcoded "A ok!" response demonstrates the plumbing, but an API that pulls live data is more useful. This next section adds a function that queries the GitHub REST API and returns a formatted profile that you can then render on any site:
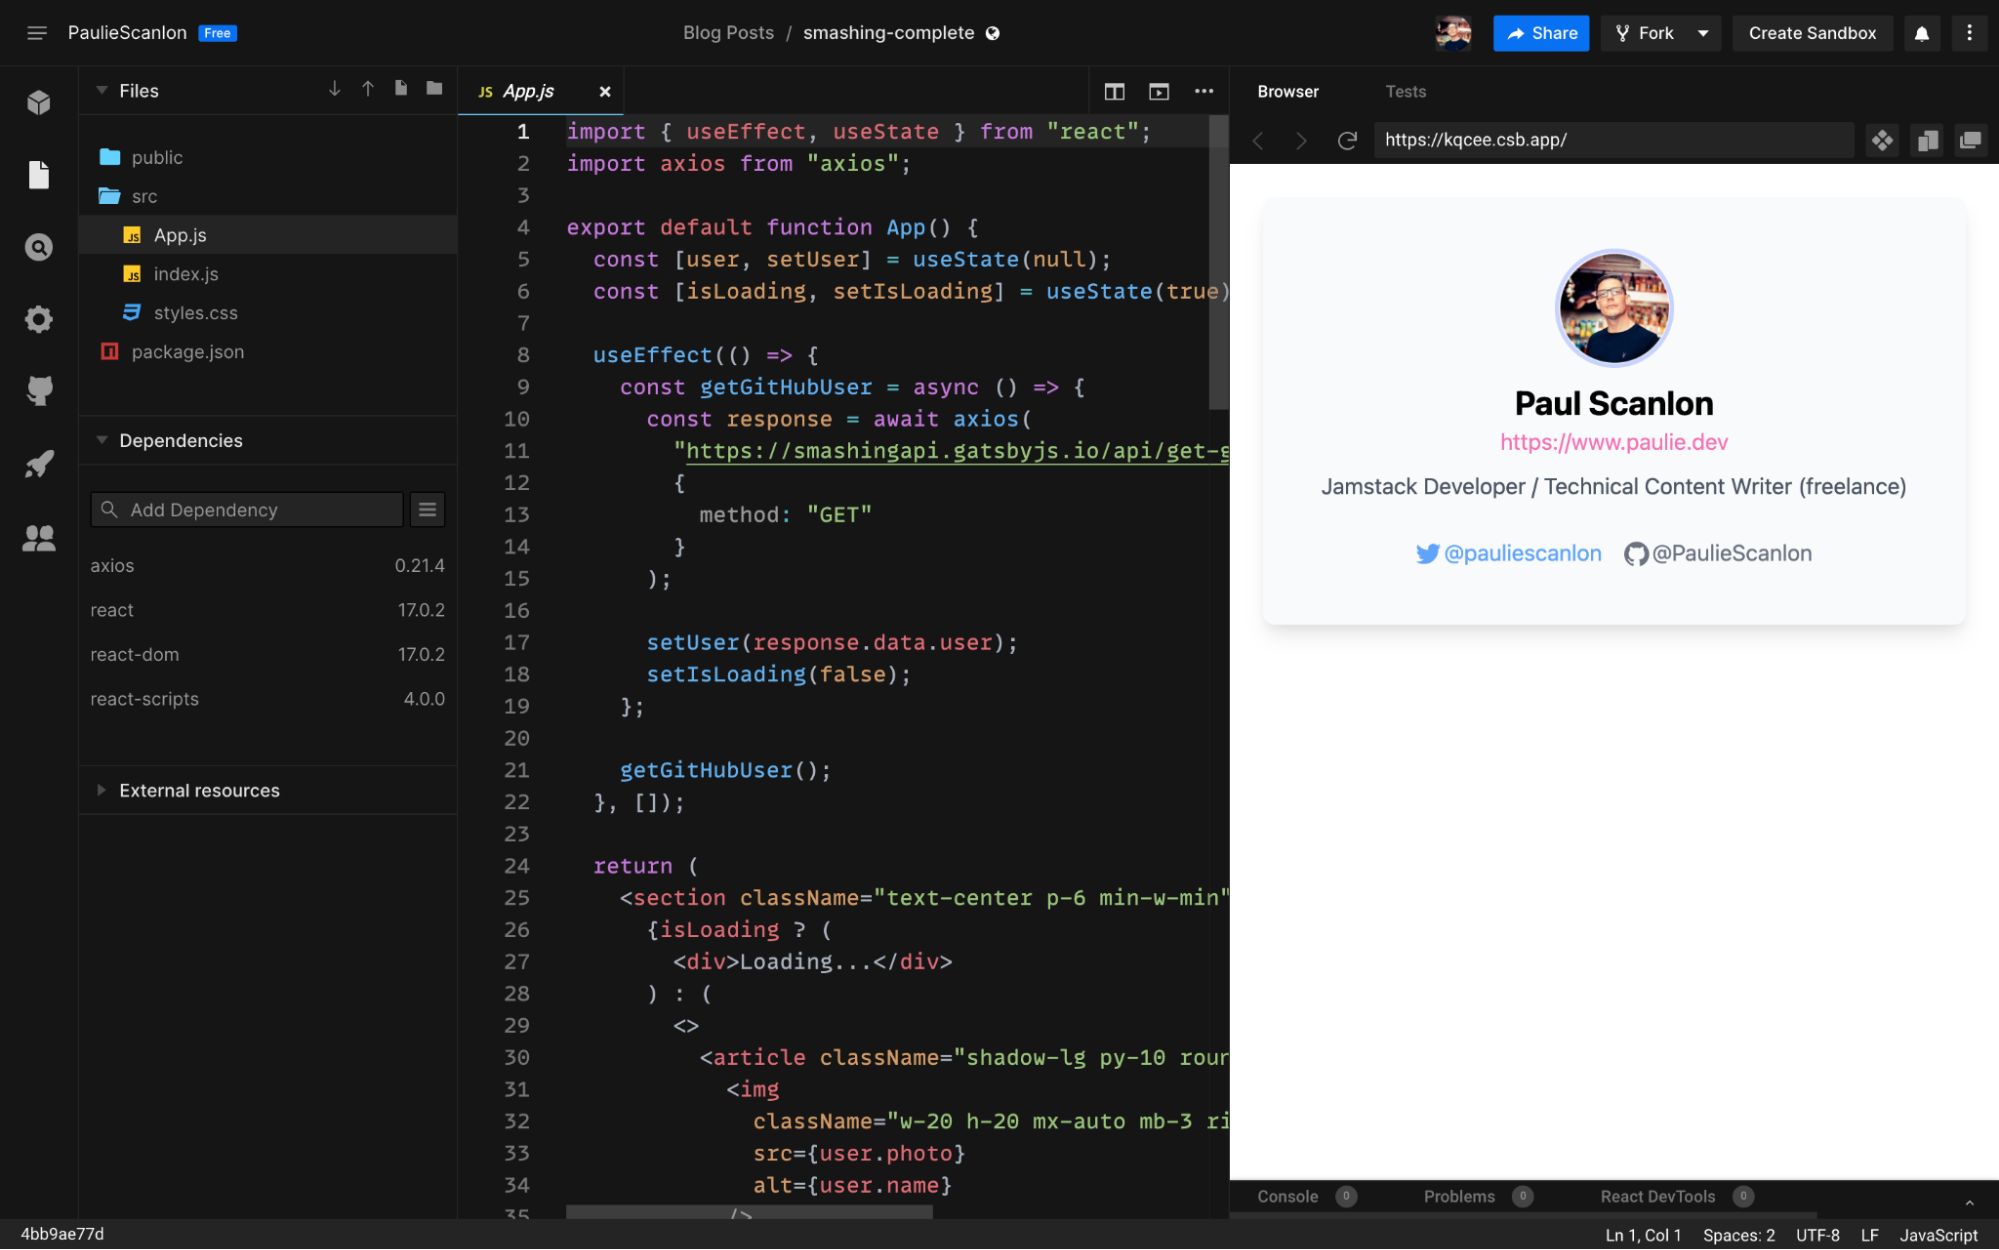
To talk to GitHub's REST API, install the official Octokit REST client:
npm install @octokit/restCreate src/api/get-github-user-raw.js to fetch the raw user object:
// src/api/get-github-user-raw.js

import { Octokit } from '@octokit/rest';

const octokit = new Octokit({
  auth: process.env.OCTOKIT_PERSONAL_ACCESS_TOKEN
});

export default async function handler(req, res) {
  res.setHeader('Access-Control-Allow-Origin', '*');

  try {
    const { data } = await octokit.request(`GET /users/{username}`, {
      username: 'PaulieScanlon'
    });

    res.status(200).json({ message: 'A ok!', user: data });
  } catch (error) {
    res.status(500).json({ message: 'Error!' });
  }
}
GitHub's REST endpoints require authentication with a personal access token. Follow GitHub's guide to create one, then store it safely in environment files. Add it to both .env.development and .env.production:
OCTOKIT_PERSONAL_ACCESS_TOKEN=123YourAccessTokenABCRefer to Gatsby's environment variables documentation for more about how these files behave.
Restart the development server:
npm run developThen visit http://localhost:8000/api/get-github-user-raw. The response contains an extensive JSON payload (abridged below):
{
  "message": "A ok!",
  "user": {
    "login": "PaulieScanlon",
    "id": 1465706,
    "node_id": "MDQ6VXNlcjE0NjU3MDY=",
    "avatar_url": "https://avatars.githubusercontent.com/u/1465706?v=4",
    "gravatar_id": "",
    "url": "https://api.github.com/users/PaulieScanlon",
    "type": "User",
    "site_admin": false,
    "name": "Paul Scanlon",
    "company": "Paulie Scanlon Ltd.",
    "blog": "https://www.paulie.dev",
    "location": "Worthing",
    "email": "[email protected]",
    "hireable": true,
    "bio": "Jamstack Developer / Technical Content Writer (freelance)",
    "twitter_username": "pauliescanlon",
    "created_at": "2012-02-23T13:43:26Z",
    "two_factor_authentication": true,
    ...
  }
}
To see the complete raw output, the sandbox below shows the full data your code receives directly from GitHub:
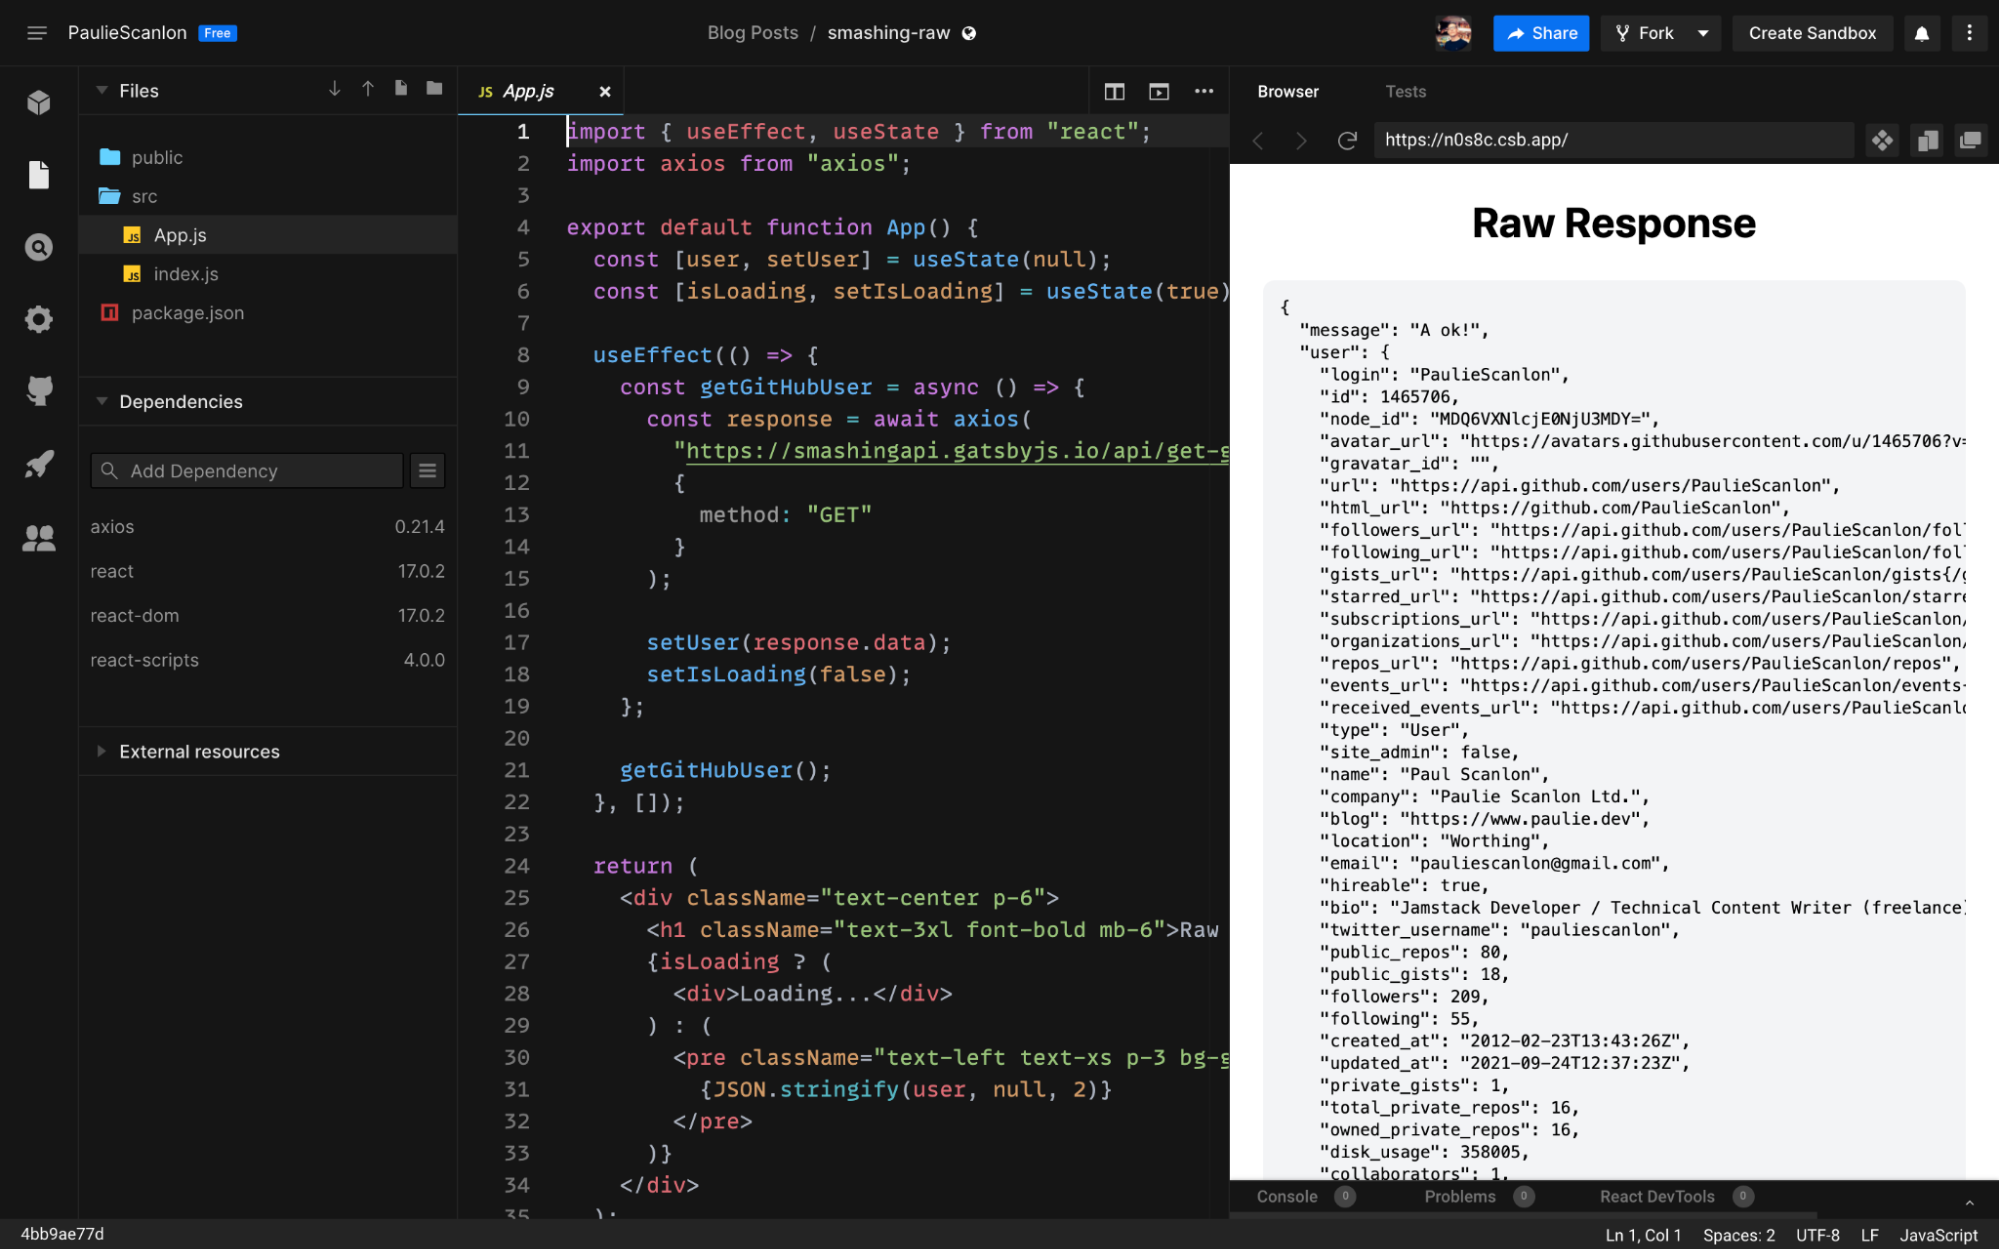
Shaping the Response
The raw GitHub response contains far more than the profile card needs. A common API practice is to slim the payload before sending it to clients — making the consuming front-end code simpler. Add src/api/get-github-user.js that maps the raw response into just those fields you plan to display, renaming keys and adding prefix text where helpful:
// src/api/get-github-user.js

import { Octokit } from '@octokit/rest';

const octokit = new Octokit({
  auth: process.env.OCTOKIT_PERSONAL_ACCESS_TOKEN
});

export default async function handler(req, res) {
  res.setHeader('Access-Control-Allow-Origin', '*');

  try {
    const { data } = await octokit.request(`GET /users/{username}`, {
      username: 'PaulieScanlon'
    });

    res.status(200).json({
      message: 'A ok!',
      user: {
        name: data.name,
        blog_url: data.blog,
        bio: data.bio,
        photo: data.avatar_url,
        githubUsername: `@${data.login}`,
        githubUrl: data.html_url,
        twitterUsername: `@${data.twitter_username}`,
        twitterUrl: `https://twitter.com/${data.twitter_username}`
      }
    });
  } catch (error) {
    res.status(500).json({ message: 'Error!' });
  }
}
The formatted response is now much easier for a front-end developer to consume:
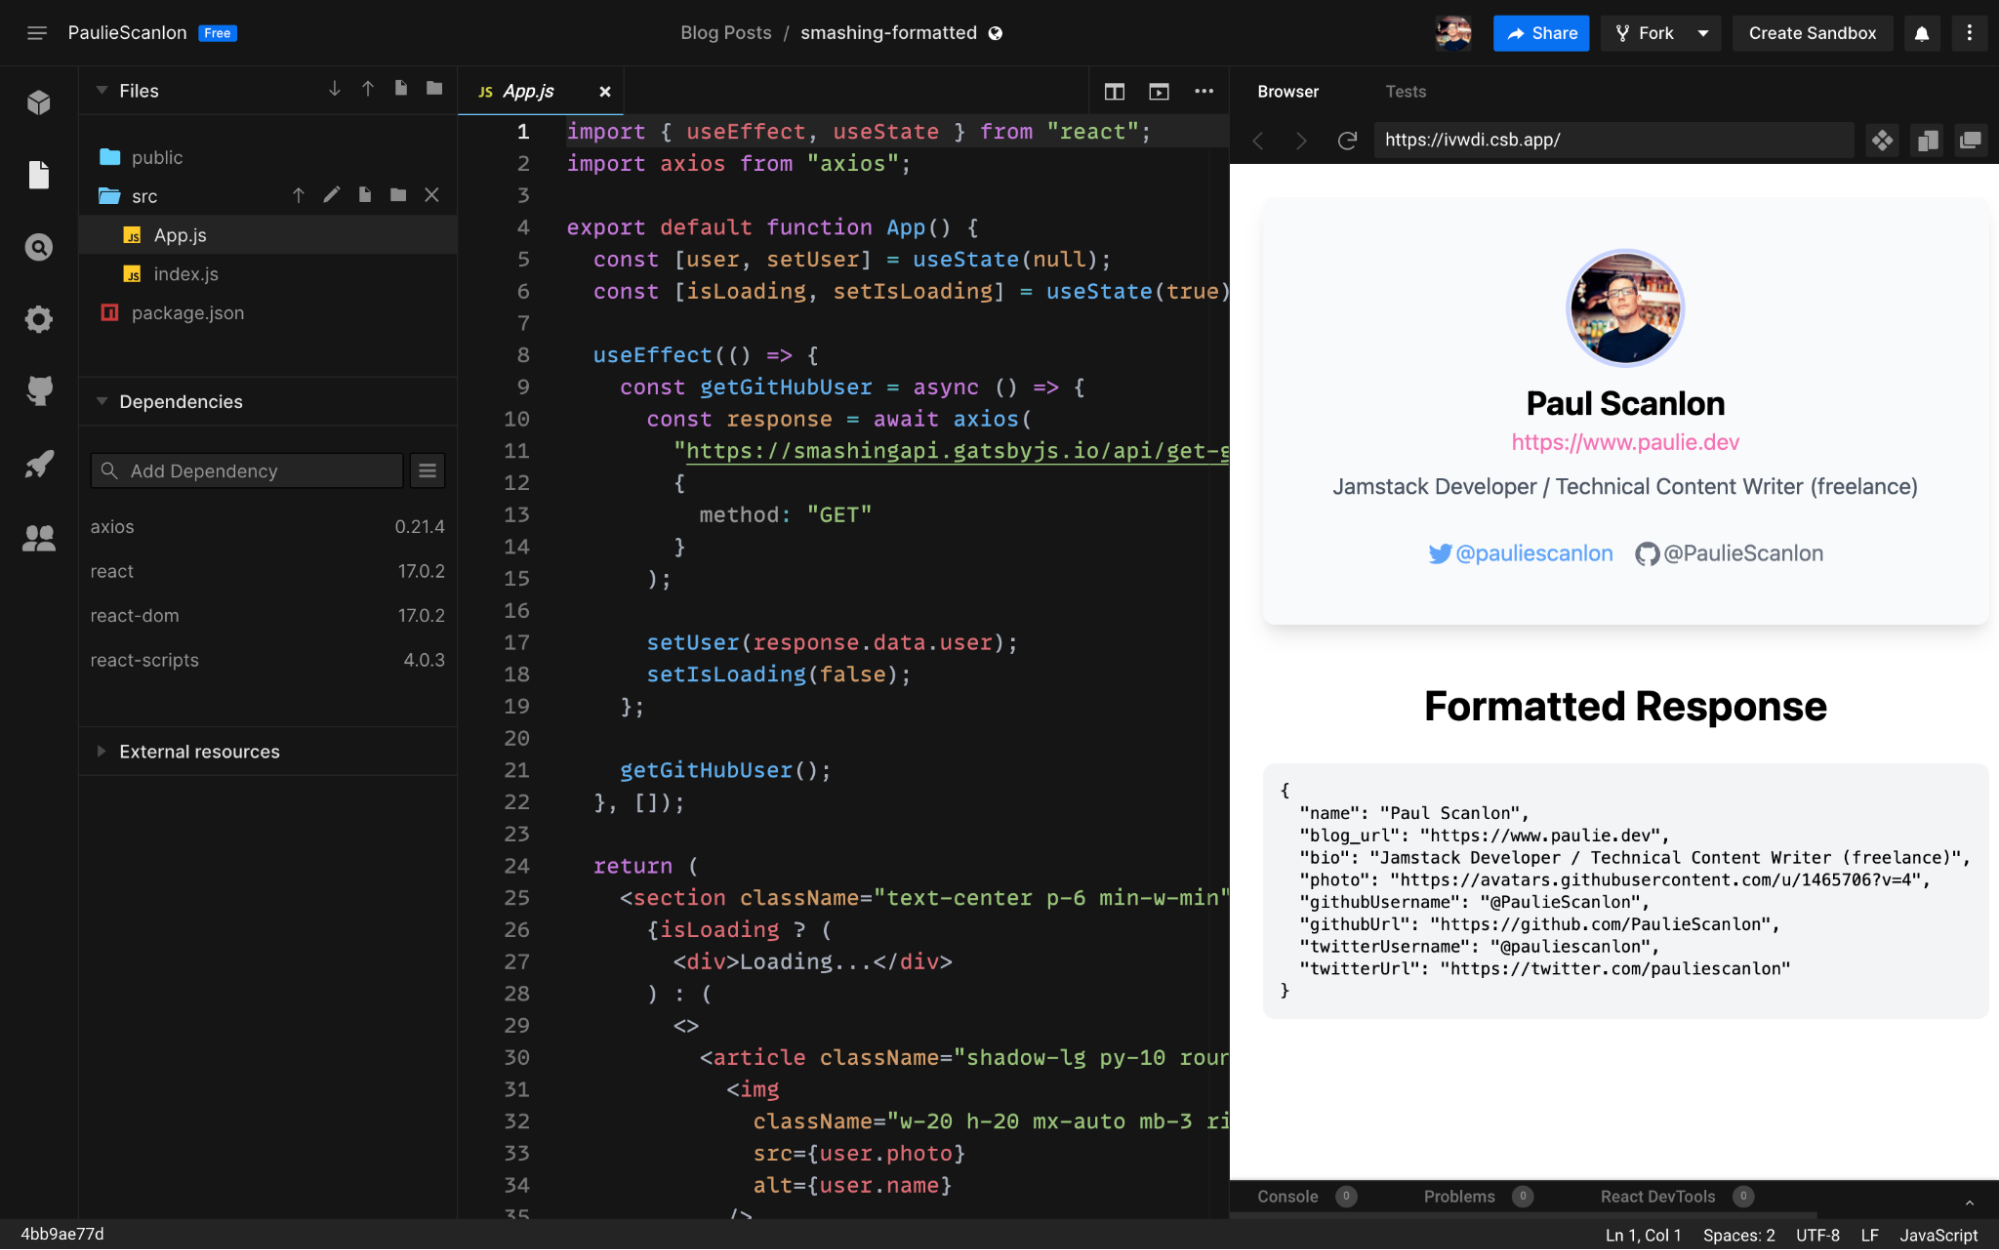
The full Card and Formatted Response demos are built on the same API as the simpler examples, and none of them runs Gatsby or Gatsby Cloud — which demonstrates why a shared Api is useful: any client technology can consume the same data.
Environment Variables in Gatsby Cloud
Before deploying the new GitHub-backed functions, add your personal access token to Gatsby Cloud's environment variables settings so the production runtime sees it, just as your .env.production file does locally:
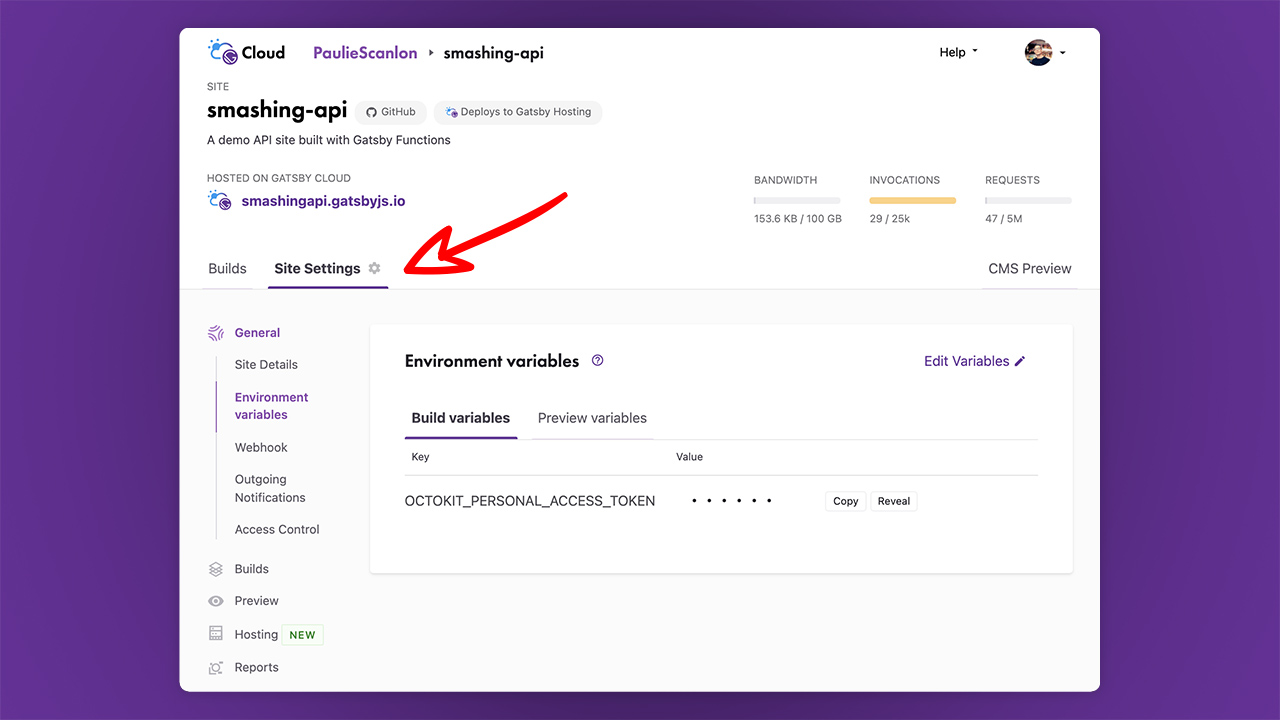
Once the deployment rebuilds, both /api/get-github-user-raw and /api/get-github-user will respond at your live Gatsby Cloud URL alongside the original my-first-function.
Reusing The Same API At Runtime And Build Time
Serverless functions are typically associated with client-side requests, but they don't have to be limited to that. Gatsby Functions can also be called during the build process, letting you statically bake data into a page at build time. This is useful for content that benefits from SEO or doesn't need to be fetched fresh with JavaScript on every visit.
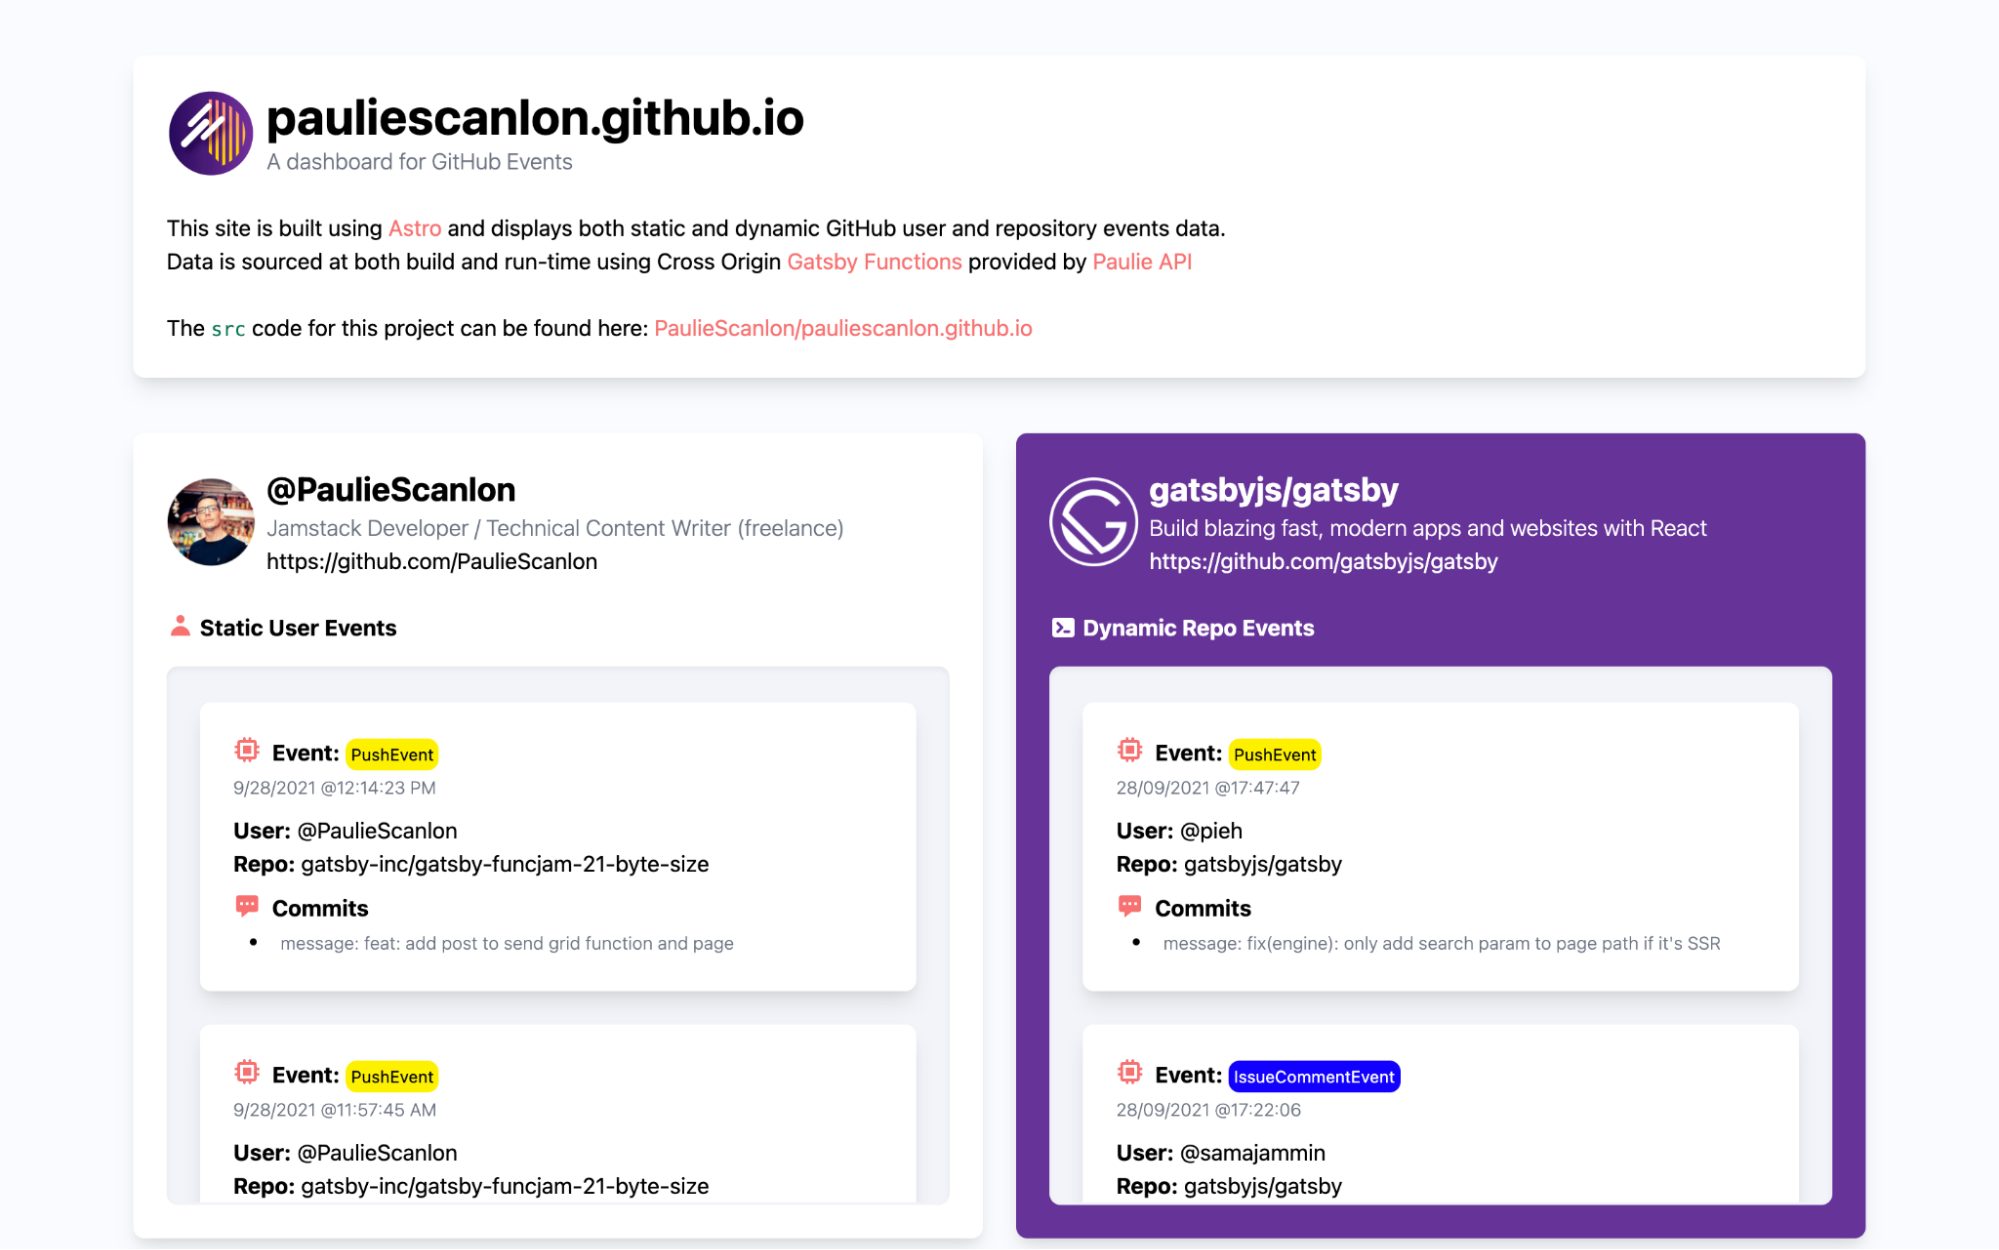
To demonstrate this, a data dashboard was built with Astro and deployed to GitHub Pages. The dashboard consumes the same API endpoints at two different stages: data on one side is requested at build time and baked into the static HTML, while data on the other side is fetched by the browser at runtime to show more current information. Different endpoints from the GitHub REST API were used to query different GitHub user accounts.

The key advantage here is code reuse. The same function logic serves both the server-side build and the browser-side request, meaning there is no duplication of implementation between the two environments.
Beyond A Tutorial: The Paulie API In Production
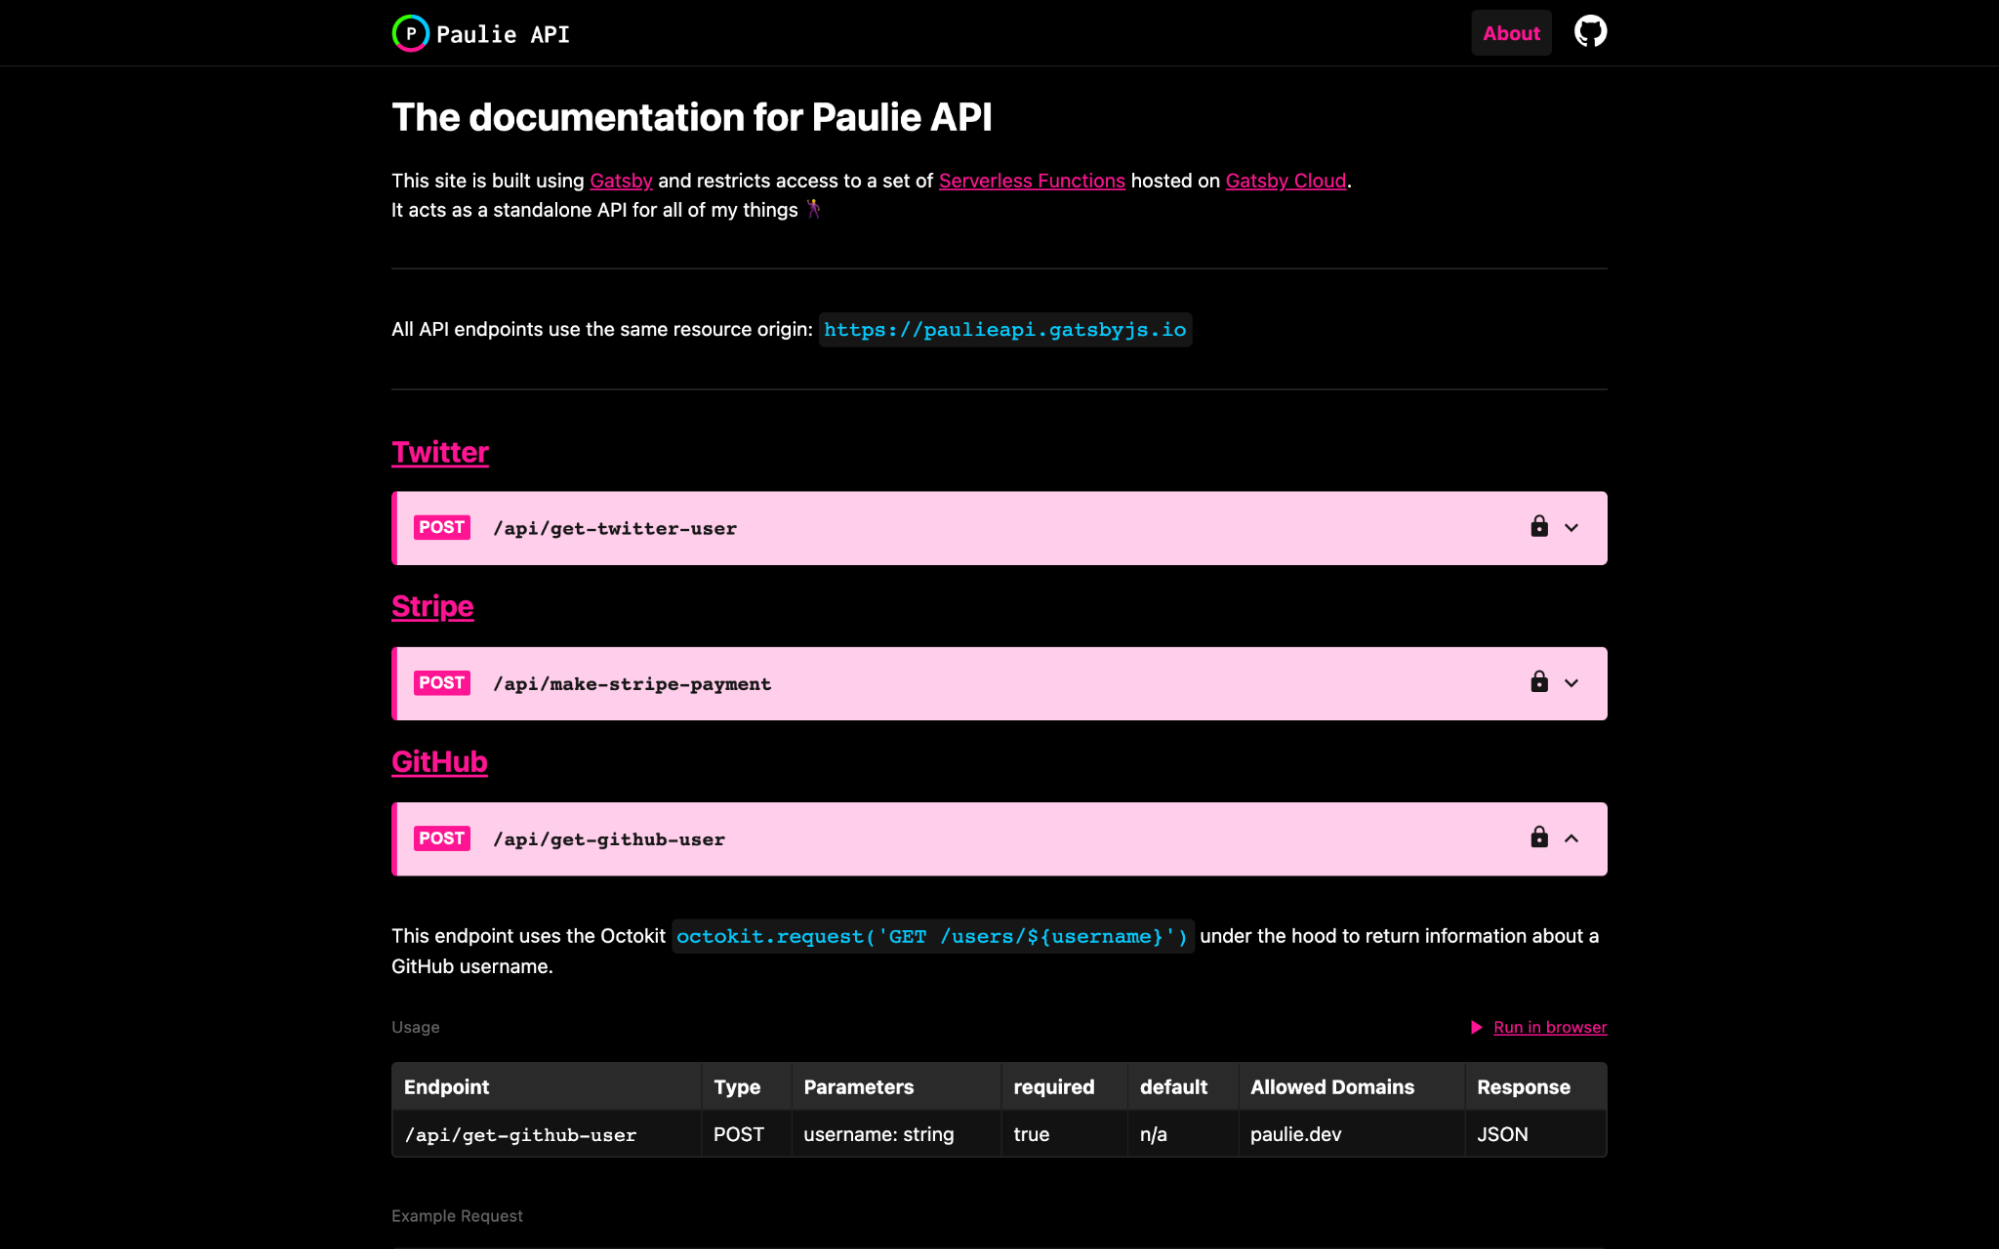
This tutorial's API is a simplified example. The same approach was expanded into a full production API called Paulie API, which powers several websites. Because Gatsby can act as both a site and an API, Paulie API doubles as its own documentation: each endpoint has a dedicated page that functions as an interactive playground for testing requests.
The takeaway is that a Gatsby Functions API is portable. It can be consumed by client-side or server-side code, and it works with any frontend tech stack, not just Gatsby-based sites.
Further Reading
- Color Mechanics In UI Kits
- Open-Source Meets Design Tooling With Penpot
- Building Gatsby Themes For WordPress-Powered Websites
- Jamstack Rendering Patterns: The Evolution