
An Event-Based Stock Price Tracker
Subscribing to events rather than constantly monitoring data streams has become the standard way users interact with real-time information. In software, this translates into building event-driven systems that notify users when specific conditions are met. This project demonstrates that pattern by building an application that tracks stock prices and sends web-push notifications when users' criteria are satisfied.
The Stocks Price Notifier application combines a Node.js data-fetching script, a Postgres database managed via Hasura GraphQL engine, and a React frontend using Apollo Client. Stock data — including high, low, open, close, and volume metrics — is stored in the database. Users subscribe to stocks based on price thresholds or choose to receive hourly updates. Web-push notifications fire when the subscribed conditions are met.

Project Architecture
The project is developed in four stages. First, a Node.js script fetches stock data at five-minute intervals from the Alpha Vantage API and inserts it into the Hasura-backed Postgres database. Next, database tables are configured through the Hasura console, which automatically generates GraphQL schemas, queries, and mutations. The frontend integrates the GraphQL endpoint with Apollo Client and Provider, displaying stock metrics as charts and enabling user preferences through GraphQL mutations. Finally, Hasura's event and scheduled triggers handle notification logic: event triggers fire when stock prices reach user-defined values, and scheduled triggers send regular hourly updates.
The complete code is available in the GitHub repository for reference.
Fetching Stock Data With Node.js
A single function queries the Alpha Vantage endpoint for stock metrics and runs on a five-minute setInterval loop. Alpha Vantage is a provider of free APIs for real-time and historical data on stocks, forex, and cryptocurrencies. The intraday endpoint returns open, high, low, close, and volume data points. An API key is required and can be obtained free from Alpha Vantage.
Dependencies and Configuration
Create a stocks-app directory with a server subdirectory. Run npm init and install three dependencies:
npm i isomorphic-fetch pg nodemon --saveisomorphic-fetch— provides consistentfetchusage across client and serverpg— non-blocking PostgreSQL client for Node.jsnodemon— restarts the server automatically when files change
A config.js file at the root holds the database credentials and connection parameters:
const config = {
  user: '<DATABASE_USER>',
  password: '<DATABASE_PASSWORD>',
  host: '<DATABASE_HOST>',
  port: '<DATABASE_PORT>',
  database: '<DATABASE_NAME>',
  ssl: '<IS_SSL>',
  apiHost: 'https://www.alphavantage.co/',
};

module.exports = config;
The user, password, host, port, database, and ssl values correspond to the Postgres configuration. These will be updated once the Hasura engine is set up.
Database Connection Pool
Establishing a database connection for each query is expensive and resource-intensive. A connection pool caches active connections and reuses them, creating new ones only when all existing connections are in use. Add a pool.js file that instantiates a Pool from the pg package:
const { Pool } = require('pg');
const config = require('./config');

const pool = new Pool({
  user: config.user,
  password: config.password,
  host: config.host,
  port: config.port,
  database: config.database,
  ssl: config.ssl,
});

module.exports = pool;
Fetching and Storing Stock Data
The main index.js file orchestrates the data retrieval:
const fetch = require('isomorphic-fetch');
const getConfig = require('./config');
const { insertStocksData } = require('./queries');

const symbols = [
  'NFLX',
  'MSFT',
  'AMZN',
  'W',
  'FB'
];

(function getStocksData () {

  const apiConfig = getConfig('apiHostOptions');
  const { host, timeSeriesFunction, interval, key } = apiConfig;

  symbols.forEach((symbol) => {
    fetch(`${host}query/?function=${timeSeriesFunction}&symbol=${symbol}&interval=${interval}&apikey=${key}`)
    .then((res) => res.json())
    .then((data) => {
      const timeSeries = data['Time Series (5min)'];
      Object.keys(timeSeries).map((key) => {
        const dataPoint = timeSeries[key];
        const payload = [
          symbol,
          dataPoint['2. high'],
          dataPoint['3. low'],
          dataPoint['1. open'],
          dataPoint['4. close'],
          dataPoint['5. volume'],
          key,
        ];
        insertStocksData(payload);
      });
    });
  })
})()
The project tracks five stocks: NFLX (Netflix), MSFT (Microsoft), AMZN (Amazon), W (Wayfair), and FB (Facebook). An IIFE named getStocksData iterates through these symbols and requests data from ${host}query/?function=${timeSeriesFunction}&symbol=${symbol}&interval=${interval}&apikey=${key}. The insertStocksData function then writes the returned data points into the stock_data table in Postgres:
const insertStocksData = async (payload) => {
  const query = 'INSERT INTO stock_data (symbol, high, low, open, close, volume, time) VALUES ($1, $2, $3, $4, $5, $6, $7)';
  pool.query(query, payload, (err, result) => {
    console.log('result here', err);
  });
};
Once the Hasura backend is configured, the correct values can be populated in the config file to complete the data-pipeline. While this approach uses raw SQL for database inserts, GraphQL mutations will provide a more streamlined path after the Hasura engine is set up. The full server code is available in the server directory of the repository.
Building the Database Layer With Hasura
Hasura generates GraphQL schemas, queries, mutations, subscriptions and event triggers automatically from a Postgres database. After signing up through the Try Hasura flow and naming the project, you’ll connect a Postgres instance. The project setup provides a Postgres DB URL, which needs to be saved for the server configuration.
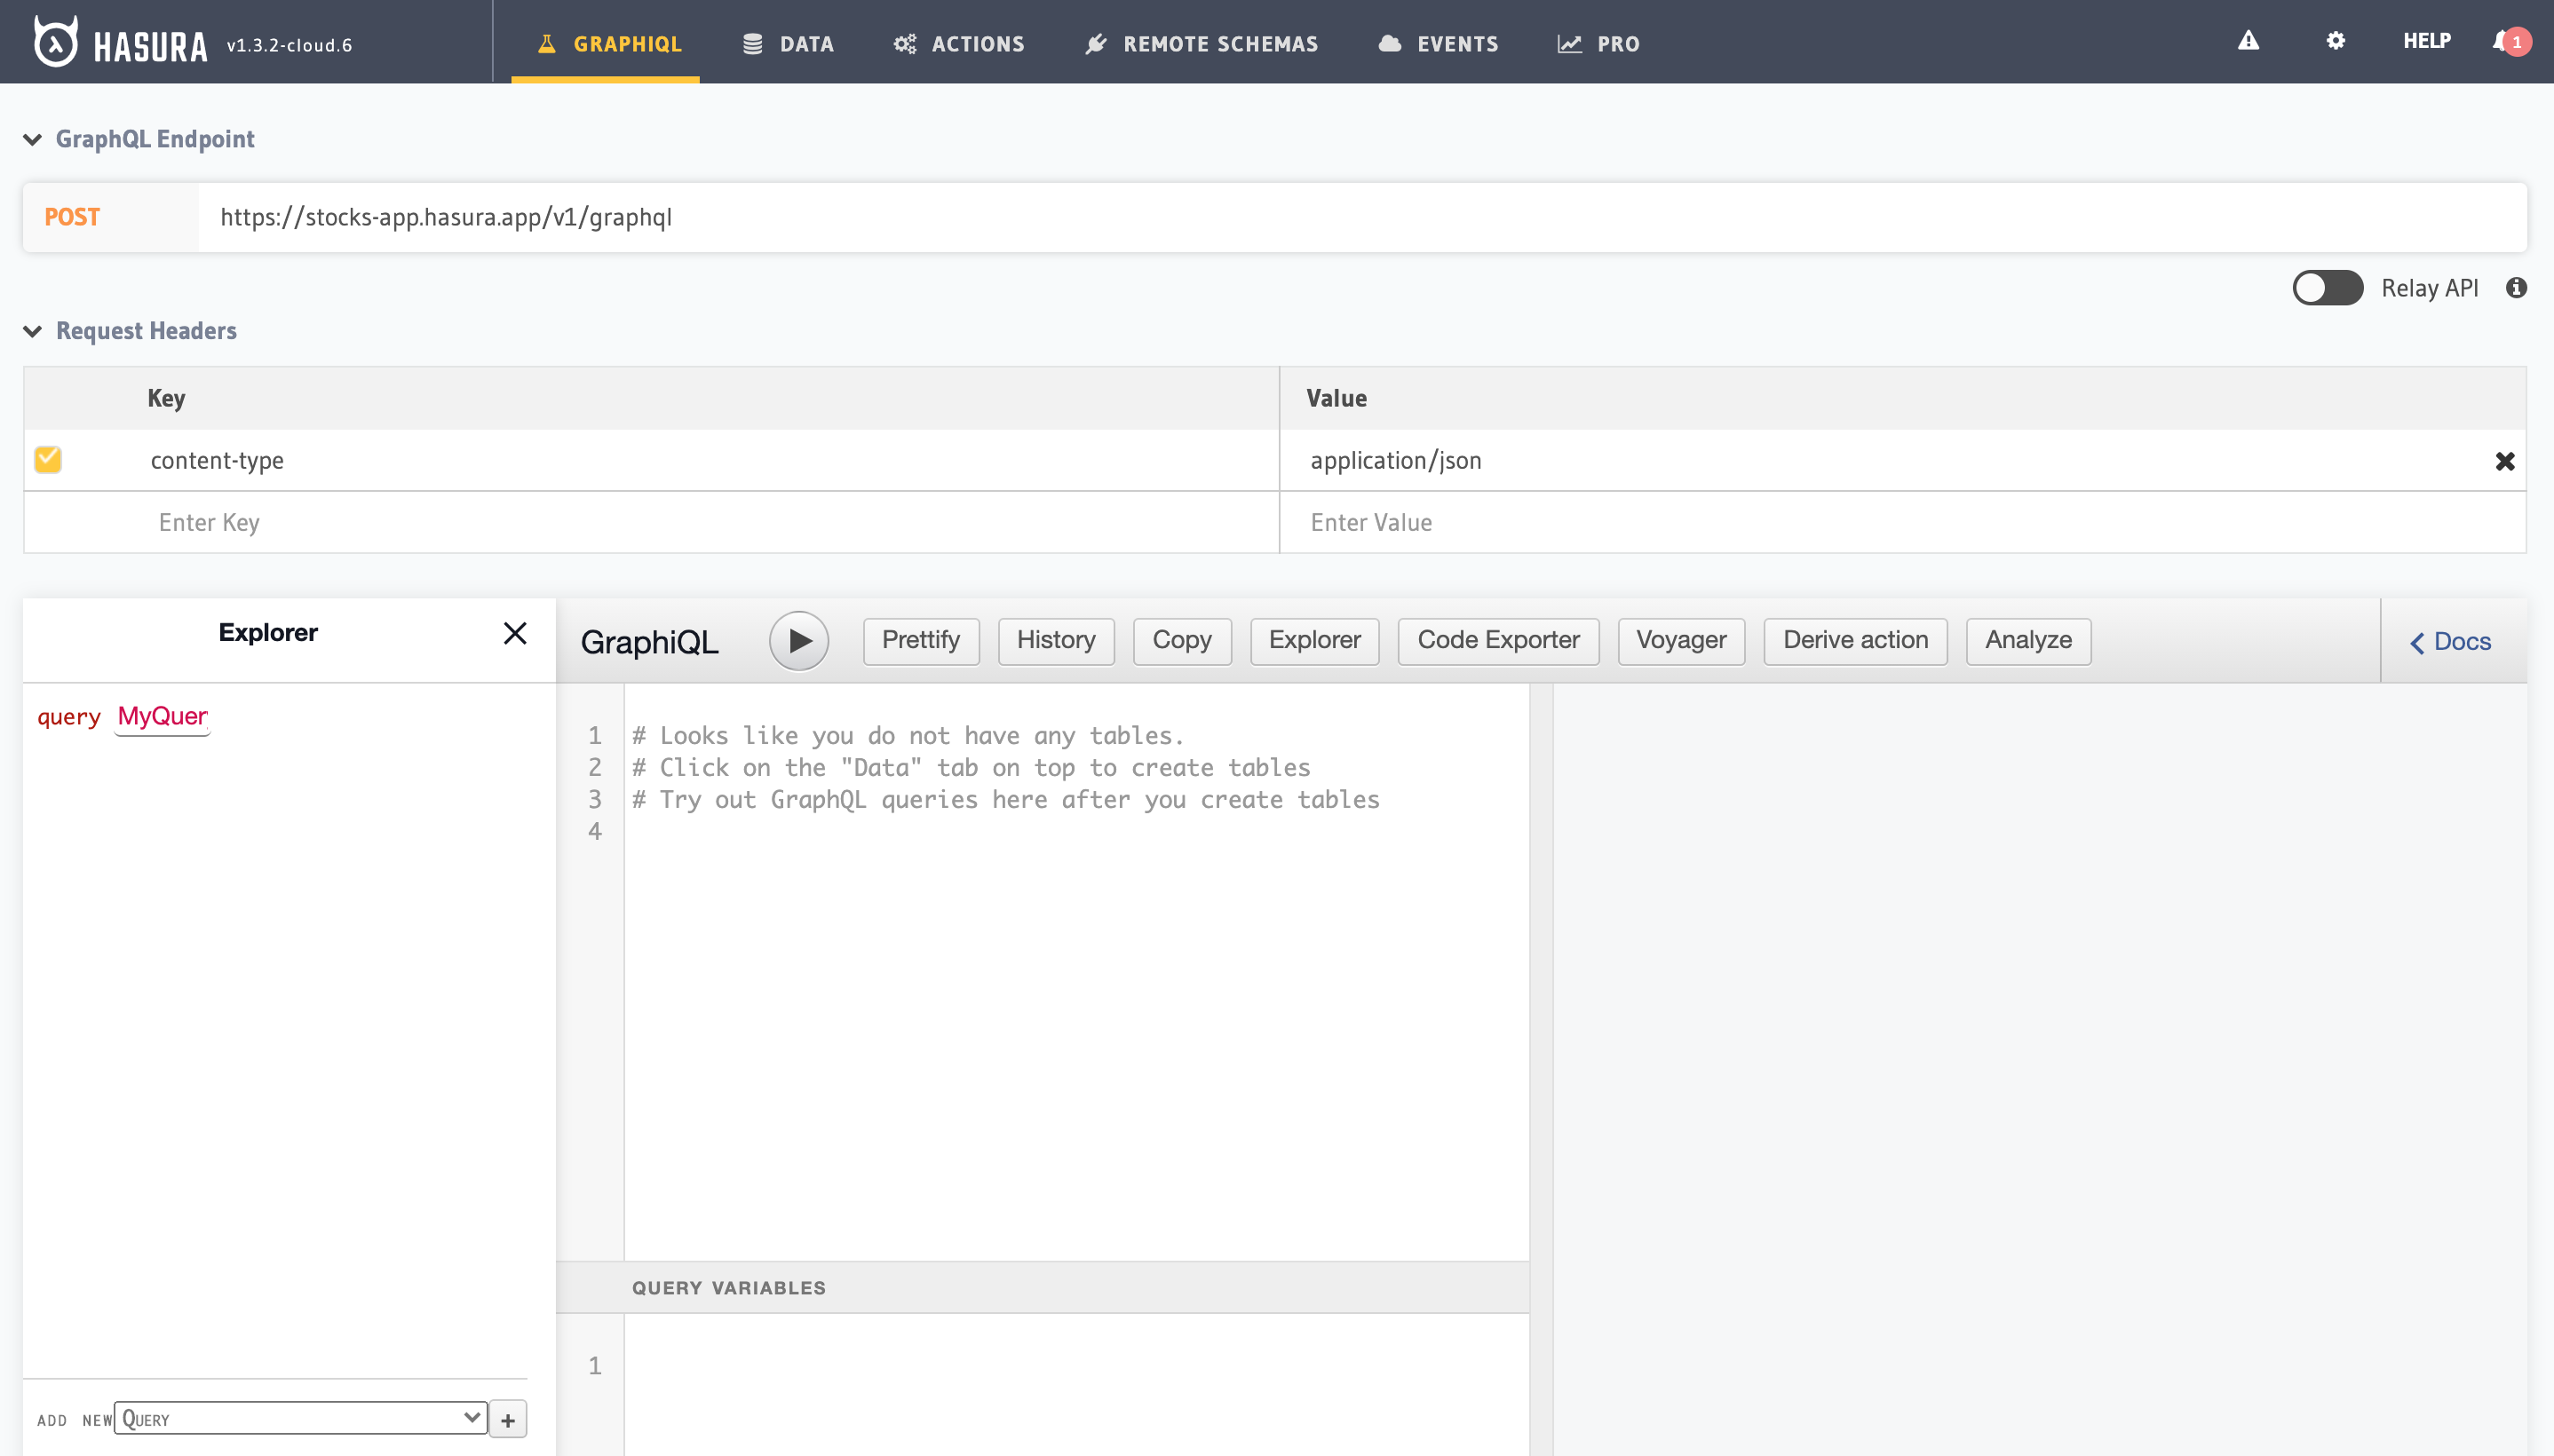
With the console open, head to the Data tab and define the four tables required for the notifier.
Table Definitions
symbol — Stores stock symbol information with id as the primary key and a company field of type varchar. Add the symbols you wish to track here:
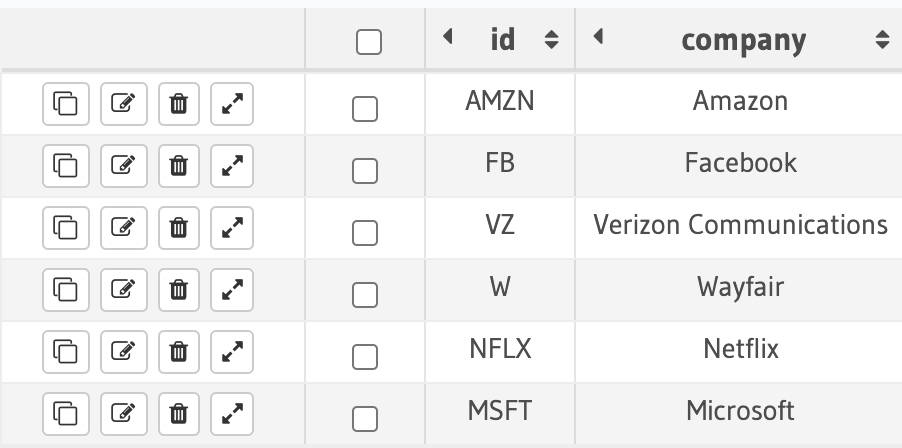
symbol table. (Large preview)stock_data — Holds price data and is populated by the Node.js script from the previous section. The fields are id, symbol, time and the metrics high, low, open, close, volume.
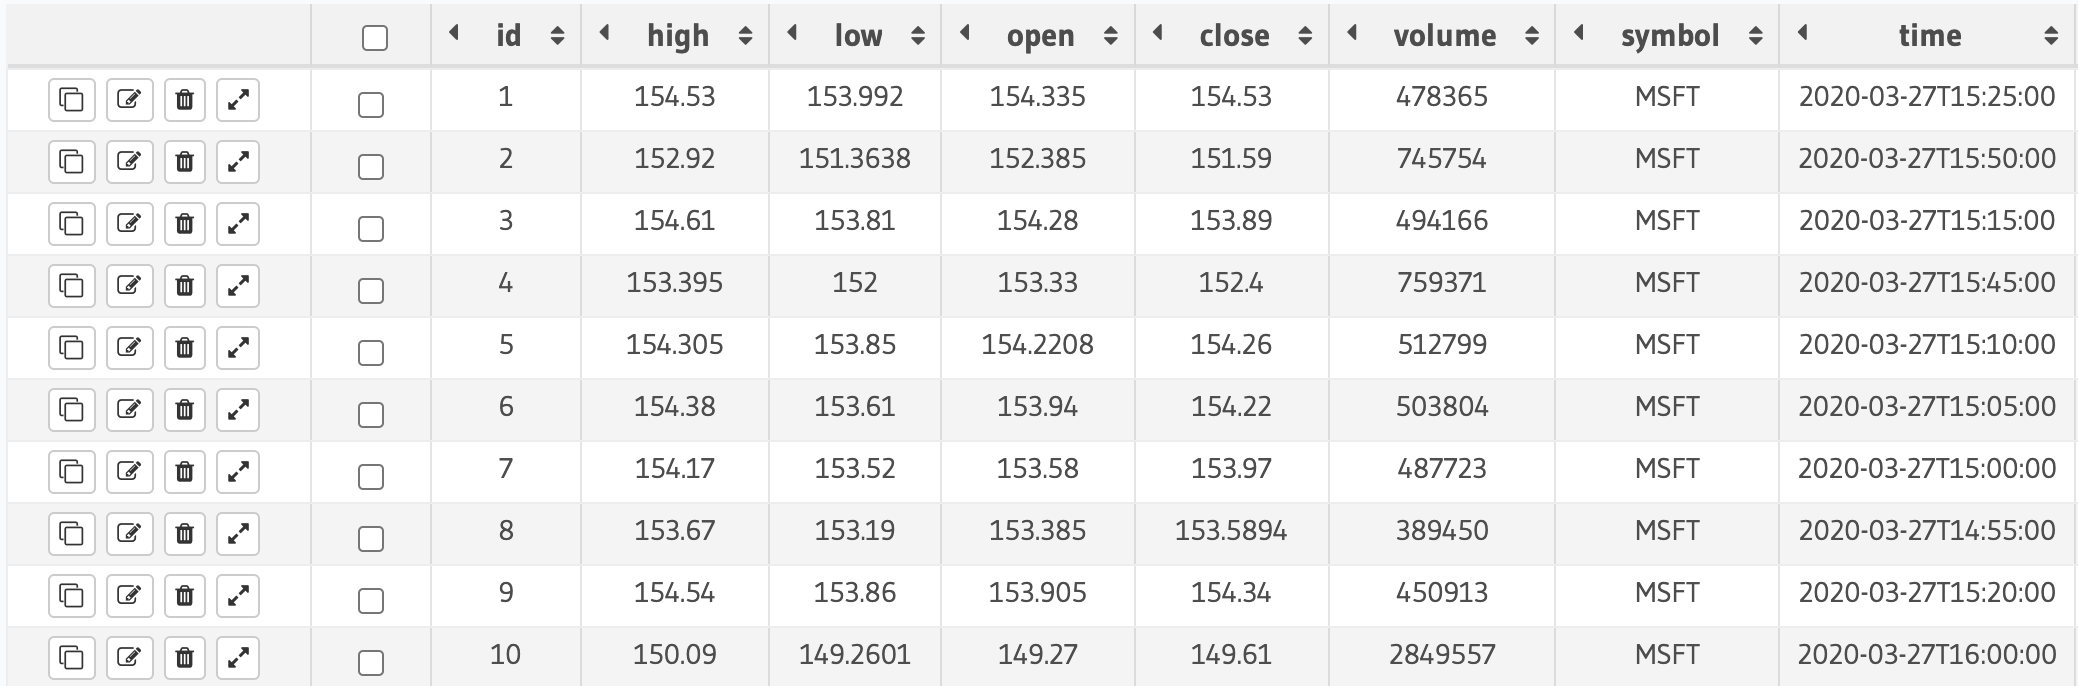
stock_data table. (Large preview)user_subscription — Keeps web-push subscription objects per user. It has an id primary key of type uuid and a subscription field of type jsonb.
events — Records the notification event options a user opts into for a stock. Columns:
id: auto-increment primary key.symbol: text field.user_id: typeuuid.trigger_type: eithertimeorevent.trigger_value: the threshold value. For an event trigger where the user wants updates when a price hits 1000,trigger_valueis 1000.
Relationships
Link the events table to user_subscription so push notifications can be sent to the right subscription object:
events.user_id → user_subscription.idConnect stock_data to symbol:
stock_data.symbol → symbol.idDefine the reverse relations on the symbol table as well:
stock_data.symbol  → symbol.id
events.symbol  → symbol.id
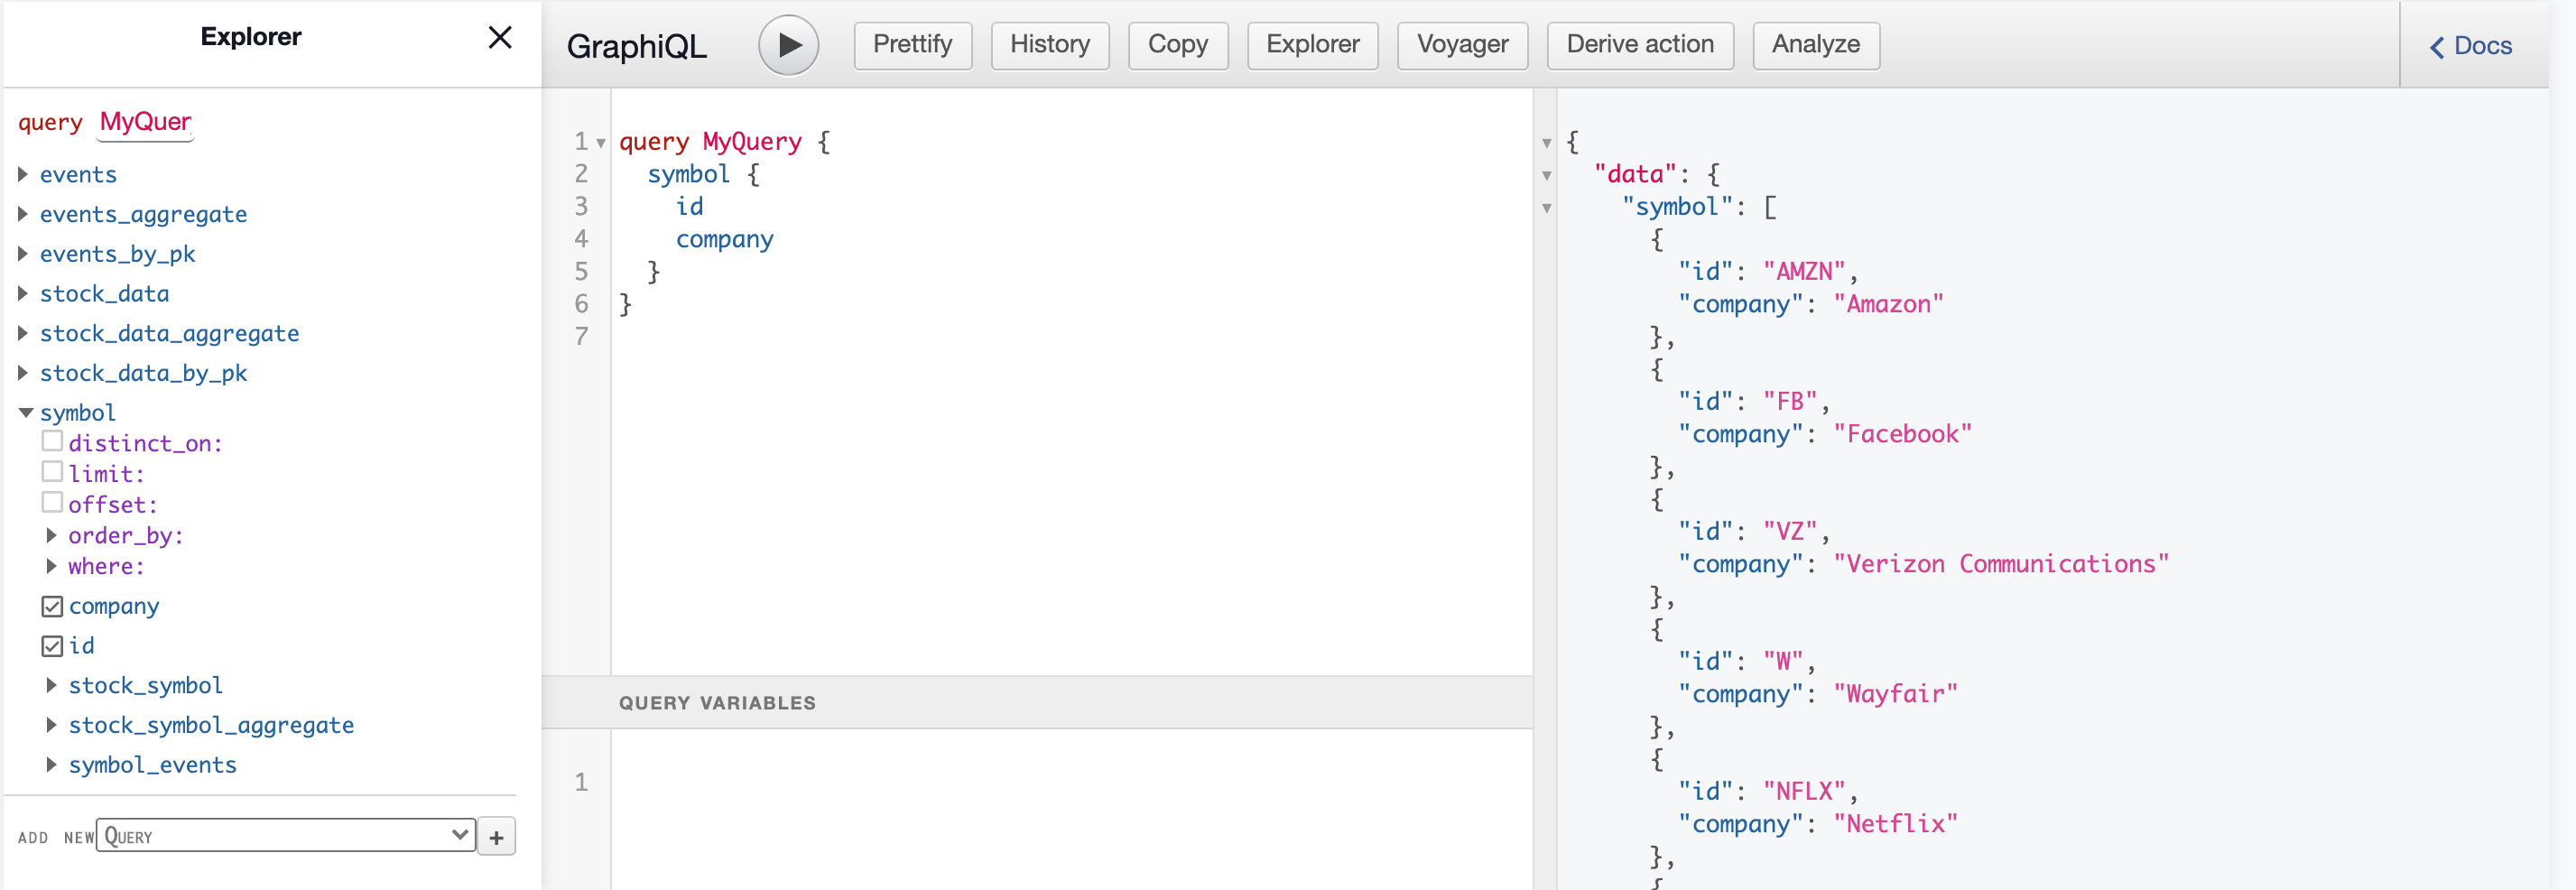
Once the tables and relations are in place, Hasura immediately exposes GraphQL queries on them. The GRAPHIQL tab shows the generated query structure, and you can apply standard filters such as distinct_on, limit, offset, order_by and where on any query.
Connecting the Node.js Script
The server code in the server directory needs the database and API options in config.js:
const config = {
  databaseOptions: {
    user: '<DATABASE_USER>',
    password: '<DATABASE_PASSWORD>',
    host: '<DATABASE_HOST>',
    port: '<DATABASE_PORT>',
    database: '<DATABASE_NAME>',
    ssl: true,
  },
  apiHostOptions: {
    host: 'https://www.alphavantage.co/',
    key: '<API_KEY>',
    timeSeriesFunction: 'TIME_SERIES_INTRADAY',
    interval: '5min'
  },
  graphqlURL: '<GRAPHQL_URL>'
};

const getConfig = (key) => {
  return config[key];
};

module.exports = getConfig;
Fill in the Postgres connection details from the Heroku database string. The apiHostOptions object holds the API host, key, timeSeriesFunction and interval. The graphqlURL field is available from the GRAPHIQL tab on the Hasura console. The getConfig function returns requested values from the config object and is already referenced by index.js.
The package.json script starts the data population:
"scripts": {
    "start": "nodemon index.js"
}
Running npm start populates the tables with data points for the symbols array defined in index.js.
Refactoring to GraphQL Mutations
The insertStocksData function in queries.js originally used a raw SQL query:
const query = 'INSERT INTO stock_data (symbol, high, low, open, close, volume, time) VALUES ($1, $2, $3, $4, $5, $6, $7)';That query can be replaced by a Hasura GraphQL mutation. The refactored queries.js uses the apollo-fetch module, which returns a fetch function for querying or mutating data on the GraphQL endpoint:
const { createApolloFetch } = require('apollo-fetch');
const getConfig = require('./config');

const GRAPHQL_URL = getConfig('graphqlURL');
const fetch = createApolloFetch({
  uri: GRAPHQL_URL,
});

const insertStocksData = async (payload) => {
  const insertStockMutation = await fetch({
    query: `mutation insertStockData($objects: [stock_data_insert_input!]!) {
      insert_stock_data (objects: $objects) {
        returning {
          id
        }
      }
    }`,
    variables: {
      objects: payload,
    },
  });
  console.log('insertStockMutation', insertStockMutation);
};

module.exports = {
  insertStocksData
}
With this change, the index.js snippet needs to return the stocks object in the shape the insertStocksData mutation expects. The full versions of the refactored code are in index2.js and queries2.js in the server directory. Note that the database configuration options are no longer required with this approach, only graphqlURL in config.js.
With the data layer complete, the next step is the React-based front end.
Front-End: React And Apollo Client
The front-end lives in the same repository and boots from create-react-app. A stock service worker generated this way handles asset caching but locks out custom service worker logic; some open issues cover adding that flexibility. There are workarounds, and this project uses one of them.
The src directory is organized by responsibility: components holds presentational pieces like the loader and chart, services has transformation helpers, styles carries the Sass files, and views contains the two main screen-level components. Service worker files live alongside these, but they are a separate concern for now. Only two views are required: the symbol list and the symbol timeseries, with the chart built from the Highcharts library.
Dependencies
The project pulls in a focused set of packages:
apollo-boost— zero-config Apollo Client setup with sensible defaults.reactstrapandbootstrap— UI component library and its styles.graphqlandgraphql-type-json— GraphQL core plus support for thejsontype in the schema.highchartsandhighcharts-react-official— chart rendering.node-sass— Sass compilation for styling.uuid— generation of strong random identifiers.
Apollo Client Setup
An apolloClient.js file in src instantiates the client and supplies the Hasura GraphQL endpoint from the uri config option — the same URI shown under GraphQL Endpoint on the GRAPHIQL tab of the Hasura console.
import ApolloClient from 'apollo-boost';

const apolloClient = new ApolloClient({
  uri: '<HASURA_CONSOLE_URL>'
});

export default apolloClient;
That small file connects the entire schema to the app. The client instance is passed to ApolloProvider, which wraps the root component so nested views can issue queries against it. In index.js, the render function mounts the root component and receives the client prop on ApolloProvider. The subscription insertion snippet inside index.js will be explained later.
const Wrapper = () => {
/* some service worker logic - ignore for now */
  const [insertSubscription] = useMutation(subscriptionMutation);
  useEffect(() => {
    serviceWorker.register(insertSubscription);
  }, [])
  /* ignore the above snippet */
  return <App />;
}

ReactDOM.render(
  <ApolloProvider client={apolloClient}>
    <Wrapper />
  </ApolloProvider>,
  document.getElementById('root')
);
Custom Service Worker
Service workers intercept network requests, checking cache-first for assets, and also deliver web-push notifications. Since the stock alert feature depends on push messages, the default service worker needs to be replaced with a custom implementation.
The registration flow starts with serviceWorker.register(insertSubscription). The register function verifies browser support for the Service Worker API, then registers the worker from the URL provided by swUrl.
export const register = (insertSubscription) => {
  if ('serviceWorker' in navigator) {
    const swUrl = `${process.env.PUBLIC_URL}/serviceWorker.js`
    navigator.serviceWorker.register(swUrl)
      .then(() => {
        console.log('Service Worker registered');
        return navigator.serviceWorker.ready;
      })
      .then((serviceWorkerRegistration) => {
        getSubscription(serviceWorkerRegistration, insertSubscription);
        Notification.requestPermission();
      })
  }
}
Once registered, getSubscription calls subscribe on the pushManager object to obtain a subscription object, which is stored in the user_subscription table against a userId generated by uuid.
const getSubscription = (serviceWorkerRegistration, insertSubscription) => {
  serviceWorkerRegistration.pushManager.getSubscription()
    .then ((subscription) => {
      const userId = uuidv4();
      if (!subscription) {
        const applicationServerKey = urlB64ToUint8Array('<APPLICATION_SERVER_KEY>')
        serviceWorkerRegistration.pushManager.subscribe({
          userVisibleOnly: true,
          applicationServerKey
        }).then (subscription => {
          insertSubscription({
            variables: {
              userId,
              subscription
            }
          });
          localStorage.setItem('serviceWorkerRegistration', JSON.stringify({
            userId,
            subscription
          }));
        })
      }
    })
}
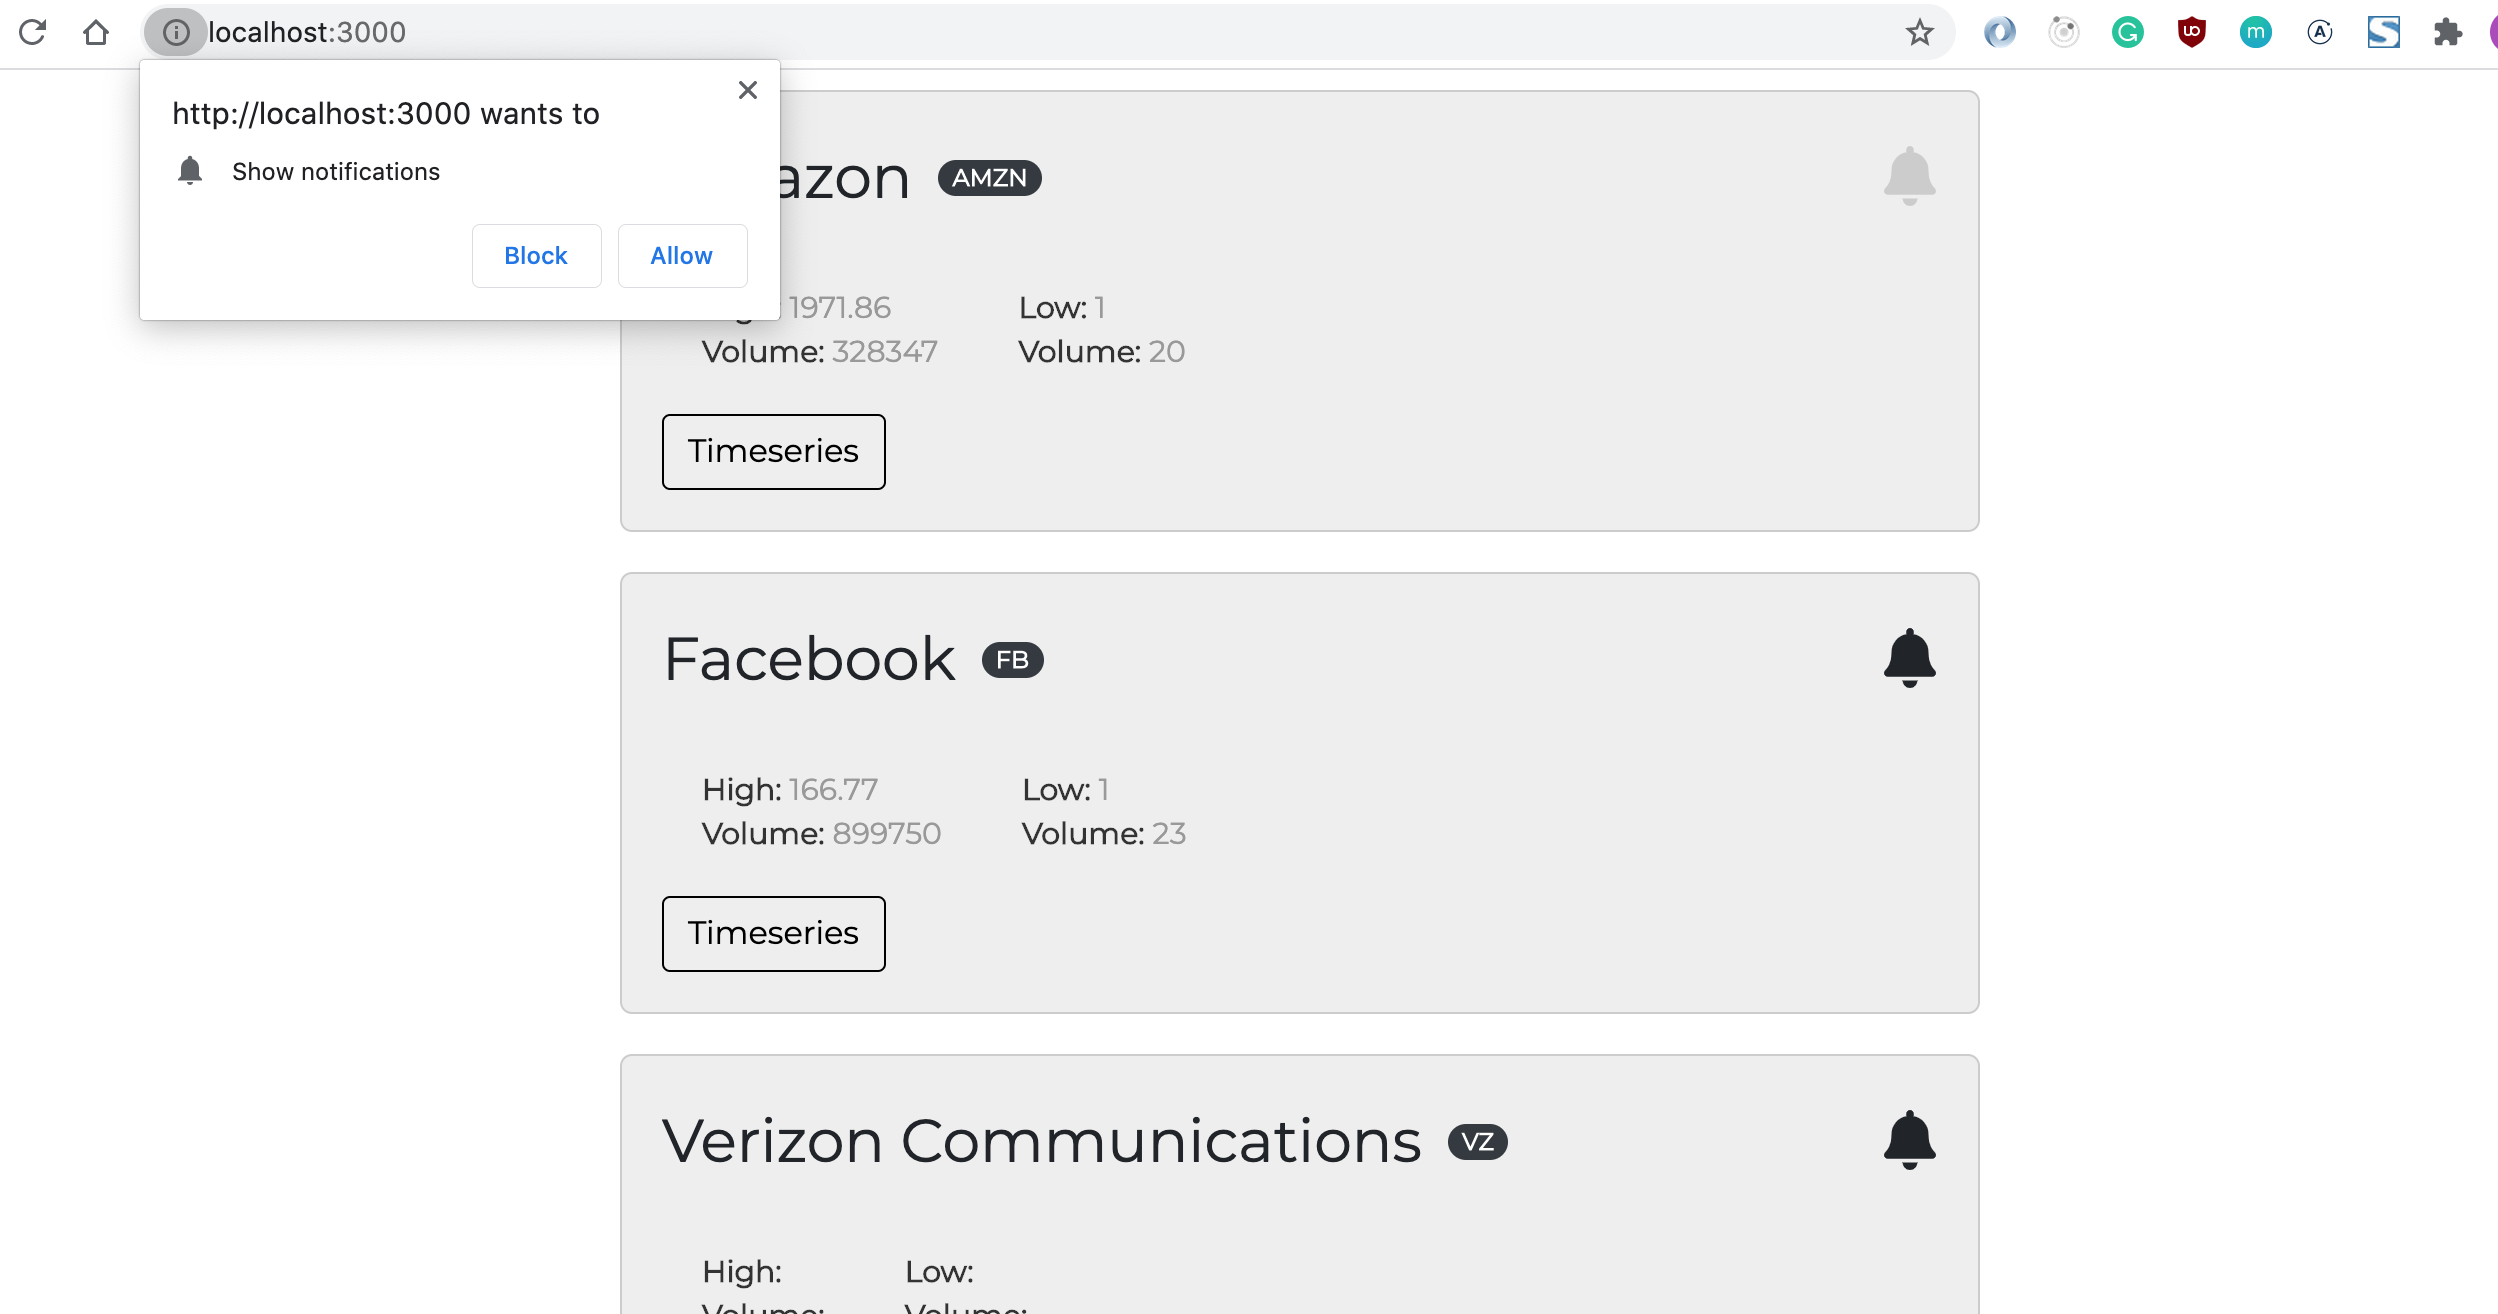
Before subscription data reaches the database, Notification.requestPermission() asks the user for notification access. When allowed, a subscription object comes back from the push service and is persisted in localStorage.
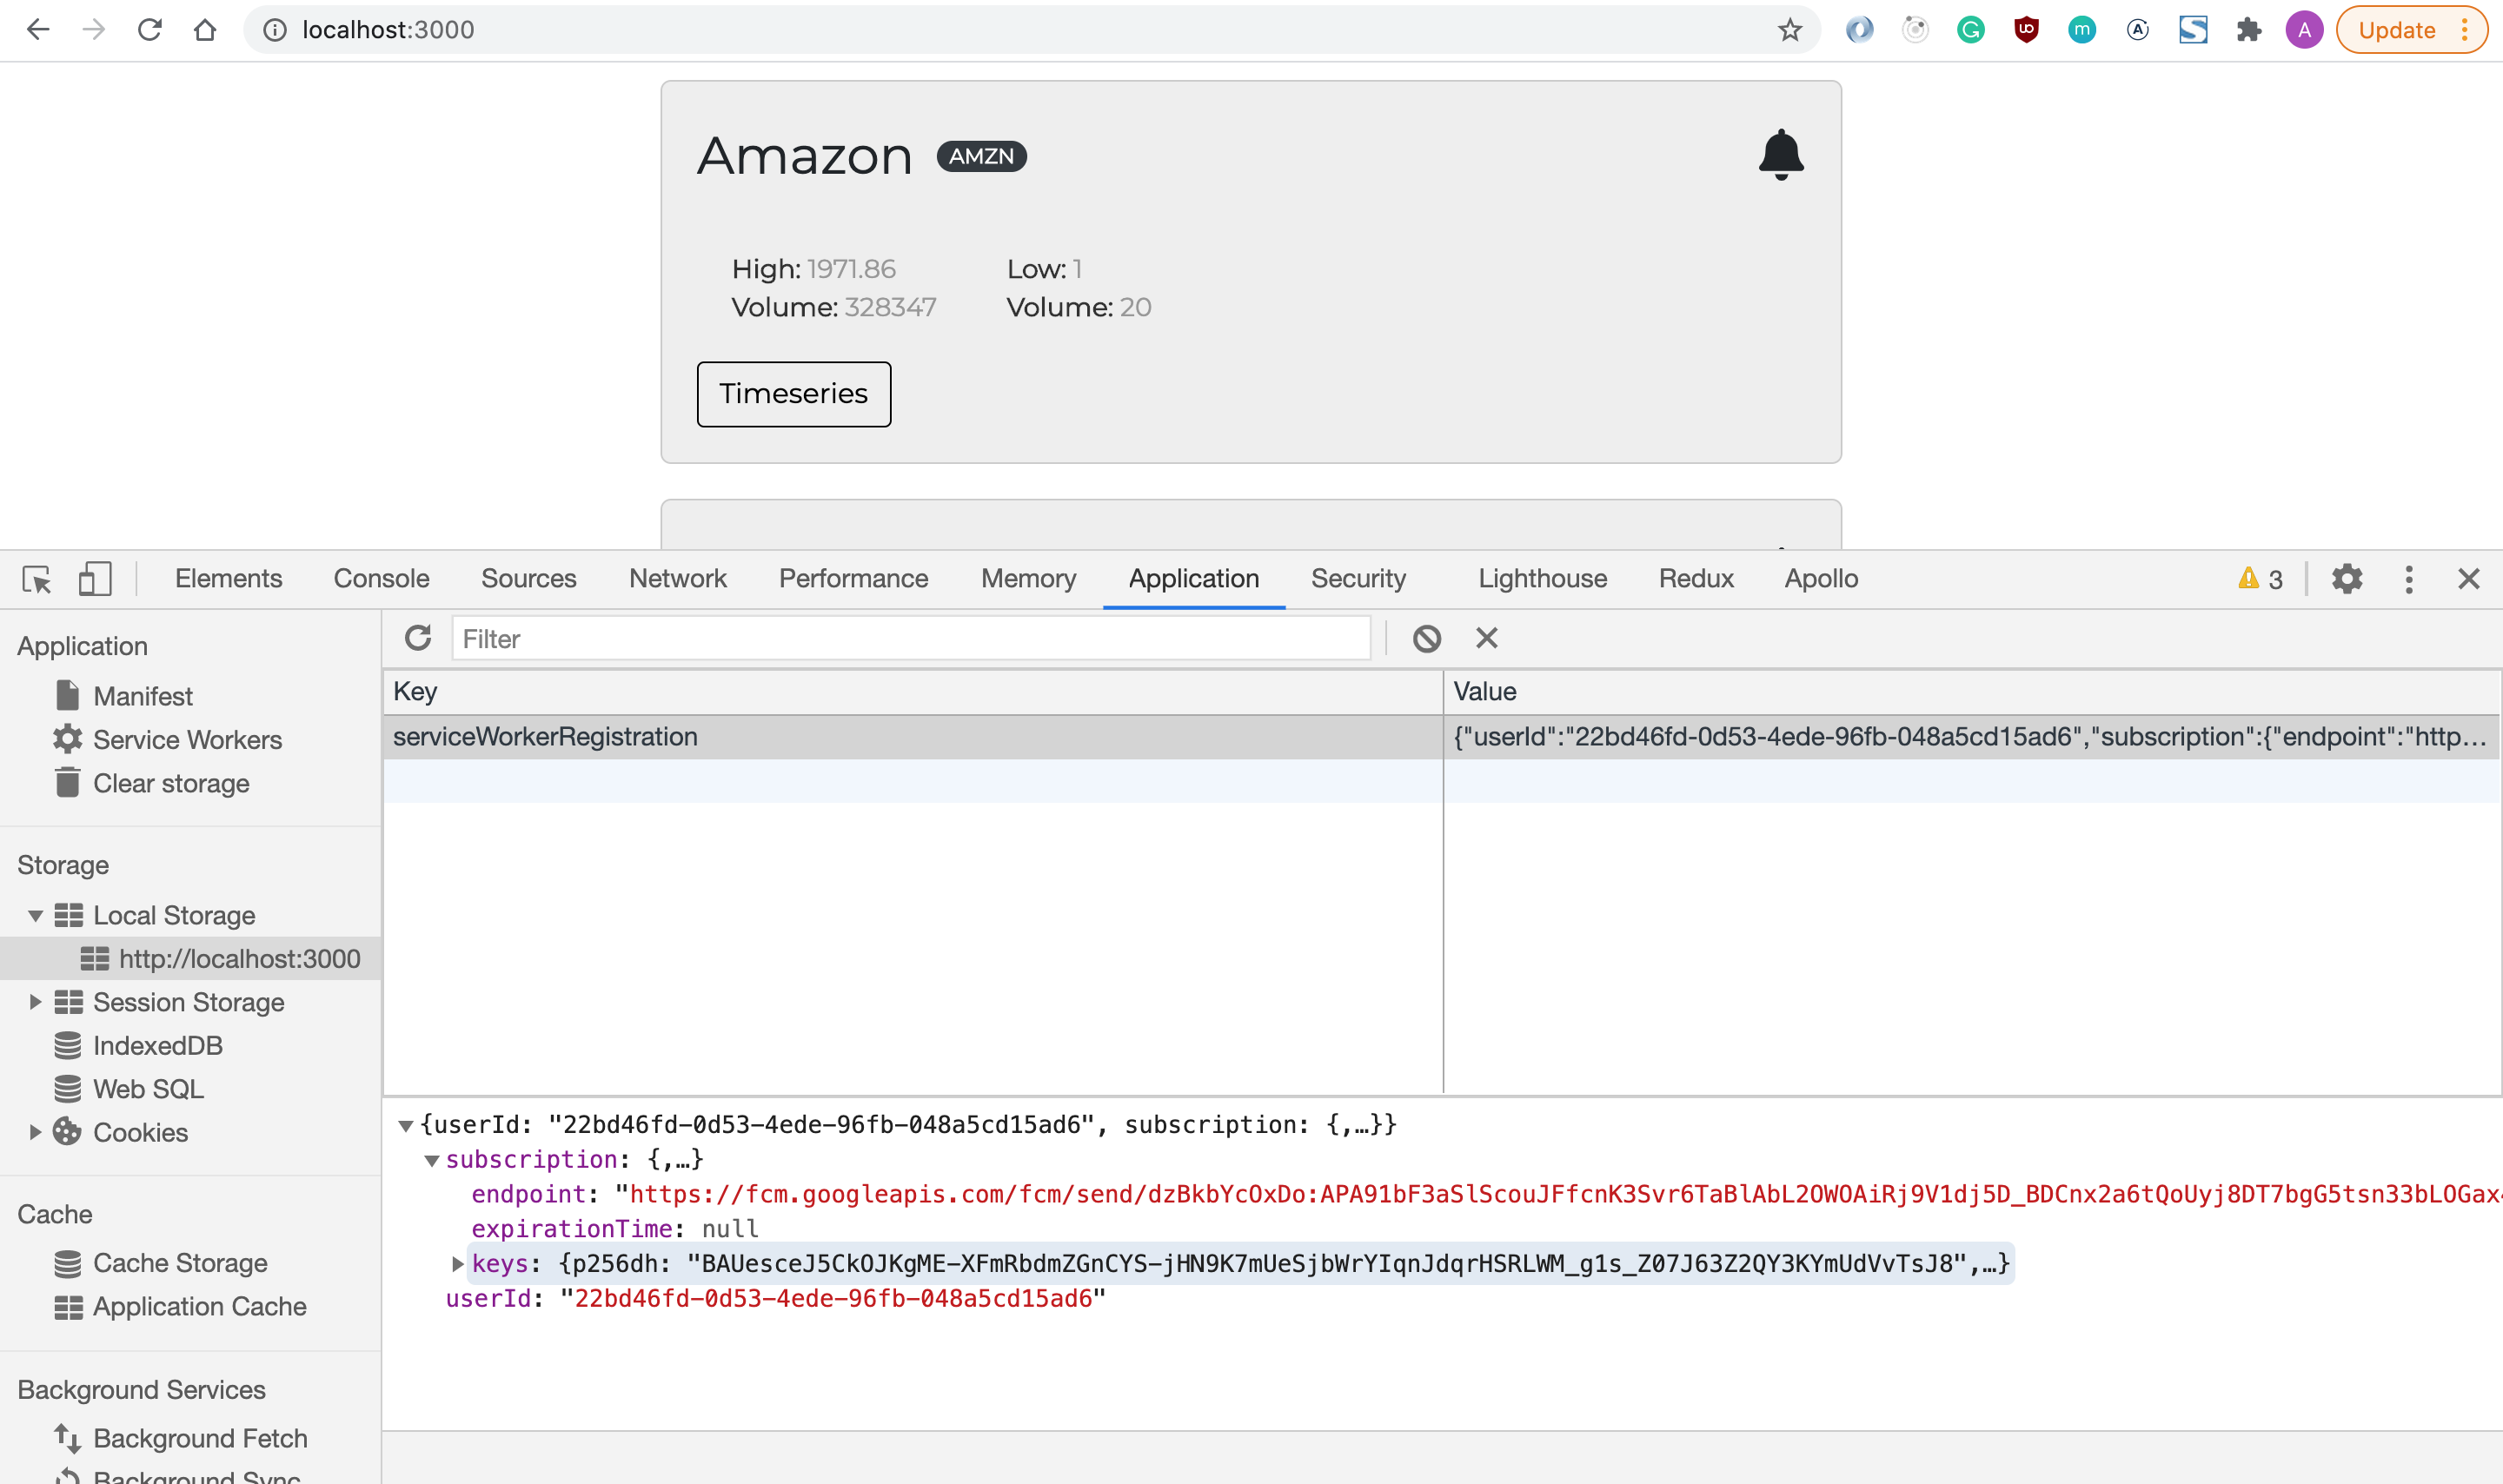
The endpoint field uniquely identifies the device and is what the server uses to address push notifications.
Because create-react-app does not expose service worker customization directly, the workbox-build module steps in. Four tasks make up this setup:
- Pre-cache assets using
workboxBuild. - Provide a service worker template for caching assets.
- Add a
sw-precache-config.jsfile holding custom configuration. - Invoke the service worker build script during the regular build step in
package.json.
Two source files, sw-build.js and sw-custom.js, live in src, while a root-level sw-precache-config.js carries the configuration.
module.exports = {
  staticFileGlobs: [
    'build/static/css/**.css',
    'build/static/js/**.js',
    'build/index.html'
  ],
  swFilePath: './build/serviceWorker.js',
  stripPrefix: 'build/',
  handleFetch: false,
  runtimeCaching: [{
    urlPattern: /this\\.is\\.a\\.regex/,
    handler: 'networkFirst'
  }]
}
"build-sw": "node ./src/sw-build.js",
"clean-cra-sw": "rm -f build/precache-manifest.*.js && rm -f build/service-worker.js","build": "react-scripts build && npm run build-sw && npm run clean-cra-sw",The public folder hosts the final custom service worker. Only one push listener is registered here — it calls showNotification to render incoming web-push notifications to the user.
function showNotification (event) {
  const eventData = event.data.json();
  const { title, body } = eventData
  self.registration.showNotification(title, { body });
}

self.addEventListener('push', (event) => {
  event.waitUntil(showNotification(event));
})
Symbol List View
The App component desends straight to SymbolList, which does the heavy lifting of rendering all tracked stocks as cards with correct subscription state.
import React from 'react';
import SymbolList from './views/symbolList';

const App = () => {
  return <SymbolList />;
};

export default App;
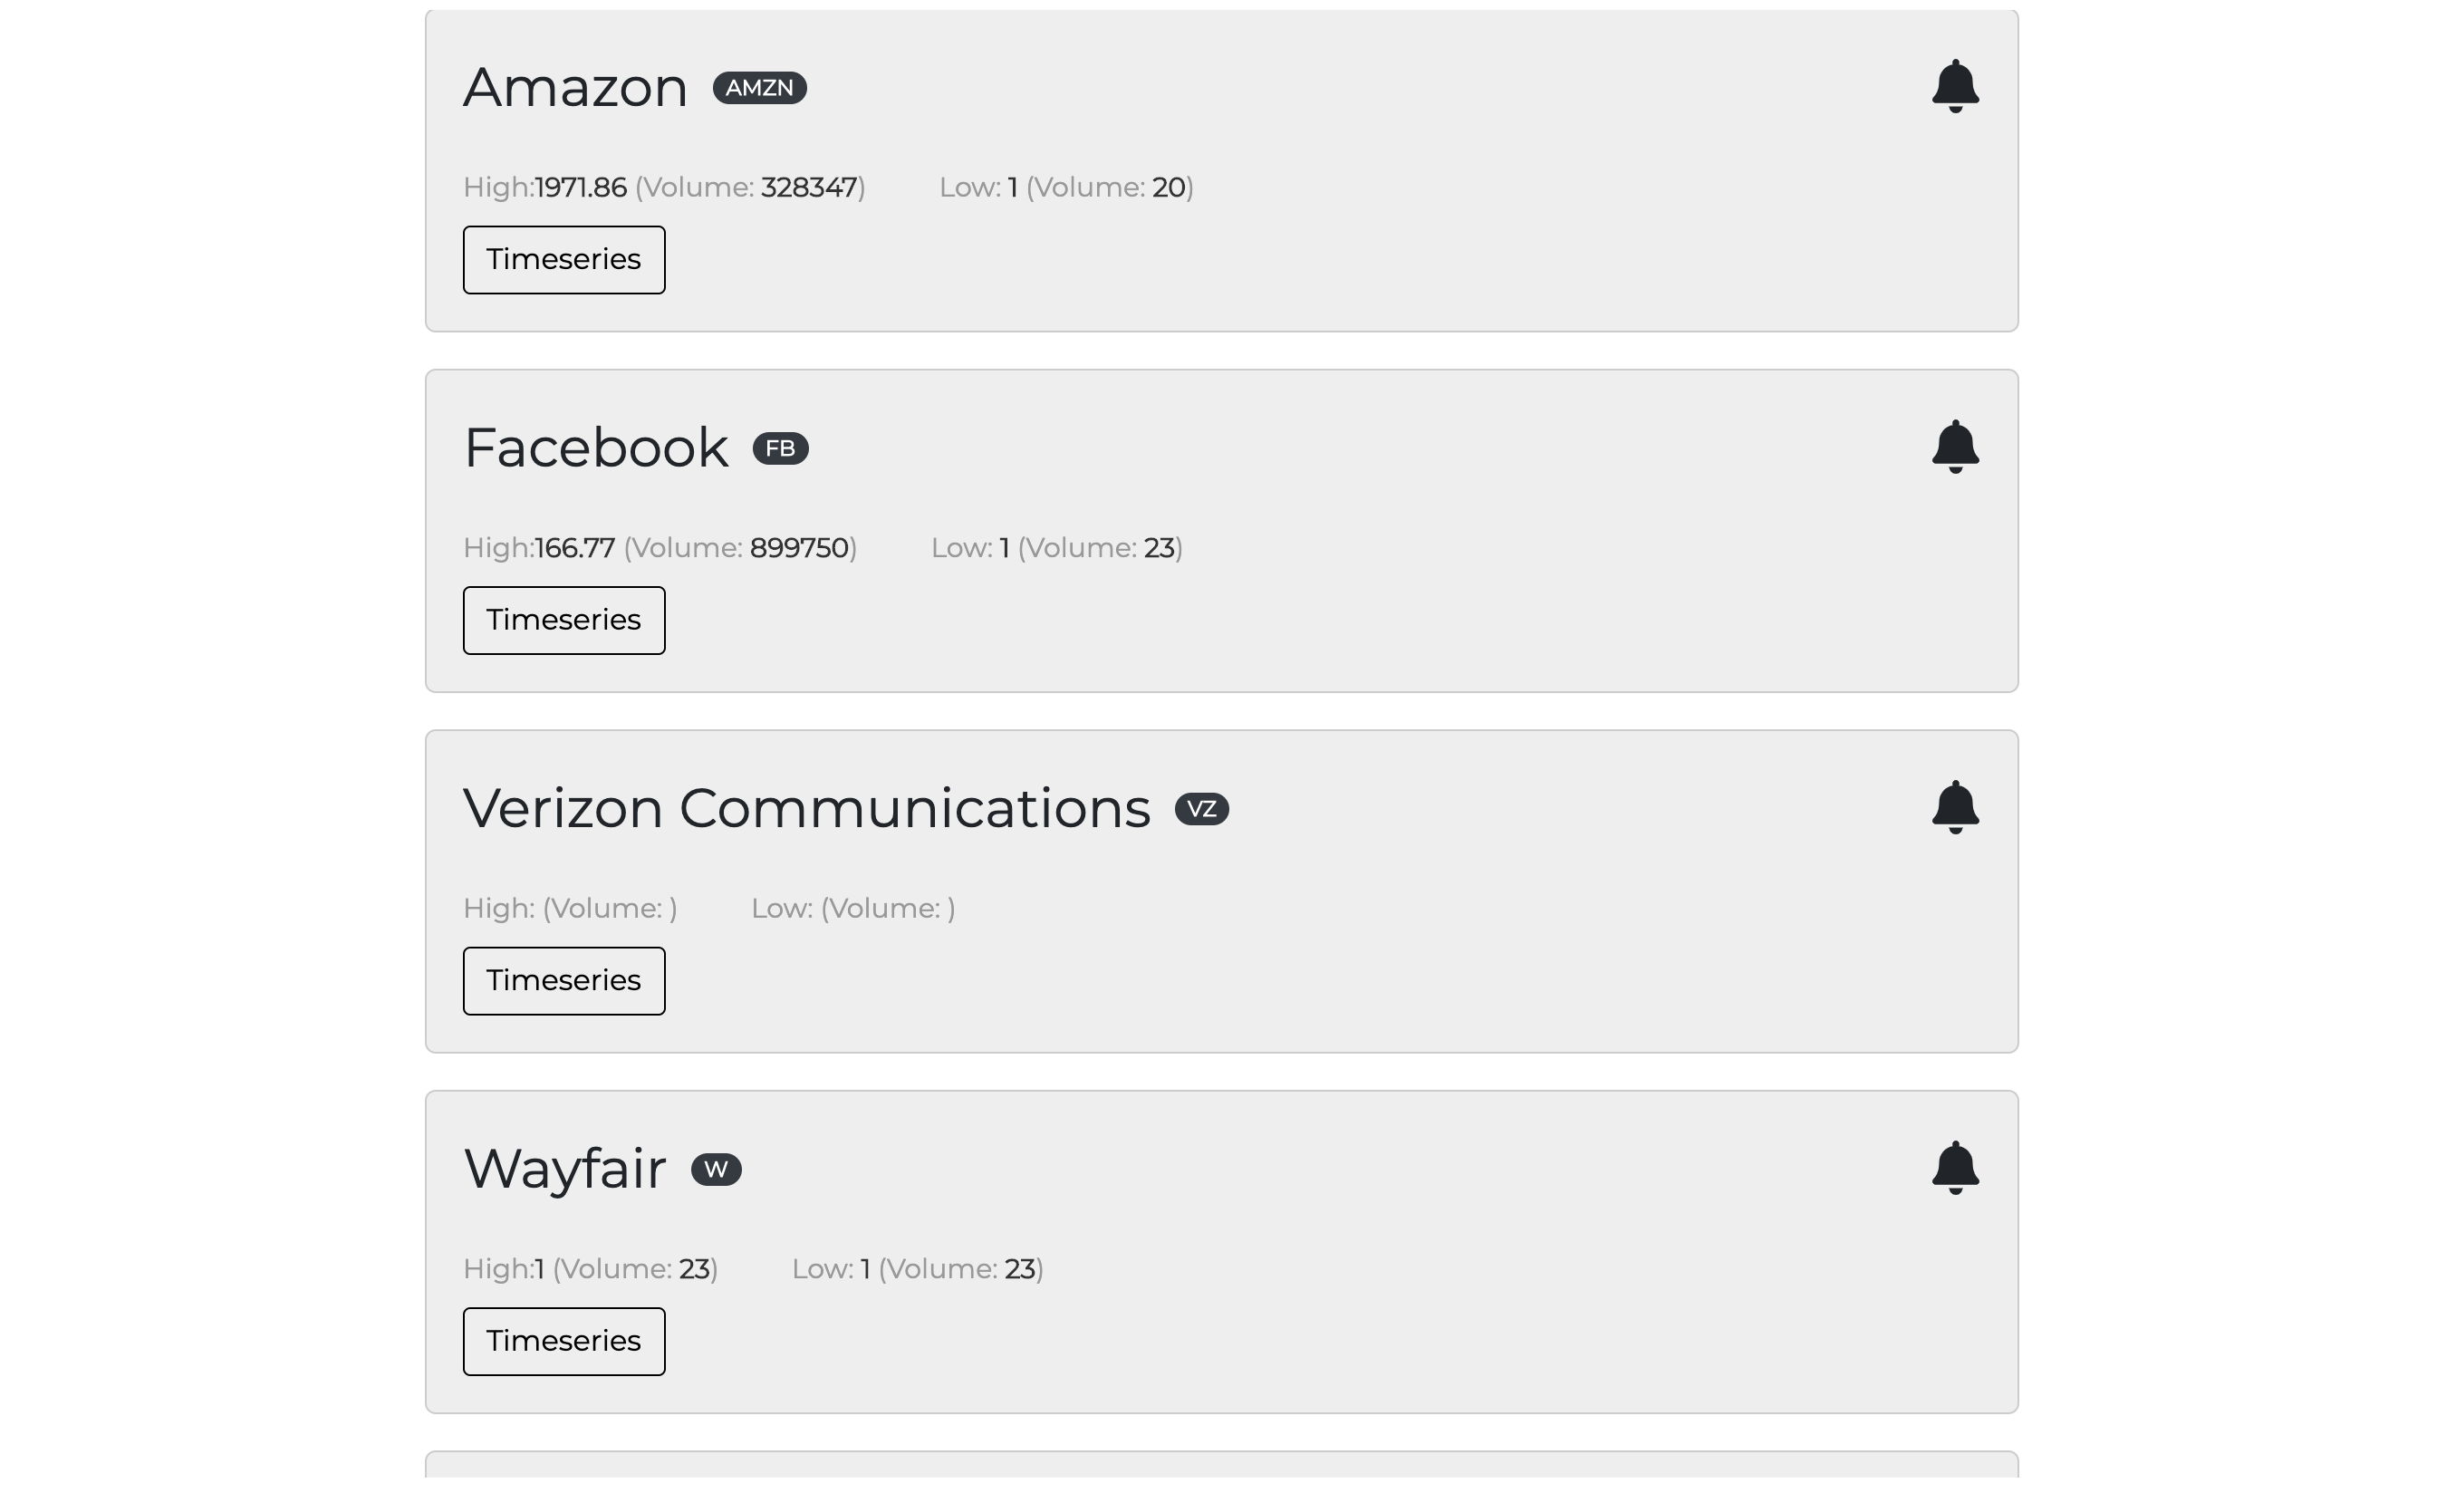
The component receives data through the useQuery hook on a symbolsQuery that includes a userId parameter. That query fetches the user's subscribed events — so the bell icon reflects what they've already configured — along with the maximum and minimum prices for each stock using Hasura's aggregate capabilities for calculations like count, sum, avg, max, and min.
const { loading, error, data } = useQuery(symbolsQuery, {variables: { userId }});export const symbolsQuery = gql`
query getSymbols($userId: uuid) {
symbol {
id
company
symbol_events(where: {user_id: {_eq: $userId}}) {
id
symbol
trigger_type
trigger_value
user_id
}
stock_symbol_aggregate {
aggregate {
max {
high
volume
}
min {
low
volume
}
}
}
}
}
`;The view maps each returned record to a ReactStrap Card component. Clicking the bell icon opens a Popover that lets the user select a subscription mode — either a notification every hour or a notification when a reference price is crossed.
<div key={id}>
  <div className="card-container">
    <Card>
      <CardBody>
        <CardTitle className="card-title">
          <span className="company-name">{company}  </span>
            <Badge color="dark" pill>{id}</Badge>
            <div className={classNames({'bell': true, 'disabled': isSubscribed})} id={`subscribePopover-${id}`}>
              <FontAwesomeIcon icon={faBell} title="Subscribe" />
            </div>
        </CardTitle>
        <div className="metrics">
          <div className="metrics-row">
            <span className="metrics-row--label">High:</span>
            <span className="metrics-row--value">{max.high}</span>
            <span className="metrics-row--label">{' '}(Volume: </span>
            <span className="metrics-row--value">{max.volume}</span>)
          </div>
          <div className="metrics-row">
            <span className="metrics-row--label">Low: </span>
            <span className="metrics-row--value">{min.low}</span>
            <span className="metrics-row--label">{' '}(Volume: </span>
            <span className="metrics-row--value">{min.volume}</span>)
          </div>
        </div>
        <Button className="timeseries-btn" outline onClick={() => toggleTimeseries(id)}>Timeseries</Button>{' '}
      </CardBody>
    </Card>
    <Popover
      className="popover-custom"
      placement="bottom"
      target={`subscribePopover-${id}`}
      isOpen={isSubscribePopoverOpen === id}
      toggle={() => setSubscribeValues(id, symbolTriggerData)}
    >
      <PopoverHeader>
        Notification Options
        <span className="popover-close">
          <FontAwesomeIcon
            icon={faTimes}
            onClick={() => handlePopoverToggle(null)}
          />
        </span>
      </PopoverHeader>
      {renderSubscribeOptions(id, isSubscribed, symbolTriggerData)}
    </Popover>
  </div>
  <Collapse isOpen={expandedStockId === id}>
    {
      isOpen(id) ? <StockTimeseries symbol={id}/> : null
    }
  </Collapse>
</div>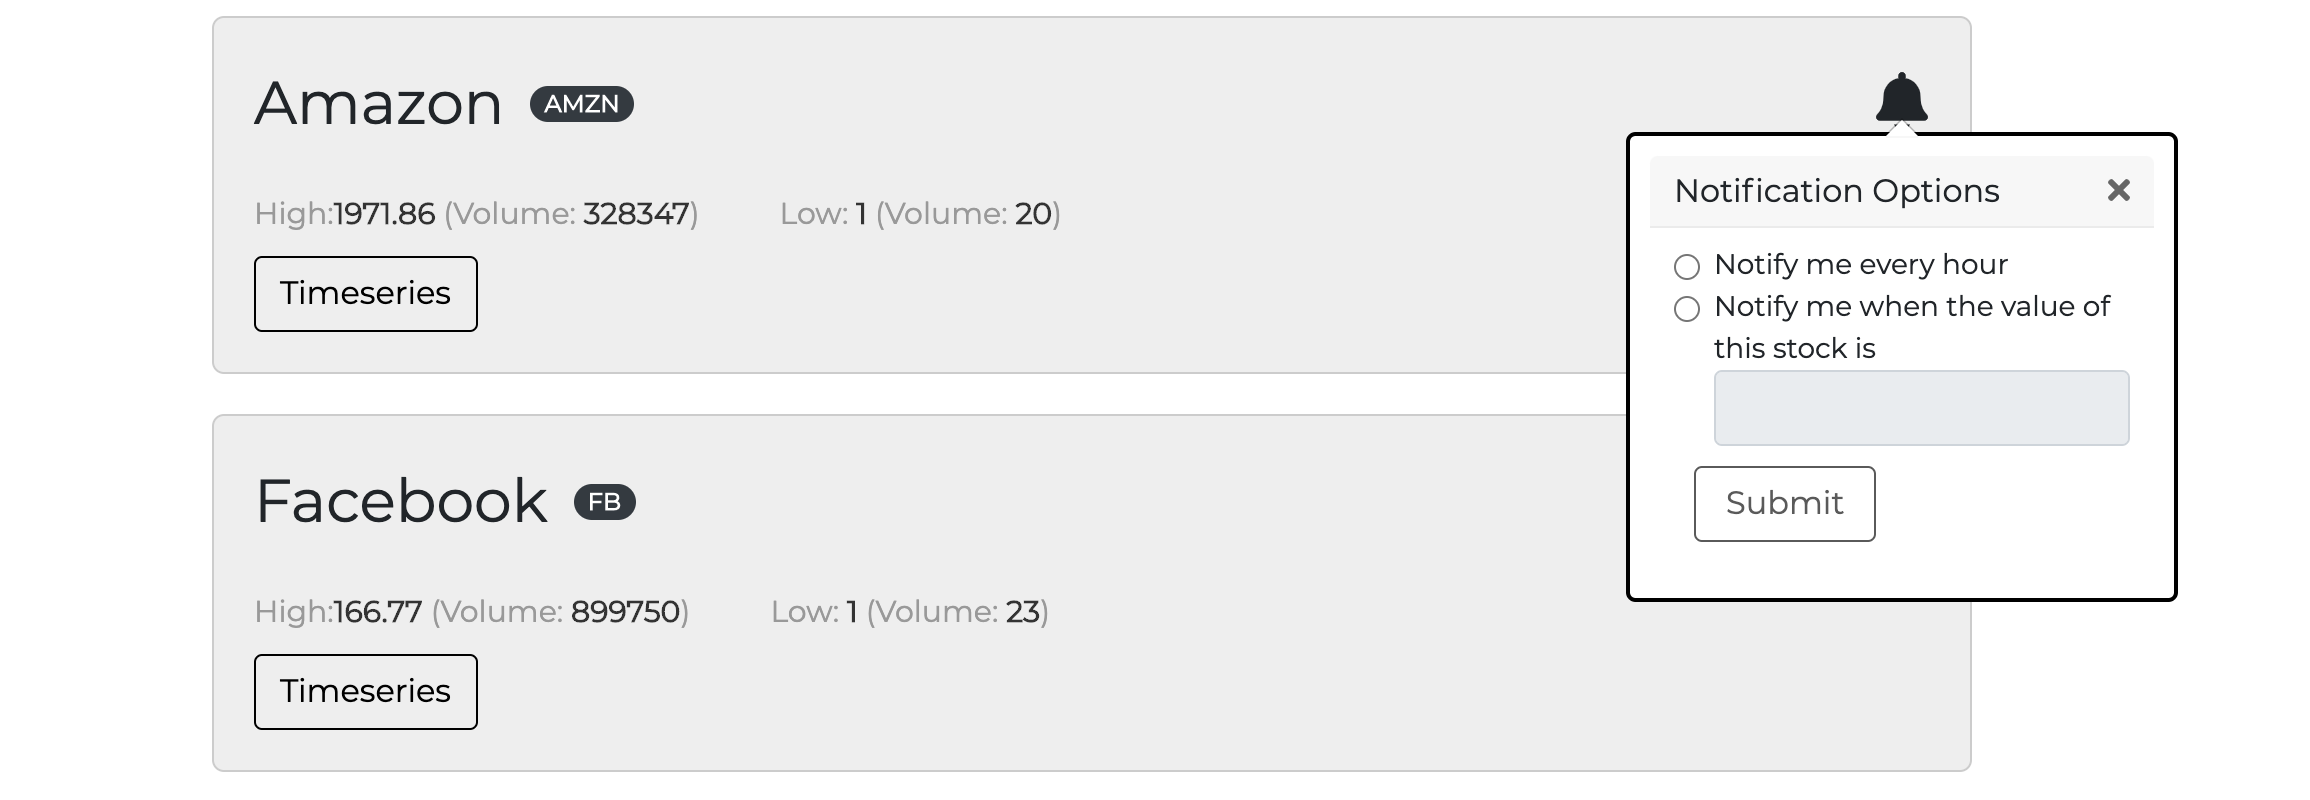
Stock Timeseries View
StockTimeseries presents the last 25 data points for a chosen symbol through the stocksDataQuery. The chart displays one metric at a time, such as the daily open price for Facebook stock.
export const stocksDataQuery = gql`
  query getStocksData($symbol: String) {
    stock_data(order_by: {time: desc}, where: {symbol: {_eq: $symbol}}, limit: 25) {
      high
      low
      open
      close
      volume
      time
    }
  }
`;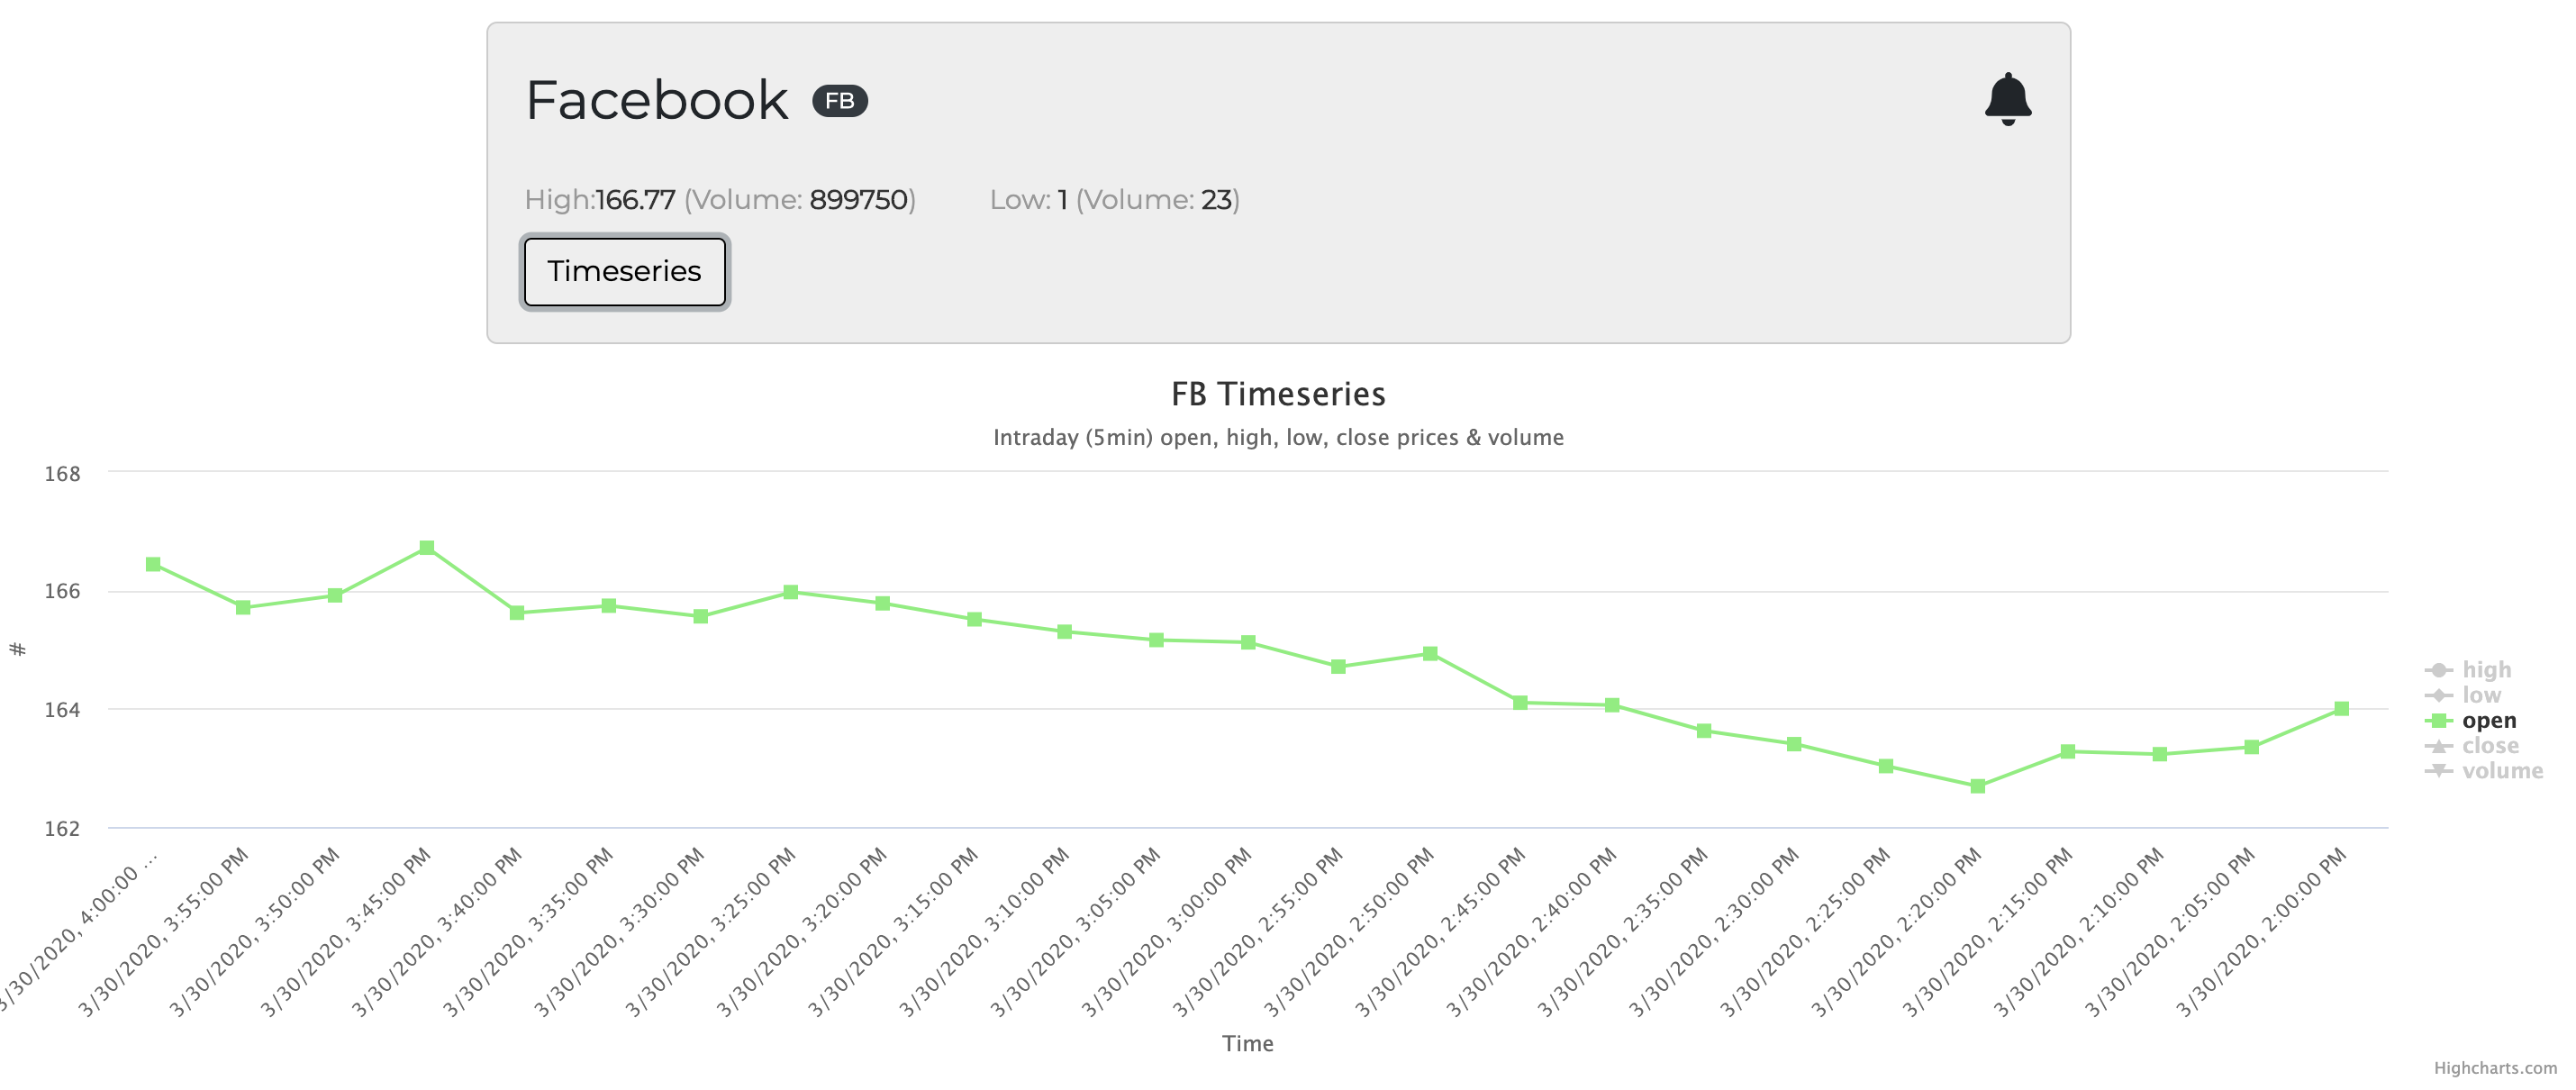
Chart configuration is straightforward: the X-Axis covers time, the Y-Axis the metric value, and getDataPoints flattens the query result into per-series point arrays before they are passed to the HighchartsReact component.
const chartOptions = {
  title: {
    text: `${symbol} Timeseries`
  },
  subtitle: {
    text: 'Intraday (5min) open, high, low, close prices & volume'
  },
  yAxis: {
    title: {
      text: '#'
    }
  },
  xAxis: {
    title: {
      text: 'Time'
    },
    categories: getDataPoints('time')
  },
  legend: {
    layout: 'vertical',
    align: 'right',
    verticalAlign: 'middle'
  },
  series: [
    {
      name: 'high',
      data: getDataPoints('high')
    }, {
      name: 'low',
      data: getDataPoints('low')
    }, {
      name: 'open',
      data: getDataPoints('open')
    },
    {
      name: 'close',
      data: getDataPoints('close')
    },
    {
      name: 'volume',
      data: getDataPoints('volume')
    }
  ]
}
const getDataPoints = (type) => {
const values = [];
data.stock_data.map((dataPoint) => {
let value = dataPoint[type];
if (type === 'time') {
value = new Date(dataPoint['time']).toLocaleString('en-US');
}
values.push(value);
});
return values;
}With data fetching, the symbol list, and timeseries views in place, the user interface is ready. The next piece is wiring up event/time triggers driven by each subscriber's selections.
Wiring Up Triggers For Stock Notifications
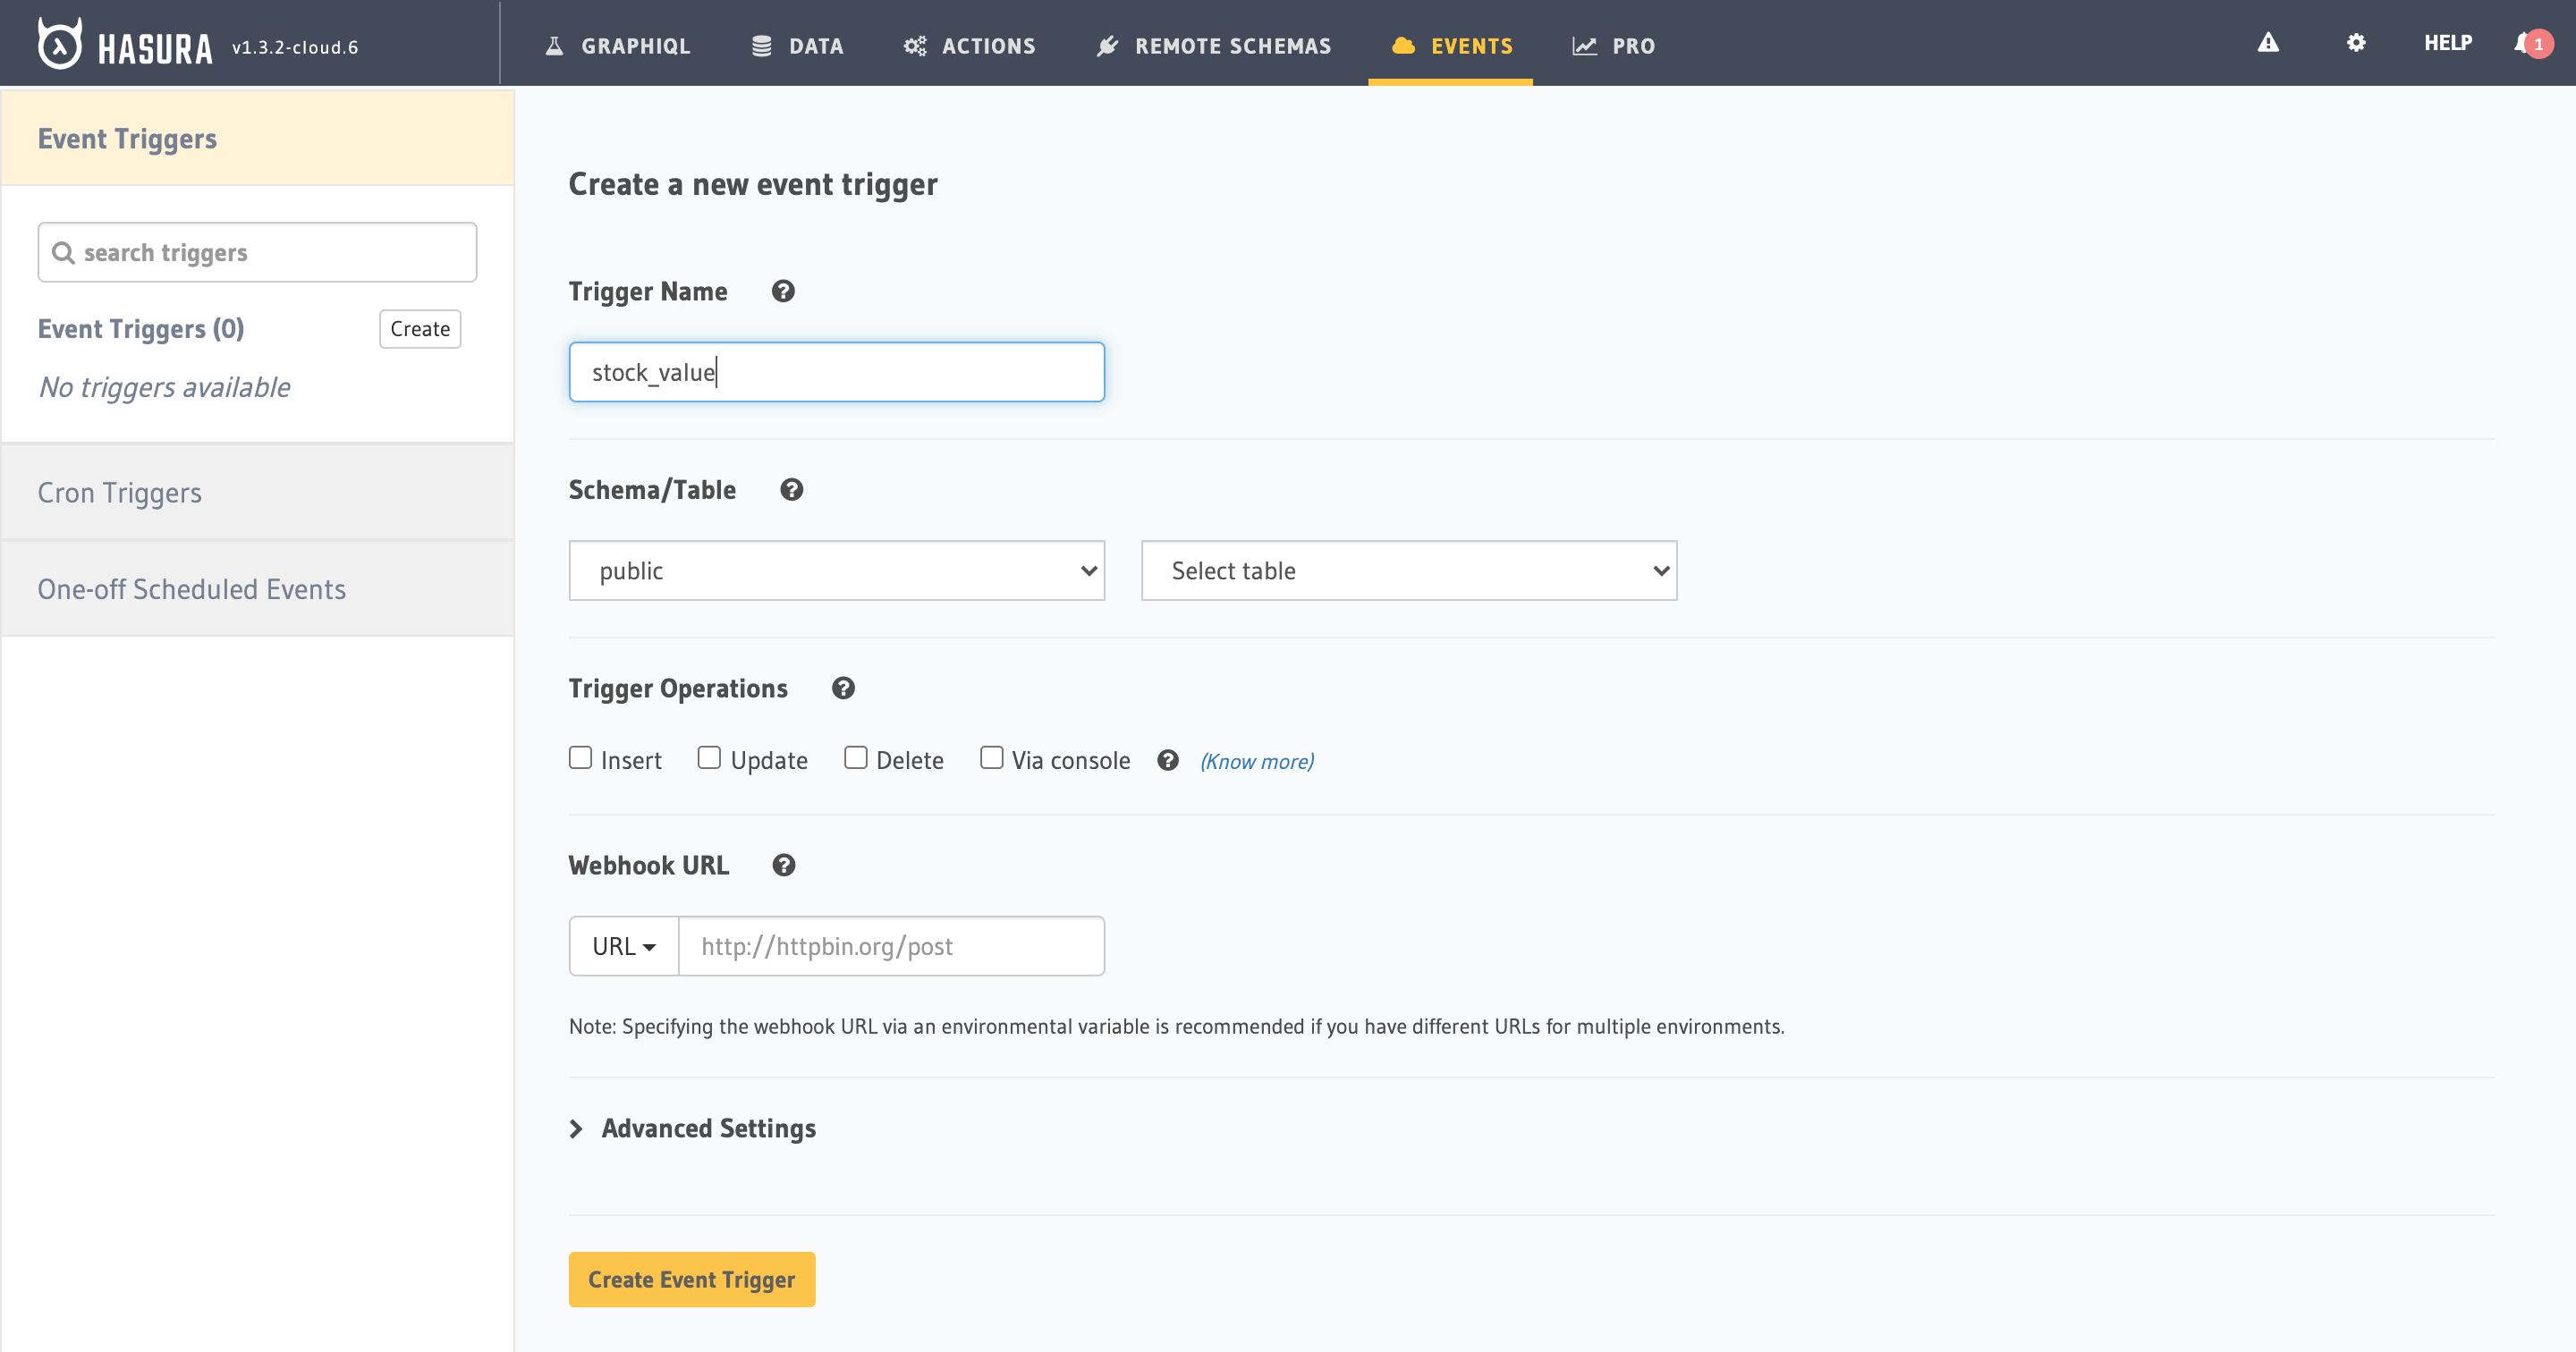
With the Hasura console, we can automate notifications by attaching triggers to database events. For this app, we create an event trigger named stock_value on the stock_data table, watching for insert operations. Every time a new row is added, Hasura makes an HTTP POST call to a configured webhook URL with the event data as the payload.
Building The Webhook With Glitch
Webhooks are a simple pattern: when an event occurs, an application sends an HTTP POST request to a predetermined URL with the relevant data. Here, the webhook needs to receive the stock datapoint (including open, close, high, low, volume, and time), find all users subscribed to that stock with a matching trigger value based on the close metric, and then send them web-push notifications.
We'll host this on a Glitch project. The setup requires an Express server and a few dependencies:
express— for creating the HTTP server.apollo-fetch— for querying the GraphQL endpoint.web-push— for sending web-push notifications.
Add a script to package.json so that npm start runs index.js:
"scripts": {
  "start": "node index.js"
}
Then, create the index.js file with both get and post listeners on the root route. The logic that matters lives in the POST handler: it checks if eventType equals stock-value-trigger and, if so, handles the trigger.
const express = require('express');
const bodyParser = require('body-parser');

const app = express();
app.use(bodyParser.json());

const handleStockValueTrigger = (eventData, res) => {
  /* Code for handling this trigger */
}

app.post('/', (req, res) => {
  const { body } = req
  const eventType = body.trigger.name
  const eventData = body.event

  switch (eventType) {
    case 'stock-value-trigger':
      return handleStockValueTrigger(eventData, res);
  }

});

app.get('/', function (req, res) {
  res.send('Hello World - For Event Triggers, try a POST request?');
});

var server = app.listen(process.env.PORT, function () {
    console.log(`server listening on port ${process.env.PORT}`);
});
Fetching And Notifying Subscribers
The handleStockValueTrigger function first retrieves the list of subscribed users using getSubscribedUsers, then loops through them to send notifications via sendWebpush. The query to find subscribers filters on three conditions:
symbolmatches the stock symbol from the payload.trigger_typeisevent.trigger_valueis greater than or equal to theclosevalue passed in.
const fetch = createApolloFetch({
  uri: process.env.GRAPHQL_URL
});

const getSubscribedUsers = (symbol, triggerValue) => {
  return fetch({
    query: `query getSubscribedUsers($symbol: String, $triggerValue: numeric) {
      events(where: {symbol: {_eq: $symbol}, trigger_type: {_eq: "event"}, trigger_value: {_gte: $triggerValue}}) {
        user_id
        user_subscription {
          subscription
        }
      }
    }`,
    variables: {
      symbol,
      triggerValue
    }
  }).then(response => response.data.events)
}

const handleStockValueTrigger = async (eventData, res) => {
  const symbol = eventData.data.new.symbol;
  const triggerValue = eventData.data.new.close;
  const subscribedUsers = await getSubscribedUsers(symbol, triggerValue);
  const webpushPayload = {
    title: `${symbol} - Stock Update`,
    body: `The price of this stock is ${triggerValue}`
  }
  subscribedUsers.map((data) => {
    sendWebpush(data.user_subscription.subscription, JSON.stringify(webpushPayload));
  })
  res.json(eventData.toString());
}
The subscription query fetches each user's ID and their stored subscription object, returning only those who meet all the above criteria:
query getSubscribedUsers($symbol: String, $triggerValue: numeric) {
  events(where: {symbol: {_eq: $symbol}, trigger_type: {_eq: "event"}, trigger_value: {_gte: $triggerValue}}) {
    user_id
    user_subscription {
      subscription
    }
  }
}
Sending Push Notifications
To send web-push messages, generate VAPID public and private keys. Store them in the .env file and reference them in index.js using webpush.setVapidDetails:
webPush.setVapidDetails(
  'mailto:<YOUR_MAIL_ID>',
  process.env.PUBLIC_VAPID_KEY,
  process.env.PRIVATE_VAPID_KEY
);

const sendWebpush = (subscription, webpushPayload) => {
  webPush.sendNotification(subscription, webpushPayload).catch(err => console.log('error while sending webpush', err))
}
The sendNotification function handles a single push. Here's the complete index.js containing the server, the subscriber query, and the notification routine:
const express = require('express');
const bodyParser = require('body-parser');
const { createApolloFetch } = require('apollo-fetch');
const webPush = require('web-push');

webPush.setVapidDetails(
  'mailto:<YOUR_MAIL_ID>',
  process.env.PUBLIC_VAPID_KEY,
  process.env.PRIVATE_VAPID_KEY
);

const app = express();
app.use(bodyParser.json());

const fetch = createApolloFetch({
  uri: process.env.GRAPHQL_URL
});

const getSubscribedUsers = (symbol, triggerValue) => {
  return fetch({
    query: `query getSubscribedUsers($symbol: String, $triggerValue: numeric) {
      events(where: {symbol: {_eq: $symbol}, trigger_type: {_eq: "event"}, trigger_value: {_gte: $triggerValue}}) {
        user_id
        user_subscription {
          subscription
        }
      }
    }`,
    variables: {
      symbol,
      triggerValue
    }
  }).then(response => response.data.events)
}

const sendWebpush = (subscription, webpushPayload) => {
  webPush.sendNotification(subscription, webpushPayload).catch(err => console.log('error while sending webpush', err))
}

const handleStockValueTrigger = async (eventData, res) => {
  const symbol = eventData.data.new.symbol;
  const triggerValue = eventData.data.new.close;
  const subscribedUsers = await getSubscribedUsers(symbol, triggerValue);
  const webpushPayload = {
    title: `${symbol} - Stock Update`,
    body: `The price of this stock is ${triggerValue}`
  }
  subscribedUsers.map((data) => {
    sendWebpush(data.user_subscription.subscription, JSON.stringify(webpushPayload));
  })
  res.json(eventData.toString());
}

app.post('/', (req, res) => {
  const { body } = req
  const eventType = body.trigger.name
  const eventData = body.event

  switch (eventType) {
    case 'stock-value-trigger':
      return handleStockValueTrigger(eventData, res);
  }

});

app.get('/', function (req, res) {
  res.send('Hello World - For Event Triggers, try a POST request?');
});

var server = app.listen(process.env.PORT, function () {
    console.log("server listening");
});
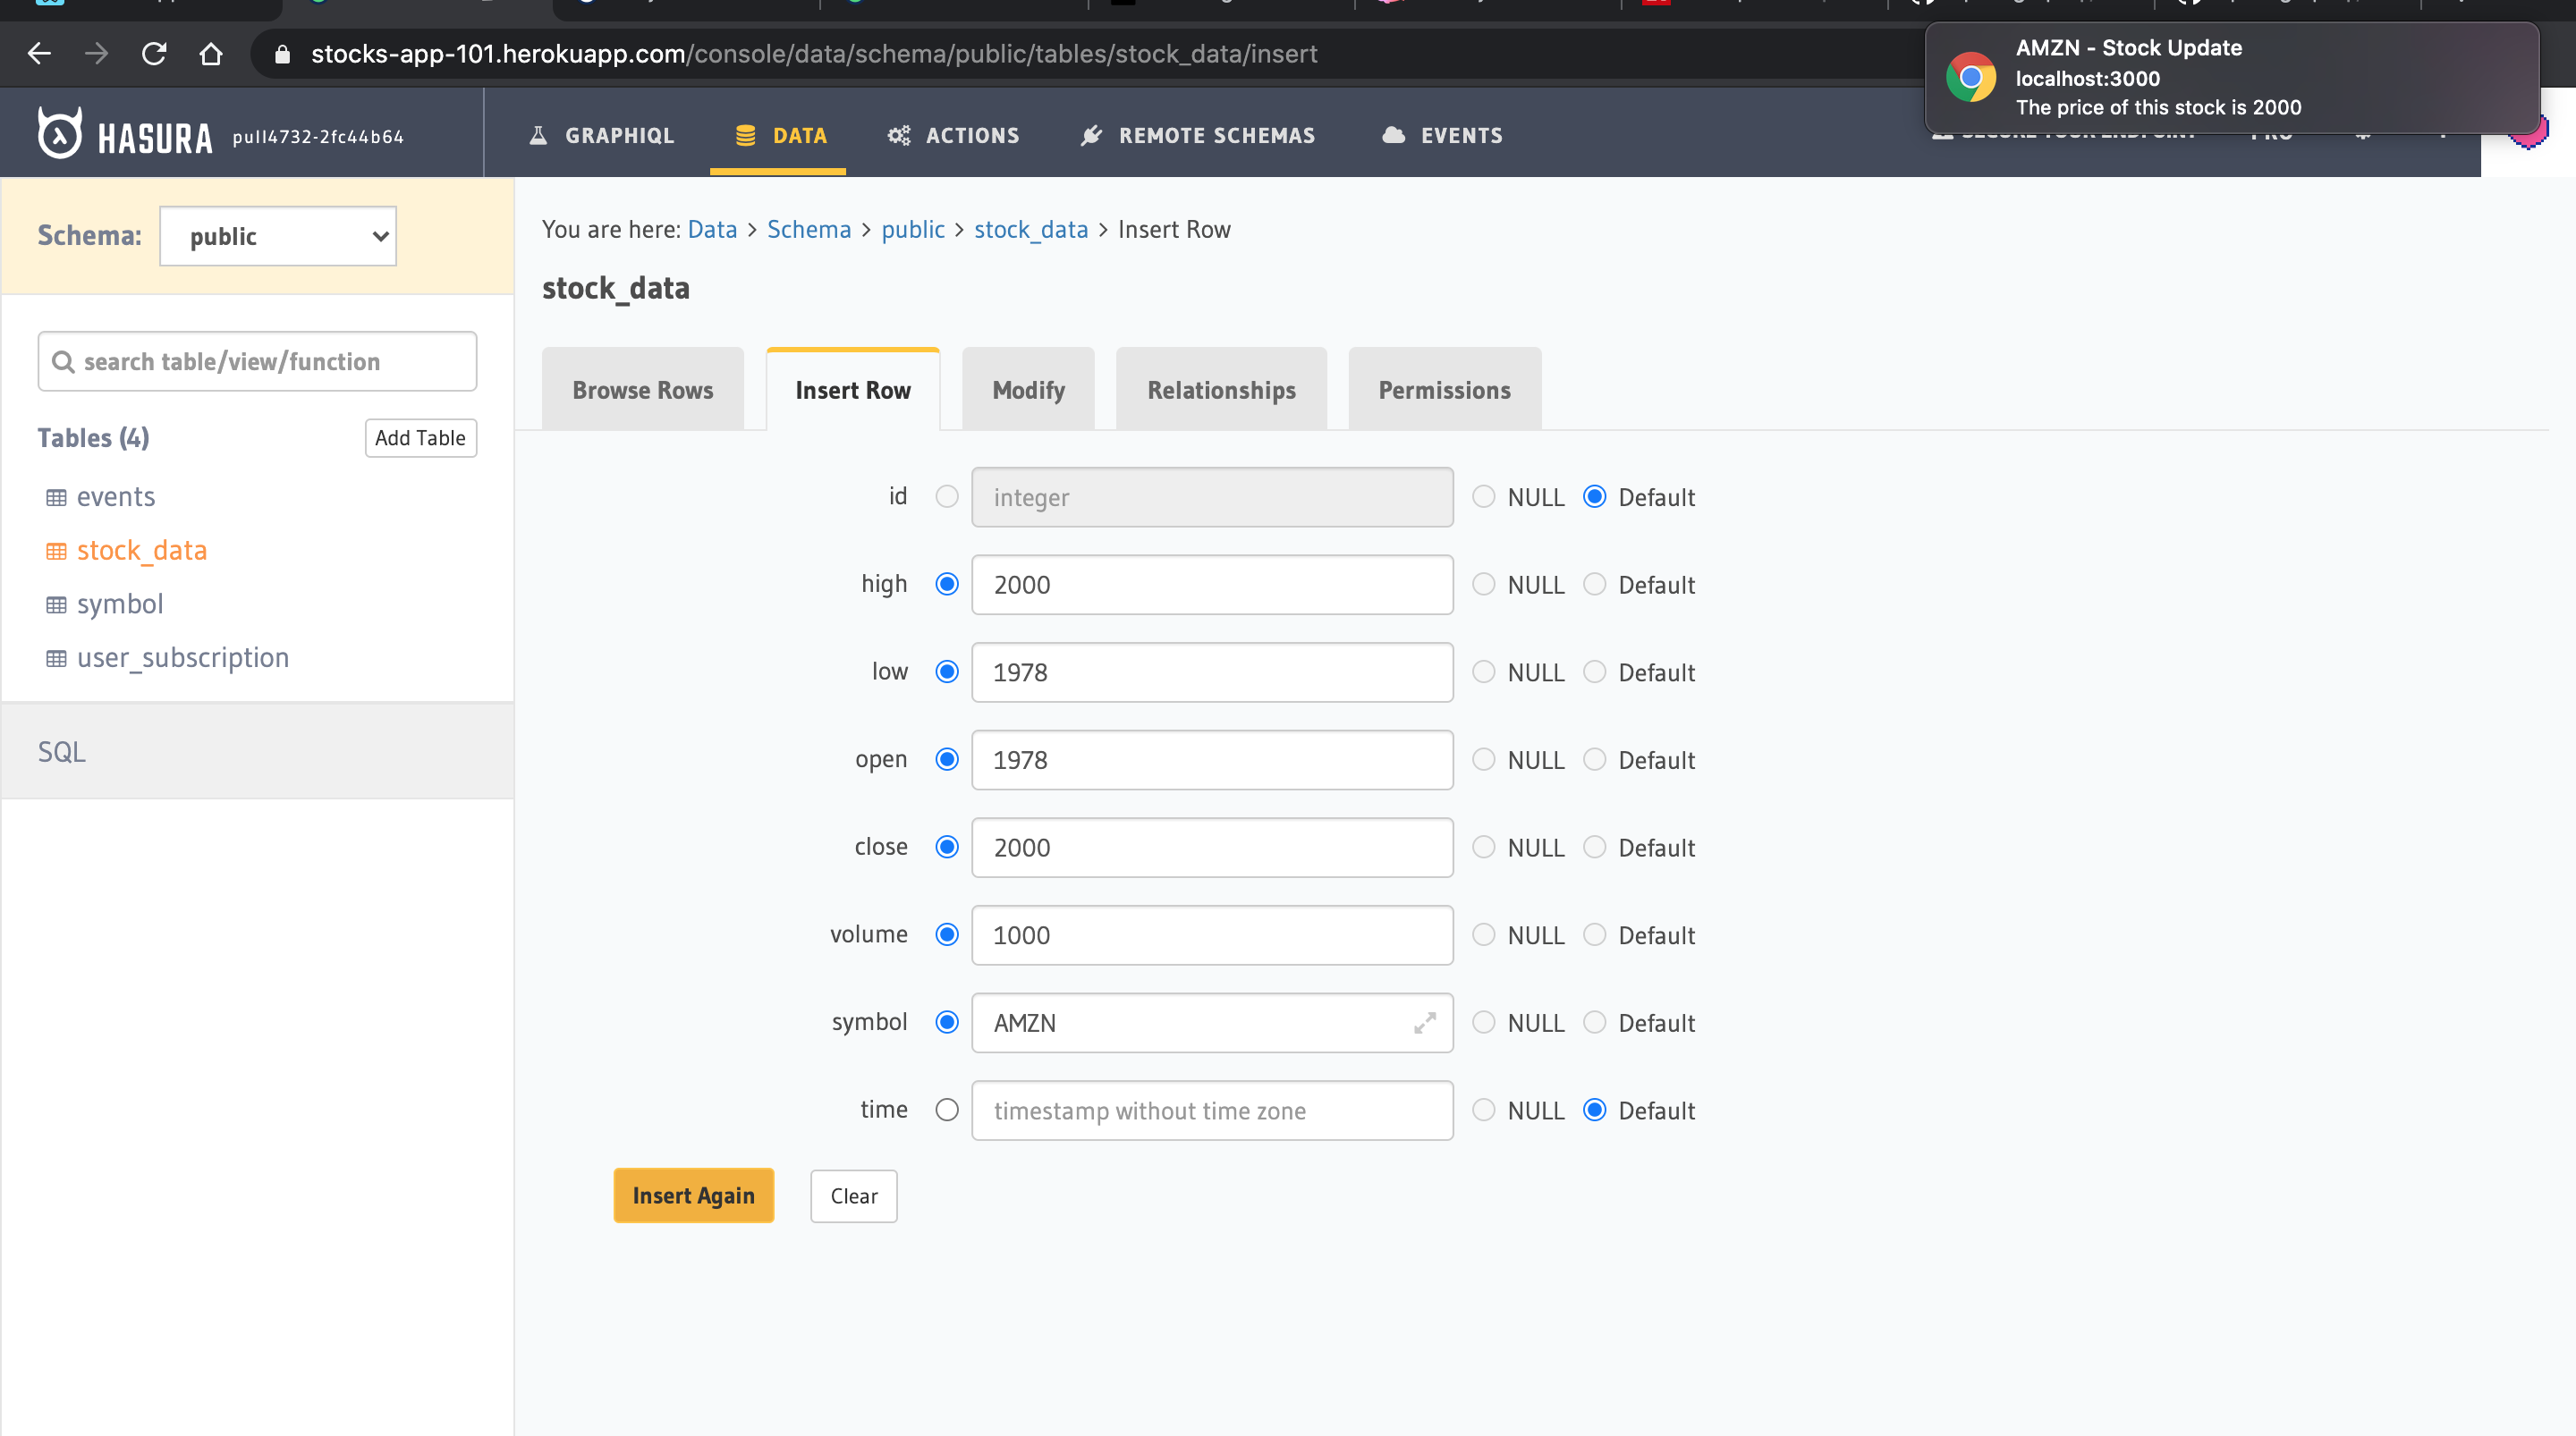
Testing the flow is straightforward: subscribe to a stock symbol at a given value, insert a matching data point manually, and watch the notification arrive. After subscribing to AMZN with a value of 2000 and inserting a data point at that price, the notifier app was triggered right away.
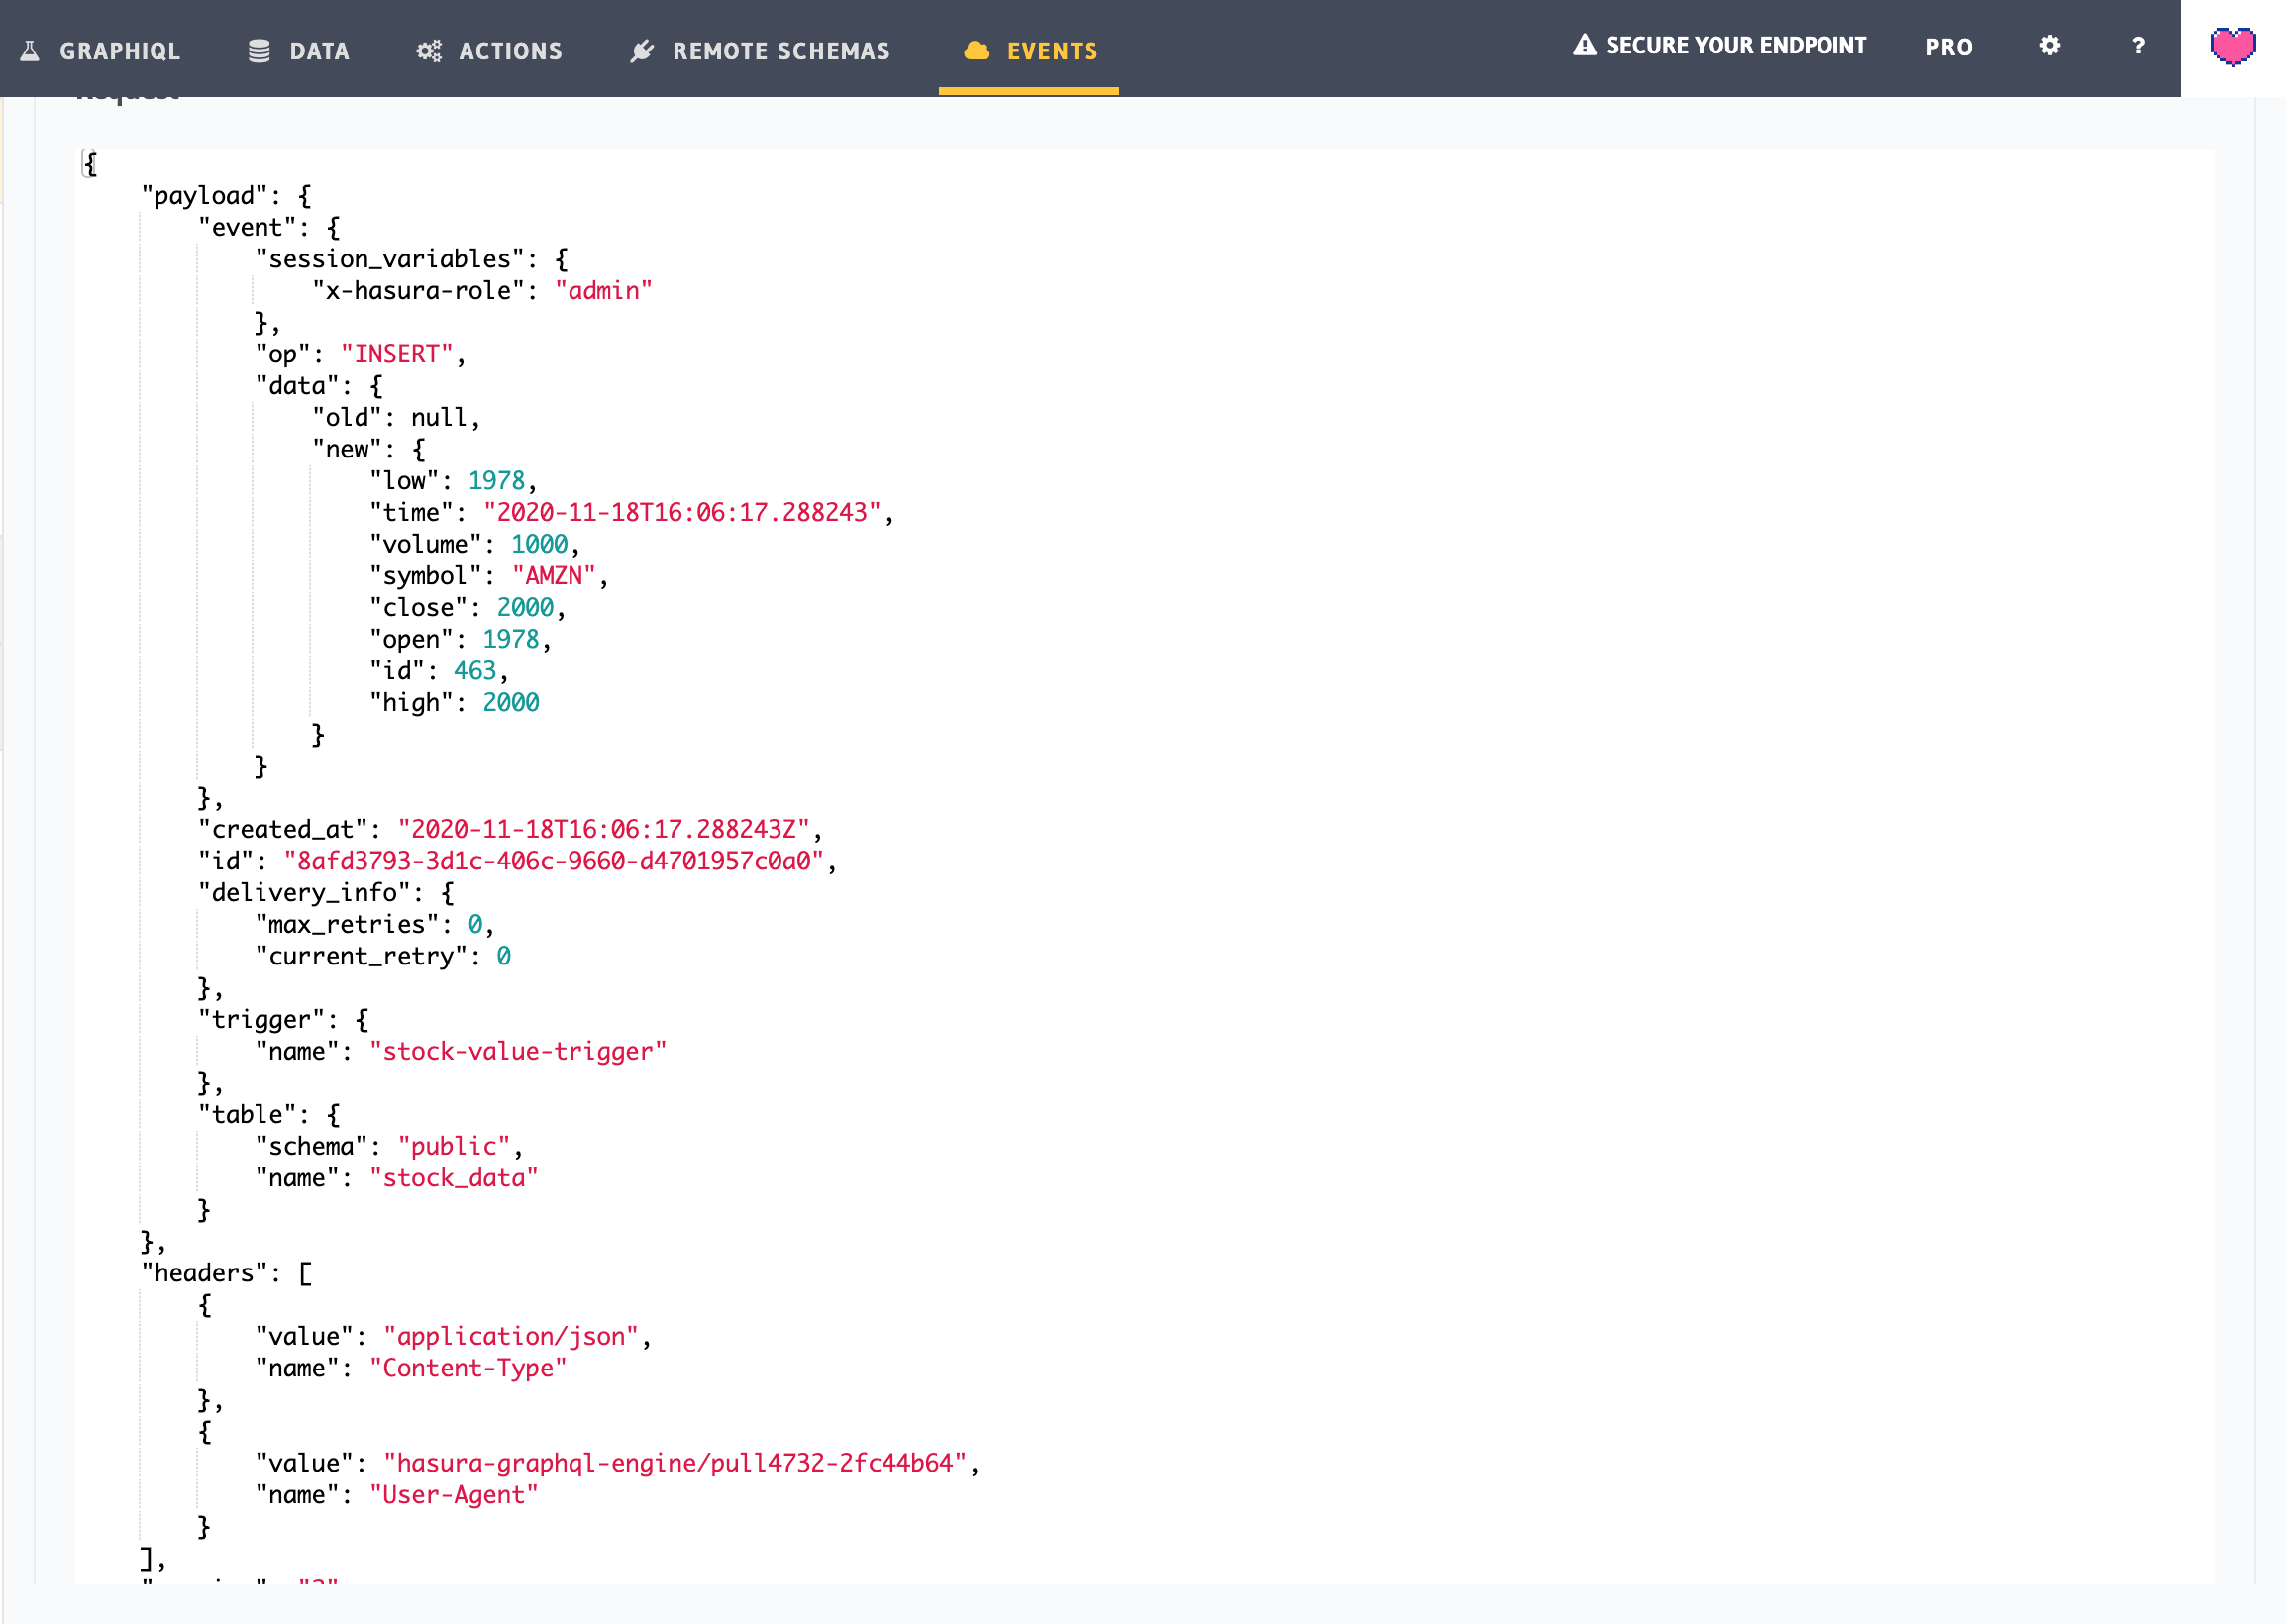
You can also verify the success by reviewing the event invocation log in the Hasura console:
Scheduled Time-Based Triggers
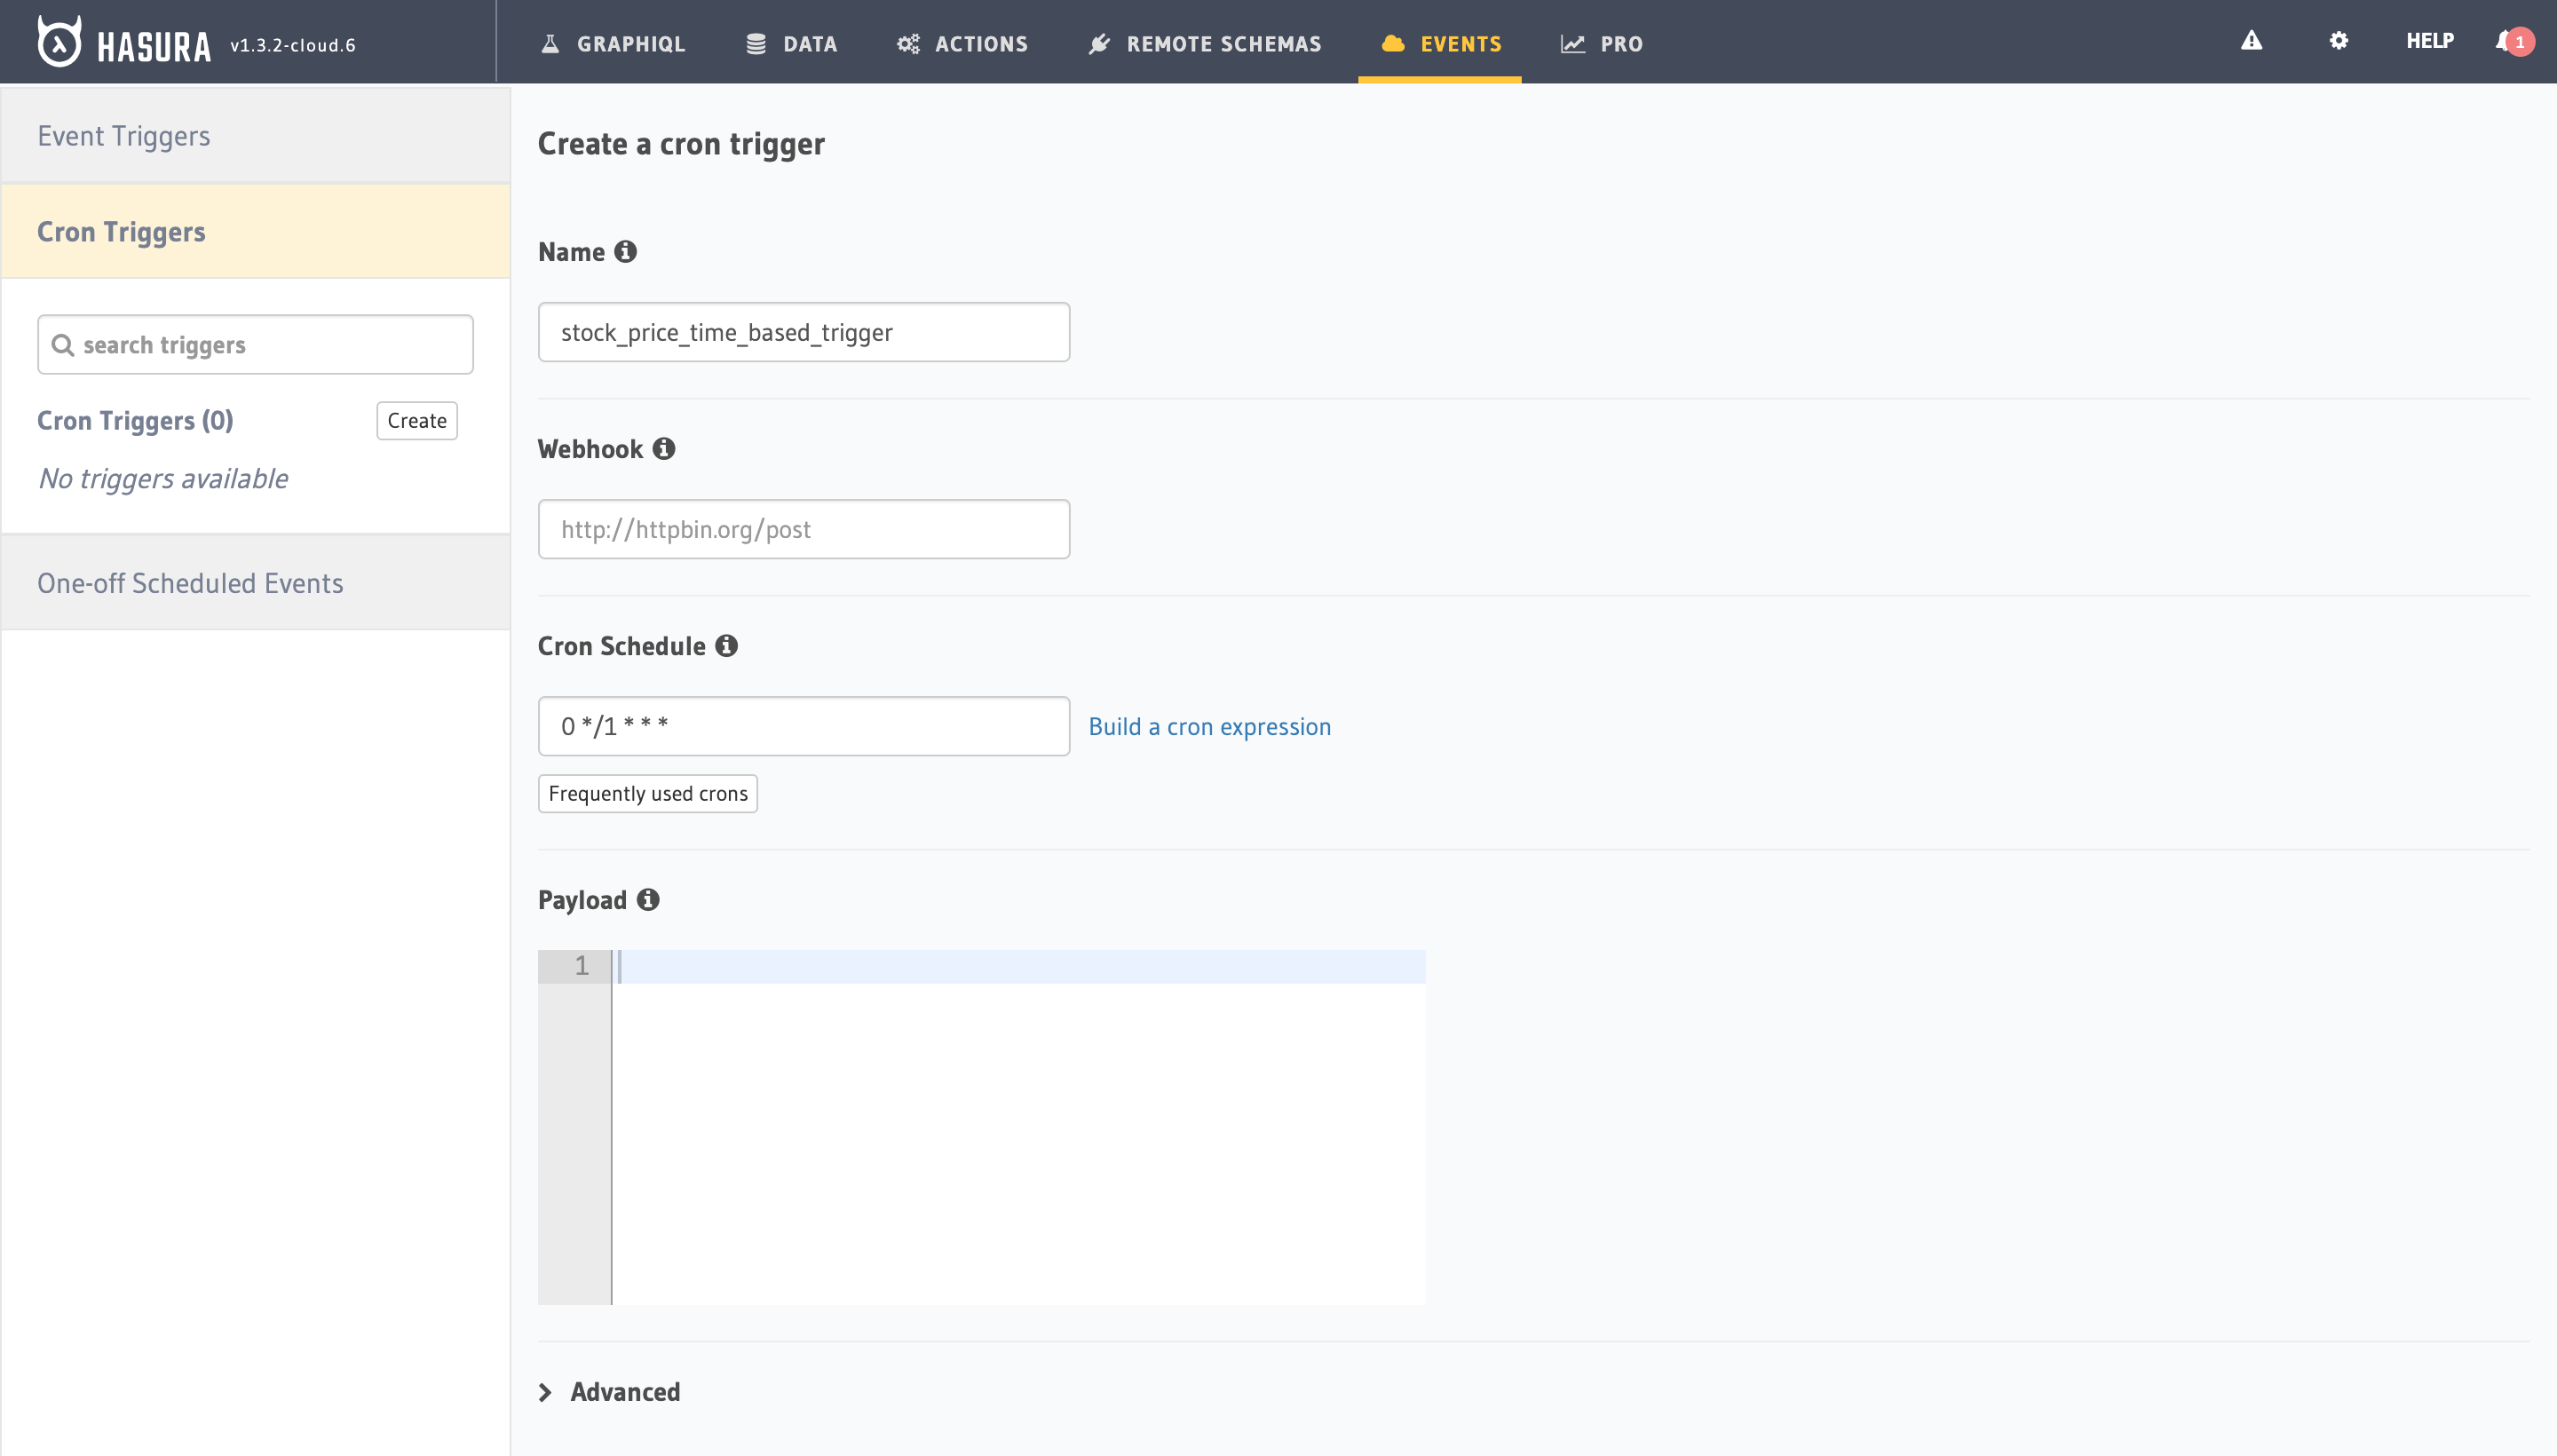
For recurring checks, Hasura's cron triggers let you fire the same webhook on a schedule. The configuration accepts a cron expression, and the webhook URL remains the same. To differentiate the payload inside the handler, distinguish the event type as stock_price_time_based_trigger instead of stock_value_trigger. The rest of the logic mirrors the event-based trigger.
Summary
The resulting stack reads stock prices from Alpha Vantage, stores each datapoint in a Postgres database managed by Hasura, and uses Hasura's GraphQL engine to expose the data. Event and cron triggers on the stock_data table send payloads to a Glitch-hosted webhook, which queries for subscribed users and fires web-push notifications through their stored subscription endpoints.